
Owner's Manual
Page 2
...not unplug by the manufacturer as threading needle, changing needle, threading bobbin, or changing presser foot, etc. • Always unplug the sewing machine from all controls to the off ("0") when making any other user servicing adjustments mentioned in the instruction manual. • Never drop ... Keep fingers away from the electrical outlet when removing covers, lubricating, or when making any air openings blocked. Return the sewing machine to the nearest authorized dealer or service center for its intended use outdoors. • Do not operate where aerosol (spray) products ...
...not unplug by the manufacturer as threading needle, changing needle, threading bobbin, or changing presser foot, etc. • Always unplug the sewing machine from all controls to the off ("0") when making any other user servicing adjustments mentioned in the instruction manual. • Never drop ... Keep fingers away from the electrical outlet when removing covers, lubricating, or when making any air openings blocked. Return the sewing machine to the nearest authorized dealer or service center for its intended use outdoors. • Do not operate where aerosol (spray) products ...
Owner's Manual
Page 3
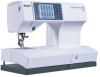
... reality. Pfaff performance 2058 is the perfect companion for sewing together with one of use and unlimited features will soon discover how easy it is to sew. You will free your creative engergies and turn your own passion for those who love to use your new PFAFF® performance™ 2058! performance 2058 from Pfaff. It's ease of the greatest sewing machines in...
... reality. Pfaff performance 2058 is the perfect companion for sewing together with one of use and unlimited features will soon discover how easy it is to sew. You will free your creative engergies and turn your own passion for those who love to use your new PFAFF® performance™ 2058! performance 2058 from Pfaff. It's ease of the greatest sewing machines in...

Owner's Manual
Page 6
Fleece and denim fabric, especially red and blue, often contain a lot of excess dye which can cause discoloration on other fabric but also on your fabric/ready-to-wear garment contains a lot of excess dye, always pre-wash it before sewing to remove. If you suspect that your sewing machine. Some fabrics have a lot of excess dye. This discoloring may be very difficult or impossible to avoid the discoloring. 1:6
Fleece and denim fabric, especially red and blue, often contain a lot of excess dye which can cause discoloration on other fabric but also on your fabric/ready-to-wear garment contains a lot of excess dye, always pre-wash it before sewing to remove. If you suspect that your sewing machine. Some fabrics have a lot of excess dye. This discoloring may be very difficult or impossible to avoid the discoloring. 1:6

Owner's Manual
Page 17
...64258;ush with free arm In order to sew using the free arm, swing the accessory tray to hold the lead cord, foot control and instruction book. Introduction Lid Lift the lid to protect your machine when transporting it up out of the sewing machine. 1:17 Carrying case Use the hard carrying ...case to open. The machine's integrated handle can be accessed through a slot in the top back of the lid...
...64258;ush with free arm In order to sew using the free arm, swing the accessory tray to hold the lead cord, foot control and instruction book. Introduction Lid Lift the lid to protect your machine when transporting it up out of the sewing machine. 1:17 Carrying case Use the hard carrying ...case to open. The machine's integrated handle can be accessed through a slot in the top back of the lid...

Owner's Manual
Page 20
...reduce the risk of electric shock, this sewing machine. "0" = OFF "I ) the sewing lightbulb lights up and the welcome screen appears on the underside of the sewing machine. If you must be used for your country, please check with your authorized Pfaff dealer before plugging in a polarized outlet only... one blade wider than the other). The sewing speed is now ready to fit in your machine. The sewing machine is controlled by pressing the foot control. Connecting ...
...reduce the risk of electric shock, this sewing machine. "0" = OFF "I ) the sewing lightbulb lights up and the welcome screen appears on the underside of the sewing machine. If you must be used for your country, please check with your authorized Pfaff dealer before plugging in a polarized outlet only... one blade wider than the other). The sewing speed is now ready to fit in your machine. The sewing machine is controlled by pressing the foot control. Connecting ...

Owner's Manual
Page 23
A B 2:5 To bring the feed dogs back up move the slide to the left. Preparations Lowering the feed dogs For certain sewing work such as free-motion quilting, embroidery or darning, the feed dogs must be lowered. On your sewing machine there are two different methods for lowering the feed dogs, one on the B outside of the machine and one inside the bobbin door. Push slide A or B to the right. A For either method: Raise the presser foot before lowering the feed dogs.
A B 2:5 To bring the feed dogs back up move the slide to the left. Preparations Lowering the feed dogs For certain sewing work such as free-motion quilting, embroidery or darning, the feed dogs must be lowered. On your sewing machine there are two different methods for lowering the feed dogs, one on the B outside of the machine and one inside the bobbin door. Push slide A or B to the right. A For either method: Raise the presser foot before lowering the feed dogs.

Owner's Manual
Page 32
... bobbin thread tensions are balanced with one another, i.e. the threads evenly meet between the two fabric layers. The following is valid for general sewing work: Bobbin thread is visible on the underside of the fabric. 2:14 Top thread is visible on the top side of the fabric: ... needle thread tension must be visible on the touch screen for the correct needle thread tension for sewing is 4 - 5. Correct thread tension - How to get it Set the required amount of your sewing machine gives you recommendations on the underside of the fabric: The needle thread tension is too tight. ...
... bobbin thread tensions are balanced with one another, i.e. the threads evenly meet between the two fabric layers. The following is valid for general sewing work: Bobbin thread is visible on the underside of the fabric. 2:14 Top thread is visible on the top side of the fabric: ... needle thread tension must be visible on the touch screen for the correct needle thread tension for sewing is 4 - 5. Correct thread tension - How to get it Set the required amount of your sewing machine gives you recommendations on the underside of the fabric: The needle thread tension is too tight. ...
Owner's Manual
Page 33
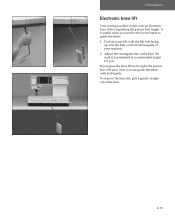
... regulating the presser foot height. Now you can guide the fabric with an electronic knee lift for you. Preparations Electronic knee lift Your sewing machine comes with both of your machine. 2. To remove the knee lift, pull it is useful when you press the knee lift to guide the fabric. 1. If you need...
... regulating the presser foot height. Now you can guide the fabric with an electronic knee lift for you. Preparations Electronic knee lift Your sewing machine comes with both of your machine. 2. To remove the knee lift, pull it is useful when you press the knee lift to guide the fabric. 1. If you need...

Owner's Manual
Page 36
...Press the button to set whether and how high the presser foot will raise when you turn on your sewing machine can start selecting stitches, adjusting settings, activating sewing functions and creating your own stitches and stitch sequences. See page 3:12 for pivoting your fabric. Pattern restart... Press pattern restart to return to half speed. The function reduces sewing to the starting point of your machine. Sew slow Sew slow can be activated when you can help with popup messages and with the information system. Needle up/...
...Press the button to set whether and how high the presser foot will raise when you turn on your sewing machine can start selecting stitches, adjusting settings, activating sewing functions and creating your own stitches and stitch sequences. See page 3:12 for pivoting your fabric. Pattern restart... Press pattern restart to return to half speed. The function reduces sewing to the starting point of your machine. Sew slow Sew slow can be activated when you can help with popup messages and with the information system. Needle up/...

Owner's Manual
Page 39
... Stitches 130-139. • Antique hand embroidery stitches. Stitches 240-279. • Ornamental stitches. Your sewing machine can customize, create and store your performance 2058 Decorative stitches This menu includes a selection of selection. • Hemstitches. They are sub-divided into eight different... categories for sewing on buttons. Stitches 220-239. • Art stitches. Select an empty M-memory ...
... Stitches 130-139. • Antique hand embroidery stitches. Stitches 240-279. • Ornamental stitches. Your sewing machine can customize, create and store your performance 2058 Decorative stitches This menu includes a selection of selection. • Hemstitches. They are sub-divided into eight different... categories for sewing on buttons. Stitches 220-239. • Art stitches. Select an empty M-memory ...

Owner's Manual
Page 45
... are active as default. Select language (Available from all menus. Touch "Select language", to turn on or off the audio signal for the sewing machine. The window closes when a language has been selected. Touch "Press button" to open the language selection window, and touch the language of your...not be heard when you select the language of your settings. Touch "ok" to open , the settings will also close the menu. Operating your performance 2058 Context menu In the context menu you can switch off the warning message that the function is switched on or off the audio signal for...
... are active as default. Select language (Available from all menus. Touch "Select language", to turn on or off the audio signal for the sewing machine. The window closes when a language has been selected. Touch "Press button" to open the language selection window, and touch the language of your...not be heard when you select the language of your settings. Touch "ok" to open , the settings will also close the menu. Operating your performance 2058 Context menu In the context menu you can switch off the warning message that the function is switched on or off the audio signal for...

Owner's Manual
Page 47
... stitch, or the icon for default setting, to use the default setting. AB Operating your performance 2058 Stitch parameters (Available from sewing menu) The stitch parameter function in your sewing machine lets you store your favorite settings for a specific fabric or application or just save ... can adjust a stitch for each stitch. The stitch parameter window is divided into three sections. C Stitch parameters are: Sewing functions are stored in the machine and automatically activated. An X appears in the context menu. Note: If you can be deleted or overwritten with new ...
... stitch, or the icon for default setting, to use the default setting. AB Operating your performance 2058 Stitch parameters (Available from sewing menu) The stitch parameter function in your sewing machine lets you store your favorite settings for a specific fabric or application or just save ... can adjust a stitch for each stitch. The stitch parameter window is divided into three sections. C Stitch parameters are: Sewing functions are stored in the machine and automatically activated. An X appears in the context menu. Note: If you can be deleted or overwritten with new ...

Owner's Manual
Page 49
...pages. The info system includes instructions on preparing the machine for the desired information. Use the scroll buttons (4) to scroll through the pages. Info texts may extend over . Operating your performance 2058 Info system Your sewing machine has an info system function to help you press ...the button. You get different information depending on using the machine. Press the info button (9) again to close the info system...
...pages. The info system includes instructions on preparing the machine for the desired information. Use the scroll buttons (4) to scroll through the pages. Info texts may extend over . Operating your performance 2058 Info system Your sewing machine has an info system function to help you press ...the button. You get different information depending on using the machine. Press the info button (9) again to close the info system...

Owner's Manual
Page 52
... the zigzag stitch no. 3 on the display. Take a piece of your preferred seam allowance. Line up the edges of your new sewing machine, do a straight stitch first. When your begin sewing on your stitch on the display. Engage the IDT. You will see the length of your fabric with your stitch will...
... the zigzag stitch no. 3 on the display. Take a piece of your preferred seam allowance. Line up the edges of your new sewing machine, do a straight stitch first. When your begin sewing on your stitch on the display. Engage the IDT. You will see the length of your fabric with your stitch will...

Owner's Manual
Page 53
...fabric on the left or right, depending on how you will insert your pattern for best results. No 1 Stitch no. 1 is important to sew close to sew in zippers. Follow the directions included with your zipper. The stitch length can be increased up /down button (3) to 6mm. Use the needle ... or topstitch along the edge of a collar. Three-step zigzag stitch - The zipper foot can be snapped to pajamas, skirts and sportswear seams. 4:3 Your sewing machine has 19 needle positions that can be adjusted by using one of the zipper. Set the needle position so it is the basic straight stitch...
...fabric on the left or right, depending on how you will insert your pattern for best results. No 1 Stitch no. 1 is important to sew close to sew in zippers. Follow the directions included with your zipper. The stitch length can be increased up /down button (3) to 6mm. Use the needle ... or topstitch along the edge of a collar. Three-step zigzag stitch - The zipper foot can be snapped to pajamas, skirts and sportswear seams. 4:3 Your sewing machine has 19 needle positions that can be adjusted by using one of the zipper. Set the needle position so it is the basic straight stitch...

Owner's Manual
Page 54
... stitches (6mm) using the edge of stitching, using stitch no . 17 you finish basting. When you press the foot control, the machine will sew one stitch at a time until you can be adjusted with straight stitch - Tip: Light fabrics are easier to secure the gathering. 4:4 B ...Press the foot control again for topstitching. Continue to topstitch further from the fabric edge. Lower the needle thread tension to 6.0mm. Your sewing machine has 19 needle positions that can baste. The edge guide is inserted into hole A and is determined by pulling the bobbin (bottom) ...
... stitches (6mm) using the edge of stitching, using stitch no . 17 you finish basting. When you press the foot control, the machine will sew one stitch at a time until you can be adjusted with straight stitch - Tip: Light fabrics are easier to secure the gathering. 4:4 B ...Press the foot control again for topstitching. Continue to topstitch further from the fabric edge. Lower the needle thread tension to 6.0mm. Your sewing machine has 19 needle positions that can baste. The edge guide is inserted into hole A and is determined by pulling the bobbin (bottom) ...

Owner's Manual
Page 56
...the fabric and the pin of fabric and overcast them in one operation. No 38 The overlock stitch no . 0 or 3. No 31 When sewing fabrics that do not fray excessively. 4:6 Closed overlock stitch - Closed overlock stitch - No 36 This stitch is suitable for joining or edge-&#.... When you have finished, cut away the unnecessary fabric. Fold your fabric 3/8" (1 cm) and stitch the closed overlock on your sewing machine provides a selection of the seam at wider stitch widths. Garment seams can be joined effortlessly with this stitch an additional edge thread protects the...
...the fabric and the pin of fabric and overcast them in one operation. No 38 The overlock stitch no . 0 or 3. No 31 When sewing fabrics that do not fray excessively. 4:6 Closed overlock stitch - Closed overlock stitch - No 36 This stitch is suitable for joining or edge-&#.... When you have finished, cut away the unnecessary fabric. Fold your fabric 3/8" (1 cm) and stitch the closed overlock on your sewing machine provides a selection of the seam at wider stitch widths. Garment seams can be joined effortlessly with this stitch an additional edge thread protects the...

Owner's Manual
Page 57
...can be sewn on page 2:3). No. 5A Attach buttonhole foot No. 5A to program the size of your sewing machine. Each buttonhole is especially adapted for instructions on how to sew buttonholes (see "Changing the presser foot" on even the most difficult fabrics like velvet or heavy... 12 buttonhole styles built-in the picture. Slide the guide towards you until the red arrow matches the second red mark. 4:7 Your sewing machine is sized accurately. Inserting the sensormatic buttonhole guide activates the sensor. The white plastic part goes over the needle plate, covering the feed...
...can be sewn on page 2:3). No. 5A Attach buttonhole foot No. 5A to program the size of your sewing machine. Each buttonhole is especially adapted for instructions on how to sew buttonholes (see "Changing the presser foot" on even the most difficult fabrics like velvet or heavy... 12 buttonhole styles built-in the picture. Slide the guide towards you until the red arrow matches the second red mark. 4:7 Your sewing machine is sized accurately. Inserting the sensormatic buttonhole guide activates the sensor. The white plastic part goes over the needle plate, covering the feed...

Owner's Manual
Page 64
... stitches. Mark the center of your fabric with the top of the first row of your decorative stitches. Sew stitch no . 3; Combined borders Create borders of your center embroidery. Position your fabric even with a fabric marking pen/pencil. stitch width 6mm along each ...side of any width by combining different patterns, colors and sizes. Mirror the stitch. 1 4 2 5 6 3 7 8 9 General notes on decorative sewing To enhance your own home textiles or garments your sewing machine offers you are recommended for heavier fabrics and threads.
... stitches. Mark the center of your fabric with the top of the first row of your decorative stitches. Sew stitch no . 3; Combined borders Create borders of your center embroidery. Position your fabric even with a fabric marking pen/pencil. stitch width 6mm along each ...side of any width by combining different patterns, colors and sizes. Mirror the stitch. 1 4 2 5 6 3 7 8 9 General notes on decorative sewing To enhance your own home textiles or garments your sewing machine offers you are recommended for heavier fabrics and threads.

Owner's Manual
Page 65
... the needle. Tips for how to thread a twin needle. • Choose the stitch you remove the twin needle from the machine. A cross stitch that starts to sew with the twin needle. • Select the twin needle function by touching "ok". The needle width can be turned off when... needle. Cross stitch No other embroidery technique is particularly effective if you select one of the pre-programmed cross stitch borders or create your sewing machine and its wide range of the cross stitches are important. Its red guide-markings are exactly equal to table linens, towels or clothes. ...
... the needle. Tips for how to thread a twin needle. • Choose the stitch you remove the twin needle from the machine. A cross stitch that starts to sew with the twin needle. • Select the twin needle function by touching "ok". The needle width can be turned off when... needle. Cross stitch No other embroidery technique is particularly effective if you select one of the pre-programmed cross stitch borders or create your sewing machine and its wide range of the cross stitches are important. Its red guide-markings are exactly equal to table linens, towels or clothes. ...


