Pfaff ClassicStyle 1529 Support and Manuals
Get Help and Manuals for this Pfaff item

View All Support Options Below
Free Pfaff ClassicStyle 1529 manuals!
Problems with Pfaff ClassicStyle 1529?
Ask a Question
Free Pfaff ClassicStyle 1529 manuals!
Problems with Pfaff ClassicStyle 1529?
Ask a Question
Most Recent Pfaff ClassicStyle 1529 Questions

Overlock Stitching
I have been trying to do an overlock stitch and have yet to be able to get the stich settings on my ...
I have been trying to do an overlock stitch and have yet to be able to get the stich settings on my ...
(Posted by funsized09 10 years ago)
Popular Pfaff ClassicStyle 1529 Manual Pages
Owner's Manual - Page 2
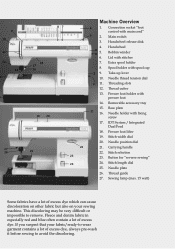
...-wash it before sewing to avoid the discoloring. Take-up lever
10. Removable accessory tray
15. Button for "reverse sewing"
24. Thread guide
27. If you suspect that your sewing machine. Handwheel release disk...9 10 11 12
13 4
5
27 26
18 17 16
19 20
25
87
23 24
Machine Overview
6 1. Connection socket "foot control with Àxing
screw
17. Main switch
3. Handwheel Bobbin...
Owner's Manual - Page 4
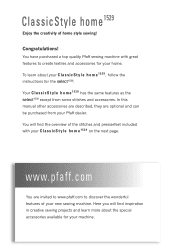
... of home style sewing! www.pfaff.com
You are optional and can be purchased from some stitches and accessories. ClassicStyle home1529
Enjoy the creativity of the stitches and presserfeet included with great features to discover the wonderful features of your new sewing machine. To learn more about your C l a s s i c S t y l e h o m e 1 5 2 9 , follow the instructions for your home. You...
Owner's Manual - Page 5
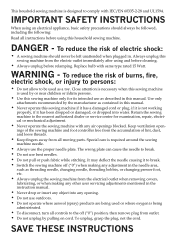
...-2-28 and UL1594. SAVE THESE INSTRUCTIONS Replace bulb with any object into water. Return the sewing machine to the off ("0") when making any adjustment in the needle area,
such as contained in this manual.
• Never operate this sewing machine only for examination, repair, electrical or mechanical adjustment.
• Never operate the sewing machine with same type rated 15 Watt...
Owner's Manual - Page 14
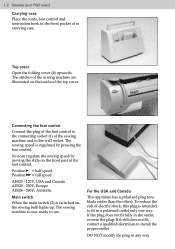
...Pfaff select Carrying-case Place the cords, foot control and instruction book in the front pocket of the sewing machine and to the wall socket.
Top cover Open the folding cover (6) upwards. The sewing speed is switched on, the sewing... install the proper outlet.
If the plug does not Àt fully in any way.
1:2 The stitches of the sewing machine are illustrated on the front part of...
Owner's Manual - Page 15
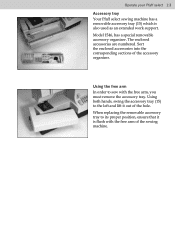
... to the left and lift it is also used as an extended work support. Using both hands, swing the accessory tray (15) to sew with the free arm of the accessory organizer.
Operate your Pfaff select 1:3 Accessory tray Your Pfaff select sewing machine has a removable accessory tray (15) which is Áush with the free arm...
Owner's Manual - Page 26
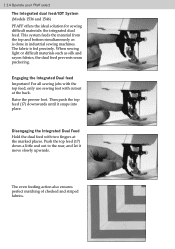
...push the top feed (17) downwards until it move slowly upwards.
1:14 Operate your Pfaff select The Integrated dual feed/IDT System (Models 1536 and 1546) PFAFF offers the ideal solution for sewing difÀcult materials: the integrated dual feed. Push the top feed (17) down... ensures perfect matching of checked and striped fabrics.
1:14 The fabric is done in industrial sewing machines.
Owner's Manual - Page 27
... B
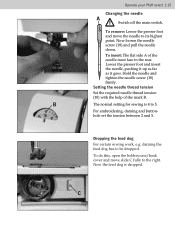
The normal setting for sewing is dropped. darning the feed dog has to the rear.
Dropping the feed dog
For certain sewing work, e.g. Now ...the feed dog is 4 to the right.
To insert: The Áat side A of the mark B.
Now loosen the needle screw (18) and pull the needle down.
To remove: Lower the presser foot and move slide C fully to 5. Operate your Pfaff...
Owner's Manual - Page 28
...will Ànd recommendations in the material. 1:16 Operate your Pfaff select
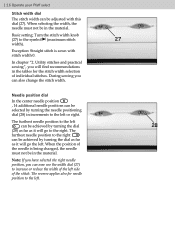
Stitch width dial The stitch width can be in the material.
In chapter "2. During sewing you can now use the width dial (27) to the...the needle must not be adjusted with stitch width 0.
Basic setting: Turn the stitch width knob (27) to the left side of individual stitches. Utility stitches and practical...
Owner's Manual - Page 49
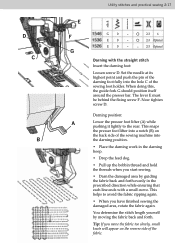
... screw D.
Set the needle at its highest point and push the pin of the darning foot fully into a notch (B) on the reverse side of the fabric.
You determine the stitch length yourself by guiding the fabric ...appear on the back side of the sewing foot holder. E
0
- This snaps the presser foot lifter into the hole C of the sewing machine into the darning position.
• Place...
Owner's Manual - Page 61
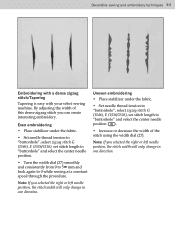
... to "buttonhole", select zigzag stitch G (1546), E (1536/1526), set stitch length to 0 while sewing at a constant speed through the procedure. Note: If you can create interesting embroidery. Decorative sewing and embroidery techniques 3:5
Embroidering with a dense zigzag stitch/Tapering
Tapering is easy with your select sewing machine. Note: If you selected the right or left needle...
Owner's Manual - Page 63
...Decorative sewing and embroidery techniques 3:7
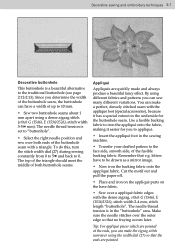
Decorative buttonhole
This buttonhole is set to "buttonhole".
• Select the right needle position and sew ... "buttonhole". The needle thread tension is in the sewing machine.
• Transfer your drafted pattern to iron the appliqué...appliqué parts on the underside for you can have to 10 mm.
• Sew two buttonhole ...
Owner's Manual - Page 64
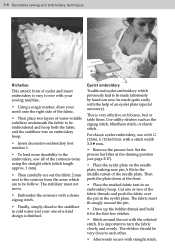
...in an embroidery hoop. For classic eyelet embroidery, use stitch G (1546), E (1536/1526), with a stitch width 3-5 mm.
• Remove the presser foot. Set the presser bar lifter at the... secure with straight stitch. 3:8 Decorative sewing and embroidery techniques
Richelieu This artistic form of eyelet and insert embroidery is easy to sew with your sewing machine.
• Using a magic marker,...
Owner's Manual - Page 65
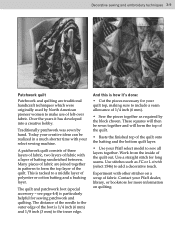
...of polyester or cotton batting and a backing layer. Use a straight stitch for your select sewing machine. Experiment with a layer of batting sandwiched between. A patchwork quilt consists of three layers ...to form the top layer of the quilt. Contact your Pfaff select model to add a decorative touch. Decorative sewing and embroidery techniques 3:9
Patchwork quilt
Patchwork and quilting are ...
Owner's Manual - Page 68
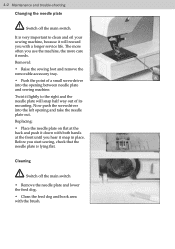
... its mounting. Replacing: • Place the needle plate on Áat at the back and push it will snap half way out of a small screwdriver into the left opening between needle plate and sewing machine.
Twist it lightly to clean and oil your sewing machine, because it down with the brush.
4:2 4:2 Maintenance and trouble-shooting Changing...
Owner's Manual - Page 69
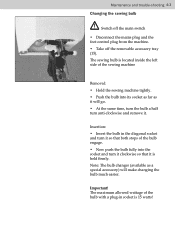
... is located inside the left side of the sewing machine
Removal: • Hold the sewing machine tightly. • Push the bulb into its socket as far as a special accessory) will ...: • Insert the bulb in socket is held Àrmly. Maintenance and trouble-shooting 4:3 Changing the sewing bulb
Switch off the main switch • Disconnect the mains plug and the foot control plug from the...
Pfaff ClassicStyle 1529 Reviews
We have not received any reviews for Pfaff yet.