
Owners Manual
Page 1
Owner's Manual Digital Camera Model No. DC-BGH1 Please read these instructions carefully before using this product, and save this manual for future use. DVQP2276ZA M1020KZ0
Owner's Manual Digital Camera Model No. DC-BGH1 Please read these instructions carefully before using this product, and save this manual for future use. DVQP2276ZA M1020KZ0
Owners Manual
Page 2
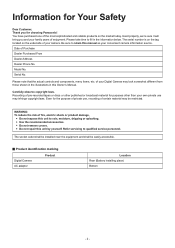
...purposes other than your own private use , recording of certain material may be easily accessible. ■■Product identification marking Digital Camera AC adaptor Product Location Rear (Battery installing place) Bottom - 2 - Please take time to qualified service personnel. Recording of ...pre-recorded tapes or discs or other published or broadcast material for choosing Panasonic! The socket outlet shall be installed near the equipment and shall be restricted. Information for Your Safety Dear Customer, Thank you ...
...purposes other than your own private use , recording of certain material may be easily accessible. ■■Product identification marking Digital Camera AC adaptor Product Location Rear (Battery installing place) Bottom - 2 - Please take time to qualified service personnel. Recording of ...pre-recorded tapes or discs or other published or broadcast material for choosing Panasonic! The socket outlet shall be installed near the equipment and shall be restricted. Information for Your Safety Dear Customer, Thank you ...

Owners Manual
Page 5
...Your Safety Cautions for a long period of time. ●● Do not use solvents such as benzine, thinner, alcohol, kitchen detergents, etc., to clean the camera, since it to the [GENLOCK IN] terminal or [TC IN/OUT] terminal, use one . ●● Use a high speed HDMI cable (Type A .... It is adversely affected by electromagnetic wave radiation. ●● Do not use this unit off . ●● Do not leave the camera with pesticides or volatile substances (can cause surface damage or coating to peel). ●● Do not keep rubber or plastic products in noise ...
...Your Safety Cautions for a long period of time. ●● Do not use solvents such as benzine, thinner, alcohol, kitchen detergents, etc., to clean the camera, since it to the [GENLOCK IN] terminal or [TC IN/OUT] terminal, use one . ●● Use a high speed HDMI cable (Type A .... It is adversely affected by electromagnetic wave radiation. ●● Do not use this unit off . ●● Do not leave the camera with pesticides or volatile substances (can cause surface damage or coating to peel). ●● Do not keep rubber or plastic products in noise ...

Owners Manual
Page 7
... 21 Power supply 21 Supplying power with an AC adaptor 21 Supplying power from a PoE+ power supply 22 Turning the camera on 23 Turning the camera off 23 Power Indications 24 Attaching a Lens 25 Connecting the external monitor 27 Connecting to the external monitor 27 Attaching the... Video 61 Time Code 62 Setting the Time Code 62 Synchronizing the Time Code with That of Parts 17 2. Basic Operations 38 Camera Setting Operations 38 Display Settings 39 Information Display (HDMI/SDI 39 Output destination screen display 40 Switching the Display Information 41 Control Panel...
... 21 Power supply 21 Supplying power with an AC adaptor 21 Supplying power from a PoE+ power supply 22 Turning the camera on 23 Turning the camera off 23 Power Indications 24 Attaching a Lens 25 Connecting the external monitor 27 Connecting to the external monitor 27 Attaching the... Video 61 Time Code 62 Setting the Time Code 62 Synchronizing the Time Code with That of Parts 17 2. Basic Operations 38 Camera Setting Operations 38 Display Settings 39 Information Display (HDMI/SDI 39 Output destination screen display 40 Switching the Display Information 41 Control Panel...

Owners Manual
Page 8
... HDMI Device 137 Outputting Audio via HDMI 137 Output the enlarged display of MF assist via SDI 138 Output control information to be Recorded 129 7. Camera Customization 154 Fn Buttons 154 Fn Button Default Settings 154 Register Functions to the Fn Buttons 155 Use the Fn Buttons 160 Quick Menu Customization... Custom Mode 165 Using Custom Mode 167 Calling Up Settings 168 My Menu 169 Registration in My Menu 169 Edit My Menu 170 [Save/Restore Camera Setting 171 - 8 - Contents 5.
... HDMI Device 137 Outputting Audio via HDMI 137 Output the enlarged display of MF assist via SDI 138 Output control information to be Recorded 129 7. Camera Customization 154 Fn Buttons 154 Fn Button Default Settings 154 Register Functions to the Fn Buttons 155 Use the Fn Buttons 160 Quick Menu Customization... Custom Mode 165 Using Custom Mode 167 Calling Up Settings 168 My Menu 169 Registration in My Menu 169 Edit My Menu 170 [Save/Restore Camera Setting 171 - 8 - Contents 5.

Owners Manual
Page 9
Remote Operations 204 About Remote Operation 204 Tethered Recording 207 Installing "LUMIX Tether 207 Operating the Camera from a PC 208 Connecting to a Smartphone 213 Flow of connecting a smartphone 213 Installing "LUMIX Sync 214 Connecting to a Smartphone (Bluetooth Connection)...215 Connecting to a Smartphone (Wi-Fi connection)...........218 Connecting to a Smartphone (Wired LAN connection 223 Operating...
Remote Operations 204 About Remote Operation 204 Tethered Recording 207 Installing "LUMIX Tether 207 Operating the Camera from a PC 208 Connecting to a Smartphone 213 Flow of connecting a smartphone 213 Installing "LUMIX Sync 214 Connecting to a Smartphone (Bluetooth Connection)...215 Connecting to a Smartphone (Wi-Fi connection)...........218 Connecting to a Smartphone (Wired LAN connection 223 Operating...

Owners Manual
Page 10
... may be provided in order to improve camera capabilities or to 32 °F)) Before use "LUMIX Tether". ■■Handling of -10 °C (14 °F). Display the recording screen or menu with a minimum recommended operating temperature of the Camera When using the camera in [Firmware Version]. ( 198 / ... where water can come into contact with a dry soft cloth. Avoid using the camera, take pictures (Still images) when you use , attach a Panasonic lens with one of the following support site: https://panasonic.jp/support/global/cs/dsc/ (English only) ●● To check the ...
... may be provided in order to improve camera capabilities or to 32 °F)) Before use "LUMIX Tether". ■■Handling of -10 °C (14 °F). Display the recording screen or menu with a minimum recommended operating temperature of the Camera When using the camera in [Firmware Version]. ( 198 / ... where water can come into contact with a dry soft cloth. Avoid using the camera, take pictures (Still images) when you use , attach a Panasonic lens with one of the following support site: https://panasonic.jp/support/global/cs/dsc/ (English only) ●● To check the ...

Owners Manual
Page 11
...copyright law, you may lead to soiling, mold, and malfunctions in the event that recording could not be performed due to a problem with the camera or a card. ■■Be Careful with Regard to check that recording can be performed normally. ■■No Compensation Regarding Recording Please... note that compensation cannot be provided in the lens. ●● If condensation occurs, turn off the camera and leave it for Use) - 11 - Take care as this may not use the images and audio you have recorded without the permission of...
...copyright law, you may lead to soiling, mold, and malfunctions in the event that recording could not be performed due to a problem with the camera or a card. ■■Be Careful with Regard to check that recording can be performed normally. ■■No Compensation Regarding Recording Please... note that compensation cannot be provided in the lens. ●● If condensation occurs, turn off the camera and leave it for Use) - 11 - Take care as this may not use the images and audio you have recorded without the permission of...

Owners Manual
Page 12
1. AC cable K2CA2CA00025 Cable lock band 1AC1MC551Z - 12 - Introduction - Standard Accessories Standard Accessories Digital camera body (Digital camera body is referred to as camera in this document.) Check that all the accessories are supplied before using the camera. (Product numbers correct as of October 2020.) AC adaptor SAE0011A ●● This is used for power supply.
1. AC cable K2CA2CA00025 Cable lock band 1AC1MC551Z - 12 - Introduction - Standard Accessories Standard Accessories Digital camera body (Digital camera body is referred to as camera in this document.) Check that all the accessories are supplied before using the camera. (Product numbers correct as of October 2020.) AC adaptor SAE0011A ●● This is used for power supply.

Owners Manual
Page 13
Introduction - Body cap*1 VKF4971 Hot shoe cover*1 DVYE1121Z BNC terminal cover*1 DVKJ1044Z/K 1. Standard Accessories HDMI terminal cover*1 DVKJ1045Z/K AUDIO terminal cover*1 DVKJ1046Z/K DC IN terminal cover*1 DVKJ1047Y/K REMOTE terminal cover*1 DVKJ1048Z/K *1 This is attached to the camera at the time of purchase but it's removable. - 13 -
Introduction - Body cap*1 VKF4971 Hot shoe cover*1 DVYE1121Z BNC terminal cover*1 DVKJ1044Z/K 1. Standard Accessories HDMI terminal cover*1 DVKJ1045Z/K AUDIO terminal cover*1 DVKJ1046Z/K DC IN terminal cover*1 DVKJ1047Y/K REMOTE terminal cover*1 DVKJ1048Z/K *1 This is attached to the camera at the time of purchase but it's removable. - 13 -

Owners Manual
Page 14
... ●● Please dispose of all packaging appropriately. ●● Keep small parts in Canada should visit our support page at www.panasonic.ca/english/support for further information about obtaining replacement parts. - 14 - Standard Accessories ●● The accessories and their shape will ...differ depending on the country or area where the camera was purchased. ●● The battery pack is optional. (Battery pack is indicated as battery pack or battery in the text.) ●...
... ●● Please dispose of all packaging appropriately. ●● Keep small parts in Canada should visit our support page at www.panasonic.ca/english/support for further information about obtaining replacement parts. - 14 - Standard Accessories ●● The accessories and their shape will ...differ depending on the country or area where the camera was purchased. ●● The battery pack is optional. (Battery pack is indicated as battery pack or battery in the text.) ●...

Owners Manual
Page 15
...Used This unit can also use the dedicated lenses compatible with the Micro Four Thirds™ System lens mount specification (Micro Four Thirds mount). https://panasonic.jp/support/global/cs/dsc/ (English only) ●● The focal length noted on the lens used, certain functions, such as Auto Focus..., may be equivalent to 100 mm lens when a 50 mm lens is equivalent to double when converted to the 35 mm film camera. (It will be disabled or operate differently. ●● Refer to catalogues/websites for most current information regarding supported lenses. Introduction -
...Used This unit can also use the dedicated lenses compatible with the Micro Four Thirds™ System lens mount specification (Micro Four Thirds mount). https://panasonic.jp/support/global/cs/dsc/ (English only) ●● The focal length noted on the lens used, certain functions, such as Auto Focus..., may be equivalent to 100 mm lens when a 50 mm lens is equivalent to double when converted to the 35 mm film camera. (It will be disabled or operate differently. ●● Refer to catalogues/websites for most current information regarding supported lenses. Introduction -

Owners Manual
Page 16
... Be Used Memory Cards That Can Be Used You can prevent the writing and deleting of data by the generic name of card in this camera. ●● SD memory card, SDHC memory card, and SDXC memory card are standards to electromagnetic waves, static electricity or a failure of ...the UHS-I/UHS-II standard. ●● The camera supports SDHC/SDXC memory cards compliant with this document. Bit rate of the recording quality Speed Class Example of indication Class 10 72 Mbps UHS...
... Be Used Memory Cards That Can Be Used You can prevent the writing and deleting of data by the generic name of card in this camera. ●● SD memory card, SDHC memory card, and SDXC memory card are standards to electromagnetic waves, static electricity or a failure of ...the UHS-I/UHS-II standard. ●● The camera supports SDHC/SDXC memory cards compliant with this document. Bit rate of the recording quality Speed Class Example of indication Class 10 72 Mbps UHS...

Owners Manual
Page 17
... recording time of Parts ■■Front 1 7 2 8 3 4 9 5 10 6 11 1 Status indicator ( 248 / Lamp / Indicator Display) ●● This displays the power status. 2 [ ] Camera ON/OFF button ( 23 / Turning the camera on the menu screen. ( 192 / [Tally Lamp]) 8 Fn button ([Fn2]) ( 154 / Fn Buttons) 9 Lens release button 10 Lens lock pin 11 Fn...
... recording time of Parts ■■Front 1 7 2 8 3 4 9 5 10 6 11 1 Status indicator ( 248 / Lamp / Indicator Display) ●● This displays the power status. 2 [ ] Camera ON/OFF button ( 23 / Turning the camera on the menu screen. ( 192 / [Tally Lamp]) 8 Fn button ([Fn2]) ( 154 / Fn Buttons) 9 Lens release button 10 Lens lock pin 11 Fn...

Owners Manual
Page 18
... attempt to attach a screw longer than 5.5 mm (0.22 inch), you may not be difficult to securely fix it in place or it may damage the camera. 20 Stereo microphone ●● Do not block the microphone with a finger. ■■Top 12 13 14 15 16 17 18 1. button ( 51 / Recording...;● Keep the hot shoe cover out of reach of children to prevent swallowing. 19 Tripod mount ●● You can attach a tripod, platform or camera cage etc. ●● The size of Parts ■■Bottom 19 20 21 22 19 23 24 12 Video rec. Audio will be able...
... attempt to attach a screw longer than 5.5 mm (0.22 inch), you may not be difficult to securely fix it in place or it may damage the camera. 20 Stereo microphone ●● Do not block the microphone with a finger. ■■Top 12 13 14 15 16 17 18 1. button ( 51 / Recording...;● Keep the hot shoe cover out of reach of children to prevent swallowing. 19 Tripod mount ●● You can attach a tripod, platform or camera cage etc. ●● The size of Parts ■■Bottom 19 20 21 22 19 23 24 12 Video rec. Audio will be able...

Owners Manual
Page 19
... from a PoE+ power supply) ●● You can control the camera remotely by connecting with a PC that has the "LUMIX Tether" software installed. ( 207 / Tethered Recording) ●● You can remotely operate the camera by connecting it with a LAN cable to the wireless access point to which... the smartphone that has the "LUMIX Tether" software installed is connected to. ( 223 / Connecting to a Smartphone (Wired LAN ...
... from a PoE+ power supply) ●● You can control the camera remotely by connecting with a PC that has the "LUMIX Tether" software installed. ( 207 / Tethered Recording) ●● You can remotely operate the camera by connecting it with a LAN cable to the wireless access point to which... the smartphone that has the "LUMIX Tether" software installed is connected to. ( 223 / Connecting to a Smartphone (Wired LAN ...

Owners Manual
Page 20
... to use one that is attached to 5C-FB. - 20 - Do not block it when using this camera. ●● The terminal cover is less than 2.8 m (9.1 feet). Names of children to the camera. (A Panasonic shutter remote control (DMW-RS2) cannot be used.) 43 Card door release lever 44 Card door 45 Card... 48 49 50 51 52 19 40 Fan outlet ●● The fan outlet for the cooling fan. Do not block it when using this camera. 41 REMOTE terminal cover ●● Keep the REMOTE terminal cover out of reach of children to prevent swallowing. 42 [REMOTE] terminal ( 145 / Using a...
... to use one that is attached to 5C-FB. - 20 - Do not block it when using this camera. ●● The terminal cover is less than 2.8 m (9.1 feet). Names of children to the camera. (A Panasonic shutter remote control (DMW-RS2) cannot be used.) 43 Card door release lever 44 Card door 45 Card... 48 49 50 51 52 19 40 Fan outlet ●● The fan outlet for the cooling fan. Do not block it when using this camera. 41 REMOTE terminal cover ●● Keep the REMOTE terminal cover out of reach of children to prevent swallowing. 42 [REMOTE] terminal ( 145 / Using a...

Owners Manual
Page 21
... into the power outlet. ●● The AC cable is AG-VBR59/AG-VBR89/AG-VBR118. (As of October 2020) Supplying power with this camera only, so do not use it will be referred to as "battery pack" or "battery" onwards. ●● When several power supplies are ... will be prioritized in the order of AC adaptor, PoE+ power supply and then battery. ●● The battery that can supply power to the camera using an AC adaptor (supplied), a PoE+*1 compatible switching hub or PoE+ compatible injector (commercially available), and a battery pack (optional)*2. *1 PoE+ is an ...
... into the power outlet. ●● The AC cable is AG-VBR59/AG-VBR89/AG-VBR118. (As of October 2020) Supplying power with this camera only, so do not use it will be referred to as "battery pack" or "battery" onwards. ●● When several power supplies are ... will be prioritized in the order of AC adaptor, PoE+ power supply and then battery. ●● The battery that can supply power to the camera using an AC adaptor (supplied), a PoE+*1 compatible switching hub or PoE+ compatible injector (commercially available), and a battery pack (optional)*2. *1 PoE+ is an ...

Owners Manual
Page 22
...one below. - This may cause malfunction. ●● Do not use the AC adaptor and AC cable with other problems with the software "LUMIX Tether" while supplying power to the LAN terminal, use any metal items (such as clips) near the contact areas of the switching hub or power...the safety standards IEC 60950-1 or IEC 62368-1. 2. Supplying power from the electrical outlet in order to supply power (power supply). Connect the camera to a PoE+ compatible switching hub or PoE+ compatible injector to save power. Otherwise, a fire and/or electric shocks may be caused by the...
...one below. - This may cause malfunction. ●● Do not use the AC adaptor and AC cable with other problems with the software "LUMIX Tether" while supplying power to the LAN terminal, use any metal items (such as clips) near the contact areas of the switching hub or power...the safety standards IEC 60950-1 or IEC 62368-1. 2. Supplying power from the electrical outlet in order to supply power (power supply). Connect the camera to a PoE+ compatible switching hub or PoE+ compatible injector to save power. Otherwise, a fire and/or electric shocks may be caused by the...

Owners Manual
Page 23
Power supply 1 Turning the camera on. ●● Press and hold the camera ON/OFF button for more than one second. ●● The status indicator will go off. - 23 - Getting Started - Turning the camera off 1 Turning the camera off. ●● Press and hold the camera ON/OFF button for more than two seconds. ●● The status indicator will light up. ●● You can change the language displayed on 2. Turning the camera on the screen from [Language] ([ ]) in the [Setup] ([Others]) menu.
Power supply 1 Turning the camera on. ●● Press and hold the camera ON/OFF button for more than one second. ●● The status indicator will go off. - 23 - Getting Started - Turning the camera off 1 Turning the camera off. ●● Press and hold the camera ON/OFF button for more than two seconds. ●● The status indicator will light up. ●● You can change the language displayed on 2. Turning the camera on the screen from [Language] ([ ]) in the [Setup] ([Others]) menu.


