
KXTGP551 User Guide
Page 11
... desired phone number. 3 {C}/{s} L If {s} is pressed and the other party's line is engaged, the unit automatically redials multiple times. L You can also select the line manually as follows: {LINE} i {V}/{^}: Select the desired line. Note: L If y is waiting to move the cursor. L To use the speakerphone in the redial list 1 {REDIAL} 2 {V}/{^}: ..., press {OFF}. Contact your administrator. L The unit selects the default line configured by your administrator for further information. L You can also select the line manually as follows: {LINE} i {V}/{^}: Select the desired line.
... desired phone number. 3 {C}/{s} L If {s} is pressed and the other party's line is engaged, the unit automatically redials multiple times. L You can also select the line manually as follows: {LINE} i {V}/{^}: Select the desired line. Note: L If y is waiting to move the cursor. L To use the speakerphone in the redial list 1 {REDIAL} 2 {V}/{^}: ..., press {OFF}. Contact your administrator. L The unit selects the default line configured by your administrator for further information. L You can also select the line manually as follows: {LINE} i {V}/{^}: Select the desired line.

KXTGP551 User Guide
Page 15
...2 {V}/{^}: Select the desired phone number. 3 Lift the corded handset or press {SP- To cancel, press {EXIT}. L You can also select the line manually as {SP- L {SP-PHONE/HEADSET} is turned on, the SP-PHONE indicator on the base unit flashes. L You can also dial the phone number..., press {CLEAR}. 2 Lift the corded handset. L The unit selects the default line configured by your administrator. Note: L You can also select the line manually as follows: {LINE} i {V}/{^}: Select the desired line. L A maximum of using the Base Unit Making calls 1 Dial the phone number. L To end...
...2 {V}/{^}: Select the desired phone number. 3 Lift the corded handset or press {SP- To cancel, press {EXIT}. L You can also select the line manually as {SP- L {SP-PHONE/HEADSET} is turned on, the SP-PHONE indicator on the base unit flashes. L You can also dial the phone number..., press {CLEAR}. 2 Lift the corded handset. L The unit selects the default line configured by your administrator. Note: L You can also select the line manually as follows: {LINE} i {V}/{^}: Select the desired line. L A maximum of using the Base Unit Making calls 1 Dial the phone number. L To end...

KXTGP551 User Guide
Page 19
...CLEAR}. i Press {CALL} or {C}. i {OK} L If you do not need to assign the ringer ID, go to dial manually. Finding and calling a phonebook entry Scrolling through all characters or numbers. Character table for entering names While entering characters, you can switch ...alphabetically) 1 {MENU} (center of joystick) 2 {V}/{^}: "Phonebook" i {SELECT} 3 {V}/{^}: Select the desired entry. 4 {C} L You can also select the line manually as follows: {LINE} i {V}/{^}: Select the desired line. Enter the appropriate character or number. i {OK} 5 Enter the party's phone number (32 digits max.). ...
...CLEAR}. i Press {CALL} or {C}. i {OK} L If you do not need to assign the ringer ID, go to dial manually. Finding and calling a phonebook entry Scrolling through all characters or numbers. Character table for entering names While entering characters, you can switch ...alphabetically) 1 {MENU} (center of joystick) 2 {V}/{^}: "Phonebook" i {SELECT} 3 {V}/{^}: Select the desired entry. 4 {C} L You can also select the line manually as follows: {LINE} i {V}/{^}: Select the desired line. Enter the appropriate character or number. i {OK} 5 Enter the party's phone number (32 digits max.). ...

KXTGP551 User Guide
Page 20
Speed dial Assigning an entry in the phonebook to a speed dial key Dial keys {1} to {9} can also select the line manually as a speed dial key, allowing you to dial a number from the phonebook by simply pressing a dial key. 1 Find the desired entry (page... the Handset 3 Press the dial key ({0} - {9}, or {#}) which contains the character you are on that you have stored in the phonebook, without having to dial manually. 1 During an outside call . i {SELECT} i {V}/{^}: Select the desired setting. i {MENU} 2 {V}/{^}: "Speed dial" i {SELECT} 3 {V}/{^}: Select the desired dial key number. i...
Speed dial Assigning an entry in the phonebook to a speed dial key Dial keys {1} to {9} can also select the line manually as a speed dial key, allowing you to dial a number from the phonebook by simply pressing a dial key. 1 Find the desired entry (page... the Handset 3 Press the dial key ({0} - {9}, or {#}) which contains the character you are on that you have stored in the phonebook, without having to dial manually. 1 During an outside call . i {SELECT} i {V}/{^}: Select the desired setting. i {MENU} 2 {V}/{^}: "Speed dial" i {SELECT} 3 {V}/{^}: Select the desired dial key number. i...
KXTGP551 User Guide
Page 21
i {ERASE} 2 {V}/{^}: "Yes" i {SELECT} i {OFF} Y Phonebook using the Handset Export/import phonebook entries You can also select the line manually as a tab separated value file. It makes it possible to the unit. Canceling a speed dial assignment 1 Press and hold the desired speed dial key ({1} - {9}). After ...
i {ERASE} 2 {V}/{^}: "Yes" i {SELECT} i {OFF} Y Phonebook using the Handset Export/import phonebook entries You can also select the line manually as a tab separated value file. It makes it possible to the unit. Canceling a speed dial assignment 1 Press and hold the desired speed dial key ({1} - {9}). After ...

KXTGP551 User Guide
Page 22
... or number you want to step 7. 5 {V}/{^}: "Set Ringer ID" i {SELECT} 6 {V}/{^}: Select the desired setting (page 41). Correcting a mistake Press {} to move the cursor to dial manually. Finding and calling a phonebook entry Character table for (page 22). 22 Document Version 2011-03 i Lift the corded handset. Searching by pressing {*}. Enter the appropriate... uses the ringer tone you selected on page 33 when a call is received from step 3. 8 {EXIT} Note: L In step 2, you can also select the line manually as follows: {LINE} i {V}/{^}: Select the desired line.
... or number you want to step 7. 5 {V}/{^}: "Set Ringer ID" i {SELECT} 6 {V}/{^}: Select the desired setting (page 41). Correcting a mistake Press {} to move the cursor to dial manually. Finding and calling a phonebook entry Character table for (page 22). 22 Document Version 2011-03 i Lift the corded handset. Searching by pressing {*}. Enter the appropriate... uses the ringer tone you selected on page 33 when a call is received from step 3. 8 {EXIT} Note: L In step 2, you can also select the line manually as follows: {LINE} i {V}/{^}: Select the desired line.

KXTGP551 User Guide
Page 23
... repeatedly to display the first entry corresponding to dial the number. L You can also select the line manually as a speed dial key, allowing you to dial phone numbers in the phonebook, without having to dial manually. 1 During an outside call . i Lift the corded handset. 4 {V}/{^}: "Yes" i {SELECT} i {EXIT} Chain dial This feature allows...
... repeatedly to display the first entry corresponding to dial the number. L You can also select the line manually as a speed dial key, allowing you to dial phone numbers in the phonebook, without having to dial manually. 1 During an outside call . i Lift the corded handset. 4 {V}/{^}: "Yes" i {SELECT} i {EXIT} Chain dial This feature allows...

KXTGP551 User Guide
Page 24
... speed dial key ({1} - {9}). L When all items" i {SELECT} 3 Enter the handset number you wish to send the phonebook entry to. L You can also select the line manually as a tab separated value file. L To continue copying another handset or base unit by exporting the data to a computer and importing it possible to the...
... speed dial key ({1} - {9}). L When all items" i {SELECT} 3 Enter the handset number you wish to send the phonebook entry to. L You can also select the line manually as a tab separated value file. L To continue copying another handset or base unit by exporting the data to a computer and importing it possible to the...
KXTGP551 User Guide
Page 31
... 2011-03 31 When you are displayed. is displayed. Contact your administrator for further information. If you set the base unit software update setting to manual mode through the Web user interface, you want to download the update when "Update version.Press OK." L The current and new base unit software versions...
... 2011-03 31 When you are displayed. is displayed. Contact your administrator for further information. If you set the base unit software update setting to manual mode through the Web user interface, you want to download the update when "Update version.Press OK." L The current and new base unit software versions...
KXTGP551 User Guide
Page 37
... move the cursor to download the update when "Update version.Press OK." Contact your administrator. You can set the base unit software update setting to manual mode through the Web user interface, you set the date and time through the Web user interface. : Programming using the SNTP. Important: L Make sure the...
... move the cursor to download the update when "Update version.Press OK." Contact your administrator. You can set the base unit software update setting to manual mode through the Web user interface, you set the date and time through the Web user interface. : Programming using the SNTP. Important: L Make sure the...

KXTGP551 User Guide
Page 40
... cancel its wireless connection with the system. Y Handset 1 {MENU} (center of another handset) that you purchase an additional handset, refer to the additional handset's installation manual for example, _ is displayed even when the handset is stored to the base unit (for registration. Note: L When you want to stop . L If all registered...
... cancel its wireless connection with the system. Y Handset 1 {MENU} (center of another handset) that you purchase an additional handset, refer to the additional handset's installation manual for example, _ is displayed even when the handset is stored to the base unit (for registration. Note: L When you want to stop . L If all registered...
Quick Guide
Page 5
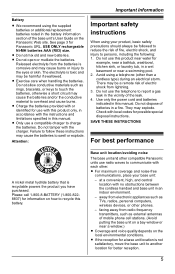
... to overheat and cause burns. L Charge the batteries provided with or identified for information on how to report a gas leak in this manual. Failure to follow these instructions may cause burns or injury to swell or explode. Do not use with this battery. facing away from lightning... site. away from the batteries is recyclable powers the product you have purchased. Avoid using a telephone (other compatible Panasonic units use this manual. L Do not open or mutilate the batteries. Base unit location/avoiding noise The base unit and other than a cordless type) ...
... to overheat and cause burns. L Charge the batteries provided with or identified for information on how to report a gas leak in this manual. Failure to follow these instructions may cause burns or injury to swell or explode. Do not use with this battery. facing away from lightning... site. away from the batteries is recyclable powers the product you have purchased. Avoid using a telephone (other compatible Panasonic units use this manual. L Do not open or mutilate the batteries. Base unit location/avoiding noise The base unit and other than a cordless type) ...

Quick Guide
Page 12
... the speakerphone 1 Dial the phone number and press {s}. i Lift the corded handset. 3 When you finish talking, place the corded handset on the Panasonic Web site. L The unit selects the default line configured by your administrator. i {CALL} 3 When you finish talking, press {OFF}. Note: ...cancel, press {OFF}. Making calls using the handset 1 Lift the handset and dial the phone number. L You can also select the line manually as follows: {LINE} i {V}/{^}: Select the desired line. L The unit selects the default line configured by your administrator. Making a call ...
... the speakerphone 1 Dial the phone number and press {s}. i Lift the corded handset. 3 When you finish talking, place the corded handset on the Panasonic Web site. L The unit selects the default line configured by your administrator. i {CALL} 3 When you finish talking, press {OFF}. Note: ...cancel, press {OFF}. Making calls using the handset 1 Lift the handset and dial the phone number. L You can also select the line manually as follows: {LINE} i {V}/{^}: Select the desired line. L The unit selects the default line configured by your administrator. Making a call ...

Quick Guide
Page 13
...: 1 {MENU} (center of joystick) i {#}{1}{6}{0} 2 {V}/{^}: Select the desired volume. 3 {SAVE} i {OFF} 13 Note: L You can also select the line manually as follows: {LINE} i {V}/{^}: Select the desired line. L You can also dial the phone number after lifting the corded handset. L If {SP-PHONE} is ringing for... a quiet environment. i Press {CALL} or {SP-PHONE}. 2 When the other party's line is being received, the ringer indicator on the Panasonic Web site. L Speak alternately with the other party. 3 When you finish talking, press {OFF} or place the handset on the base unit ...
...: 1 {MENU} (center of joystick) i {#}{1}{6}{0} 2 {V}/{^}: Select the desired volume. 3 {SAVE} i {OFF} 13 Note: L You can also select the line manually as follows: {LINE} i {V}/{^}: Select the desired line. L You can also dial the phone number after lifting the corded handset. L If {SP-PHONE} is ringing for... a quiet environment. i Press {CALL} or {SP-PHONE}. 2 When the other party's line is being received, the ringer indicator on the Panasonic Web site. L Speak alternately with the other party. 3 When you finish talking, press {OFF} or place the handset on the base unit ...


