Digital Still Camera-english/spanish
Page 54
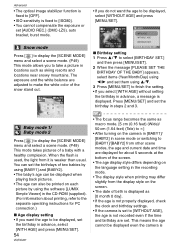
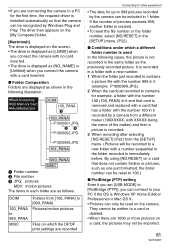
...connection.) ∫ Age display setting • If you do not want the age to be displayed even the camera is Press [MENU/SET] and set them using the software [LUMIX Simple Viewer] in the CD-ROM (supplied). (For information about printing, refer to the separate operating instructions ... BABY1 3 WITH AGE WITHOUT AGE 9 months 10 days 10:00 DEC. 1.2006 BIRTHDAY SET. The exposure and the white balance are set [AUDIO REC.] (DMC-LZ5), auto bracket, burst mode. Snow mode Press [ MENU SET ] to display the [SCENE MODE] menu and select a scene mode. (P49) This mode ...
...connection.) ∫ Age display setting • If you do not want the age to be displayed even the camera is Press [MENU/SET] and set them using the software [LUMIX Simple Viewer] in the CD-ROM (supplied). (For information about printing, refer to the separate operating instructions ... BABY1 3 WITH AGE WITHOUT AGE 9 months 10 days 10:00 DEC. 1.2006 BIRTHDAY SET. The exposure and the white balance are set [AUDIO REC.] (DMC-LZ5), auto bracket, burst mode. Snow mode Press [ MENU SET ] to display the [SCENE MODE] menu and select a scene mode. (P49) This mode ...
Digital Still Camera-english/spanish
Page 71
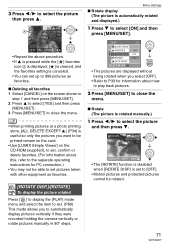
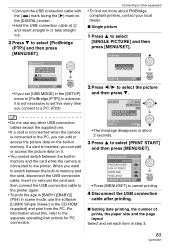
... a photo printing store, [ALL DELETE EXCEPT ] (P34) is useful so only the pictures you to automatically display pictures vertically if they were recorded holding the camera vertically or rotate pictures manually in step 1 and then press [MENU/SET]. 2 Press 3 to select [YES] and then press [MENU/SET]. 3 Press [MENU...[PLAY] mode menu and select the item to set. (P69) This mode allows you want to be printed remain on the card. • Use [LUMIX Simple Viewer] on the screen shown in 90° steps. Menu Settings ∫ Rotate display (The picture is set to [OFF]. • Motion ...
... a photo printing store, [ALL DELETE EXCEPT ] (P34) is useful so only the pictures you to automatically display pictures vertically if they were recorded holding the camera vertically or rotate pictures manually in step 1 and then press [MENU/SET]. 2 Press 3 to select [YES] and then press [MENU/SET]. 3 Press [MENU...[PLAY] mode menu and select the item to set. (P69) This mode allows you want to be printed remain on the card. • Use [LUMIX Simple Viewer] on the screen shown in 90° steps. Menu Settings ∫ Rotate display (The picture is set to [OFF]. • Motion ...
Digital Still Camera-english/spanish
Page 78
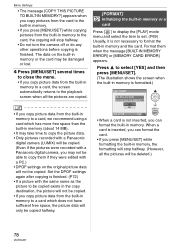
...about 14 MB). • It may take time to copy the picture data. • Only pictures recorded with a Panasonic digital camera (LUMIX) will be copied. (Even if the pictures were recorded with a Panasonic digital camera, you may not be copied. Menu Settings • The message [COPY THIS PICTURE TO BUILT-IN MEMORY?] appears when ... [MENU/SET] while copying pictures from the built-in memory to the card, the copying will stop halfway. • Do not turn the camera off or do any other operations before copying is not inserted, you can format the card. • If you press [MENU/SET] while...
...about 14 MB). • It may take time to copy the picture data. • Only pictures recorded with a Panasonic digital camera (LUMIX) will be copied. (Even if the pictures were recorded with a Panasonic digital camera, you may not be copied. Menu Settings • The message [COPY THIS PICTURE TO BUILT-IN MEMORY?] appears when ... [MENU/SET] while copying pictures from the built-in memory to the card, the copying will stop halfway. • Do not turn the camera off or do any other operations before copying is not inserted, you can format the card. • If you press [MENU/SET] while...

Digital Still Camera-english/spanish
Page 80
Connecting to other equipment Connecting to other equipment Connecting to a PC SCN1 SCN2 You can deform the connection terminals and damage the camera or the connected equipment.) ACCESS DIGITAL AV OUT DC IN 3V A: USB connection cable (supplied) B: AC adaptor (DMW-AC6; optional) • Use batteries with the [ ] ... the CD-ROM (supplied) allows you can acquire recorded pictures to a PC, print them and send them by connecting the camera and the PC. The software [LUMIX Simple Viewer] (for Windows®) in or take straight out. (If you forcibly insert the USB connection cable at a ...
Connecting to other equipment Connecting to other equipment Connecting to a PC SCN1 SCN2 You can deform the connection terminals and damage the camera or the connected equipment.) ACCESS DIGITAL AV OUT DC IN 3V A: USB connection cable (supplied) B: AC adaptor (DMW-AC6; optional) • Use batteries with the [ ] ... the CD-ROM (supplied) allows you can acquire recorded pictures to a PC, print them and send them by connecting the camera and the PC. The software [LUMIX Simple Viewer] (for Windows®) in or take straight out. (If you forcibly insert the USB connection cable at a ...
Digital Still Camera-english/spanish
Page 81
... card, the pictures may not be imported. 81 VQT0U87 The drive then appears on the [My Computer] folder. [Macintosh] The drive is displayed on the camera. They cannot be written to a PC for the first time, the required driver is Windows XP Home Edition/ Professional or Mac OS X. • Pictures ...folders or pictures, such as one just formatted, the folder number can be read on the screen. • The drive is displayed as [LUMIX] when you connect the camera with no card inserted. • The drive is displayed as [NO_NAME] or [Untitled] when you can connect to 999 pictures recorded by...
... card, the pictures may not be imported. 81 VQT0U87 The drive then appears on the [My Computer] folder. [Macintosh] The drive is displayed on the camera. They cannot be written to a PC for the first time, the required driver is Windows XP Home Edition/ Professional or Mac OS X. • Pictures ...folders or pictures, such as one just formatted, the folder number can be read on the screen. • The drive is displayed as [LUMIX] when you connect the camera with no card inserted. • The drive is displayed as [NO_NAME] or [Untitled] when you can connect to 999 pictures recorded by...
Digital Still Camera-english/spanish
Page 83
...Connect the USB connection cable with the [ ] mark facing the [1] mark on the [DIGITAL] socket. • Hold the USB connection cable at C and insert straight in or ...SET]. Connecting to other USB connection cables except the supplied one. • If a card is not inserted when the camera is connected to select [PRINT START] and then press [MENU/SET]. SINGLE PICTURE PRINT START PRINT WITH DATE NUM.... in about this every time you connect to a PC. (P23) • Do not use the software [LUMIX Simple Viewer] in step 3. 83 VQT0U87 If a card is inserted, you can edit or access the picture...
...Connect the USB connection cable with the [ ] mark facing the [1] mark on the [DIGITAL] socket. • Hold the USB connection cable at C and insert straight in or ...SET]. Connecting to other USB connection cables except the supplied one. • If a card is not inserted when the camera is connected to select [PRINT START] and then press [MENU/SET]. SINGLE PICTURE PRINT START PRINT WITH DATE NUM.... in about this every time you connect to a PC. (P23) • Do not use the software [LUMIX Simple Viewer] in step 3. 83 VQT0U87 If a card is inserted, you can edit or access the picture...


