
User Manual
Page 1
...-I (Video mode 22 Image-II (Computer mode 24 Image-II (Video mode 26 Management ...28 System ...30 Appendices 32 Troubleshooting 32 Replacing the lamp 35 Ceiling Mount Installation 36 Throw Angle ...37 1
...-I (Video mode 22 Image-II (Computer mode 24 Image-II (Video mode 26 Management ...28 System ...30 Appendices 32 Troubleshooting 32 Replacing the lamp 35 Ceiling Mount Installation 36 Throw Angle ...37 1
User Manual
Page 28
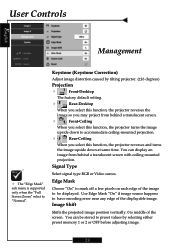
You can display an image from behind a translucent screen. 4 Front-Ceiling When you may project from behind a translucent screen with ceiling mounted projection. Use Edge Mask "On" if image source happens to be stored to preset values by tilting projector. (&#.... Image Shift Shifts the projected image position vertically. 0 is supported only when the "Full Screen Zoom" select to accommodate ceiling-mounted projection. 4 Rear-Ceiling When you select this function, the projector reverses the image so you select this function, the projector turns the image upside ...
You can display an image from behind a translucent screen. 4 Front-Ceiling When you may project from behind a translucent screen with ceiling mounted projection. Use Edge Mask "On" if image source happens to be stored to preset values by tilting projector. (&#.... Image Shift Shifts the projected image position vertically. 0 is supported only when the "Full Screen Zoom" select to accommodate ceiling-mounted projection. 4 Rear-Ceiling When you select this function, the projector reverses the image so you select this function, the projector turns the image upside ...

User Manual
Page 36
To prevent damaging your projector, please use a third party ceiling mount kit, please ensure the screws used to attached a mount to the projector met the following specifications: ™Please note that damage resulting from incorrect installation will invalidate the warranty. 4 Screw type: M2.6 4 Maximum screw length: 10mm 4 Minimum screw length: 8mm 110.00 55.00 238.15 233.64 82.14 74.17 106.17 69.67 101.66 67.00 123.48 Max. / Min. 602.50 / 402.50 50.32 36 English Appendices Ceiling Mount Installation 1. If you wish to use the ceiling mount package for installation. 2.
To prevent damaging your projector, please use a third party ceiling mount kit, please ensure the screws used to attached a mount to the projector met the following specifications: ™Please note that damage resulting from incorrect installation will invalidate the warranty. 4 Screw type: M2.6 4 Maximum screw length: 10mm 4 Minimum screw length: 8mm 110.00 55.00 238.15 233.64 82.14 74.17 106.17 69.67 101.66 67.00 123.48 Max. / Min. 602.50 / 402.50 50.32 36 English Appendices Ceiling Mount Installation 1. If you wish to use the ceiling mount package for installation. 2.
