FE-115 Advanced Manual (English)
Page 1
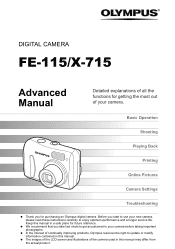
... a longer service life. In the interest of continually improving products, Olympus reserves the right to update or modify information contained in a safe place for future reference. The images of the LCD screen and illustrations of your camera before taking important photographs. DIGITAL CAMERA FE-115/X-715 Advanced Manual Detailed explanations of all the functions for getting...
... a longer service life. In the interest of continually improving products, Olympus reserves the right to update or modify information contained in a safe place for future reference. The images of the LCD screen and illustrations of your camera before taking important photographs. DIGITAL CAMERA FE-115/X-715 Advanced Manual Detailed explanations of all the functions for getting...
FE-115 Advanced Manual (English)
Page 2
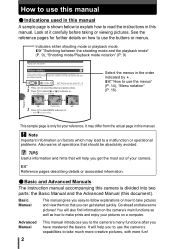
... be absolutely avoided. Note This sample page is divided into two parts: the Basic Manual and the Advanced Manual (this camera is only for further details on factors which may differ from the actual page in this manual. g Reference pages describing ...details or associated information. (Basic and Advanced Manuals The instruction manual accompanying this document). Go ahead and take much more creative pictures, with the camera held vertically are oriented correctly. [y] i g"How to use the menus" (P. 14) 1 Press ^] to select the picture you want to rotate...
... be absolutely avoided. Note This sample page is divided into two parts: the Basic Manual and the Advanced Manual (this camera is only for further details on factors which may differ from the actual page in this manual. g Reference pages describing ...details or associated information. (Basic and Advanced Manuals The instruction manual accompanying this document). Go ahead and take much more creative pictures, with the camera held vertically are oriented correctly. [y] i g"How to use the menus" (P. 14) 1 Press ^] to select the picture you want to rotate...

FE-115 Advanced Manual (English)
Page 3
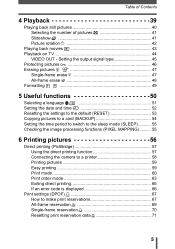
...the pictures you have taken on a computer. How to use . Table of Contents Basic operation Tips before taking pictures. Settings to use OLYMPUS Master. For when you want to know the names of parts, see a list of menus, or find important points for . Troubleshooting.... enjoy the pictures you have taken. Composition of the manual You'll find what you are looking for getting the most out of your camera easier to make your camera here. From shooting basics to handy picture-taking pictures P. 4 P. 7 1 P. 17 2 Shooting P. 27 3 Playback P. 39 4 Useful functions P. ...
...the pictures you have taken on a computer. How to use . Table of Contents Basic operation Tips before taking pictures. Settings to use OLYMPUS Master. For when you want to know the names of parts, see a list of menus, or find important points for . Troubleshooting.... enjoy the pictures you have taken. Composition of the manual You'll find what you are looking for getting the most out of your camera easier to make your camera here. From shooting basics to handy picture-taking pictures P. 4 P. 7 1 P. 17 2 Shooting P. 27 3 Playback P. 39 4 Useful functions P. ...

FE-115 Advanced Manual (English)
Page 4
Table of Contents How to use this manual 2 Composition of the manual 3 1 Basic operation 7 Power on/off 8 Switching between the shooting mode and the playback mode ... 9 How to use the mode dial 10 How to use the direct buttons 11 Using the direct buttons 13 How to use the menus 14 Using the menus 15 2 Tips before you start taking pictures 17 If correct focus cannot be obtained 18 How to focus (focus lock 18 Subjects that are difficult to focus on 19 Record mode 20 Still picture record modes 20 Movie record modes 21 Number of storable still pictures/remaining recording time ...
Table of Contents How to use this manual 2 Composition of the manual 3 1 Basic operation 7 Power on/off 8 Switching between the shooting mode and the playback mode ... 9 How to use the mode dial 10 How to use the direct buttons 11 Using the direct buttons 13 How to use the menus 14 Using the menus 15 2 Tips before you start taking pictures 17 If correct focus cannot be obtained 18 How to focus (focus lock 18 Subjects that are difficult to focus on 19 Record mode 20 Still picture record modes 20 Movie record modes 21 Number of storable still pictures/remaining recording time ...
FE-115 Advanced Manual (English)
Page 5
... (SLEEP 55 Checking the image processing functions (PIXEL MAPPING) ......... 55 6 Printing pictures 56 Direct printing (PictBridge 57 Using the direct printing function 57 Connecting the camera to a printer 58 Printing pictures 59 Easy printing 59 Print mode 60 Print order mode 63 Exiting direct printing 65 If an error code is...
... (SLEEP 55 Checking the image processing functions (PIXEL MAPPING) ......... 55 6 Printing pictures 56 Direct printing (PictBridge 57 Using the direct printing function 57 Connecting the camera to a printer 58 Printing pictures 59 Easy printing 59 Print mode 60 Print order mode 63 Exiting direct printing 65 If an error code is...
FE-115 Advanced Manual (English)
Page 6
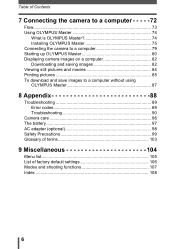
Table of Contents 7 Connecting the camera to a computer - - - - - 72 Flow 73 Using OLYMPUS Master 74 What is OLYMPUS Master 74 Installing OLYMPUS Master 75 Connecting the camera to a computer 79 Starting up OLYMPUS Master 80 Displaying camera images on a computer 82 Downloading and saving images 82 Viewing ...and movies 84 Printing pictures 85 To download and save images to a computer without using OLYMPUS Master 87 8 Appendix 88 Troubleshooting 89 Error codes 89 Troubleshooting 90 Camera care 96 The battery 97 AC adapter (optional 98 Safety Precautions 99 Glossary of terms ...
Table of Contents 7 Connecting the camera to a computer - - - - - 72 Flow 73 Using OLYMPUS Master 74 What is OLYMPUS Master 74 Installing OLYMPUS Master 75 Connecting the camera to a computer 79 Starting up OLYMPUS Master 80 Displaying camera images on a computer 82 Downloading and saving images 82 Viewing ...and movies 84 Printing pictures 85 To download and save images to a computer without using OLYMPUS Master 87 8 Appendix 88 Troubleshooting 89 Error codes 89 Troubleshooting 90 Camera care 96 The battery 97 AC adapter (optional 98 Safety Precautions 99 Glossary of terms ...
FE-115 Advanced Manual (English)
Page 7
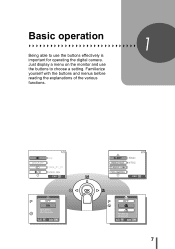
Familiarize yourself with the buttons and menus before reading the explanations of the various functions. 1 7 Just display a menu on the monitor and use the buttons effectively is important for operating the digital camera. 1 Basic operation Basic operation Being able to use the buttons to choose a setting.
Familiarize yourself with the buttons and menus before reading the explanations of the various functions. 1 7 Just display a menu on the monitor and use the buttons effectively is important for operating the digital camera. 1 Basic operation Basic operation Being able to use the buttons to choose a setting.

FE-115 Advanced Manual (English)
Page 8
...operation Power on/off before opening the cover. 8 When changing the card, be restored. Destroyed data cannot be sure to turn the camera off Power on . The camera is turned on : 1 Press the power switch. Power switch Monitor Orange lamp Power off .) The orange lamp goes out. Doing ...the battery compartment/card cover, remove the card or the batteries, or connect or disconnect the AC adapter while the camera is ready for shooting (shooting mode). The camera automatically retracts the lens and turns off. (The monitor also turns off : Press the power switch. The lens extends...
...operation Power on/off before opening the cover. 8 When changing the card, be restored. Destroyed data cannot be sure to turn the camera off Power on . The camera is turned on : 1 Press the power switch. Power switch Monitor Orange lamp Power off .) The orange lamp goes out. Doing ...the battery compartment/card cover, remove the card or the batteries, or connect or disconnect the AC adapter while the camera is ready for shooting (shooting mode). The camera automatically retracts the lens and turns off. (The monitor also turns off : Press the power switch. The lens extends...

FE-115 Advanced Manual (English)
Page 9
Indicates shooting mode. The green lamp next to k is lit. Shooting mode/Playback mode notation In this manual, the following icons indicate the camera mode necessary for using functions. The orange lamp next to l is lit. 9 Indicates playback mode. Press the l or the shutter button. ...10 5 • The last taken picture is not a malfunction. This is displayed on the monitor. • The green lamp on the camera lights. Power on/off Switching between the shooting mode and the playback mode Shooting button (l) Shutter button 1 Orange lamp Basic operation Green lamp Playback...
Indicates shooting mode. The green lamp next to k is lit. Shooting mode/Playback mode notation In this manual, the following icons indicate the camera mode necessary for using functions. The orange lamp next to l is lit. 9 Indicates playback mode. Press the l or the shutter button. ...10 5 • The last taken picture is not a malfunction. This is displayed on the monitor. • The green lamp on the camera lights. Power on/off Switching between the shooting mode and the playback mode Shooting button (l) Shutter button 1 Orange lamp Basic operation Green lamp Playback...

FE-115 Advanced Manual (English)
Page 10
... taking portrait-style pictures. o Suitable for taking still pictures and movies. Use the mode dial to switch between shooting modes before and after turning the camera on the monitor 1 259620 1920 (About the mode dial Mode dial Suitable for general situations. When the mode dial is set to a mode, the explanation...
... taking portrait-style pictures. o Suitable for taking still pictures and movies. Use the mode dial to switch between shooting modes before and after turning the camera on the monitor 1 259620 1920 (About the mode dial Mode dial Suitable for general situations. When the mode dial is set to a mode, the explanation...

FE-115 Advanced Manual (English)
Page 11
... The buttons that can be used in shooting mode and playback mode differ. (Direct buttons in shooting mode c 1 Basic operation i de h fg c k (Playback) button The camera switches to the factory default settings. gP. 14 e (Flash mode) button This function is displayed. gP. 32 f m (Self-timer) button The self-timer switches on...
... The buttons that can be used in shooting mode and playback mode differ. (Direct buttons in shooting mode c 1 Basic operation i de h fg c k (Playback) button The camera switches to the factory default settings. gP. 14 e (Flash mode) button This function is displayed. gP. 32 f m (Self-timer) button The self-timer switches on...

FE-115 Advanced Manual (English)
Page 12
e (Erase) button This function erases displayed pictures. d button The playback mode menu is displayed. gP. 9 gP. 14 gP. 47 12 Basic operation How to use the direct buttons (Direct buttons in playback mode c 1 ed c l (Shooting) button The camera switches to shooting mode.
e (Erase) button This function erases displayed pictures. d button The playback mode menu is displayed. gP. 9 gP. 14 gP. 47 12 Basic operation How to use the direct buttons (Direct buttons in playback mode c 1 ed c l (Shooting) button The camera switches to shooting mode.

FE-115 Advanced Manual (English)
Page 13
Selected setting 3 Press i. • The camera is displayed. Current setting Operating guide 2 Press [\ to make each setting. 1 How to set the flash mode using the direct buttons. Follow the buttons displayed ... using is shown below. 1 Press in shooting mode. • The flash mode selection screen is ready to shoot. • If not used for 3 seconds, the camera applies the current settings, and the setting screen disappears. 13
Selected setting 3 Press i. • The camera is displayed. Current setting Operating guide 2 Press [\ to make each setting. 1 How to set the flash mode using the direct buttons. Follow the buttons displayed ... using is shown below. 1 Press in shooting mode. • The flash mode selection screen is ready to shoot. • If not used for 3 seconds, the camera applies the current settings, and the setting screen disappears. 13

FE-115 Advanced Manual (English)
Page 14
Press to exit the menu, and the camera is ready to make all camera settings. Indicates more pages below. This menu is pressed with the camera on. The menu items displayed in shooting mode and playback mode differ. 1 Press . EXIT Press to exit the menu and return to use the menus The menu is displayed on the monitor when is used to shoot. Shooting mode menu Playback mode menu Indicates menu page 1 out of 3. Basic operation How to playback mode. 14
Press to exit the menu, and the camera is ready to make all camera settings. Indicates more pages below. This menu is pressed with the camera on. The menu items displayed in shooting mode and playback mode differ. 1 Press . EXIT Press to exit the menu and return to use the menus The menu is displayed on the monitor when is used to shoot. Shooting mode menu Playback mode menu Indicates menu page 1 out of 3. Basic operation How to playback mode. 14

FE-115 Advanced Manual (English)
Page 15
How to use the arrow pad to make settings. Selected setting 3 Press [\ to select the setting, and press i or ]. • Unavailable settings cannot be selected. How to use the menus Using the menus Use the arrow pad and i to select and set menu items. Follow the buttons displayed on the menu screen and use the menus using screens from shooting mode is shown below. 1 Ex: Setting the [SLEEP] function 1 Press . • The menu is displayed. Basic operation 2 Press [\ to change the setting, and press i or ^. 30sec 1min 3min 10min Selected setting 15
How to use the arrow pad to make settings. Selected setting 3 Press [\ to select the setting, and press i or ]. • Unavailable settings cannot be selected. How to use the menus Using the menus Use the arrow pad and i to select and set menu items. Follow the buttons displayed on the menu screen and use the menus using screens from shooting mode is shown below. 1 Ex: Setting the [SLEEP] function 1 Press . • The menu is displayed. Basic operation 2 Press [\ to change the setting, and press i or ^. 30sec 1min 3min 10min Selected setting 15

FE-115 Advanced Manual (English)
Page 16
Basic operation How to use the menus 4 Press . • The menu closes, and the camera is ready to the same setting, and the setting can be made from either mode. Menu notation In this manual, procedures for using the menus are saved even if the camera is turned off. • Menu items common to both shooting mode and playback mode apply to shoot. 1 TIPS • Settings made in the menu are expressed as follows. • Ex: Steps 1 and 2 of setting the [SLEEP] function [SLEEP] i 16
Basic operation How to use the menus 4 Press . • The menu closes, and the camera is ready to the same setting, and the setting can be made from either mode. Menu notation In this manual, procedures for using the menus are saved even if the camera is turned off. • Menu items common to both shooting mode and playback mode apply to shoot. 1 TIPS • Settings made in the menu are expressed as follows. • Ex: Steps 1 and 2 of setting the [SLEEP] function [SLEEP] i 16

FE-115 Advanced Manual (English)
Page 17
Just knowing which button to press or which setting to change can help you solve these problems. And did you know that by selecting an image size according to how you plan to use the pictures afterwards, you can 't focus on your subject or the picture doesn't come out well just by setting the mode dial to come out the way you want... These are almost guaranteed to and pressing the shutter button. Tips before you start 2 Tips before you start taking pictures taking pictures Your pictures are just some of the hints provided in this chapter. 2 Printing applications Ideas...
Just knowing which button to press or which setting to change can help you solve these problems. And did you know that by selecting an image size according to how you plan to use the pictures afterwards, you can 't focus on your subject or the picture doesn't come out well just by setting the mode dial to come out the way you want... These are almost guaranteed to and pressing the shutter button. Tips before you start 2 Tips before you start taking pictures taking pictures Your pictures are just some of the hints provided in this chapter. 2 Printing applications Ideas...

FE-115 Advanced Manual (English)
Page 18
...strong contrast in the frame. Tips before you want to focus on. • When shooting a hard-to-focus or fastmoving subject, focus the camera on the subject and press the shutter button halfway again. 3 Keeping the shutter button Green lamp pressed halfway, recompose your shot. 2560 1920 ... How to focus (focus lock) 1 Position the AF target mark on the subject you start taking pictures If correct focus cannot be obtained The camera automatically detects the focus target in the frame. AF target mark • When the focus and exposure are locked, the green lamp lights. •...
...strong contrast in the frame. Tips before you want to focus on. • When shooting a hard-to-focus or fastmoving subject, focus the camera on the subject and press the shutter button halfway again. 3 Keeping the shutter button Green lamp pressed halfway, recompose your shot. 2560 1920 ... How to focus (focus lock) 1 Position the AF target mark on the subject you start taking pictures If correct focus cannot be obtained The camera automatically detects the focus target in the frame. AF target mark • When the focus and exposure are locked, the green lamp lights. •...

FE-115 Advanced Manual (English)
Page 19
... shutter button fully. The green lamp blinks. If the subject has no vertical lines, hold the camera vertically and focus the camera using the focus lock function by pressing the shutter button halfway, then return the camera to focus on an object with an extremely bright area in the center of the frame...
... shutter button fully. The green lamp blinks. If the subject has no vertical lines, hold the camera vertically and focus the camera using the focus lock function by pressing the shutter button halfway, then return the camera to focus on an object with an extremely bright area in the center of the frame...

FE-115 Advanced Manual (English)
Page 20
For information on the image sizes for your pictures in which to take pictures or shoot movies. Picture with high number of pixels Image becomes clearer Image size becomes larger Application Compression Low Image size compression Select according to print size 2560 × 1920 2048 × 1536 SHQ - High compression HQ SQ1 SQ2 Image size The number of dots (pixels). Pictures are made from thousands of pixels (horizontal × vertical) used when saving an image. Save your purpose (printing, editing on P. 21. The higher the compression, the less clear the ...
For information on the image sizes for your pictures in which to take pictures or shoot movies. Picture with high number of pixels Image becomes clearer Image size becomes larger Application Compression Low Image size compression Select according to print size 2560 × 1920 2048 × 1536 SHQ - High compression HQ SQ1 SQ2 Image size The number of dots (pixels). Pictures are made from thousands of pixels (horizontal × vertical) used when saving an image. Save your purpose (printing, editing on P. 21. The higher the compression, the less clear the ...
