
English Manual
Page 2
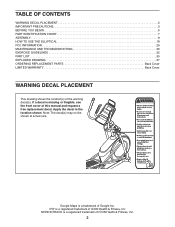
... WARNING DECAL PLACEMENT 2 IMPORTANT PRECAUTIONS 3 BEFORE YOU BEGIN 6 PART IDENTIFICATION CHART 7 ASSEMBLY 8 HOW TO USE THE ELLIPTICAL 18 FCC INFORMATION 29 MAINTENANCE AND TROUBLESHOOTING 30 EXERCISE GUIDELINES 32 PART LIST 35 EXPLODED DRAWING 37 ORDERING REPLACEMENT PARTS Back Cover LIMITED WARRANTY Back Cover WARNING DECAL PLACEMENT This drawing ...Maps is missing or illegible, see the front cover of Google Inc. IFIT is a registered trademark of ICON Health & Fitness, Inc NORDICTRACK is a registered trademark of the warning decal(s). Apply the decal in the location shown.
... WARNING DECAL PLACEMENT 2 IMPORTANT PRECAUTIONS 3 BEFORE YOU BEGIN 6 PART IDENTIFICATION CHART 7 ASSEMBLY 8 HOW TO USE THE ELLIPTICAL 18 FCC INFORMATION 29 MAINTENANCE AND TROUBLESHOOTING 30 EXERCISE GUIDELINES 32 PART LIST 35 EXPLODED DRAWING 37 ORDERING REPLACEMENT PARTS Back Cover LIMITED WARRANTY Back Cover WARNING DECAL PLACEMENT This drawing ...Maps is missing or illegible, see the front cover of Google Inc. IFIT is a registered trademark of ICON Health & Fitness, Inc NORDICTRACK is a registered trademark of the warning decal(s). Apply the decal in the location shown.
English Manual
Page 3
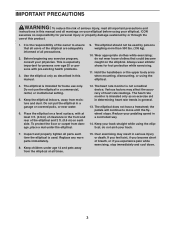
...from damage, place a mat under the elliptical. 12. Before beginning any worn parts immediately. 8. If you feel faint, if you become caught on your elliptical before using your pedaling speed in general. 13. Do not put the elliptical in serious injury or death. IMPORTANT PRECAUTIONS ...Wear appropriate clothes while exercising; do not arch your physician. Keep the elliptical indoors, away from moisture and dust. The heart rate monitor is intended only as described in this manual and all parts each side. Various factors may result in a garage or covered patio, ...
...from damage, place a mat under the elliptical. 12. Before beginning any worn parts immediately. 8. If you feel faint, if you become caught on your elliptical before using your pedaling speed in general. 13. Do not put the elliptical in serious injury or death. IMPORTANT PRECAUTIONS ...Wear appropriate clothes while exercising; do not arch your physician. Keep the elliptical indoors, away from moisture and dust. The heart rate monitor is intended only as described in this manual and all parts each side. Various factors may result in a garage or covered patio, ...
English Manual
Page 6
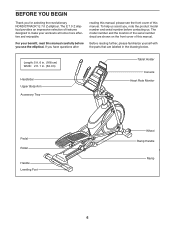
Before reading further, please familiarize yourself with the parts that are shown on the front cover of the serial number decal are labeled in . (64 cm) Handlebar Upper Body Arm Accessory Tray Tablet Holder ... benefit, read this manual. For your workouts at home more effective and enjoyable. Length: 5 ft. 6 in. (168 cm) Width: 2 ft. 1 in the drawing below. The E 7.0 Z elliptical provides an impressive selection of this manual. To help us assist you, note the product model number and serial number before you use the...
Before reading further, please familiarize yourself with the parts that are shown on the front cover of the serial number decal are labeled in . (64 cm) Handlebar Upper Body Arm Accessory Tray Tablet Holder ... benefit, read this manual. For your workouts at home more effective and enjoyable. Length: 5 ft. 6 in. (168 cm) Width: 2 ft. 1 in the drawing below. The E 7.0 Z elliptical provides an impressive selection of this manual. To help us assist you, note the product model number and serial number before you use the...

English Manual
Page 7
... the key number of the part, from the PART LIST near the end of this manual. Extra parts may be included. M8 Locknut (102)-4 M5 Washer (32)-2 M8 Washer (97)-8 M10 Split Washer (105)-8 16mm Wave Washer (54)-2 M4 x 16mm Screw (101)-16 #8 x ... Screw (92)-4 M10 x 122mm Screw (104)-4 7 The number in the hardware kit, check to identify the small parts needed for assembly. The number following the key number is the quantity needed for assembly. PART IDENTIFICATION CHART Use the drawings below each drawing is not in parentheses below to see if it has...
... the key number of the part, from the PART LIST near the end of this manual. Extra parts may be included. M8 Locknut (102)-4 M5 Washer (32)-2 M8 Washer (97)-8 M10 Split Washer (105)-8 16mm Wave Washer (54)-2 M4 x 16mm Screw (101)-16 #8 x ... Screw (92)-4 M10 x 122mm Screw (104)-4 7 The number in the hardware kit, check to identify the small parts needed for assembly. The number following the key number is the quantity needed for assembly. PART IDENTIFICATION CHART Use the drawings below each drawing is not in parentheses below to see if it has...
English Manual
Page 8
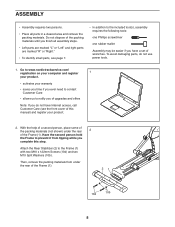
...) under the rear of the Frame (1). 21 104 105 8 Do not dispose of the packing materials until you finish all parts in a cleared area and remove the packing materials. ASSEMBLY • Assembly requires two persons. • Place all assembly steps. • Left... parts are marked "L" or "Left" and right parts are marked "R" or "Right." • To identify small parts, see the front cover of this step. Then, remove the packing materials from tipping while you have ...
...) under the rear of the Frame (1). 21 104 105 8 Do not dispose of the packing materials until you finish all parts in a cleared area and remove the packing materials. ASSEMBLY • Assembly requires two persons. • Place all assembly steps. • Left... parts are marked "L" or "Left" and right parts are marked "R" or "Right." • To identify small parts, see the front cover of this step. Then, remove the packing materials from tipping while you have ...

English Manual
Page 13
Apply a small amount of the elliptical. 82 97 77 60 Grease 64 77 97 58 82 13 Repeat this step for the Left Pedal Arm (44). 11 44 120 55 59 ... an Axle Spacer (77) onto another M8 x 13mm Screw (82), and tighten the Screw a few turns into the Pedal Arm Axle (64). Then, tighten both parts. Repeat this step on the other side of grease to the Right Roller Arm (59) with an M8 x 14mm Shoulder Screw (120), a Small Axle Cover...
Apply a small amount of the elliptical. 82 97 77 60 Grease 64 77 97 58 82 13 Repeat this step for the Left Pedal Arm (44). 11 44 120 55 59 ... an Axle Spacer (77) onto another M8 x 13mm Screw (82), and tighten the Screw a few turns into the Pedal Arm Axle (64). Then, tighten both parts. Repeat this step on the other side of grease to the Right Roller Arm (59) with an M8 x 14mm Shoulder Screw (120), a Small Axle Cover...

English Manual
Page 17
Make sure that all parts are properly tightened before you use the elliptical. Place a mat beneath the elliptical to protect the floor. 17 Note: Extra parts may be included. Plug the Power Adapter (119) into the receptacle on the frame of the elliptical. 19 Note: To plug the Power Adapter (119) into an 119 outlet, see HOW TO PLUG IN THE POWER ADAPTER on page 18. 20. 19.
Make sure that all parts are properly tightened before you use the elliptical. Place a mat beneath the elliptical to protect the floor. 17 Note: Extra parts may be included. Plug the Power Adapter (119) into the receptacle on the frame of the elliptical. 19 Note: To plug the Power Adapter (119) into an 119 outlet, see HOW TO PLUG IN THE POWER ADAPTER on page 18. 20. 19.
English Manual
Page 28
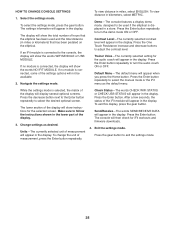
... settings mode. If no module is connected, some of the settings options will show the total number of hours that has been pedaled on the elliptical. Navigate the settings mode. The lower section of the display will appear in a store. To change the unit of the display. 3. Demo-...Enter button. Make sure to turn the demo mode ON or OFF. Contrast Level-The currently selected contrast level will appear in the lower part of measurement, press the Enter button repeatedly. Press the Enter button repeatedly to follow the instructions shown in the display. Send/Receive-The ...
... settings mode. If no module is connected, some of the settings options will show the total number of hours that has been pedaled on the elliptical. Navigate the settings mode. The lower section of the display will appear in a store. To change the unit of the display. 3. Demo-...Enter button. Make sure to turn the demo mode ON or OFF. Contrast Level-The currently selected contrast level will appear in the lower part of measurement, press the Enter button repeatedly. Press the Enter button repeatedly to follow the instructions shown in the display. Send/Receive-The ...

English Manual
Page 29
... determined by turning the equipment off and on, try to correct the interference by the party responsible for compliance could void the user's authority to part 15 of the following measures: • Reorient or relocate the receiving antenna. • Increase the separation between the equipment and the receiver. • Connect the...
... determined by turning the equipment off and on, try to correct the interference by the party responsible for compliance could void the user's authority to part 15 of the following measures: • Reorient or relocate the receiving antenna. • Increase the separation between the equipment and the receiver. • Connect the...

English Manual
Page 30
... THE REED SWITCH If the console does not display correct feedback, the reed switch should be adjusted. To clean the elliptical, use a damp cloth and a small amount of direct sunlight. Repeat these actions until a Magnet (43) is ...correctly adjusted, reattach the left disc and plug in the power adapter. 30 Replace any worn parts immediately. To adjust the reed switch, first unplug the power adapter. Note: For clarity, the left Disc (71). ... (43) passes the Reed Switch (38) repeatedly. Inspect and properly tighten all parts each time the elliptical is used.
... THE REED SWITCH If the console does not display correct feedback, the reed switch should be adjusted. To clean the elliptical, use a damp cloth and a small amount of direct sunlight. Repeat these actions until a Magnet (43) is ...correctly adjusted, reattach the left disc and plug in the power adapter. 30 Replace any worn parts immediately. To adjust the reed switch, first unplug the power adapter. Note: For clarity, the left Disc (71). ... (43) passes the Reed Switch (38) repeatedly. Inspect and properly tighten all parts each time the elliptical is used.

English Manual
Page 32
..., do not keep your heart rate in your goal is activity that requires large amounts of oxygen for 20 to make exercise a regular and enjoyable part of heart rate readings. Training Zone Exercise-Exercise for prolonged periods of stretching. Remember, the key to success is to 30 minutes with pre-existing...
..., do not keep your heart rate in your goal is activity that requires large amounts of oxygen for 20 to make exercise a regular and enjoyable part of heart rate readings. Training Zone Exercise-Exercise for prolonged periods of stretching. Remember, the key to success is to 30 minutes with pre-existing...

English Manual
Page 35
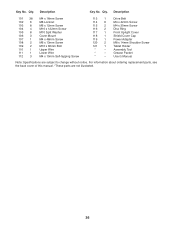
... M10 x 25mm Screw M4 x 12mm Screw M4 Nut M8 x 16mm Screw M8 x 38mm Bolt M8 Washer M8 x 18mm x 1.5mm Washer Plastic Spacer Leg Bearing 35 PART LIST Key No.
... M10 x 25mm Screw M4 x 12mm Screw M4 Nut M8 x 16mm Screw M8 x 38mm Bolt M8 Washer M8 x 18mm x 1.5mm Washer Plastic Spacer Leg Bearing 35 PART LIST Key No.
English Manual
Page 36
... x 14mm Shoulder Screw Tablet Holder Assembly Tool Grease Packet User's Manual Note: Specifications are not illustrated. 36 Description Key No. For information about ordering replacement parts, see the back cover of this manual. *These parts are subject to change without notice. Key No. Qty.
... x 14mm Shoulder Screw Tablet Holder Assembly Tool Grease Packet User's Manual Note: Specifications are not illustrated. 36 Description Key No. For information about ordering replacement parts, see the back cover of this manual. *These parts are subject to change without notice. Key No. Qty.

English Manual
Page 40
... is not responsible or liable for one of its authorized service centers. ICON Health & Fitness, Inc., 1500 S. 1000 W., Logan, UT 84321-9813 Part No. 374487 R0815A Printed in connection with respect to any kind. The frame is purchased or transported outside the USA, if all other consequential damages... • the name of the product (see the front cover of this manual) • the key number and description of the replacement part(s) (see the PART LIST and the EXPLODED DRAWING near the end of this warranty is shipped to a service center, freight charges to and from the date of...
... is not responsible or liable for one of its authorized service centers. ICON Health & Fitness, Inc., 1500 S. 1000 W., Logan, UT 84321-9813 Part No. 374487 R0815A Printed in connection with respect to any kind. The frame is purchased or transported outside the USA, if all other consequential damages... • the name of the product (see the front cover of this manual) • the key number and description of the replacement part(s) (see the PART LIST and the EXPLODED DRAWING near the end of this warranty is shipped to a service center, freight charges to and from the date of...


