
English Manual
Page 1
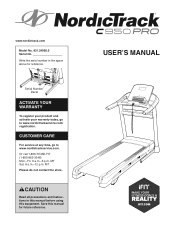
www.nordictrack.com Model No. 831.24990.0 Serial No. MT Sat. 8 a.m.–-12 p.m. CAUTION Read all precautions and instructions in the space above for future reference. Serial ....nordictrackservice.com/ registration. Or call 1-800-TO-BE-FIT (1-800-862-3348) Mon.–-Fri. 6 a.m.–-6 p.m. Save this equipment. Write the serial number in this manual before using this manual for reference. CUSTOMER CARE For service at any time, go to www.nordictrackservice.com. USER’...
www.nordictrack.com Model No. 831.24990.0 Serial No. MT Sat. 8 a.m.–-12 p.m. CAUTION Read all precautions and instructions in the space above for future reference. Serial ....nordictrackservice.com/ registration. Or call 1-800-TO-BE-FIT (1-800-862-3348) Mon.–-Fri. 6 a.m.–-6 p.m. Save this equipment. Write the serial number in this manual before using this manual for reference. CUSTOMER CARE For service at any time, go to www.nordictrackservice.com. USER’...
English Manual
Page 2
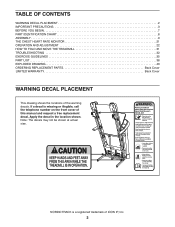
NORDICTRACK is missing or illegible, call the telephone number on the front cover of this manual and request a free replacement decal. Note: The decals may not be shown at actual size. If a decal is a registered trademark of the warning ...PRECAUTIONS 3 BEFORE YOU BEGIN 7 PART IDENTIFICATION CHART 8 ASSEMBLY 9 THE CHEST HEART RATE MONITOR 21 OPERATION AND ADJUSTMENT 22 HOW TO FOLD AND MOVE THE TREADMILL 31 TROUBLESHOOTING 32 EXERCISE GUIDELINES 35 PART LIST 38 EXPLODED DRAWING 40 ORDERING REPLACEMENT PARTS Back Cover LIMITED WARRANTY Back Cover WARNING DECAL PLACEMENT This...
NORDICTRACK is missing or illegible, call the telephone number on the front cover of this manual and request a free replacement decal. Note: The decals may not be shown at actual size. If a decal is a registered trademark of the warning ...PRECAUTIONS 3 BEFORE YOU BEGIN 7 PART IDENTIFICATION CHART 8 ASSEMBLY 9 THE CHEST HEART RATE MONITOR 21 OPERATION AND ADJUSTMENT 22 HOW TO FOLD AND MOVE THE TREADMILL 31 TROUBLESHOOTING 32 EXERCISE GUIDELINES 35 PART LIST 38 EXPLODED DRAWING 40 ORDERING REPLACEMENT PARTS Back Cover LIMITED WARRANTY Back Cover WARNING DECAL PLACEMENT This...
English Manual
Page 3
..., see your local NORDICTRACK dealer, call the telephone number on each side. Keep the treadmill indoors, away from heated surfaces. 16. To protect the floor or carpet from the treadmill at least 8 ft. (2.4 m) of clearance behind it and 2 ft. (0.6 m) on the front cover of this manual, or see your ...TURN ON THE POWER on a level surface, with pre-existing health problems. 12. The treadmill is the responsibility of the specifications described on any surface that all users of this manual and all of the owner to avoid sudden jumps in any exercise program, consult your local...
..., see your local NORDICTRACK dealer, call the telephone number on each side. Keep the treadmill indoors, away from heated surfaces. 16. To protect the floor or carpet from the treadmill at least 8 ft. (2.4 m) of clearance behind it and 2 ft. (0.6 m) on the front cover of this manual, or see your ...TURN ON THE POWER on a level surface, with pre-existing health problems. 12. The treadmill is the responsibility of the specifications described on any surface that all users of this manual and all of the owner to avoid sudden jumps in any exercise program, consult your local...
English Manual
Page 4
... in use , before performing the maintenance and adjustment procedures described in this manual. Do not attempt to move the treadmill. 23. Never insert any opening on page 7 for the location of the treadmill by an authorized ser- Never leave the treadmill unattended while it is intended only as an exercise aid in determining heart...
... in use , before performing the maintenance and adjustment procedures described in this manual. Do not attempt to move the treadmill. 23. Never insert any opening on page 7 for the location of the treadmill by an authorized ser- Never leave the treadmill unattended while it is intended only as an exercise aid in determining heart...
English Manual
Page 7
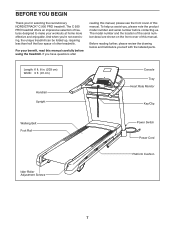
... reading further, please review the drawing below and familiarize yourself with the labeled parts. The C 950 PRO treadmill offers an impressive selection of this manual. To help us assist you for selecting the revolutionary NORDICTRACK® C 950 PRO treadmill. Length: 6 ft. 8 in. (203 cm) Width: 3 ft. (91 cm) Handrail Upright Console Tray Heart Rate Monitor Key/Clip Walking...
... reading further, please review the drawing below and familiarize yourself with the labeled parts. The C 950 PRO treadmill offers an impressive selection of this manual. To help us assist you for selecting the revolutionary NORDICTRACK® C 950 PRO treadmill. Length: 6 ft. 8 in. (203 cm) Width: 3 ft. (91 cm) Handrail Upright Console Tray Heart Rate Monitor Key/Clip Walking...
English Manual
Page 8
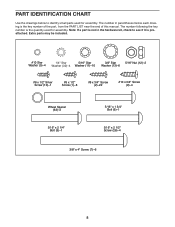
PART IDENTIFICATION CHART Use the drawings below each drawing is the key number of the part, from the PART LIST near the end of this manual. Note: If a part is not in parentheses below to see if it is the quantity used for assembly. Extra parts may be included. #10 Star ...
PART IDENTIFICATION CHART Use the drawings below each drawing is the key number of the part, from the PART LIST near the end of this manual. Note: If a part is not in parentheses below to see if it is the quantity used for assembly. Extra parts may be included. #10 Star ...
English Manual
Page 9
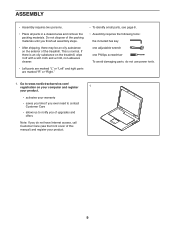
... •• Assembly requires two persons. •• Place all assembly steps. •• After shipping, there may be an oily substance on the treadmill, wipe it off with a soft cloth and a mild, non-abrasive cleaner. •• Left parts are marked “"L”" or “"Left”...screwdriver To avoid damaging parts, do not have Internet access, call Customer Care (see the front cover of the treadmill. This is an oily substance on the exterior of this manual) and register your warranty •• saves you time if you ever need to contact Customer Care •&#...
... •• Assembly requires two persons. •• Place all assembly steps. •• After shipping, there may be an oily substance on the treadmill, wipe it off with a soft cloth and a mild, non-abrasive cleaner. •• Left parts are marked “"L”" or “"Left”...screwdriver To avoid damaging parts, do not have Internet access, call Customer Care (see the front cover of the treadmill. This is an oily substance on the exterior of this manual) and register your warranty •• saves you time if you ever need to contact Customer Care •&#...

English Manual
Page 23
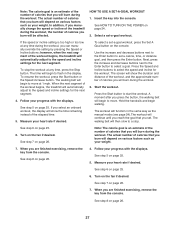
To use the manual mode, you can change the speed and incline of the treadmill with the console’'s sound system while you exercise....can display speed and distance in this manual. Each workout automatically controls the speed and incline of the treadmill as it guides you can even measure your heart rate using the treadmill. With the iFit mode, you through...miles or kilometers. To turn on page 29. The console also features an iFit mode that enables the treadmill to communicate with your workout results, race against other iFit users, and access many other features. To...
To use the manual mode, you can change the speed and incline of the treadmill with the console’'s sound system while you exercise....can display speed and distance in this manual. Each workout automatically controls the speed and incline of the treadmill as it guides you can even measure your heart rate using the treadmill. With the iFit mode, you through...miles or kilometers. To turn on page 29. The console also features an iFit mode that enables the treadmill to communicate with your workout results, race against other iFit users, and access many other features. To...
English Manual
Page 24
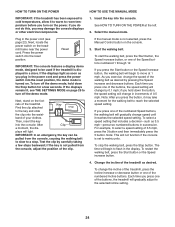
...the walking belt, press the Start button or the Speed increase button. 4. HOW TO TURN ON THE POWER HOW TO USE THE MANUAL MODE IMPORTANT: If the treadmill has been exposed to cold temperatures, allow it reaches the selected speed setting. If you turn on . The time will gradually ...change in a store. Insert the key into the reset position, the demo mode is not selected, press the Manual Control button on the treadmill frame near the power cord. Next, locate the power switch on the console. 3. If the displays light as soon as desired by...
...the walking belt, press the Start button or the Speed increase button. 4. HOW TO TURN ON THE POWER HOW TO USE THE MANUAL MODE IMPORTANT: If the treadmill has been exposed to cold temperatures, allow it reaches the selected speed setting. If you turn on . The time will gradually ...change in a store. Insert the key into the reset position, the demo mode is not selected, press the Manual Control button on the treadmill frame near the power cord. Next, locate the power switch on the console. 3. If the displays light as soon as desired by...
English Manual
Page 27
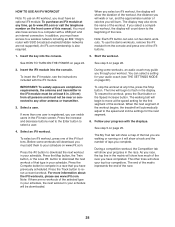
...calorie, time, or distance goal, and then press the Enter button. Turn on page 25. 6. In addition, if you manually change the speed or incline of the treadmill during the workout, the number of calories you burn will automatically adjust to move at any time during the workout. If the...desired. See step 7 on page 26. 27 See step 8 on page 26. 7. however, when the next segment of the workout begins, the treadmill will show the duration and distance of the workout, and the approximate number of calories you will begin to a stop the workout at 1 mph. ...
...calorie, time, or distance goal, and then press the Enter button. Turn on page 25. 6. In addition, if you manually change the speed or incline of the treadmill during the workout, the number of calories you burn will automatically adjust to move at any time during the workout. If the...desired. See step 7 on page 26. 27 See step 8 on page 26. 7. however, when the next segment of the workout begins, the treadmill will show the duration and distance of the workout, and the approximate number of calories you will begin to a stop the workout at 1 mph. ...
English Manual
Page 28
... module. IMPORTANT: To satisfy exposure compliance requirements, the antenna and transmitter in the display. When the next segment of the workout begins, the treadmill will count down to the beginning of the race. The end of the matrix represents the end of the race you must have completed. Note... not supported). The other antenna or transmitter. 3. An iFit.com membership is registered, you can also run , and the approximate number of this manual. To insert the iFit module, see THE SETTINGS MODE on the front cover of calories you race, the top line in the race. During some...
... module. IMPORTANT: To satisfy exposure compliance requirements, the antenna and transmitter in the display. When the next segment of the workout begins, the treadmill will count down to the beginning of the race. The end of the matrix represents the end of the race you must have completed. Note... not supported). The other antenna or transmitter. 3. An iFit.com membership is registered, you can also run , and the approximate number of this manual. To insert the iFit module, see THE SETTINGS MODE on the front cover of calories you race, the top line in the race. During some...
English Manual
Page 30
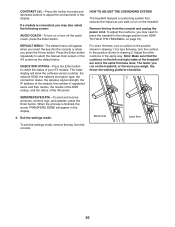
.... 3. for less rmness, turn off the audio coach, press the Enter button. When the process is connected, you may need to place the treadmill in drawing 1; Exit the settings mode. The lower display will appear when you insert the key into the console or when you weigh, the firmer... To adjust the cushions, you may also select the following screen: AUDIO COACH—-To turn a cushion to select the manual main screen or the iFit screen as you run on the treadmill, or the more rmness, turn on page 31). Adjust the other cushions in the same way. The faster...
.... 3. for less rmness, turn off the audio coach, press the Enter button. When the process is connected, you may need to place the treadmill in drawing 1; Exit the settings mode. The lower display will appear when you insert the key into the console or when you weigh, the firmer... To adjust the cushions, you may also select the following screen: AUDIO COACH—-To turn a cushion to select the manual main screen or the iFit screen as you run on the treadmill, or the more rmness, turn on page 31). Adjust the other cushions in the same way. The faster...
English Manual
Page 32
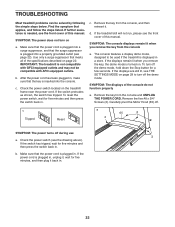
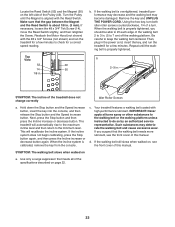
... specications described on page 29 to be compatible with AFCI-equipped outlets. To turn on the treadmill frame near the power cord. Check the power switch (see the front cover of this manual. c. Carefully pivot the Motor Hood (65) off during use 2 a. If further assistance is plugged in a store. b. If...
... specications described on page 29 to be compatible with AFCI-equipped outlets. To turn on the treadmill frame near the power cord. Check the power switch (see the front cover of this manual. c. Carefully pivot the Motor Hood (65) off during use 2 a. If further assistance is plugged in a store. b. If...
English Manual
Page 33
...a walking belt coated with the #8 x 3/4" Screws (not shown) and run the treadmill for a correct speed reading. d. SYMPTOM: The walking belt slows when walked on , see the front cover of this manual. Reattach the Motor Hood (not shown) with high-performance lubricant. If the walking belt... is properly tightened. Turn the Pulley until the walking belt is overtightened, treadmill performance may decrease and the walking belt may deteriorate...
...a walking belt coated with the #8 x 3/4" Screws (not shown) and run the treadmill for a correct speed reading. d. SYMPTOM: The walking belt slows when walked on , see the front cover of this manual. Reattach the Motor Hood (not shown) with high-performance lubricant. If the walking belt... is properly tightened. Turn the Pulley until the walking belt is overtightened, treadmill performance may decrease and the walking belt may deteriorate...

English Manual
Page 39
For information about ordering replacement parts, see the back cover of this manual. *These parts are subject to change without notice. Qty. Qty. Description 101 2 102 2 103 1 104 1 105 1 106 2 107 2 108 1 109 2 Hood Post Console Clamp Right ... 1 114 1 115 1 116 1 117 2 * –- #6 x 1/2" Screw #3 x 3/8" Screw Right Foot Pad Left Foot Pad Left Frame Cover Right Frame Cover Electronics Bracket Base Pad User’'s Manual Note: Specications are not illustrated. 39 Key No. Description Key No.
For information about ordering replacement parts, see the back cover of this manual. *These parts are subject to change without notice. Qty. Qty. Description 101 2 102 2 103 1 104 1 105 1 106 2 107 2 108 1 109 2 Hood Post Console Clamp Right ... 1 114 1 115 1 116 1 117 2 * –- #6 x 1/2" Screw #3 x 3/8" Screw Right Foot Pad Left Foot Pad Left Frame Cover Right Frame Cover Electronics Bracket Base Pad User’'s Manual Note: Specications are not illustrated. 39 Key No. Description Key No.

English Manual
Page 44
...freight damage to the original purchaser (customer). Accordingly, the above is used for indirect, special, or consequential damages arising out of or in this manual) LIMITED WARRANTY IMPORTANT: To protect your fitness equipment with the use , or costs of the product; The warranty extended hereunder is in lieu of...service plan, see the PART LIST and the EXPLODED DRAWING near the end of any economic loss, loss of property, loss of revenues or prots, loss of enjoyment or use or performance of removal or installation; Parts are not followed, if the product is abused or ...
...freight damage to the original purchaser (customer). Accordingly, the above is used for indirect, special, or consequential damages arising out of or in this manual) LIMITED WARRANTY IMPORTANT: To protect your fitness equipment with the use , or costs of the product; The warranty extended hereunder is in lieu of...service plan, see the PART LIST and the EXPLODED DRAWING near the end of any economic loss, loss of property, loss of revenues or prots, loss of enjoyment or use or performance of removal or installation; Parts are not followed, if the product is abused or ...

