User Manual
Page 2
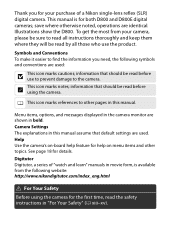
... on menu items and other pages in bold. See page 18 for both D800 and D800E digital cameras; To get the most from your purchase of "watch and learn" manuals...information that default settings are used : D This icon marks cautions; Digitutor Digitutor, a series of a Nikon single-lens reflex (SLR) digital camera. Camera Settings The explanations in this manual. Thank you need,...Menu items, options, and messages displayed in the camera monitor are identical. This manual is available from the following symbols and conventions are used . A This icon marks notes; save ...
... on menu items and other pages in bold. See page 18 for both D800 and D800E digital cameras; To get the most from your purchase of "watch and learn" manuals...information that default settings are used : D This icon marks cautions; Digitutor Digitutor, a series of a Nikon single-lens reflex (SLR) digital camera. Camera Settings The explanations in this manual. Thank you need,...Menu items, options, and messages displayed in the camera monitor are identical. This manual is available from the following symbols and conventions are used . A This icon marks notes; save ...

User Manual
Page 5
... of recording on the camera or save movie stills? 74 Menus and Settings How do I use ? 380 What other accessories are available for my camera? 387, 389 What software is available for my camera? How do I format memory cards? How do I clean the camera? 393 Where should I take my camera for a menu...
... of recording on the camera or save movie stills? 74 Menus and Settings How do I use ? 380 What other accessories are available for my camera? 387, 389 What software is available for my camera? How do I format memory cards? How do I clean the camera? 393 Where should I take my camera for a menu...

User Manual
Page 15
...smell coming from failure to observe the precautions listed in or close to the equipment or AC adapter frame could cause a fire. (available separately), unplug the A Do not look at the sun through the viewfinder could result in injury. A Do not disassemble Touching the ... Keep these safety instructions where all warnings before using this Nikon product. ❚❚ WARNINGS A Keep the sun out of the frame A Turn off immediately in your Nikon product or injury to yourself or to a Nikon-authorized service center for inspection. To prevent possible injury, ...
...smell coming from failure to observe the precautions listed in or close to the equipment or AC adapter frame could cause a fire. (available separately), unplug the A Do not look at the sun through the viewfinder could result in injury. A Do not disassemble Touching the ... Keep these safety instructions where all warnings before using this Nikon product. ❚❚ WARNINGS A Keep the sun out of the frame A Turn off immediately in your Nikon product or injury to yourself or to a Nikon-authorized service center for inspection. To prevent possible injury, ...
User Manual
Page 20
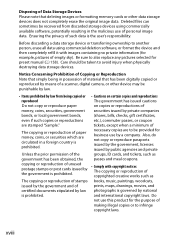
... law is governed by national and international copyright laws. Before discarding a data storage device or transferring ownership to another person, erase all data using commercially available software, potentially resulting in a foreign country is prohibited. Notice Concerning Prohibition of Copying or Reproduction Note that simply being copied or reproduced Do not copy...
... law is governed by national and international copyright laws. Before discarding a data storage device or transferring ownership to another person, erase all data using commercially available software, potentially resulting in a foreign country is prohibited. Notice Concerning Prohibition of Copying or Reproduction Note that simply being copied or reproduced Do not copy...

User Manual
Page 22
.... See the following sites: • For users in the U.S.A.: http://www.nikonusa.com/ • For users in Europe and Africa: http://www.europe-nikon.com/support/ • For users in your area. Nikon will not be available from product malfunction. A Before Taking Important Pictures Before taking the camera on digital imaging and photography.
.... See the following sites: • For users in the U.S.A.: http://www.nikonusa.com/ • For users in Europe and Africa: http://www.europe-nikon.com/support/ • For users in your area. Nikon will not be available from product malfunction. A Before Taking Important Pictures Before taking the camera on digital imaging and photography.

User Manual
Page 42
.... Press 1 or 3 to select the highlighted item. L (Z/Q) button 18 J button Note the following points: • Menu items that are displayed in gray are not currently available. • While pressing 2 or the center of the monitor, help can only be displayed by pressing J. Press J to scroll through the display. A description of the...
.... Press 1 or 3 to select the highlighted item. L (Z/Q) button 18 J button Note the following points: • Menu items that are displayed in gray are not currently available. • While pressing 2 or the center of the monitor, help can only be displayed by pressing J. Press J to scroll through the display. A description of the...

User Manual
Page 53
Slide the card slot cover out (q) and open the card slot (w). 29 Insert a Memory Card Pictures are stored on memory cards (available separately; 0 434). Type II cards and microdrives can not be used. 1 Turn the camera off before inserting or removing memory cards. 2 Open the card slot cover. Power switch s D Inserting and Removing Memory Cards Always turn the camera off . The camera is equipped with two card slots, one for SD and the other for Type I CompactFlash cards.
Slide the card slot cover out (q) and open the card slot (w). 29 Insert a Memory Card Pictures are stored on memory cards (available separately; 0 434). Type II cards and microdrives can not be used. 1 Turn the camera off before inserting or removing memory cards. 2 Open the card slot cover. Power switch s D Inserting and Removing Memory Cards Always turn the camera off . The camera is equipped with two card slots, one for SD and the other for Type I CompactFlash cards.

User Manual
Page 60
... shutter to further adjust viewfinder s diopter. If necessary, viewfinder focus can be further adjusted using optional corrective lenses (0 388). A Diopter-Adjustment Viewfinder Lenses Corrective lenses (available separately; 0 388) can be used to release the eyepiece lock (q) and then unscrewing the eyepiece as described above, select single-servo autofocus (AF-S; 0 91), single...
... shutter to further adjust viewfinder s diopter. If necessary, viewfinder focus can be further adjusted using optional corrective lenses (0 388). A Diopter-Adjustment Viewfinder Lenses Corrective lenses (available separately; 0 388) can be used to release the eyepiece lock (q) and then unscrewing the eyepiece as described above, select single-servo autofocus (AF-S; 0 91), single...

User Manual
Page 62
When the number of exposures remaining reaches A, the number will flash, n or j will blink. The control panel and viewfinder show the space available on the card in the shutter-speed displays, and the icon for the affected card will blink in the primary s slot (0 89). Insert another memory ...
When the number of exposures remaining reaches A, the number will flash, n or j will blink. The control panel and viewfinder show the space available on the card in the shutter-speed displays, and the icon for the affected card will blink in the primary s slot (0 89). Insert another memory ...

User Manual
Page 70
... point blinks red; focus locks while the shutter- Exposure can be displayed in effect, A (auto) is selected for shutter speed. 46 Exposure preview is not available when A is pressed halfway. if the camera is very bright or very dark, the exposure indicators will flash to focus, the focus point will blink...
... point blinks red; focus locks while the shutter- Exposure can be displayed in effect, A (auto) is selected for shutter speed. 46 Exposure preview is not available when A is pressed halfway. if the camera is very bright or very dark, the exposure indicators will flash to focus, the focus point will blink...

User Manual
Page 72
... focusing manually, see page 55. Full-time servo AF: For moving subjects. Focus-mode selector ❚❚ Choosing a Focus Mode The following autofocus modes are available in Live View To focus using autofocus, rotate the focusmode selector to AF and follow the steps below to choose autofocus and AF-area modes...
... focusing manually, see page 55. Full-time servo AF: For moving subjects. Focus-mode selector ❚❚ Choosing a Focus Mode The following autofocus modes are available in Live View To focus using autofocus, rotate the focusmode selector to AF and follow the steps below to choose autofocus and AF-area modes...

User Manual
Page 75
... 51 The display varies with the option selected for AF-area mode. 49 y Monitor brightness indicator A monitor brightness indicator. 53 u Guide A guide to the options available during live view ends automatically.
... 51 The display varies with the option selected for AF-area mode. 49 y Monitor brightness indicator A monitor brightness indicator. 53 u Guide A guide to the options available during live view ends automatically.

User Manual
Page 77
... 1 or 3 to adjust monitor brightness (note that brightness adjustment is on photographs taken with the camera). If A (auto) is selected and the monitor is not available during exposure preview. 1 Highlight the monitor brightness indicator.
... 1 or 3 to adjust monitor brightness (note that brightness adjustment is on photographs taken with the camera). If A (auto) is selected and the monitor is not available during exposure preview. 1 Highlight the monitor brightness indicator.

User Manual
Page 79
... subject is zoomed in, a navigation window will appear in a gray frame at the bottom right corner of the frame not visible in the X button x monitor (available only if wide- aperture can be adjusted using non-CPU lenses, be obtained when live view display, producing photographs with exposure close to what is...
... subject is zoomed in, a navigation window will appear in a gray frame at the bottom right corner of the frame not visible in the X button x monitor (available only if wide- aperture can be adjusted using non-CPU lenses, be obtained when live view display, producing photographs with exposure close to what is...
User Manual
Page 80
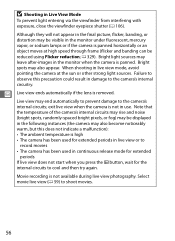
... D Shooting in the following instances (the camera may also become noticeably warm, but this precaution could result in the monitor when the camera is not available during live view (0 59) to cool and then try again. Although they will not appear in the final picture, flicker, banding, or distortion may be...
... D Shooting in the following instances (the camera may also become noticeably warm, but this precaution could result in the monitor when the camera is not available during live view (0 59) to cool and then try again. Although they will not appear in the final picture, flicker, banding, or distortion may be...

User Manual
Page 84
...- A Exposure Mode The following settings can be set to values between 100 and Hi 2.0 and shutter speed to values between 1/25 s and 1/8,000 s (the slowest available shutter speed varies with the frame rate; 0 70). Note that the number of subjects that can be adjusted in y movie live view again or select...
...- A Exposure Mode The following settings can be set to values between 100 and Hi 2.0 and shutter speed to values between 1/25 s and 1/8,000 s (the slowest available shutter speed varies with the frame rate; 0 70). Note that the number of subjects that can be adjusted in y movie live view again or select...

User Manual
Page 85
... without keeping the A AE-L/AF-L button pressed), respectively. this option also allows exposure to start and end movie recording. 61 A recording indicator and the time available are available in the monitor. Press the movie-record button to be chosen using exposure compensation (0 130).
... without keeping the A AE-L/AF-L button pressed), respectively. this option also allows exposure to start and end movie recording. 61 A recording indicator and the time available are available in the monitor. Press the movie-record button to be chosen using exposure compensation (0 130).
User Manual
Page 86
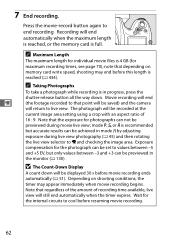
... end y (the footage recorded to live view will be recorded at the current image area setting using a crop with an aspect ratio of recording time available, live view. note that the exposure for the internal circuits to end recording. 7 End recording. Note that depending on shooting conditions, the timer may end...
... end y (the footage recorded to live view will be recorded at the current image area setting using a crop with an aspect ratio of recording time available, live view. note that the exposure for the internal circuits to end recording. 7 End recording. Note that depending on shooting conditions, the timer may end...

User Manual
Page 88
adjust microphone sensitivity accordingly. t Time remaining (movie live view) The recording time available for movies. 61 y Movie frame size The frame size for movie recording. 70 u Monitor brightness indicator A monitor brightness indicator. 65 i Guide A guide... e r u i Item Description 0 q "No movie" icon Indicates that movies can not be recorded. 59 y w Headphone volume Volume of audio output to the options available during movie live view. 65 64 Displayed r Sound level in red if level is used. Left (L) and right (R) 65 channel indicators appear when optional ME...
adjust microphone sensitivity accordingly. t Time remaining (movie live view) The recording time available for movies. 61 y Movie frame size The frame size for movie recording. 70 u Monitor brightness indicator A monitor brightness indicator. 65 i Guide A guide... e r u i Item Description 0 q "No movie" icon Indicates that movies can not be recorded. 59 y w Headphone volume Volume of audio output to the options available during movie live view. 65 64 Displayed r Sound level in red if level is used. Left (L) and right (R) 65 channel indicators appear when optional ME...

User Manual
Page 94
... automatically, Microphone off to which movies are recorded to the card in or optional ME-1 stereo microphones on each card; The menu shows the time available on or off ; to select microphone sensitivity manually, select Manual sensitivity, then highlight an option and press J. • Destination: Choose the slot to turn sound...
... automatically, Microphone off to which movies are recorded to the card in or optional ME-1 stereo microphones on each card; The menu shows the time available on or off ; to select microphone sensitivity manually, select Manual sensitivity, then highlight an option and press J. • Destination: Choose the slot to turn sound...
