
Reference Manual
Page 19
...d Protect E33 f Rotate Image E35 h Copy (Copy Between Internal Memory and Memory Card E36 The Movie Menu E38 Movie Options E38 Autofocus Mode (L26 Only E39 The Setup Menu E40 Welcome Screen E40 Time Zone and Date E41 Monitor Settings E45 Print Date (Imprinting Date and Time)... E47 Electronic... VR E48 Motion Detection E50 AF Assist (L26 Only E51 Sound Settings E52 Auto Off E53 Format Memory/Format Card E54 Language E55 Video Mode E55 Blink Warning E56 Eye-Fi Upload E58 Reset All E59 Battery Type E62 Firmware Version...
...d Protect E33 f Rotate Image E35 h Copy (Copy Between Internal Memory and Memory Card E36 The Movie Menu E38 Movie Options E38 Autofocus Mode (L26 Only E39 The Setup Menu E40 Welcome Screen E40 Time Zone and Date E41 Monitor Settings E45 Print Date (Imprinting Date and Time)... E47 Electronic... VR E48 Motion Detection E50 AF Assist (L26 Only E51 Sound Settings E52 Auto Off E53 Format Memory/Format Card E54 Language E55 Video Mode E55 Blink Warning E56 Eye-Fi Upload E58 Reset All E59 Battery Type E62 Firmware Version...

Reference Manual
Page 23
1 14 13 16 15 2 3 4 5 6 7 8 9 10 12 11 Parts of the Camera 1 Monitor 6 2 Flash lamp 50 3 b (e movie-record) button 78 4 A (shooting mode) button...34, 35, 43, 47 5 c (playback) button 29 6 Multi selector 7 k (apply selection) button 8 d button 45, 48, 68, 81, 86 9 l (delete) button 31 10 Battery-chamber/ memory card slot cover 10, 13 11 Battery chamber 10 12 Memory card slot 13 13 USB/audio/video output connector.......69 14 Connector cover 69 15 Tripod socket F18 16 Speaker 82 3
1 14 13 16 15 2 3 4 5 6 7 8 9 10 12 11 Parts of the Camera 1 Monitor 6 2 Flash lamp 50 3 b (e movie-record) button 78 4 A (shooting mode) button...34, 35, 43, 47 5 c (playback) button 29 6 Multi selector 7 k (apply selection) button 8 d button 45, 48, 68, 81, 86 9 l (delete) button 31 10 Battery-chamber/ memory card slot cover 10, 13 11 Battery chamber 10 12 Memory card slot 13 13 USB/audio/video output connector.......69 14 Connector cover 69 15 Tripod socket F18 16 Speaker 82 3

Reference Manual
Page 25
1 16 15 2 3 4 5 6 7 8 9 14 13 10 12 11 Parts of the Camera 1 Monitor 6 2 Flash lamp 50 3 b (e movie-record) button 78 4 A (shooting mode) button...34, 35, 43, 47 5 c (playback) button 29 6 Multi selector 7 k (apply selection) button 8 d button 45, 48, 68, 81, 86 9 l (delete) button 31 10 Battery-chamber/ memory card slot cover 10, 13 11 Battery chamber 10 12 Memory card slot 13 13 USB/audio/video output connector.......69 14 Connector cover 69 15 Tripod socket F18 16 Speaker 82 5
1 16 15 2 3 4 5 6 7 8 9 14 13 10 12 11 Parts of the Camera 1 Monitor 6 2 Flash lamp 50 3 b (e movie-record) button 78 4 A (shooting mode) button...34, 35, 43, 47 5 c (playback) button 29 6 Multi selector 7 k (apply selection) button 8 d button 45, 48, 68, 81, 86 9 l (delete) button 31 10 Battery-chamber/ memory card slot cover 10, 13 11 Battery chamber 10 12 Memory card slot 13 13 USB/audio/video output connector.......69 14 Connector cover 69 15 Tripod socket F18 16 Speaker 82 5

Reference Manual
Page 89
Playback Features 69 How to an external device, make sure the remaining battery level is sufficient and turn the camera off. USB/audio/video output connector Insert the plug straight. Connecting the Camera to a TV, Computer, or Printer You can enhance your enjoyment of images and movies by connecting the camera to a TV, computer, or printer. • Before connecting the camera to open the connector cover. For information about the connection methods and subsequent operations, refer to the documentation included with the device in addition to this document.
Playback Features 69 How to an external device, make sure the remaining battery level is sufficient and turn the camera off. USB/audio/video output connector Insert the plug straight. Connecting the Camera to a TV, Computer, or Printer You can enhance your enjoyment of images and movies by connecting the camera to a TV, computer, or printer. • Before connecting the camera to open the connector cover. For information about the connection methods and subsequent operations, refer to the documentation included with the device in addition to this document.

Reference Manual
Page 90
... to the TV's input jacks. Viewing images on a TV E12 You can print images without using a computer. Connection method: Connect the video and audio plugs of the optional Audio Video Cable EG-CP14 to the printer's USB input jack with the included USB Cable UC-E16. • Before connecting to a computer, install...
... to the TV's input jacks. Viewing images on a TV E12 You can print images without using a computer. Connection method: Connect the video and audio plugs of the optional Audio Video Cable EG-CP14 to the printer's USB input jack with the included USB Cable UC-E16. • Before connecting to a computer, install...

Reference Manual
Page 94
To transfer images that the memory card is displayed, follow the steps below to select Nikon Transfer 2. 1 Under Import pictures and videos, click Change program. If the memory card contains a large number of the following methods: • Direct USB connection: Turn the ...available separately from the camera before connecting it may not be inserted directly in the camera. A program selection dialog will be displayed; Wait until Nikon Transfer 2 starts. Playback Features select Import File using the included USB Cable. Choose one of images, it to the computer. • SD...
To transfer images that the memory card is displayed, follow the steps below to select Nikon Transfer 2. 1 Under Import pictures and videos, click Change program. If the memory card contains a large number of the following methods: • Direct USB connection: Turn the ...available separately from the camera before connecting it may not be inserted directly in the camera. A program selection dialog will be displayed; Wait until Nikon Transfer 2 starts. Playback Features select Import File using the included USB Cable. Choose one of images, it to the computer. • SD...

Reference Manual
Page 107
... this setting to match the type of batteries that are detected when taking pictures of people using face detection. Option Format memory/ Format card Language Video mode Blink warning Eye-Fi upload Reset all Battery type Firmware version Description A Allows you to reset the camera's settings to their default values. E55...
... this setting to match the type of batteries that are detected when taking pictures of people using face detection. Option Format memory/ Format card Language Video mode Blink warning Eye-Fi upload Reset all Battery type Firmware version Description A Allows you to reset the camera's settings to their default values. E55...

Reference Manual
Page 120
Yellow White 3 Set the TV's input to external video input. • See the documentation provided with your TV for details. 4 Hold down the c button to turn on the camera. • The camera enters playback ... the TV, the camera monitor will remain off the camera. 2 Connect the camera to the TV. • Connect the yellow plug of the audio/video cable to the video-in jack on the TV. 1 Turn off . E12 Reference Section Connecting the Camera to a TV (Viewing Images on a TV) Connect the camera to...
Yellow White 3 Set the TV's input to external video input. • See the documentation provided with your TV for details. 4 Hold down the c button to turn on the camera. • The camera enters playback ... the TV, the camera monitor will remain off the camera. 2 Connect the camera to the TV. • Connect the yellow plug of the audio/video cable to the video-in jack on the TV. 1 Turn off . E12 Reference Section Connecting the Camera to a TV (Viewing Images on a TV) Connect the camera to...

Reference Manual
Page 121
Do not use force when connecting the cable to the standard used by your TV. E13 Reference Section When disconnecting the cable, do not pull the connector at an angle. B If the Images Are Not Displayed on the TV Be sure that the camera connector is properly oriented. B Notes About Connecting the Cable When connecting the cable, be sure that the camera's video mode setting in the Video mode (E55) under the setup menu conforms to the camera.
Do not use force when connecting the cable to the standard used by your TV. E13 Reference Section When disconnecting the cable, do not pull the connector at an angle. B If the Images Are Not Displayed on the TV Be sure that the camera connector is properly oriented. B Notes About Connecting the Cable When connecting the cable, be sure that the camera's video mode setting in the Video mode (E55) under the setup menu conforms to the camera.

Reference Manual
Page 163
Czech Danish German (default setting) Spanish Greek French Indonesian Italian Hungarian Dutch Norwegian Polish Brazilian Portuguese European Portuguese Russian Romanian Finnish Swedish Vietnamese Turkish Ukrainian Arabic Simplified Chinese Traditional Chinese Japanese Korean Thai Hindi Reference Section Video Mode d button M z tab M Video mode Adjust settings for display of 29 languages for connection to a TV. Select from NTSC and PAL. E55 Language d button M z tab M Language Select one of camera menus and messages.
Czech Danish German (default setting) Spanish Greek French Indonesian Italian Hungarian Dutch Norwegian Polish Brazilian Portuguese European Portuguese Russian Romanian Finnish Swedish Vietnamese Turkish Ukrainian Arabic Simplified Chinese Traditional Chinese Japanese Korean Thai Hindi Reference Section Video Mode d button M z tab M Video mode Adjust settings for display of 29 languages for connection to a TV. Select from NTSC and PAL. E55 Language d button M z tab M Language Select one of camera menus and messages.

Reference Manual
Page 169
... White balance Setup menu: Settings for image registered for Welcome screen (E40), Time zone and date (E41), Language (E55), Video mode (E55), and Battery type (E62) Reference Section E61 AF assist (L26 only; Numbering will remain unaffected when menus are reset with Reset all also clears the current file number (E63) from...
... White balance Setup menu: Settings for image registered for Welcome screen (E40), Time zone and date (E41), Language (E55), Video mode (E55), and Battery type (E62) Reference Section E61 AF assist (L26 only; Numbering will remain unaffected when menus are reset with Reset all also clears the current file number (E63) from...

Reference Manual
Page 172
USB Cable UC-E162 Audio Video Cable EG-CP14 1 To charge EN-MH2 batteries, use these battery chargers to charge any other type of battery. 2 Included with the camera at the ...-MH batteries EN-MH2)1 Battery Charger MH-73 (includes four rechargeable Ni-MH batteries EN-MH2)1 AC Adapter EH-65A (connect as shown) COOLPIX L26 1 1 2 2 COOLPIX L25 1 2 1 2 USB cable Audio/video cable AC Adapter EH-62B cannot be used. Reference Section E64 Optional Accessories Rechargeable battery Battery charger AC adapter Rechargeable Ni-MH batteries...
USB Cable UC-E162 Audio Video Cable EG-CP14 1 To charge EN-MH2 batteries, use these battery chargers to charge any other type of battery. 2 Included with the camera at the ...-MH batteries EN-MH2)1 Battery Charger MH-73 (includes four rechargeable Ni-MH batteries EN-MH2)1 AC Adapter EH-65A (connect as shown) COOLPIX L26 1 1 2 2 COOLPIX L25 1 2 1 2 USB cable Audio/video cable AC Adapter EH-62B cannot be used. Reference Section E64 Optional Accessories Rechargeable battery Battery charger AC adapter Rechargeable Ni-MH batteries...

Reference Manual
Page 184
...flash lamp flashes, wait until flash has charged. • Camera and computer are connected via USB cable. • Camera and TV are connected via audio/video cable. 21 21 2, 22 50 69, 74 69, E12 • Adjust monitor brightness. • Monitor is hard to read. Cause/Solution A .... 21 • Camera has turned off automatically to function as expected, check the list of common problems below before consulting your retailer or Nikon-authorized service representative. Clean monitor. 86, E45 F7 Technical Notes and Index F8 Troubleshooting If the camera fails to save power. 86, E53...
...flash lamp flashes, wait until flash has charged. • Camera and computer are connected via USB cable. • Camera and TV are connected via audio/video cable. 21 21 2, 22 50 69, 74 69, E12 • Adjust monitor brightness. • Monitor is hard to read. Cause/Solution A .... 21 • Camera has turned off automatically to function as expected, check the list of common problems below before consulting your retailer or Nikon-authorized service representative. Clean monitor. 86, E45 F7 Technical Notes and Index F8 Troubleshooting If the camera fails to save power. 86, E53...

Reference Manual
Page 186
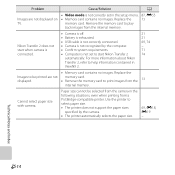
Characteristics of continued malfunction, contact your retailer or Nikon-authorized service representative. Shooting Issues Problem Cause/Solution A Cannot switch...stop functioning. Data already saved will not be affected. Turn the camera off and then on again. Disconnect audio/video cable or USB cable. 69, 74, E12, E15 • When camera is too close. the shutter-release ...cannot focus. • Subject is in the monitor and the camera may result in the setup menu to Auto (L26 only). 86, E51 • Turn camera off , remove and replace the battery, then turn the camera on...
Characteristics of continued malfunction, contact your retailer or Nikon-authorized service representative. Shooting Issues Problem Cause/Solution A Cannot switch...stop functioning. Data already saved will not be affected. Turn the camera off and then on again. Disconnect audio/video cable or USB cable. 69, 74, E12, E15 • When camera is too close. the shutter-release ...cannot focus. • Subject is in the monitor and the camera may result in the setup menu to Auto (L26 only). 86, E51 • Turn camera off , remove and replace the battery, then turn the camera on...
Reference Manual
Page 190
...connected. • Camera is not set in the following situations, even when printing from a PictBridge-compatible printer. For more information about Nikon Transfer 2, refer to play back images from the 13 internal memory. Problem Images are not displayed. Remove the memory card to help ... setup menu. • Memory card contains no images. Replace the Images to print images from the internal memory. Cause/Solution • Video mode is not correctly set to select paper size. • The printer does not support the paper sizes specified by the computer. &#...
...connected. • Camera is not set in the following situations, even when printing from a PictBridge-compatible printer. For more information about Nikon Transfer 2, refer to play back images from the 13 internal memory. Problem Images are not displayed. Remove the memory card to help ... setup menu. • Memory card contains no images. Replace the Images to print images from the internal memory. Cause/Solution • Video mode is not correctly set to select paper size. • The printer does not support the paper sizes specified by the computer. &#...

Reference Manual
Page 193
...s • 4 s (Fireworks show scene mode) COOLPIX L26: Electronically-controlled ND filter (-2.7 AV) selection COOLPIX L25: Electronically-controlled ND filter (-2 AV) selection COOLPIX L26: 2 steps (f/3.2 and f/8 [W]) COOLPIX L25: 2 steps (f/2.7 and f/5.4 [W]) Approx. 10 s COOLPIX L26: [W]: 0.5 to 3.6 m (1 ft 8 in. to 5 ft 6 in.) COOLPIX L25: [W]: 0.3 to 4.2 m (1 ft to ... Self-timer Built-in flash Range (approx.) (ISO sensitivity: Auto) Flash control Interface Data transfer protocol Video output I /O (USB) Arabic, Chinese (Simplified and Traditional), Czech, Danish, Dutch, English, Finnish,...
...s • 4 s (Fireworks show scene mode) COOLPIX L26: Electronically-controlled ND filter (-2.7 AV) selection COOLPIX L25: Electronically-controlled ND filter (-2 AV) selection COOLPIX L26: 2 steps (f/3.2 and f/8 [W]) COOLPIX L25: 2 steps (f/2.7 and f/5.4 [W]) Approx. 10 s COOLPIX L26: [W]: 0.5 to 3.6 m (1 ft 8 in. to 5 ft 6 in.) COOLPIX L25: [W]: 0.3 to 4.2 m (1 ft to ... Self-timer Built-in flash Range (approx.) (ISO sensitivity: Auto) Flash control Interface Data transfer protocol Video output I /O (USB) Arabic, Chinese (Simplified and Traditional), Czech, Danish, Dutch, English, Finnish,...

Reference Manual
Page 197
... 55 o Exposure compensation 57 j Help 35 A AC adapter 12, E64 AF-assist illuminator 2, 86, E51 Alkaline batteries 10 Aperture value 27 Audio/video cable........ 70, E12, E64 Audio/video-in jack 70, E12 Auto flash 51 Auto mode 47 Auto off 22, 86, E53 Autofocus 28, 56 Autofocus mode 81, E39 AVI...
... 55 o Exposure compensation 57 j Help 35 A AC adapter 12, E64 AF-assist illuminator 2, 86, E51 Alkaline batteries 10 Aperture value 27 Audio/video cable........ 70, E12, E64 Audio/video-in jack 70, E12 Auto flash 51 Auto mode 47 Auto off 22, 86, E53 Autofocus 28, 56 Autofocus mode 81, E39 AVI...

Reference Manual
Page 200
... T Thumbnail display 67 Time difference E44 Time zone 17, E41, E44 Tripod socket 3, 5, F18 TV 70, E12 U USB cable 69, 74, E16, E64 USB/audio/video output connector 3, 5, 69, 74, E12, E14 V Video mode 87, E55 ViewNX 2 71, 73 Vivid color 48, E28
... T Thumbnail display 67 Time difference E44 Time zone 17, E41, E44 Tripod socket 3, 5, F18 TV 70, E12 U USB cable 69, 74, E16, E64 USB/audio/video output connector 3, 5, 69, 74, E12, E14 V Video mode 87, E55 ViewNX 2 71, 73 Vivid color 48, E28


