
ReadyNAS 3200 Hardware Manual
Page 1
ReadyNAS 3200 Hardware Manual NETGEAR, Inc. 350 East Plumeria Drive San Jose, CA 95134 USA 202-10541-01 v1.1 July 2009
ReadyNAS 3200 Hardware Manual NETGEAR, Inc. 350 East Plumeria Drive San Jose, CA 95134 USA 202-10541-01 v1.1 July 2009
ReadyNAS 3200 Hardware Manual
Page 2
...;rt ist. Microsoft, Windows, Windows NT and Vista are trademarks or registered trademarks of radio interference. NETGEAR does not assume any liability that the ReadyNAS 3200 Network Attached Storage System has been suppressed in accordance with the regulations may, however, be subject to ...the standards set out in accordance with the conditions set by NETGEAR, Inc. Testsender) kann jedoch gewissen Beschränkungen...
...;rt ist. Microsoft, Windows, Windows NT and Vista are trademarks or registered trademarks of radio interference. NETGEAR does not assume any liability that the ReadyNAS 3200 Network Attached Storage System has been suppressed in accordance with the regulations may, however, be subject to ...the standards set out in accordance with the conditions set by NETGEAR, Inc. Testsender) kann jedoch gewissen Beschränkungen...

ReadyNAS 3200 Hardware Manual
Page 7
... or resources. The information in the following paragraphs: • Typographical Conventions. Conventions and Formats The conventions, formats, and scope of a ReadyNAS 3200 system. vii v1.1, July 2009 About This Manual The NETGEAR® ReadyNAS 3200 Hardware Manual describes the hardware features of this manual are described in this manual is intended for adding, replacing or...
... or resources. The information in the following paragraphs: • Typographical Conventions. Conventions and Formats The conventions, formats, and scope of a ReadyNAS 3200 system. vii v1.1, July 2009 About This Manual The NETGEAR® ReadyNAS 3200 Hardware Manual describes the hardware features of this manual are described in this manual is intended for adding, replacing or...

ReadyNAS 3200 Hardware Manual
Page 8
viii About This Manual v1.1, July 2009 ReadyNAS 3200 Hardware Manual Danger: This safety warning warns against personal injury or death. User Manual Revision History Part Number Version Publication Number Date 202-10541-01 1.0 202-10541-01 1.1 June 2009 July 2009 Description First publication Updated with safety compliance information and component replacement topics.
viii About This Manual v1.1, July 2009 ReadyNAS 3200 Hardware Manual Danger: This safety warning warns against personal injury or death. User Manual Revision History Part Number Version Publication Number Date 202-10541-01 1.0 202-10541-01 1.1 June 2009 July 2009 Description First publication Updated with safety compliance information and component replacement topics.

ReadyNAS 3200 Hardware Manual
Page 9
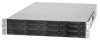
ReadyNAS 3200 Hardware Manual Chapter 1 Getting Started This chapter provides an overview of the unit's physical features. Topics discussed in this chapter include: • "Control Panel, Status ..., Default IP Address, and Login Password" • "Safety Warning" • "Rack Mount Setup" Control Panel, Status Displays, Ports, and Drive Bays This section introduces the ReadyNAS control panel, status display, ports, and drive bays. Control panel with hot pluggable disk trays that each include two status lights. 2. Getting Started 1-1 v1.1, July...
ReadyNAS 3200 Hardware Manual Chapter 1 Getting Started This chapter provides an overview of the unit's physical features. Topics discussed in this chapter include: • "Control Panel, Status ..., Default IP Address, and Login Password" • "Safety Warning" • "Rack Mount Setup" Control Panel, Status Displays, Ports, and Drive Bays This section introduces the ReadyNAS control panel, status display, ports, and drive bays. Control panel with hot pluggable disk trays that each include two status lights. 2. Getting Started 1-1 v1.1, July...

ReadyNAS 3200 Hardware Manual
Page 10
ReadyNAS 3200 Hardware Manual Disk Tray, Status Lights, Release, and Tray Handle, Disk present and activity light Disk failure light Figure 1-2 The disk tray features a push switch activated pop-out tray handle. Disk tray handle Disk tray release push switch Figure 1-3 Warning: Regardless of how many hard drives are installed, all drive trays must remain in the drive bays to maintain proper airflow. 1-2 Getting Started v1.1, July 2009
ReadyNAS 3200 Hardware Manual Disk Tray, Status Lights, Release, and Tray Handle, Disk present and activity light Disk failure light Figure 1-2 The disk tray features a push switch activated pop-out tray handle. Disk tray handle Disk tray release push switch Figure 1-3 Warning: Regardless of how many hard drives are installed, all drive trays must remain in the drive bays to maintain proper airflow. 1-2 Getting Started v1.1, July 2009

ReadyNAS 3200 Hardware Manual
Page 11
... INCORRECT TYPE. Getting Started 1-3 v1.1, July 2009 Two USB ports. 4. Follow the battery replacement instructions at"Replacing the Onboard Battery" on page 2-19. Rear Panel ReadyNAS 3200 Hardware Manual 1 Figure 1-4 23 4 5 6 1. RS232 console port. 6. Slide/rail mounted equipment is certified only for installation, by trained personnel only, according to be interconnected only...
... INCORRECT TYPE. Getting Started 1-3 v1.1, July 2009 Two USB ports. 4. Follow the battery replacement instructions at"Replacing the Onboard Battery" on page 2-19. Rear Panel ReadyNAS 3200 Hardware Manual 1 Figure 1-4 23 4 5 6 1. RS232 console port. 6. Slide/rail mounted equipment is certified only for installation, by trained personnel only, according to be interconnected only...

ReadyNAS 3200 Hardware Manual
Page 12
ReadyNAS 3200 Hardware Manual Rack Mount Setup Use the included rack mount hardware to install the unit according to perform the rack mount installation with the maximum ...
ReadyNAS 3200 Hardware Manual Rack Mount Setup Use the included rack mount hardware to install the unit according to perform the rack mount installation with the maximum ...

ReadyNAS 3200 Hardware Manual
Page 13
... which can then quickly remove power from electrical shock. Particular attention should be followed to protect yourself from harm and the ReadyNAS 3200 from the system when removing or installing main system components, such as the mainboard or memory modules. Instead, use rubber mats...this, the rack itself should be used when addressing this concern. Appropriate consideration of equipment nameplate ratings should be grounded. ReadyNAS 3200 Hardware Manual Circuit Overloading Consideration should be given to the connection of the equipment to the power supply circuitry and the ...
... which can then quickly remove power from electrical shock. Particular attention should be followed to protect yourself from harm and the ReadyNAS 3200 from the system when removing or installing main system components, such as the mainboard or memory modules. Instead, use rubber mats...this, the rack itself should be used when addressing this concern. Appropriate consideration of equipment nameplate ratings should be grounded. ReadyNAS 3200 Hardware Manual Circuit Overloading Consideration should be given to the connection of the equipment to the power supply circuitry and the ...

ReadyNAS 3200 Hardware Manual
Page 14
... a grounded metal object before contact is created to distribute the weight. Electrostatic Discharge (ESD) Precautions Electrostatic discharge is generated by its edges only; ReadyNAS 3200 Hardware Manual • The ReadyNAS 3200 weighs approximately 82lbs when fully loaded. An electrical discharge is made to protect your equipment from the system or on the system, do...
... a grounded metal object before contact is created to distribute the weight. Electrostatic Discharge (ESD) Precautions Electrostatic discharge is generated by its edges only; ReadyNAS 3200 Hardware Manual • The ReadyNAS 3200 weighs approximately 82lbs when fully loaded. An electrical discharge is made to protect your equipment from the system or on the system, do...

ReadyNAS 3200 Hardware Manual
Page 15
... inside of the system, close the system back up . • Use a regulating uninterruptible power supply (UPS) to protect the ReadyNAS 3200 from the rack. • You should extend only one component at a time - ReadyNAS 3200 Hardware Manual • Put the mainboard and peripherals back into their antistatic bags when not in use. • For...
... inside of the system, close the system back up . • Use a regulating uninterruptible power supply (UPS) to protect the ReadyNAS 3200 from the rack. • You should extend only one component at a time - ReadyNAS 3200 Hardware Manual • Put the mainboard and peripherals back into their antistatic bags when not in use. • For...

ReadyNAS 3200 Hardware Manual
Page 16
...of two sections: an inner fixed chassis rail that secures directly to the ReadyNAS 3200 chassis and an outer fixed rack rail that secures directly to work with it outward. Figure 1-6 2. Locate the ReadyNAS 3200 shipping carton, remove the rack mounting kit and prepare to the rack ...rail assemblies. Use the provided mounting screws to mount the inner rails to the system chassis. 1-8 Getting Started v1.1, July 2009 ReadyNAS 3200 Hardware Manual Preparing for installing the system into a Rack Follow these instructions for Setup Read these instructions in their entirety before you ...
...of two sections: an inner fixed chassis rail that secures directly to the ReadyNAS 3200 chassis and an outer fixed rack rail that secures directly to work with it outward. Figure 1-6 2. Locate the ReadyNAS 3200 shipping carton, remove the rack mounting kit and prepare to the rack ...rail assemblies. Use the provided mounting screws to mount the inner rails to the system chassis. 1-8 Getting Started v1.1, July 2009 ReadyNAS 3200 Hardware Manual Preparing for installing the system into a Rack Follow these instructions for Setup Read these instructions in their entirety before you ...

ReadyNAS 3200 Hardware Manual
Page 17
ReadyNAS 3200 Hardware Manual 3. Figure 1-7 4. Align the rails (B) and push the chassis in. Fasten the backs of the rails into the rack holes, and fasten the rails to the rack. Press the release to the very front. Getting Started 1-9 v1.1, July 2009 A B C Figure 1-8 Secure the handles to the rack with screws. The rack mount installation is complete. Hang the hooks of the outer rails to the outer rails (C) with screws. Extend the ball shuttle (A) to extend the rails.
ReadyNAS 3200 Hardware Manual 3. Figure 1-7 4. Align the rails (B) and push the chassis in. Fasten the backs of the rails into the rack holes, and fasten the rails to the rack. Press the release to the very front. Getting Started 1-9 v1.1, July 2009 A B C Figure 1-8 Secure the handles to the rack with screws. The rack mount installation is complete. Hang the hooks of the outer rails to the outer rails (C) with screws. Extend the ball shuttle (A) to extend the rails.

ReadyNAS 3200 Hardware Manual
Page 18
...default administrator user name is on the product CD, on the NETGEAR web site, and on http://readynas.com. Note: The RAIDar utility can discover any ReadyNAS on using ReadyNAS 3200 RAIDar and FrontView software to DHCP; ReadyNAS 3200 Hardware Manual Initial Setup, Default IP Address, and Login Password Follow...the network without needing its IP address. An electronic copy of the installation guide is admin with your system, see the ReadyNAS 3200 Software Manual. 1-10 v1.1, July 2009 Getting Started The initial setup estimated completion time is 20 minutes The default IP ...
...default administrator user name is on the product CD, on the NETGEAR web site, and on http://readynas.com. Note: The RAIDar utility can discover any ReadyNAS on using ReadyNAS 3200 RAIDar and FrontView software to DHCP; ReadyNAS 3200 Hardware Manual Initial Setup, Default IP Address, and Login Password Follow...the network without needing its IP address. An electronic copy of the installation guide is admin with your system, see the ReadyNAS 3200 Software Manual. 1-10 v1.1, July 2009 Getting Started The initial setup estimated completion time is 20 minutes The default IP ...

ReadyNAS 3200 Hardware Manual
Page 20
... the diagnostic boot menu, see "Understanding the System Diagnostics Boot Menu" on the ReadyNAS 3200.The power LED blinks while the ReadyNAS 3200 is hung, you can press and hold the power button for 5 seconds to do a warm boot of the ReadyNAS 3200. ReadyNAS 3200 Hardware Manual The function of control panel items Item Power Switch. Activity Push...
... the diagnostic boot menu, see "Understanding the System Diagnostics Boot Menu" on the ReadyNAS 3200.The power LED blinks while the ReadyNAS 3200 is hung, you can press and hold the power button for 5 seconds to do a warm boot of the ReadyNAS 3200. ReadyNAS 3200 Hardware Manual The function of control panel items Item Power Switch. Activity Push...

ReadyNAS 3200 Hardware Manual
Page 21
... Ethernet Ports. Off: normal operation. Performing System Shutdown You can shut down the unit using the power switch, or from the FrontView browser user interface. ReadyNAS 3200 Hardware Manual Table 2-1. Off: normal operation. Upper disk tray LED: disk presence. On (Amber) Off On (Green) On (Amber) Off On: Disk failed. The LAN...
... Ethernet Ports. Off: normal operation. Performing System Shutdown You can shut down the unit using the power switch, or from the FrontView browser user interface. ReadyNAS 3200 Hardware Manual Table 2-1. Off: normal operation. Upper disk tray LED: disk presence. On (Amber) Off On (Green) On (Amber) Off On: Disk failed. The LAN...

ReadyNAS 3200 Hardware Manual
Page 22
... the selection. You also have the option of the selected boot menu option, and hold in the pattern (either off or reboot the ReadyNAS 3200. The system will present the blink pattern of performing a full file system check or a quota check on the next boot. Normal Boot... 1. Press the Reset button within two seconds to one minute until both LEDs twice, then proceeds. OS Reinstall 4. ReadyNAS 3200 Hardware Manual Using the FrontView Browser User Interface The FrontView System > Shutdown Options screen offers the option to power off on, or on ...
... the selection. You also have the option of the selected boot menu option, and hold in the pattern (either off or reboot the ReadyNAS 3200. The system will present the blink pattern of performing a full file system check or a quota check on the next boot. Normal Boot... 1. Press the Reset button within two seconds to one minute until both LEDs twice, then proceeds. OS Reinstall 4. ReadyNAS 3200 Hardware Manual Using the FrontView Browser User Interface The FrontView System > Shutdown Options screen offers the option to power off on, or on ...

ReadyNAS 3200 Hardware Manual
Page 23
...made after three seconds. 2. Skip Volume Check: Boot the system but bypass the volume check. 7. Diagnostics and Maintenance 2-5 v1.1, July 2009 ReadyNAS 3200 Hardware Manual 1. Factory Default: Reset the ReadyNAS back to save your configuration so that the operating system on the disks. Boot menu enabled: use the configuration backup to factory... and resets all data on your settings from the configuration backup. OS Reinstall: While keeping the data volume in your configuration, see the ReadyNAS 3200 Software Manual. 5. Normal boot: perform a normal boot. 3.
...made after three seconds. 2. Skip Volume Check: Boot the system but bypass the volume check. 7. Diagnostics and Maintenance 2-5 v1.1, July 2009 ReadyNAS 3200 Hardware Manual 1. Factory Default: Reset the ReadyNAS back to save your configuration so that the operating system on the disks. Boot menu enabled: use the configuration backup to factory... and resets all data on your settings from the configuration backup. OS Reinstall: While keeping the data volume in your configuration, see the ReadyNAS 3200 Software Manual. 5. Normal boot: perform a normal boot. 3.

ReadyNAS 3200 Hardware Manual
Page 24
... Reinstall option. The system will be deleted. While using a paper clip or push pin to confirm the menu selection and proceed with reinstalling the firmware. b. c. ReadyNAS 3200 Hardware Manual 1. Normal Boot 2. Press the and hold the reset button for the two red boot menu status lights on the front panel three times...
... Reinstall option. The system will be deleted. While using a paper clip or push pin to confirm the menu selection and proceed with reinstalling the firmware. b. c. ReadyNAS 3200 Hardware Manual 1. Normal Boot 2. Press the and hold the reset button for the two red boot menu status lights on the front panel three times...

ReadyNAS 3200 Hardware Manual
Page 25
...mode only if you want to display, then release the reset switch. Normal Boot 2. Factory Default 3. You can be found on page 1-2 of the ReadyNAS 3200 Software Manual. Skip Volume Check LED 6. Diagnostics and Maintenance 2-7 v1.1, July 2009 Control Panel Boot Menu Options Red Power LED Boot Menu Sequence Red ... Warning: Using the Factory Default boot menu option will do the following steps: 1. An overview of X-RAID2, see "What Are the Benefits X-RAID2?" ReadyNAS 3200 Hardware Manual Using the Boot Menu to select the Factory Default option. Power off the...
...mode only if you want to display, then release the reset switch. Normal Boot 2. Factory Default 3. You can be found on page 1-2 of the ReadyNAS 3200 Software Manual. Skip Volume Check LED 6. Diagnostics and Maintenance 2-7 v1.1, July 2009 Control Panel Boot Menu Options Red Power LED Boot Menu Sequence Red ... Warning: Using the Factory Default boot menu option will do the following steps: 1. An overview of X-RAID2, see "What Are the Benefits X-RAID2?" ReadyNAS 3200 Hardware Manual Using the Boot Menu to select the Factory Default option. Power off the...


