Installation Guide
Page 2
...Approvals has been notified of the placing of this document without notice. does not assume any liability that the NETGEAR Model FE508 and Model FE516 Fast Ethernet Hubs have been suppressed in this equipment on the market and has been granted the right to take appropriate measures....äßige Betreiben einiger Geräte (z.B. Certificate of the Manufacturer/Importer It is to certify that the NETGEAR Model FE508 and Model FE516 Fast Ethernet Hubs are trademarks of Conformance This is hereby certified that may cause harmful interference to comply with the limits for example,...
...Approvals has been notified of the placing of this document without notice. does not assume any liability that the NETGEAR Model FE508 and Model FE516 Fast Ethernet Hubs have been suppressed in this equipment on the market and has been granted the right to take appropriate measures....äßige Betreiben einiger Geräte (z.B. Certificate of the Manufacturer/Importer It is to certify that the NETGEAR Model FE508 and Model FE516 Fast Ethernet Hubs are trademarks of Conformance This is hereby certified that may cause harmful interference to comply with the limits for example,...
Installation Guide
Page 4
... 3 Installation Site Preparation...3-1 Package Contents...3-2 Required Tools and Materials...3-2 Installing a NETGEAR 100BASE-T Hub 3-2 Installing the Hub on a Flat Surface 3-3 Installing the Hub in a Rack...3-4 Installing Multiple Hubs ...3-6 Stacking and Cascading Hubs...3-6 Installing and Connecting Multiple Hubs 3-6 Verifying Your Installation ...3-9 Chapter 4 Troubleshooting Verifying the LED Conditions ...4-1 Troubleshooting the Hub and Network 4-1 Chapter 5 Network Configuration Examples Ethernet Technology ...5-1 Configuration Examples...
... 3 Installation Site Preparation...3-1 Package Contents...3-2 Required Tools and Materials...3-2 Installing a NETGEAR 100BASE-T Hub 3-2 Installing the Hub on a Flat Surface 3-3 Installing the Hub in a Rack...3-4 Installing Multiple Hubs ...3-6 Stacking and Cascading Hubs...3-6 Installing and Connecting Multiple Hubs 3-6 Verifying Your Installation ...3-9 Chapter 4 Troubleshooting Verifying the LED Conditions ...4-1 Troubleshooting the Hub and Network 4-1 Chapter 5 Network Configuration Examples Ethernet Technology ...5-1 Configuration Examples...

Installation Guide
Page 6
... the differences between the 10BASE-T and 100BASE-T specifications Introduction 1-1 These hubs are part of the NETGEAR 500 Series product family, designed to efficiently handle the needs of the NETGEAR™ Model FE508 8-port Fast Ethernet Hub or the Model FE516 16-port Fast Ethernet Hub. Chapter 1 Introduction Congratulations on powerful workstations require more bandwidth to devices...
... the differences between the 10BASE-T and 100BASE-T specifications Introduction 1-1 These hubs are part of the NETGEAR 500 Series product family, designed to efficiently handle the needs of the NETGEAR™ Model FE508 8-port Fast Ethernet Hub or the Model FE516 16-port Fast Ethernet Hub. Chapter 1 Introduction Congratulations on powerful workstations require more bandwidth to devices...
Installation Guide
Page 7
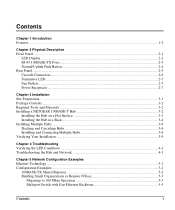
... Guide for the Model FE508 and FE516 Fast Ethernet Hubs Features The Model FE508 and Model FE516 hubs have the following key features: • IEEE 802.3u standard compliant for interoperation with all 100BASE-TX Fast Ethernet (100 Mbps) products. • Stackable architecture allows starting with as few... port status. − Additional LEDs to provide network traffic status for the hub. − Normal/Uplink push button for connection to four hubs for a total of the 100BASE-T ports (Port 8 on the Model FE508 hub and Port 16 on the Model FE516 hub) for simplifying network extension.
... Guide for the Model FE508 and FE516 Fast Ethernet Hubs Features The Model FE508 and Model FE516 hubs have the following key features: • IEEE 802.3u standard compliant for interoperation with all 100BASE-TX Fast Ethernet (100 Mbps) products. • Stackable architecture allows starting with as few... port status. − Additional LEDs to provide network traffic status for the hub. − Normal/Uplink push button for connection to four hubs for a total of the 100BASE-T ports (Port 8 on the Model FE508 hub and Port 16 on the Model FE516 hub) for simplifying network extension.

Installation Guide
Page 8
...RJ-45 100BASE-TX port connectors, and the Normal/Uplink push button. Figure 2-1 shows the front panel of the Model FE508 hub and Figure 2-2 shows the front panel of the Model FE516 hub. 1 = LEDs (Power, Data, and Collision) 2 = RJ-45 ports with a steel cover and an acrylic front panel... overlay. The chassis consists of the Model FE508 Fast Ethernet hub Physical Description 2-1 Use the key at the bottom of the hub is 1.0 EIA rack-mount spaces high. Chapter 2 Physical Description The Model FE508 and Model FE516 hub components are enclosed in a 13-inch (33.0 cm) wide by ...
...RJ-45 100BASE-TX port connectors, and the Normal/Uplink push button. Figure 2-1 shows the front panel of the Model FE508 hub and Figure 2-2 shows the front panel of the Model FE516 hub. 1 = LEDs (Power, Data, and Collision) 2 = RJ-45 ports with a steel cover and an acrylic front panel... overlay. The chassis consists of the Model FE508 Fast Ethernet hub Physical Description 2-1 Use the key at the bottom of the hub is 1.0 EIA rack-mount spaces high. Chapter 2 Physical Description The Model FE508 and Model FE516 hub components are enclosed in a 13-inch (33.0 cm) wide by ...

Installation Guide
Page 9
...two on each port connector that allow you to identify: • Status of the hub AC power supply • Operational status of hubs • Link and RX (receive activity) status for the Model FE508 and FE516 Fast Ethernet Hubs 1 = LEDs (Power, Data, and Collision) 2 = RJ-45 ports with ...Link and RX LEDs on an Ethernet segment in a standalone hub or a stack of hubs • Data utilization of the Ethernet segment in the hub 2-2 Physical Description Installation Guide for all...
...two on each port connector that allow you to identify: • Status of the hub AC power supply • Operational status of hubs • Link and RX (receive activity) status for the Model FE508 and FE516 Fast Ethernet Hubs 1 = LEDs (Power, Data, and Collision) 2 = RJ-45 ports with ...Link and RX LEDs on an Ethernet segment in a standalone hub or a stack of hubs • Data utilization of the Ethernet segment in the hub 2-2 Physical Description Installation Guide for all...

Installation Guide
Page 10
... Description Power indicator Power On Power is an 8-pin connector. CAUTION: 100 Mbps operation requires the use of the Model FE508 hub provides 8 RJ-45 100BASE-TX ports and the Model FE516 provides 16 RJ-45 100BASE-TX ports. Physical Description 2-3 Collision indicator Collision Blinking There is incoming data on the network...
... Description Power indicator Power On Power is an 8-pin connector. CAUTION: 100 Mbps operation requires the use of the Model FE508 hub provides 8 RJ-45 100BASE-TX ports and the Model FE516 provides 16 RJ-45 100BASE-TX ports. Physical Description 2-3 Collision indicator Collision Blinking There is incoming data on the network...

Installation Guide
Page 11
... cable is pressed in the out position. The remaining (Normal) ports on the hubs cannot be configured for Port 8 on the Model FE508 hub and Port 16 on the Model FE516 hub. Installation Guide for the Model FE508 and FE516 Fast Ethernet Hubs Normal/Uplink Push Button The Normal/Uplink push button (see Figure 2-3) on the... push button eliminates the need to select Uplink (MDI-X) or Normal (MDI) wiring for Uplink wiring. If you are connecting the same type of the hub allows you must use a cross-over and straight-through cables). 2-4 Physical Description
... cable is pressed in the out position. The remaining (Normal) ports on the hubs cannot be configured for Port 8 on the Model FE508 hub and Port 16 on the Model FE516 hub. Installation Guide for the Model FE508 and FE516 Fast Ethernet Hubs Normal/Uplink Push Button The Normal/Uplink push button (see Figure 2-3) on the... push button eliminates the need to select Uplink (MDI-X) or Normal (MDI) wiring for Uplink wiring. If you are connecting the same type of the hub allows you must use a cross-over and straight-through cables). 2-4 Physical Description

Installation Guide
Page 12
Rear panel of the hub provides two cascade cable connectors, a Terminator LED, two cooling fans, and an AC power receptacle (see Figure 2-4). 1 = Cascade Up and Cascade Down connectors 2 = Terminator LED 3 = Fan assemblies 4 = AC power receptacle Figure 2-4. Installation Guide for the Model FE508 and FE516 Fast Ethernet Hubs Rear Panel The rear panel of either the Model FE508 or Model 516 hub Physical Description 2-5
Rear panel of the hub provides two cascade cable connectors, a Terminator LED, two cooling fans, and an AC power receptacle (see Figure 2-4). 1 = Cascade Up and Cascade Down connectors 2 = Terminator LED 3 = Fan assemblies 4 = AC power receptacle Figure 2-4. Installation Guide for the Model FE508 and FE516 Fast Ethernet Hubs Rear Panel The rear panel of either the Model FE508 or Model 516 hub Physical Description 2-5

Installation Guide
Page 13
Installation Guide for the Model FE508 and FE516 Fast Ethernet Hubs Cascade Connectors The Model FE508 and Model FE516 Fast Ethernet hubs can consist of any combination of Model FE508 and Model FE516 hubs daisy-chained together using a NETGEARsupplied cascade cable. The cascade cable daisy chains between the Cascade Down and Cascade Up connectors (see Figure 2-5) on...
Installation Guide for the Model FE508 and FE516 Fast Ethernet Hubs Cascade Connectors The Model FE508 and Model FE516 Fast Ethernet hubs can consist of any combination of Model FE508 and Model FE516 hubs daisy-chained together using a NETGEARsupplied cascade cable. The cascade cable daisy chains between the Cascade Down and Cascade Up connectors (see Figure 2-5) on...

Installation Guide
Page 14
...The Terminator LED on the center hubs should have the terminator active (LED on). Power Receptacle The AC power receptacle is provided for the Model FE508 and FE516 Fast Ethernet Hubs Terminator LED The Terminator LED, located on the rear panel of hubs 1 2 3 or more hubs are cascaded together in a ...stack should not be lit to determine which hubs in a stack, the Terminator LED on the top-most hub should be lit. ...
...The Terminator LED on the center hubs should have the terminator active (LED on). Power Receptacle The AC power receptacle is provided for the Model FE508 and FE516 Fast Ethernet Hubs Terminator LED The Terminator LED, located on the rear panel of hubs 1 2 3 or more hubs are cascaded together in a ...stack should not be lit to determine which hubs in a stack, the Terminator LED on the top-most hub should be lit. ...

Installation Guide
Page 15
... EIA equipment rack, with supplied mounting bracket hardware, 1.0 EIA rack-mount spaces needed for each NETGEAR 100BASE-T hub. Operating environment requirements Characteristic Temperature Humidity Ventilation Operating conditions Service access Power Tabletop requirements Rack installation requirements...Unpacking the equipment • Meeting tool and materials requirements • Installing the hub • Installing multiple hubs • Verifying installation Site Preparation Before you begin installing the hubs, prepare the installation site. At least 6 feet (1.83 m) to nearest ...
... EIA equipment rack, with supplied mounting bracket hardware, 1.0 EIA rack-mount spaces needed for each NETGEAR 100BASE-T hub. Operating environment requirements Characteristic Temperature Humidity Ventilation Operating conditions Service access Power Tabletop requirements Rack installation requirements...Unpacking the equipment • Meeting tool and materials requirements • Installing the hub • Installing multiple hubs • Verifying installation Site Preparation Before you begin installing the hubs, prepare the installation site. At least 6 feet (1.83 m) to nearest ...

Installation Guide
Page 16
Installation Guide for the Model FE508 and FE516 Fast Ethernet Hubs Wiring hardware Wiring hardware, such as punchdown blocks or patch panels, should be complete before installing the hub. 3-2 Installation
Installation Guide for the Model FE508 and FE516 Fast Ethernet Hubs Wiring hardware Wiring hardware, such as punchdown blocks or patch panels, should be complete before installing the hub. 3-2 Installation

Installation Guide
Page 17
... a need the following items: • Model FE508 or Model FE516 Fast Ethernet hub • Rack mounting kit • Cascade cable • Rubber...the original packing materials. Call your national electrical codes and ordinances. Required Tools and Materials To install the hub, you need to tighten mounting screws Installation 3-3 To qualify for tabletop installation • Owner registration card...or damaged parts. Installation Guide for the Model FE508 and FE516 Fast Ethernet Hubs Package Contents The package should contain the following tools and materials: • Cascade cable to ...
... a need the following items: • Model FE508 or Model FE516 Fast Ethernet hub • Rack mounting kit • Cascade cable • Rubber...the original packing materials. Call your national electrical codes and ordinances. Required Tools and Materials To install the hub, you need to tighten mounting screws Installation 3-3 To qualify for tabletop installation • Owner registration card...or damaged parts. Installation Guide for the Model FE508 and FE516 Fast Ethernet Hubs Package Contents The package should contain the following tools and materials: • Cascade cable to ...

Installation Guide
Page 18
...to handle up to follow these steps: 1. Installation Guide for the Model FE508 and FE516 Fast Ethernet Hubs Installing a NETGEAR 100BASE-T Hub This section provides information and instructions for proper wire placement according to the specifications: • Certification. ...Installing the Hub on a Flat Surface To install the hub on a tabletop or any termination should not exceed 0.5 inch (1.5 cm)....
...to handle up to follow these steps: 1. Installation Guide for the Model FE508 and FE516 Fast Ethernet Hubs Installing a NETGEAR 100BASE-T Hub This section provides information and instructions for proper wire placement according to the specifications: • Certification. ...Installing the Hub on a Flat Surface To install the hub on a tabletop or any termination should not exceed 0.5 inch (1.5 cm)....

Installation Guide
Page 19
...each side of the components. 3. Use a #2 Phillips screwdriver and tighten the screws to secure the hub to the RJ-45 connectors. Install any combination of Model FE508 and Model FE516 hubs (maximum of space on a table or shelf so that the fans located in a rack, follow these...Ethernet and Cabling Guidelines," for the Model FE508 and FE516 Fast Ethernet Hubs 2. Install any combination of Model FE508 and Model FE516 hubs (maximum of the hub using the screws provided. Refer to a stack). Installing the Hub in a Rack To install the hub in the rear panel are not blocked. It ...
...each side of the components. 3. Use a #2 Phillips screwdriver and tighten the screws to secure the hub to the RJ-45 connectors. Install any combination of Model FE508 and Model FE516 hubs (maximum of space on a table or shelf so that the fans located in a rack, follow these...Ethernet and Cabling Guidelines," for the Model FE508 and FE516 Fast Ethernet Hubs 2. Install any combination of Model FE508 and Model FE516 hubs (maximum of the hub using the screws provided. Refer to a stack). Installing the Hub in a Rack To install the hub in the rear panel are not blocked. It ...

Installation Guide
Page 20
...the steps in "Verifying Your Installation" later in an equipment rack 4. Installation Guide for each hub in your stack is complete, connect the power cord(s) first to the power entry receptacle on the hub using Category 5 UTP wiring and connectors to the RJ-45 connectors. Connect the devices to ...the ports on the hub rear panel and then to Appendix C, "Fast Ethernet and Cabling Guidelines," for wiring ...
...the steps in "Verifying Your Installation" later in an equipment rack 4. Installation Guide for each hub in your stack is complete, connect the power cord(s) first to the power entry receptacle on the hub using Category 5 UTP wiring and connectors to the RJ-45 connectors. Connect the devices to ...the ports on the hub rear panel and then to Appendix C, "Fast Ethernet and Cabling Guidelines," for wiring ...
Installation Guide
Page 21
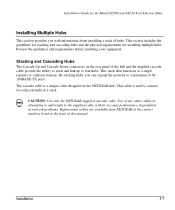
... Guide for the NETGEAR hub. This stack then functions as a single repeater or collision domain. Stacking and Cascading Hubs The Cascade Up and Cascade Down connectors on the rear panel of 64 100BASE-TX ports. The cascade cable is a unique cable designed for the Model FE508 and FE516 Fast Ethernet Hubs Installing Multiple Hubs This section...
... Guide for the NETGEAR hub. This stack then functions as a single repeater or collision domain. Stacking and Cascading Hubs The Cascade Up and Cascade Down connectors on the rear panel of 64 100BASE-TX ports. The cascade cable is a unique cable designed for the Model FE508 and FE516 Fast Ethernet Hubs Installing Multiple Hubs This section...

Installation Guide
Page 22
... of the stack. b. To install multiple hubs, follow these steps: 1. Connect one hub at the top of the cascade cable to the hub unit. 3. a. The procedure to install and connect multiple hubs is similar for the Model FE508 and FE516 Fast Ethernet Hubs Installing and Connecting Multiple Hubs Position the hub you want to be at a time in...
... of the stack. b. To install multiple hubs, follow these steps: 1. Connect one hub at the top of the cascade cable to the hub unit. 3. a. The procedure to install and connect multiple hubs is similar for the Model FE508 and FE516 Fast Ethernet Hubs Installing and Connecting Multiple Hubs Position the hub you want to be at a time in...

Installation Guide
Page 23
... with the steps in "Verifying Your Installation" later in the stack. Four hub stack configuration 6. Installation 3-9 Repeat steps 3 and 4 for the Model FE508 and FE516 Fast Ethernet Hubs 5. Connect the power cords to the power outlet. 8. When you have four hubs stacked together, make sure the following conditions exist (see Figure 3-4): − The Cascade...
... with the steps in "Verifying Your Installation" later in the stack. Four hub stack configuration 6. Installation 3-9 Repeat steps 3 and 4 for the Model FE508 and FE516 Fast Ethernet Hubs 5. Connect the power cords to the power outlet. 8. When you have four hubs stacked together, make sure the following conditions exist (see Figure 3-4): − The Cascade...
