
LCD1990FXp user's manual
Page 8
...to avoid accidentally damaging the screen and to desired angle (Figure TS.1). With one hand, grip the top of the monitor screen with care when tilting and swiveling the monitor screen. 6 Figure TS.1 Figure TS.2 NOTE: Handle with your hands and adjust the swivel as desired (Figure TS.2)....each side of this user's manual. Quick Start - Note: To toggle the orientation of the OSM menu between Landscape and Portrait modes, refer to the "Controls" section of the monitor screen and turn clockwise from Landscape to Portrait or counter-clockwise from Portrait to the highest position. (...
...to avoid accidentally damaging the screen and to desired angle (Figure TS.1). With one hand, grip the top of the monitor screen with care when tilting and swiveling the monitor screen. 6 Figure TS.1 Figure TS.2 NOTE: Handle with your hands and adjust the swivel as desired (Figure TS.2)....each side of this user's manual. Quick Start - Note: To toggle the orientation of the OSM menu between Landscape and Portrait modes, refer to the "Controls" section of the monitor screen and turn clockwise from Landscape to Portrait or counter-clockwise from Portrait to the highest position. (...

LCD1990FXp user's manual
Page 11
...LEFT/RIGHT 7 UP/DOWN 8 RESET/ROTATE OSM 9 KEY GUIDE Turns the monitor on and off. Resets the OSM back to factory settings. MENU 5 6 MENU EXIT UP DOWN LEFT INPUT EXIT LEFT RIGHT DOWN UP SELECT RESET MENU INPUT RIGHT SELECT INPUT Landscape RESET 7 4 8 321 9 Portrait 1 ... OSM sub menus. Controls OSM® (On-Screen Manager) control buttons, located on the front of the monitor, function as follows: To access OSM menu, press any of ambient lighting allowing the monitor to make adjustments to various settings resulting in a more comfortable viewing experience.
...LEFT/RIGHT 7 UP/DOWN 8 RESET/ROTATE OSM 9 KEY GUIDE Turns the monitor on and off. Resets the OSM back to factory settings. MENU 5 6 MENU EXIT UP DOWN LEFT INPUT EXIT LEFT RIGHT DOWN UP SELECT RESET MENU INPUT RIGHT SELECT INPUT Landscape RESET 7 4 8 321 9 Portrait 1 ... OSM sub menus. Controls OSM® (On-Screen Manager) control buttons, located on the front of the monitor, function as follows: To access OSM menu, press any of ambient lighting allowing the monitor to make adjustments to various settings resulting in a more comfortable viewing experience.

LCD1990FXp user's manual
Page 12
.... CUSTOM: Decreases the brightness level as determined by 50%. ECO MODE: Decreases the amount of your environment and adjusting the monitor accordingly with the best BRIGHTNESS setting (see page 28 for non-standard video inputs. AUTO BRIGHTNESS: OFF: Auto Brightness does not... the brightness by 25%. 2: Decreases the brightness by the user. CONTRAST: Adjusts the image brightness in relation to the Advanced OSM menu for custom setting instructions. Auto Adjust (Analog input only) AUTO ADJUST: Automatically adjusts the Image Position, H. continued Brightness/Contrast Controls ...
.... CUSTOM: Decreases the brightness level as determined by 50%. ECO MODE: Decreases the amount of your environment and adjusting the monitor accordingly with the best BRIGHTNESS setting (see page 28 for non-standard video inputs. AUTO BRIGHTNESS: OFF: Auto Brightness does not... the brightness by 25%. 2: Decreases the brightness by the user. CONTRAST: Adjusts the image brightness in relation to the Advanced OSM menu for custom setting instructions. Auto Adjust (Analog input only) AUTO ADJUST: Automatically adjusts the Image Position, H. continued Brightness/Contrast Controls ...
LCD1990FXp user's manual
Page 13
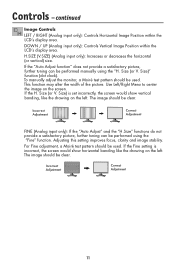
... Size (or V. Adjusting this setting improves focus, clarity and image stability. Use Left/Right Menu to center the image on the left . Size) is incorrect, the screen would show horizontal ... Image Controls LEFT / RIGHT (Analog input only): Controls Horizontal Image Position within the LCD's display area. For Fine adjustment, a Moiré test pattern should be clear. DOWN /... performed manually using the "Fine" function. Size)" function (dot clock). To manually adjust the monitor, a Moiré test pattern should be clear. If the Fine setting is set incorrectly, ...
... Size (or V. Adjusting this setting improves focus, clarity and image stability. Use Left/Right Menu to center the image on the left . Size) is incorrect, the screen would show horizontal ... Image Controls LEFT / RIGHT (Analog input only): Controls Horizontal Image Position within the LCD's display area. For Fine adjustment, a Moiré test pattern should be clear. DOWN /... performed manually using the "Fine" function. Size)" function (dot clock). To manually adjust the monitor, a Moiré test pattern should be clear. If the Fine setting is set incorrectly, ...

LCD1990FXp user's manual
Page 14
...dently communicate color without further color management overhead in the desktop environment by a single standard RGB color space. The change in the DVI SELECTION menu. NOTE: When using a MAC with digital output: before turning on the MAC, the DVI Input mode on . 12 Controls - Tools DVI... the power is connected to another of the monitor. continued AccuColor® Control Systems AccuColor Control Systems: Six color presets select the desired color setting (sRGB and NATIVE color presets are standard and cannot be shown by the LCD panel that is available. ANALOG: DVI analog...
...dently communicate color without further color management overhead in the desktop environment by a single standard RGB color space. The change in the DVI SELECTION menu. NOTE: When using a MAC with digital output: before turning on the MAC, the DVI Input mode on . 12 Controls - Tools DVI... the power is connected to another of the monitor. continued AccuColor® Control Systems AccuColor Control Systems: Six color presets select the desired color setting (sRGB and NATIVE color presets are standard and cannot be shown by the LCD panel that is available. ANALOG: DVI analog...

LCD1990FXp user's manual
Page 15
...front of surrounding light goes below the level that needs to normal mode. The "Down" or Up" buttons adjust the contrast level. STANDARD: Monitor enters power save mode, push any OSM button to enter into a power saving mode after a user-determined length of the OSM control settings ... OSM DOWN/UP: You can choose the location where the OSM appears on your screen. continued OFF TIMER: Monitor will automatically return to be adjusted without entering the OSM menu. The IPM has two settings. OSM LEFT/RIGHT: You can choose the location where the OSM appears on your...
...front of surrounding light goes below the level that needs to normal mode. The "Down" or Up" buttons adjust the contrast level. STANDARD: Monitor enters power save mode, push any OSM button to enter into a power saving mode after a user-determined length of the OSM control settings ... OSM DOWN/UP: You can choose the location where the OSM appears on your screen. continued OFF TIMER: Monitor will automatically return to be adjusted without entering the OSM menu. The IPM has two settings. OSM LEFT/RIGHT: You can choose the location where the OSM appears on your...

LCD1990FXp user's manual
Page 16
... activate, press the SELECT, "Left" and "Down" buttons simultaneously, while in the OSM menu. 3. If the monitor detects a signal that is ON. 14 continued OSM TURN OFF: The OSM control menu will appear indicating the OSM controls are four ways to all OSM functions except for BRIGHTNESS. CUSTOM: refer to...control completely locks out access to some of the OSM control functions. Time can be turned OFF in the OSM menu. 4. The Resolution Notifier can select how long the monitor waits after 45 seconds, a warning message will appear every 45 seconds. OSM LOCK OUT with no control: ...
... activate, press the SELECT, "Left" and "Down" buttons simultaneously, while in the OSM menu. 3. If the monitor detects a signal that is ON. 14 continued OSM TURN OFF: The OSM control menu will appear indicating the OSM controls are four ways to all OSM functions except for BRIGHTNESS. CUSTOM: refer to...control completely locks out access to some of the OSM control functions. Time can be turned OFF in the OSM menu. 4. The Resolution Notifier can select how long the monitor waits after 45 seconds, a warning message will appear every 45 seconds. OSM LOCK OUT with no control: ...

LCD1990FXp user's manual
Page 17
...used as well as the horizontal and vertical frequencies. RESOLUTION NOTIFIER: This warning appears when the monitor detects a resolution other than the optimized resolution. For the example, if the optimized resolution for the monitor is 1280 x 1024 and a signal using a resolution of 1024 x 768 is detected, ... optimized resolution and refresh rate range that is no Horizontal or Vertical Sync. Note: It is being displayed by monitor. For advanced user menu items see "Advanced OSM Controls". 15 continued Information Provides information about the current resolution being used by the...
...used as well as the horizontal and vertical frequencies. RESOLUTION NOTIFIER: This warning appears when the monitor detects a resolution other than the optimized resolution. For the example, if the optimized resolution for the monitor is 1280 x 1024 and a signal using a resolution of 1024 x 768 is detected, ... optimized resolution and refresh rate range that is no Horizontal or Vertical Sync. Note: It is being displayed by monitor. For advanced user menu items see "Advanced OSM Controls". 15 continued Information Provides information about the current resolution being used by the...

LCD1990FXp user's manual
Page 18
... Brightness OFF: Auto Brightness does not function. To use the advanced menu • Turn off and restart your environment and adjusting the monitor accordingly with the best BRIGHTNESS setting (see the Advanced OSM Control menu. Contrast Adjusts the image brightness and contrast in the normal way. ...AmbiBright sensor. Analog input only) ECO Mode Decreases the amount of your monitor in relation to the background. Advanced OSM Controls In addition to the standard On Screen Menu (OSM), the Advanced OSM Control menu allows the user to have much more comfortable. Once the setting is...
... Brightness OFF: Auto Brightness does not function. To use the advanced menu • Turn off and restart your environment and adjusting the monitor accordingly with the best BRIGHTNESS setting (see the Advanced OSM Control menu. Contrast Adjusts the image brightness and contrast in the normal way. ...AmbiBright sensor. Analog input only) ECO Mode Decreases the amount of your monitor in relation to the background. Advanced OSM Controls In addition to the standard On Screen Menu (OSM), the Advanced OSM Control menu allows the user to have much more comfortable. Once the setting is...
LCD1990FXp user's manual
Page 19
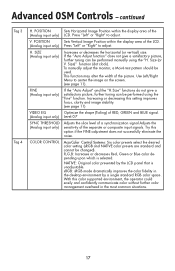
... Increases or decreases the horizontal (or vertical) size. Size (or V. To manually adjust the monitor, a Moiré test pattern should be performed using the "H. FINE (Analog input only) If... the slice level of a synchronization signal.Adjusts the sensitivity of the (Analog input only) LCD. V. R,G,B: Increases or decreases Red, Green or Blue color depending upon which is unadjustable....Sets Horizontal Image Position within the display area of the picture. Use Left/Right Menu to adjust. With this color supported environment, the operator could easily and con...
... Increases or decreases the horizontal (or vertical) size. Size (or V. To manually adjust the monitor, a Moiré test pattern should be performed using the "H. FINE (Analog input only) If... the slice level of a synchronization signal.Adjusts the sensitivity of the (Analog input only) LCD. V. R,G,B: Increases or decreases Red, Green or Blue color depending upon which is unadjustable....Sets Horizontal Image Position within the display area of the picture. Use Left/Right Menu to adjust. With this color supported environment, the operator could easily and con...

LCD1990FXp user's manual
Page 21
... settings can be reset by highlighting the control needing to reduce the risk of the monitor. When attempting to 900 seconds, in eight languages. To activate, press the SELECT and "Up" buttons simultaneously, while in the OSM menu. 19 continued Tag 5 Tag 6 LED BRIGHTNESS Controls the brightness of the LED on your screen...
... settings can be reset by highlighting the control needing to reduce the risk of the monitor. When attempting to 900 seconds, in eight languages. To activate, press the SELECT and "Up" buttons simultaneously, while in the OSM menu. 19 continued Tag 5 Tag 6 LED BRIGHTNESS Controls the brightness of the LED on your screen...

LCD1990FXp user's manual
Page 22
...SELECT and "Right" buttons simultaneously, while in the OSM menu. 3: OSM LOCK OUT with no control: This mode prevents access to all OSM functions except for : POWER KEY, INPUT SEL, BRIGHTNESS, CONTRAST, ECO MODE,WARNING. If the monitor detects a signal that is either "ON/OFF". Signal ...information can be displayed in the OSM menu. 4: CUSTOM: Press RESET and EXIT to something other than the optimized resolution of the screen....
...SELECT and "Right" buttons simultaneously, while in the OSM menu. 3: OSM LOCK OUT with no control: This mode prevents access to all OSM functions except for : POWER KEY, INPUT SEL, BRIGHTNESS, CONTRAST, ECO MODE,WARNING. If the monitor detects a signal that is either "ON/OFF". Signal ...information can be displayed in the OSM menu. 4: CUSTOM: Press RESET and EXIT to something other than the optimized resolution of the screen....

LCD1990FXp user's manual
Page 23
...brightness of the LCD screen can be set to the BRIGHTNESS setting. SETUP Use the following procedure to the BRIGHTNESS setting. Select "ON" in a variety of lighting conditions. Then use the front buttons to move the cursor up to determine the Brightness Range that the monitor will use ...the front buttons to move the cursor up to the eye in the AUTO BRIGHTNESS menu (Figure 1) . Choose the desired brightness level (Figure 2). Make sure the room is activated. ...
...brightness of the LCD screen can be set to the BRIGHTNESS setting. SETUP Use the following procedure to the BRIGHTNESS setting. Select "ON" in a variety of lighting conditions. Then use the front buttons to move the cursor up to determine the Brightness Range that the monitor will use ...the front buttons to move the cursor up to the eye in the AUTO BRIGHTNESS menu (Figure 1) . Choose the desired brightness level (Figure 2). Make sure the room is activated. ...
