
PV Series RS-232 Control Specification
Page 1
... are not supplied with the Monitor. Connect External Equipment < Back panel of the control device to control the set's functions externally. The Monitor remote control and front panel controls (except main power) will not be functional if the set is controlled by a PC computer or other external device.... AccuSync PV Series External Control Device Setup Connect the RS-232 input jack to a control device (such as a computer or an A/V control system) in ...
... are not supplied with the Monitor. Connect External Equipment < Back panel of the control device to control the set's functions externally. The Monitor remote control and front panel controls (except main power) will not be functional if the set is controlled by a PC computer or other external device.... AccuSync PV Series External Control Device Setup Connect the RS-232 input jack to a control device (such as a computer or an A/V control system) in ...

PV Series RS-232 Control Specification
Page 7
...source for the Monitor. Transmission [k][b][ ][Set ID][ ][Data][Cr] Data 0 : DTV 2 : AV1 4 : AV3 6 : Component 8 : HDMI1 A : HDMI3 (Option) OK Acknowledgement 1 : TV 3 : AV2 5 : S-Video 7 : PC-RGB 9 : HDMI2 [b][ ][Set ID][ ][OK][Data][x] 03. Volume Mute (Command 2 : d) To control volume mute on/off ) OK ... when receiving normal data. Error Acknowledgment [Command2][ ][Set ID][ ][NG][Data][x] * The Monitor transmits ACK (acknowledgement) based on remote control or in special menu * [Data] : To transmit command data * [Cr] : Carriage Return OK Acknowledgement [Command2][ ][...
...source for the Monitor. Transmission [k][b][ ][Set ID][ ][Data][Cr] Data 0 : DTV 2 : AV1 4 : AV3 6 : Component 8 : HDMI1 A : HDMI3 (Option) OK Acknowledgement 1 : TV 3 : AV2 5 : S-Video 7 : PC-RGB 9 : HDMI2 [b][ ][Set ID][ ][OK][Data][x] 03. Volume Mute (Command 2 : d) To control volume mute on/off ) OK ... when receiving normal data. Error Acknowledgment [Command2][ ][Set ID][ ][NG][Data][x] * The Monitor transmits ACK (acknowledgement) based on remote control or in special menu * [Data] : To transmit command data * [Cr] : Carriage Return OK Acknowledgement [Command2][ ][...

PV Series RS-232 Control Specification
Page 9
...ID][ ][Data][Cr] Data 0 : Right down on screen 2 : Left up on screen 1 : Left down on screen 3 : Right up on remote control. You can also adjust balance in the Main/PIP menu. Balance (Command 2 : r) To adjust sound balance. See page 52. Transmission [k][s][ ][...Data][x] 22. Transmission [k][q][ ][Set ID][ ][Data][Cr] Data Min : 0 ~ Max : 64 * Refer to 'Real data mapping'. See page 52. TV Speaker (Command 2 : u) To control TV Speaker On/Off of the set . Transmission [k][v][ ][Set ID][ ][Data][Cr] Data 0 : Execute OK Acknowledgement [v][ ][Set ID][ ][OK][Data][x] 9...
...ID][ ][Data][Cr] Data 0 : Right down on screen 2 : Left up on screen 1 : Left down on screen 3 : Right up on remote control. You can also adjust balance in the Main/PIP menu. Balance (Command 2 : r) To adjust sound balance. See page 52. Transmission [k][s][ ][...Data][x] 22. Transmission [k][q][ ][Set ID][ ][Data][Cr] Data Min : 0 ~ Max : 64 * Refer to 'Real data mapping'. See page 52. TV Speaker (Command 2 : u) To control TV Speaker On/Off of the set . Transmission [k][v][ ][Set ID][ ][Data][Cr] Data 0 : Execute OK Acknowledgement [v][ ][Set ID][ ][OK][Data][x] 9...
PV32-AVT UM
Page 5
APV46 English-8 Remote Control English-9 Battery Installation English-10 Connections Connect Antenna English-11 Connect VCR English-11 Connect Cable TV English-12 Connect External AV Source English-12 Connect DVD Player English-13 Connect HDMI English-13 Connect Headphones English-14 Connect PC (DTV English-... English-28 Stereo/SAP Broadcasts Setup English-29 Clock English-30 On/Off Time English-31 Auto Sleep English-32 Daylight Saving (Digital Mode only English-33 Sleep Timer English-33 Child Lock English-34 Front Light English-34 Closed Caption English-35 Closed Caption (...
APV46 English-8 Remote Control English-9 Battery Installation English-10 Connections Connect Antenna English-11 Connect VCR English-11 Connect Cable TV English-12 Connect External AV Source English-12 Connect DVD Player English-13 Connect HDMI English-13 Connect Headphones English-14 Connect PC (DTV English-... English-28 Stereo/SAP Broadcasts Setup English-29 Clock English-30 On/Off Time English-31 Auto Sleep English-32 Daylight Saving (Digital Mode only English-33 Sleep Timer English-33 Child Lock English-34 Front Light English-34 Closed Caption English-35 Closed Caption (...
PV32-AVT UM
Page 9
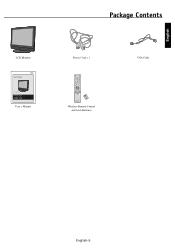
English Package Contents LCD Monitor User's Manual LCD Color Monitor AccuSync™ PV32 AccuSync™ PV40 AccuSync™ PV46 User's Manual Power Cord x 1 POWER ON POWER OFF - TV/DTV PICTURE ASPECT SOUND MENU FAVORITE INPUT MUTE MTS Q.VIEW CH EDIT INFO SLEEP Wireless Remote Control and AAA Batteries VGA Cable English-5
English Package Contents LCD Monitor User's Manual LCD Color Monitor AccuSync™ PV32 AccuSync™ PV40 AccuSync™ PV46 User's Manual Power Cord x 1 POWER ON POWER OFF - TV/DTV PICTURE ASPECT SOUND MENU FAVORITE INPUT MUTE MTS Q.VIEW CH EDIT INFO SLEEP Wireless Remote Control and AAA Batteries VGA Cable English-5

PV32-AVT UM
Page 10
... the set on from standby or to standby from on -screen menu setting. 5. English-6 POWER (r) Switches the set on . 7. Select on . 6. REMOTE CONTROL SENSOR 8. POWER/STANDBY INDICATOR (r) Glows red in standby mode. Part Names and Functions Control Panel * 46inch model only 9 On/Off 5 4 3...8 67 1. MENU Selects a menu. 4. Switches the set on from standby. 2. F / G (Volume Up/Down) Adjusts the volume. INPUT Select input source: DTV, TV, AV1, AV2, AV3, S-Video, Component, PC-RGB, HDMI1, HDMI2, HDMI3 (HDMI3 available for 40/46 inch models only). D / E (Channel Up/Down) Selects ...
... the set on from standby or to standby from on -screen menu setting. 5. English-6 POWER (r) Switches the set on . 7. Select on . 6. REMOTE CONTROL SENSOR 8. POWER/STANDBY INDICATOR (r) Glows red in standby mode. Part Names and Functions Control Panel * 46inch model only 9 On/Off 5 4 3...8 67 1. MENU Selects a menu. 4. Switches the set on from standby. 2. F / G (Volume Up/Down) Adjusts the volume. INPUT Select input source: DTV, TV, AV1, AV2, AV3, S-Video, Component, PC-RGB, HDMI1, HDMI2, HDMI3 (HDMI3 available for 40/46 inch models only). D / E (Channel Up/Down) Selects ...

PV32-AVT UM
Page 13
...work. 2. POWER (ON) Switches the power on. * If the Power Indicator on the channel scan mode through 9 sub pictures. 23. TV/DTV Choose between main and sub picture. PICTURE Recalls preferred picture settings. 7. ASPECT Changes aspect ratio of the screen during DTV viewing. 21. .... OK Accepts your selection or displays the current mode. 17. A.SWAP PIP mode - English Part Names and Functions - continued Remote Control Functions POWER 1 ON POWER OFF 2 3 - 4 TV/DTV 5 PICTURE ASPECT SOUND 6 8 MENU FAVORITE INPUT 9 10 14 MUTE MTS 7 11 12 13 15 16 17 Q.VIEW...
...work. 2. POWER (ON) Switches the power on. * If the Power Indicator on the channel scan mode through 9 sub pictures. 23. TV/DTV Choose between main and sub picture. PICTURE Recalls preferred picture settings. 7. ASPECT Changes aspect ratio of the screen during DTV viewing. 21. .... OK Accepts your selection or displays the current mode. 17. A.SWAP PIP mode - English Part Names and Functions - continued Remote Control Functions POWER 1 ON POWER OFF 2 3 - 4 TV/DTV 5 PICTURE ASPECT SOUND 6 8 MENU FAVORITE INPUT 9 10 14 MUTE MTS 7 11 12 13 15 16 17 Q.VIEW...

PV32-AVT UM
Page 14
Put the two batteries into the compartment, observing battery polarity. 3. Replace the cover. Do mix old and new batteries. Always dispose of batteries properly. continued Battery Installation The remote control is powered by two AAA batteries. 1. To insert batteries, turn the remote control handset over and remove the battery cover. 2. To avoid damage from possible battery leakage, remove the batteries if the remote will not be used for an extended period time. Do not mix battery types. Part Names and Functions - English-10
Put the two batteries into the compartment, observing battery polarity. 3. Replace the cover. Do mix old and new batteries. Always dispose of batteries properly. continued Battery Installation The remote control is powered by two AAA batteries. 1. To insert batteries, turn the remote control handset over and remove the battery cover. 2. To avoid damage from possible battery leakage, remove the batteries if the remote will not be used for an extended period time. Do not mix battery types. Part Names and Functions - English-10

PV32-AVT UM
Page 15
Use the INPUT button on the remote control to select AV1, AV2 or AV3. (If connected to the corresponding input jacks on the TV. Connection 2 1. Connect the audio/video output jacks on VCR to S-VIDEO on the VCR. (Refer to the same channel number. Insert a video ... coaxial wire (75 ohms) ANT VHF antenna UHF antenna outdoor antenna Single-family Dwellings / Houses (Connect to wall jack for specific information. When connecting the TV to TV mode if the CH D / E button or number buttons are pressed. Connect VCR ANT 1 Y Pb Pr (L) AUDIO (R) COMPONENT IN S-VIDEO IN RS-232...
Use the INPUT button on the remote control to select AV1, AV2 or AV3. (If connected to the corresponding input jacks on the TV. Connection 2 1. Connect the audio/video output jacks on VCR to S-VIDEO on the VCR. (Refer to the same channel number. Insert a video ... coaxial wire (75 ohms) ANT VHF antenna UHF antenna outdoor antenna Single-family Dwellings / Houses (Connect to wall jack for specific information. When connecting the TV to TV mode if the CH D / E button or number buttons are pressed. Connect VCR ANT 1 Y Pb Pr (L) AUDIO (R) COMPONENT IN S-VIDEO IN RS-232...

PV32-AVT UM
Page 16
... A/V equipment, match the jack color (Video = yellow, Audio Left = white, and Audio Right = red). When connecting the TV to the corresponding input jacks on the remote control to Cable Box, match the jack color (Video = yellow, Audio Left = white, and Audio Right = red). 2. ...and cable converter required. Select channels at the cable box or with the cable box remote control. continued Connect Cable TV VIDEO (L) AUDIO (R) AV1 IN ANT VIDEO (L) AUDIO (R) AV2 IN (R) AUDIO (L) VIDEO TV VCR RF Cable Cable Box Subscription to the same selected output channel of cable box....
... A/V equipment, match the jack color (Video = yellow, Audio Left = white, and Audio Right = red). When connecting the TV to the corresponding input jacks on the remote control to Cable Box, match the jack color (Video = yellow, Audio Left = white, and Audio Right = red). 2. ...and cable converter required. Select channels at the cable box or with the cable box remote control. continued Connect Cable TV VIDEO (L) AUDIO (R) AV1 IN ANT VIDEO (L) AUDIO (R) AV2 IN (R) AUDIO (L) VIDEO TV VCR RF Cable Cable Box Subscription to the same selected output channel of cable box....

PV32-AVT UM
Page 17
... Y PB PR Connect HDMI(DTV) HDMI1 IN (DVI) HDMI2 IN (DVI) AUDIO IN (RGB/DVI) RGB IN (PC/DTV) HDMI OUTPUT (R) AUDIO (L) or This TV SET can receive High-Definition Multimedia Interface (HDMI) or Digital Visual Interface (DVI) signals. Y PB PR (R) AUDIO (L) DVD 3. Connect the signal cable from the PC... and connect the DVD audio outputs to the component input ports as shown. Switch on the HDMI device, and the HDMI screen appears on the remote control to select HDMI1, HDMI2, or HDMI3 (APV40/46 only). HDMI-DTV input signal: 480p-60Hz, 720p-50Hz, 720p-60Hz, 1080i-50Hz, 1080i-60Hz. ...
... Y PB PR Connect HDMI(DTV) HDMI1 IN (DVI) HDMI2 IN (DVI) AUDIO IN (RGB/DVI) RGB IN (PC/DTV) HDMI OUTPUT (R) AUDIO (L) or This TV SET can receive High-Definition Multimedia Interface (HDMI) or Digital Visual Interface (DVI) signals. Y PB PR (R) AUDIO (L) DVD 3. Connect the signal cable from the PC... and connect the DVD audio outputs to the component input ports as shown. Switch on the HDMI device, and the HDMI screen appears on the remote control to select HDMI1, HDMI2, or HDMI3 (APV40/46 only). HDMI-DTV input signal: 480p-60Hz, 720p-50Hz, 720p-60Hz, 1080i-50Hz, 1080i-60Hz. ...

PV32-AVT UM
Page 19
... / E button to silence the audio. Press the MUTE button to select the SETUP menu. Basic Operation English-15 All the text of the on the remote control to go back into the standby mode. On Screen Language Selection Press the MENU button and then use D / E button to adjust the volume....rating, it on fully. Press MUTE, F / G, SOUND or the MTS buttons to normal TV viewing. Press the POWER button on screen displays will appear in standby mode, press the POWER, or the D / E buttons on the remote control to switch it enters the standby mode. When the set is in the selected...
... / E button to silence the audio. Press the MUTE button to select the SETUP menu. Basic Operation English-15 All the text of the on the remote control to go back into the standby mode. On Screen Language Selection Press the MENU button and then use D / E button to adjust the volume....rating, it on fully. Press MUTE, F / G, SOUND or the MTS buttons to normal TV viewing. Press the POWER button on screen displays will appear in standby mode, press the POWER, or the D / E buttons on the remote control to switch it enters the standby mode. When the set is in the selected...

PV32-AVT UM
Page 27
... E button to select the PICTURE menu. You can adjust picture contrast, brightness, color, sharpness and tint to select a picture setting on the remote control. The Dynamic, Standard, Mild and Game settings are set for the best picture appearance. Basic Operation - Press the MENU button and then... use D / E button to normal TV viewing. continued PICTURE Color Temperature Picture Mode Contrast Brightness Color Sharpness Tint OK MENU PICTURE Color Temperature Picture Mode Contrast Brightness Color ...
... E button to select the PICTURE menu. You can adjust picture contrast, brightness, color, sharpness and tint to select a picture setting on the remote control. The Dynamic, Standard, Mild and Game settings are set for the best picture appearance. Basic Operation - Press the MENU button and then... use D / E button to normal TV viewing. continued PICTURE Color Temperature Picture Mode Contrast Brightness Color Sharpness Tint OK MENU PICTURE Color Temperature Picture Mode Contrast Brightness Color ...

PV32-AVT UM
Page 29
... OK MENU 120 200 500 1.2k 3k 7.5k 12k Hz OK MENU English-25 d. Press the G button and then use D / E button to normal TV viewing. Press the OK button to select Sound Mode. Press the G button and then use D / E button to provide the best sound without any special ...adjustment because the TV sets the appropriate sound options based on the remote control. English Sound Sound Mode helps to select the SOUND menu. Press the MENU button and then use D / E button to store...
... OK MENU 120 200 500 1.2k 3k 7.5k 12k Hz OK MENU English-25 d. Press the G button and then use D / E button to normal TV viewing. Press the OK button to select Sound Mode. Press the G button and then use D / E button to provide the best sound without any special ...adjustment because the TV sets the appropriate sound options based on the remote control. English Sound Sound Mode helps to select the SOUND menu. Press the MENU button and then use D / E button to store...

PV32-AVT UM
Page 38
...On or Off. Press the G button and then D / E button to select Child Lock. This feature can be set so that the remote control handset is pressed while viewing the TV. Press the G button and then D / E button to select the SETUP menu. With the lock on, the display Child Lock appears ... SETUP Language On PC Control Off WXGA VGA Child Lock Front Light Caption Set ID OK MENU English-34 Basic Operation - continued Child Lock The TV can switch Front Light LED on the unit. Press the MENU button and then D / E button to select Front Light. Press the G button and then D ...
...On or Off. Press the G button and then D / E button to select Child Lock. This feature can be set so that the remote control handset is pressed while viewing the TV. Press the G button and then D / E button to select the SETUP menu. With the lock on, the display Child Lock appears ... SETUP Language On PC Control Off WXGA VGA Child Lock Front Light Caption Set ID OK MENU English-34 Basic Operation - continued Child Lock The TV can switch Front Light LED on the unit. Press the MENU button and then D / E button to select Front Light. Press the G button and then D ...

PV32-AVT UM
Page 50
Basic Operation - The Monitor remote control and front panel controls (except main power) will not be functional if the set . RS-232 connection cables are not supplied with the Monitor. ...
Basic Operation - The Monitor remote control and front panel controls (except main power) will not be functional if the set . RS-232 connection cables are not supplied with the Monitor. ...

PV32-AVT UM
Page 54
... poor picture Picture OK, poor sound Picture blurred Lines or streaks in picture Poor reception on some channels No color Poor color Remote control does not work Incorrect position Vertical bars or stripes on background Horizontal noise Signal Cable message appears Check these items and try... on Try another channel (weak signal) Check aerial (plugged into TV?) Check aerial (broken lead?) Check aerial Check for local interference Adjust contrast Adjust brightness Adjust color Adjust volume Check the batteries in remote control Check Audio/Video sockets (VCR only) Auto-configure or adjust the H/V ...
... poor picture Picture OK, poor sound Picture blurred Lines or streaks in picture Poor reception on some channels No color Poor color Remote control does not work Incorrect position Vertical bars or stripes on background Horizontal noise Signal Cable message appears Check these items and try... on Try another channel (weak signal) Check aerial (plugged into TV?) Check aerial (broken lead?) Check aerial Check for local interference Adjust contrast Adjust brightness Adjust color Adjust volume Check the batteries in remote control Check Audio/Video sockets (VCR only) Auto-configure or adjust the H/V ...

