Motorola warranty terms and conditions
Page 2
.... Who is " and without warranty. How to personal contacts, games and ringer tones, will at www.motorola.com/servicemyphone Phone support 1-800-331-6456 iDEN phone support 1-800-453-0920 (Boost, Southern LINC, Nextel customers) Two-Way Radios and Messaging Devices 1-800-...of tampering; (c) mismatched board serial numbers; CD-ROM, or floppy disk). This warranty extends only to requesting service. What Will Motorola Do? Defects or damages resulting from service, testing, adjustment, installation, maintenance, alteration, or modification in Physical Media. Exclusions ƒ...
.... Who is " and without warranty. How to personal contacts, games and ringer tones, will at www.motorola.com/servicemyphone Phone support 1-800-331-6456 iDEN phone support 1-800-453-0920 (Boost, Southern LINC, Nextel customers) Two-Way Radios and Messaging Devices 1-800-...of tampering; (c) mismatched board serial numbers; CD-ROM, or floppy disk). This warranty extends only to requesting service. What Will Motorola Do? Defects or damages resulting from service, testing, adjustment, installation, maintenance, alteration, or modification in Physical Media. Exclusions ƒ...
User Guide
Page 3
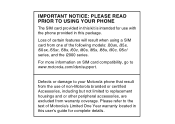
..., go to replacement housings and or other peripheral accessories, are excluded from one of non-Motorola branded or certified Accessories, including but not limited to www.motorola.com/iden/support. IMPORTANT NOTICE: PLEASE READ PRIOR TO USING YOUR PHONE The SIM card provided in this kit is intended for use of the following models...
..., go to replacement housings and or other peripheral accessories, are excluded from one of non-Motorola branded or certified Accessories, including but not limited to www.motorola.com/iden/support. IMPORTANT NOTICE: PLEASE READ PRIOR TO USING YOUR PHONE The SIM card provided in this kit is intended for use of the following models...
User Guide
Page 5
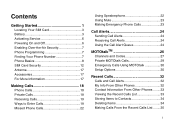
... 3 Activating Service 6 Powering On and Off 6 Enabling Over-the-Air Security 7 Phone Programming 7 Finding Your Phone Number 7 Phone Basics 8 SIM Card Security 12 Antenna 17 Accessories 17 For More Information 17 Making Calls 18 Phone Calls 18 Private Calls 18 Receiving Calls 19 Ways to Enter Calls 19 Missed... Calls Using MOTOtalk 30 Setup Options 30 Recent Calls 32 Calls and Call Alerts 32 My Info From Other Phones 32 Contact Information From Other Phones ........33 Viewing the Recent Calls List 33 Storing Items to Contacts 34 Deleting Items 34 Making Calls From the...
... 3 Activating Service 6 Powering On and Off 6 Enabling Over-the-Air Security 7 Phone Programming 7 Finding Your Phone Number 7 Phone Basics 8 SIM Card Security 12 Antenna 17 Accessories 17 For More Information 17 Making Calls 18 Phone Calls 18 Private Calls 18 Receiving Calls 19 Ways to Enter Calls 19 Missed... Calls Using MOTOtalk 30 Setup Options 30 Recent Calls 32 Calls and Call Alerts 32 My Info From Other Phones 32 Contact Information From Other Phones ........33 Viewing the Recent Calls List 33 Storing Items to Contacts 34 Deleting Items 34 Making Calls From the...
User Guide
Page 6
...39 Editing Entries 40 Deleting Entries 40 Checking Capacity 40 Creating Pauses and Waits 41 International Numbers 41 Accessing Contacts with GSM Phones ...........42 Call Forwarding 43 Forwarding All Calls 43 Turning Off Call Forwarding 44 Forwarding Missed Calls 44 Viewing Call Forwarding Settings 45...Selective Dynamic Group Calls...........54 Group Calls 54 Selective Dynamic Group (SDG) Calls ...........56 Memo 61 Ring Tones 62 Setting Your Phone to Vibrate 62 Ring and Vibrate 63 Assigning Ring Tones to Contacts 63 Viewing Ring Tone Assignments 63 Downloading More Ring Tones ...
...39 Editing Entries 40 Deleting Entries 40 Checking Capacity 40 Creating Pauses and Waits 41 International Numbers 41 Accessing Contacts with GSM Phones ...........42 Call Forwarding 43 Forwarding All Calls 43 Turning Off Call Forwarding 44 Forwarding Missed Calls 44 Viewing Call Forwarding Settings 45...Selective Dynamic Group Calls...........54 Group Calls 54 Selective Dynamic Group (SDG) Calls ...........56 Memo 61 Ring Tones 62 Setting Your Phone to Vibrate 62 Ring and Vibrate 63 Assigning Ring Tones to Contacts 63 Viewing Ring Tone Assignments 63 Downloading More Ring Tones ...
User Guide
Page 8
... 103 Labeling Voice Records 103 Deleting Voice Records 104 Locking Voice Records 104 Managing Memory 104 Customizing Your Phone 105 Setting the Volume 105 Setting Your Phone to Vibrate 105 Changing the Look of Your Phone 105 Airplane Mode- Temporarily Turning Off Calls 107 Using Settings 107 Profiles 112 Viewing Profiles 112 Switching...
... 103 Labeling Voice Records 103 Deleting Voice Records 104 Locking Voice Records 104 Managing Memory 104 Customizing Your Phone 105 Setting the Volume 105 Setting Your Phone to Vibrate 105 Changing the Look of Your Phone 105 Airplane Mode- Temporarily Turning Off Calls 107 Using Settings 107 Profiles 112 Viewing Profiles 112 Switching...

User Guide
Page 10
Address: 8000 West Sunrise Boulevard Plantation, FL 33322 USA Phone Number: 1 (800) 453-0920 Hereby declares that the product: Product Name: i560 Model Number: H65XAN6RR4BN Conforms to the following regulations: FCC Part 15, subpart B, section 15.107(a), 15.107(d) and section 15.109(a) Class B Digital...correct the interference by one or more of the FCC Rules. DECLARATION OF CONFORMITY Per FCC CFR 47 Part 2 Section 2.1077(a) Responsible Party Name: Motorola, Inc. x Note: This equipment has been tested and found to comply with Part 15 of the following two conditions: (1) this device may ...
Address: 8000 West Sunrise Boulevard Plantation, FL 33322 USA Phone Number: 1 (800) 453-0920 Hereby declares that the product: Product Name: i560 Model Number: H65XAN6RR4BN Conforms to the following regulations: FCC Part 15, subpart B, section 15.107(a), 15.107(d) and section 15.109(a) Class B Digital...correct the interference by one or more of the FCC Rules. DECLARATION OF CONFORMITY Per FCC CFR 47 Part 2 Section 2.1077(a) Responsible Party Name: Motorola, Inc. x Note: This equipment has been tested and found to comply with Part 15 of the following two conditions: (1) this device may ...

User Guide
Page 12
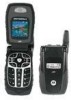
...menus and lists. press the arrows to idle screen. O OK key - accesses context-sensitive menus. places phone calls. used with voice names and voice records. . To start using your i560 phone: • Make sure your service. • Enable over-the-air security if you are prompted to.... s Send key - selects the option appearing above it on ; e End key - t Acts like e when the flip is closed ; selects highlighted item; ends phone calls; Acts like s when the flip is in place. • Charge the battery. • Activate your SIM card is closed ; m Menu key - Navigation key...
...menus and lists. press the arrows to idle screen. O OK key - accesses context-sensitive menus. places phone calls. used with voice names and voice records. . To start using your i560 phone: • Make sure your service. • Enable over-the-air security if you are prompted to.... s Send key - selects the option appearing above it on ; e End key - t Acts like e when the flip is closed ; selects highlighted item; ends phone calls; Acts like s when the flip is in place. • Charge the battery. • Activate your SIM card is closed ; m Menu key - Navigation key...

User Guide
Page 13
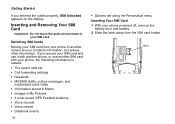
... SIM card from the surrounding plastic and insert it from the back of a credit card. If there is no SIM card in your phone or the box, contact your phone, underneath the battery. Locating Your SIM Card Your SIM (Subscriber Identity Module) card is a small piece of plastic located in the SIM... card holder in the back of your service provider. 3 Allow the battery door to a piece of plastic about the size of your phone came in, attached to pop up, slide it forward, and remove it as described in "Inserting Your SIM Card" on page 14.
... SIM card from the surrounding plastic and insert it from the back of a credit card. If there is no SIM card in your phone or the box, contact your phone, underneath the battery. Locating Your SIM Card Your SIM (Subscriber Identity Module) card is a small piece of plastic located in the SIM... card holder in the back of your service provider. 3 Allow the battery door to a piece of plastic about the size of your phone came in, attached to pop up, slide it forward, and remove it as described in "Inserting Your SIM Card" on page 14.

User Guide
Page 14
Getting Started Inserting the Battery 1 Remove the battery door. 2 Insert the top of the battery into the accessory connector. 4 Press the bottom of the charger into the battery area. connector cover 3 Plug the other end of the battery to secure it gently until you hear a click. Charging the Battery Your phone comes with a battery charger. 1 Plug the charger into an electrical outlet. 2 Open the connector cover. 3 Replace the battery door and press it .
Getting Started Inserting the Battery 1 Remove the battery door. 2 Insert the top of the battery into the accessory connector. 4 Press the bottom of the charger into the battery area. connector cover 3 Plug the other end of the battery to secure it gently until you hear a click. Charging the Battery Your phone comes with a battery charger. 1 Plug the charger into an electrical outlet. 2 Open the connector cover. 3 Replace the battery door and press it .

User Guide
Page 15
...about 1% of their charge per day. 5 Charging Times See your battery and charger to 40°C). Battery Removing the Battery 1 With the phone powered off, remove the battery door. 2 Remove the battery by lifting it out from the accessory connector: Press the buttons on the internal ...display. Tip: To remove the charger from the side. Battery Use and Maintenance • The Motorola iDEN Approved Lithium Ion chargers provide optimum performance. 4 Charger Attached or Device Attached appears on the sides of the plug. Prolonged charging is not ...
...about 1% of their charge per day. 5 Charging Times See your battery and charger to 40°C). Battery Removing the Battery 1 With the phone powered off, remove the battery door. 2 Remove the battery by lifting it out from the accessory connector: Press the buttons on the internal ...display. Tip: To remove the charger from the side. Battery Use and Maintenance • The Motorola iDEN Approved Lithium Ion chargers provide optimum performance. 4 Charger Attached or Device Attached appears on the sides of the plug. Prolonged charging is not ...
User Guide
Page 16
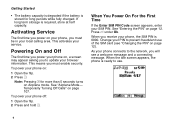
... you will see "Changing the PIN" on Airplane mode. Powering On and Off The first time you power your phone connects to the network, you to use of the SIM card (see a welcome message and a connecting message....for long periods while fully charged. To power your service. Press A under Ok. To power your phone on your SIM PIN. When You Power On For the First Time If the Enter SIM PIN Code screen appears,... enter your phone, you must enable security. If long term storage is stored for more than 5 seconds turns...
... you will see "Changing the PIN" on Airplane mode. Powering On and Off The first time you power your phone connects to the network, you to use of the SIM card (see a welcome message and a connecting message....for long periods while fully charged. To power your service. Press A under Ok. To power your phone on your SIM PIN. When You Power On For the First Time If the Enter SIM PIN Code screen appears,... enter your phone, you must enable security. If long term storage is stored for more than 5 seconds turns...
User Guide
Page 17
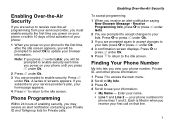
... O or press A under Goto. 2 You are prompted to accept changes to your information: • My Name - Finding Your Phone Number My Info lets you view your phone number, Private ID, and other phone information: 1 Press m to access the main menu. 2 Scroll to My Info. 3 Press O. 4 Scroll to see your lists..., after the idle screen appears, you will be prompted to select Ok to update your first call on your Private ID and Talkgroup lists for phone lines 1 and 2. Press O or press A under Ok. 4 A confirmation screen displays. Enter your lists, press O or press A under Ok. 3 If you ...
... O or press A under Goto. 2 You are prompted to accept changes to your information: • My Name - Finding Your Phone Number My Info lets you view your phone number, Private ID, and other phone information: 1 Press m to access the main menu. 2 Scroll to My Info. 3 Press O. 4 Scroll to see your lists..., after the idle screen appears, you will be prompted to select Ok to update your first call on your Private ID and Talkgroup lists for phone lines 1 and 2. Press O or press A under Ok. 4 A confirmation screen displays. Enter your lists, press O or press A under Ok. 3 If you ...

User Guide
Page 18
... The screen shown is a problem with information and options. Your Private ID is filled in any activity. See "Using Your Phone as a Modem" on your phone. You receive this number from your service provider. To see more information, open the flip. The text that others use to... contact you with your service provider. It is the number that appears on your phone. • Circuit Data- Getting Started • Private - the number of the internal display. The external display shows a shortened version of ...
... The screen shown is a problem with information and options. Your Private ID is filled in any activity. See "Using Your Phone as a Modem" on your phone. You receive this number from your service provider. To see more information, open the flip. The text that others use to... contact you with your service provider. It is the number that appears on your phone. • Circuit Data- Getting Started • Private - the number of the internal display. The external display shows a shortened version of ...
User Guide
Page 19
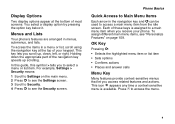
... menus that let you receive your keypad. Press m to select a menu or list item. Display Options Two display options appear at the top of your phone. Each of the navigation key speeds up , down, left, or right. This icon S appears any time a context-sensitive menu is assigned to access a main ...menu item from the idle screen. Holding down the appropriate part of these keys is available. To access the items in menus, submenus, and lists. Phone Basics Quick Access to Main Menu Items Each arrow in the navigation key and O can be used to a main menu item when you access related...
... menus that let you receive your keypad. Press m to select a menu or list item. Display Options Two display options appear at the top of your phone. Each of the navigation key speeds up , down, left, or right. This icon S appears any time a context-sensitive menu is assigned to access a main ...menu item from the idle screen. Holding down the appropriate part of these keys is available. To access the items in menus, submenus, and lists. Phone Basics Quick Access to Main Menu Items Each arrow in the navigation key and O can be used to a main menu item when you access related...
User Guide
Page 20
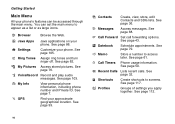
...See page 117. See page 62. [ My Pictures Access stored pictures. Find your phone. o Datebook Schedule appointments. s Shortcuts Create shortcuts to access later. j My Info l GPS View personal phone information, including phone number and Private ID. See page 7. You can be accessed through the main menu....play audio messages. See page 79. See page 50. a Browser Browse the Web. h Call Timers Phone usage information. See page 112. 10 Getting Started Main Menu All your phone's features can set the main menu to appear as a list or as large icons. q Java Apps ...
...See page 117. See page 62. [ My Pictures Access stored pictures. Find your phone. o Datebook Schedule appointments. s Shortcuts Create shortcuts to access later. j My Info l GPS View personal phone information, including phone number and Private ID. See page 7. You can be accessed through the main menu....play audio messages. See page 79. See page 50. a Browser Browse the Web. h Call Timers Phone usage information. See page 112. 10 Getting Started Main Menu All your phone's features can set the main menu to appear as a list or as large icons. q Java Apps ...

User Guide
Page 21
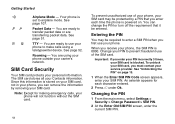
... MOTOtalk - Internet - You are ready to the antenna indicate a stronger signal. Note: MOTOtalk may not be offered by your phone is set not to forward calls. A Phone In Use - Your phone is active on a phone call. Phone Basics C S 1 2 m G J H K I L u M Q w xT yz DE Talkgroup In Use - ...the display. o p q r Signal Strength - B Private In Use - Your phone is active on a Private call . Your phone is active on a SDG call . Your phone is set to make calls; 2 indicates phone line 2 is set to ring. Status Icons Status icons appear at all times....
... MOTOtalk - Internet - You are ready to the antenna indicate a stronger signal. Note: MOTOtalk may not be offered by your phone is set not to forward calls. A Phone In Use - Your phone is active on a phone call. Phone Basics C S 1 2 m G J H K I L u M Q w xT yz DE Talkgroup In Use - ...the display. o p q r Signal Strength - B Private In Use - Your phone is active on a Private call . Your phone is active on a SDG call . Your phone is set to make calls; 2 indicates phone line 2 is set to ring. Status Icons Status icons appear at all times....
User Guide
Page 22
... Security > Change Password > SIM PIN. 2 At the Enter Old SIM PIN screen, enter the current SIM PIN. TTY - Note: Except for each time the phone is powered on. Entering the PIN You may be required to transfer packet data or are ready to enter a SIM PIN when you receive your... card, you enter each character entered. 2 Press A under Ok. Change your PIN to prevent fraudulent use of the SIM card. To unblock your phone, the SIM PIN is blocked. The SIM card stores all your personal information. When you first use your carrier's network. You are transferring packet data...
... Security > Change Password > SIM PIN. 2 At the Enter Old SIM PIN screen, enter the current SIM PIN. TTY - Note: Except for each time the phone is powered on. Entering the PIN You may be required to transfer packet data or are ready to enter a SIM PIN when you receive your... card, you enter each character entered. 2 Press A under Ok. Change your PIN to prevent fraudulent use of the SIM card. To unblock your phone, the SIM PIN is blocked. The SIM card stores all your personal information. When you first use your carrier's network. You are transferring packet data...

User Guide
Page 23
... * # m 1. 2 At your SIM card is on, you are prompted to give you unsuccessfully enter the PUK code 10 times, your phone can use your phone and access your phone. Turning the PIN Requirement On and Off When the SIM PIN requirement is blocked. Anyone can be replaced. to 8-digit SIM PIN... 4 At the Enter New SIM PIN screen, enter the new 4- Note: If a SIM PIN is not protected. Except for making emergency calls, your phone will get a PIN Unblock Code (PUK). When the PIN requirement is entered, except for making emergency calls. You will not function until the SIM PIN...
... * # m 1. 2 At your SIM card is on, you are prompted to give you unsuccessfully enter the PUK code 10 times, your phone can use your phone and access your phone. Turning the PIN Requirement On and Off When the SIM PIN requirement is blocked. Anyone can be replaced. to 8-digit SIM PIN... 4 At the Enter New SIM PIN screen, enter the new 4- Note: If a SIM PIN is not protected. Except for making emergency calls, your phone will get a PIN Unblock Code (PUK). When the PIN requirement is entered, except for making emergency calls. You will not function until the SIM PIN...
User Guide
Page 24
...Moving your SIM card from the SIM card holder. Getting Started If you remove your SIM card and use it with another phone, or use another SIM card with your phone, the following information is erased: • The recent calls list • Call forwarding settings • Net alerts &#...Datebook events 14 • Options set using the Personalize menu Inserting Your SIM Card 1 With your phone powered off, remove the battery door and battery. 2 Slide the latch away from one phone to another moves all your Contacts information, but erases other information. If you entered the codes properly...
...Moving your SIM card from the SIM card holder. Getting Started If you remove your SIM card and use it with another phone, or use another SIM card with your phone, the following information is erased: • The recent calls list • Call forwarding settings • Net alerts &#...Datebook events 14 • Options set using the Personalize menu Inserting Your SIM Card 1 With your phone powered off, remove the battery door and battery. 2 Slide the latch away from one phone to another moves all your Contacts information, but erases other information. If you entered the codes properly...

User Guide
Page 26
... Started Removing Your SIM Card Important: To avoid loss or damage, do not remove your SIM card from the SIM card holder. 4 Carefully slide your phone powered off, remove the battery door and battery. See "Removing the Battery" on page 5. 2 Slide the latch away from your... phone unless absolutely necessary. 1 With your SIM card out of the SIM card holder. latch 5 Close the SIM card holder. 3 Open the SIM card holder. 16 6 ...
... Started Removing Your SIM Card Important: To avoid loss or damage, do not remove your SIM card from the SIM card holder. 4 Carefully slide your phone powered off, remove the battery door and battery. See "Removing the Battery" on page 5. 2 Slide the latch away from your... phone unless absolutely necessary. 1 With your SIM card out of the SIM card holder. latch 5 Close the SIM card holder. 3 Open the SIM card holder. 16 6 ...


