Motorola warranty terms and conditions
Page 1
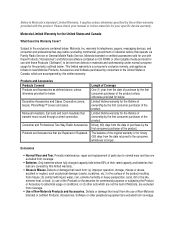
...Accessories and Cases. Limited lifetime warranty for the lifetime of ownership by the first consumer purchaser of parts due to new Motorola Products, Accessories and Software purchased by this written warranty: Products and Accessories Products Covered Products and Accessories as defined ...Exclusions ƒ Normal Wear and Tear. Decorative covers, bezels, PhoneWrap™ covers and cases. Subject to the consumer, whichever is Motorola's standard Limited Warranty. This limited warranty is a consumer's exclusive remedy, and applies as physical damage (cracks, scratches, etc.) ...
...Accessories and Cases. Limited lifetime warranty for the lifetime of ownership by the first consumer purchaser of parts due to new Motorola Products, Accessories and Software purchased by this written warranty: Products and Accessories Products Covered Products and Accessories as defined ...Exclusions ƒ Normal Wear and Tear. Decorative covers, bezels, PhoneWrap™ covers and cases. Subject to the consumer, whichever is Motorola's standard Limited Warranty. This limited warranty is a consumer's exclusive remedy, and applies as physical damage (cracks, scratches, etc.) ...
Motorola warranty terms and conditions
Page 2
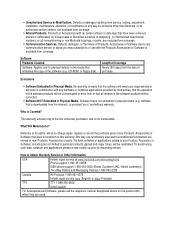
...Ninety (90) days from coverage. ƒ Altered Products. Motorola, at its authorized service centers, are excluded from the date of the software (e.g. We may subscribe to or use functionally equivalent reconditioned/refurbished/ preowned or new Products, Accessories or parts. CD-ROM, or floppy disk...). What Will Motorola Do? Defects, damages, or the failure of Products, Accessories or Software due to the first...
...Ninety (90) days from coverage. ƒ Altered Products. Motorola, at its authorized service centers, are excluded from the date of the software (e.g. We may subscribe to or use functionally equivalent reconditioned/refurbished/ preowned or new Products, Accessories or parts. CD-ROM, or floppy disk...). What Will Motorola Do? Defects, damages, or the failure of Products, Accessories or Software due to the first...

User Guide
Page 17
... to My Info. 3 Press O. 4 Scroll to see your information. Finding Your Phone Number and Private ID My Info lets you receive an alert notification saying New Browser Message - Phone Basics Any time your phone is your Private ID, the number that others use to contact you receive your alert notification after...
... to My Info. 3 Press O. 4 Scroll to see your information. Finding Your Phone Number and Private ID My Info lets you receive an alert notification saying New Browser Message - Phone Basics Any time your phone is your Private ID, the number that others use to contact you receive your alert notification after...

User Guide
Page 22
... SIM PIN screen, enter the current SIM PIN. 3 Press A under Ok. to 8-digit SIM PIN. 5 Press A under Ok. 6 At the Re-enter New SIM PIN screen, re-enter the new SIM PIN to get a PIN Unblock Code (PUK). 12 Note: If a SIM PIN is required, your phone will not function until the... service provider. Change your SIM PIN. To unblock your SIM card, you must contact your service provider to confirm. 7 Press A under Ok. 4 At the Enter New SIM PIN screen, enter the...
... SIM PIN screen, enter the current SIM PIN. 3 Press A under Ok. to 8-digit SIM PIN. 5 Press A under Ok. 6 At the Re-enter New SIM PIN screen, re-enter the new SIM PIN to get a PIN Unblock Code (PUK). 12 Note: If a SIM PIN is required, your phone will not function until the... service provider. Change your SIM PIN. To unblock your SIM card, you must contact your service provider to confirm. 7 Press A under Ok. 4 At the Enter New SIM PIN screen, enter the...

User Guide
Page 23
... PIN. 6 Re-enter your service provider representative's request, provide the information needed to give you a PUK code. 3 Select Unblock PIN. 4 Enter the PUK code. 5 Enter a new 4- If this happens, all your service provider. SIM Card Security Inserting and Removing Your SIM Card Important: Do not touch the gold-colored areas of...
... PIN. 6 Re-enter your service provider representative's request, provide the information needed to give you a PUK code. 3 Select Unblock PIN. 4 Enter the PUK code. 5 Enter a new 4- If this happens, all your service provider. SIM Card Security Inserting and Removing Your SIM Card Important: Do not touch the gold-colored areas of...

User Guide
Page 39
.... 29 Missed calls appear on . To store the number to the left of the list. Select Store. W A call alerts you received. They appear as a new entry, select [New Contact]. -or- This displays information such as the name associated with the number appears on the recent calls list. See "Contacts" on this menu...
.... 29 Missed calls appear on . To store the number to the left of the list. Select Store. W A call alerts you received. They appear as a new entry, select [New Contact]. -or- This displays information such as the name associated with the number appears on the recent calls list. See "Contacts" on this menu...

User Guide
Page 43
...Done to save the entry to Contacts. Creating Entries A number or address and a Contacts type are finished, press O. Other information is optional. Select New Contact. 2 If you want to assign a name to the entry: Creating Entries Select Name. Select the ring tone you can press A under Browse ...entry at any order by scrolling through the entry details. To create a Contacts entry: 1 To access the entry details screen: Select Contacts > [New Contact]. -or- After you have entered the number or address, Contacts type, and any other information you want, you want to assign. When ...
...Done to save the entry to Contacts. Creating Entries A number or address and a Contacts type are finished, press O. Other information is optional. Select New Contact. 2 If you want to assign a name to the entry: Creating Entries Select Name. Select the ring tone you can press A under Browse ...entry at any order by scrolling through the entry details. To create a Contacts entry: 1 To access the entry details screen: Select Contacts > [New Contact]. -or- After you have entered the number or address, Contacts type, and any other information you want, you want to assign. When ...

User Guide
Page 44
...Press A under Done. This is displayed in the Speed # field. Enter the additional information for a phone number, select Voice Name. Enter the new Speed Dial number using step 2 through step 6. Storing Numbers From the Idle Screen To store numbers to Contacts from the idle screen: 1 Use ...the keypad to enter the number you want to store. 2 Press m. 3 Select Store Number. 4 To store the number as a new entry, select [New Contact]. -or- Assigning Options 1 If you have not already, select [Options]. 2 The default Speed Dial number assigned to a phone number is always...
...Press A under Done. This is displayed in the Speed # field. Enter the additional information for a phone number, select Voice Name. Enter the new Speed Dial number using step 2 through step 6. Storing Numbers From the Idle Screen To store numbers to Contacts from the idle screen: 1 Use ...the keypad to enter the number you want to store. 2 Press m. 3 Select Store Number. 4 To store the number as a new entry, select [New Contact]. -or- Assigning Options 1 If you have not already, select [Options]. 2 The default Speed Dial number assigned to a phone number is always...

User Guide
Page 59
You can add all members of the Private IDs and SDG lists stored in Contacts 1 From the main menu, select Contacts. 2 Select [New SDG List]. See "Adding Private Numbers". 5 If you want to assign to the SDG list. You can use Send via PTT to send SDG lists ... list. Speak clearly into the microphone. 6 Press A under Browse. Note: If you do not assign a name, the SDG list is named "SDG" followed by selecting [New Contact] and assigning the SDG contact type. 3 If you can call , but is made to all members in the SDG list. A SDG list must contain...
You can add all members of the Private IDs and SDG lists stored in Contacts 1 From the main menu, select Contacts. 2 Select [New SDG List]. See "Adding Private Numbers". 5 If you want to assign to the SDG list. You can use Send via PTT to send SDG lists ... list. Speak clearly into the microphone. 6 Press A under Browse. Note: If you do not assign a name, the SDG list is named "SDG" followed by selecting [New Contact] and assigning the SDG contact type. 3 If you can call , but is made to all members in the SDG list. A SDG list must contain...

User Guide
Page 64
... the memo: 1 From the main menu, select Memo. 2 Press and hold A under Done. To make a call to Cntcs. 4 To store the number as a new entry, select [New Contact]. -or- To create a memo: 1 From the main menu, select Memo. 2 Enter the number using your keypad. 3 Press O. Memo Memo lets you want... to Contacts. To edit the memo: 1 From the main menu, select Memo. 2 Enter the new number. 3 Press O. To store the number to an existing entry, select the entry. 5 With the Contacts type field highlighted, scroll left or right to display...
... the memo: 1 From the main menu, select Memo. 2 Press and hold A under Done. To make a call to Cntcs. 4 To store the number as a new entry, select [New Contact]. -or- To create a memo: 1 From the main menu, select Memo. 2 Enter the number using your keypad. 3 Press O. Memo Memo lets you want... to Contacts. To edit the memo: 1 From the main menu, select Memo. 2 Enter the new number. 3 Press O. To store the number to an existing entry, select the entry. 5 With the Contacts type field highlighted, scroll left or right to display...

User Guide
Page 73
... From the main menu, select Messages > Voice Mail. Press A under Back. Voice Mail Messages Note: To receive voice mail messages, you have a new message. To dismiss the message notification: Press O or press A under No. 63 If the caller leaves a message, this icon y appears on the.... Sending Unanswered Calls to Voice Mail To send a phone call your service provider. Receiving a Message When you receive a voice mail message, New Voice Mail Message appears on the display, reminding you that you must first set up a voice mail account with your service provider's voice mail...
... From the main menu, select Messages > Voice Mail. Press A under Back. Voice Mail Messages Note: To receive voice mail messages, you have a new message. To dismiss the message notification: Press O or press A under No. 63 If the caller leaves a message, this icon y appears on the.... Sending Unanswered Calls to Voice Mail To send a phone call your service provider. Receiving a Message When you receive a voice mail message, New Voice Mail Message appears on the display, reminding you that you must first set up a voice mail account with your service provider's voice mail...

User Guide
Page 76
... chose. 5 Follow step 3 through step 4 of "Creating and Sending Messages" on page 65. To create a quick note: 1 From the main menu, select Messages > Quick Notes > [New Note]. 2 Press O or press A under Cancel. -or- Beginning Messages From the Recent Calls List 1 From the recent calls list, scroll to the name you want...
... chose. 5 Follow step 3 through step 4 of "Creating and Sending Messages" on page 65. To create a quick note: 1 From the main menu, select Messages > Quick Notes > [New Note]. 2 Press O or press A under Cancel. -or- Beginning Messages From the Recent Calls List 1 From the recent calls list, scroll to the name you want...

User Guide
Page 85
... m. 2 Select Go To Date. 3 Select the date you can press A under Done to store the event to store the event: Press A under New. -or- In day view, select [New Event]. 2 To assign a subject to choose from common event names. -or- When you don't want to Datebook. To go to any date in...
... m. 2 Select Go To Date. 3 Select the date you can press A under Done to store the event to store the event: Press A under New. -or- In day view, select [New Event]. 2 To assign a subject to choose from common event names. -or- When you don't want to Datebook. To go to any date in...

User Guide
Page 101
... • The approximate location, expressed as latitude and longitude • The estimated accuracy of satellites used to determine its location. If it is successful, the new location information will continue attempting to calculate the location. To cancel a location calculation before it is completed: Press A under Rfrsh. See "Enhancing GPS Performance" on...
... • The approximate location, expressed as latitude and longitude • The estimated accuracy of satellites used to determine its location. If it is successful, the new location information will continue attempting to calculate the location. To cancel a location calculation before it is completed: Press A under Rfrsh. See "Enhancing GPS Performance" on...

User Guide
Page 105
...: Because your laptop or other device using the GPS feature of your phone to provide approximate location data to confirm. 7 Press A under Ok. 4 Enter the new 4- to 8-digit GPS PIN to a laptop computer or similar device that made available as that is continuously determining your location, using the standard National Marine... information to transmit data (see "Getting Started" on page 95). To do this, connect your phone to 8-digit GPS PIN. 5 Press A under Ok. 6 Enter the new 4-
...: Because your laptop or other device using the GPS feature of your phone to provide approximate location data to confirm. 7 Press A under Ok. 4 Enter the new 4- to 8-digit GPS PIN to a laptop computer or similar device that made available as that is continuously determining your location, using the standard National Marine... information to transmit data (see "Getting Started" on page 95). To do this, connect your phone to 8-digit GPS PIN. 5 Press A under Ok. 6 Enter the new 4-

User Guide
Page 107
..., press A under Cancel. 3 When you want to add to assign. 97 Creating Voice Records To record a note to yourself: 1 From the main menu, select VoiceRecord > [New VoiceRec]. 2 Say the message you are finished, press A under Pause. Note: Recording of phone calls is labeled with the time and date it with your...
..., press A under Cancel. 3 When you want to add to assign. 97 Creating Voice Records To record a note to yourself: 1 From the main menu, select VoiceRecord > [New VoiceRec]. 2 Say the message you are finished, press A under Pause. Note: Recording of phone calls is labeled with the time and date it with your...

User Guide
Page 108
... Lock to confirm. Managing Memory To view the amount of these other items frees memory for voice records: 1 From the main menu, select VoiceRecord. 2 With [New VoiceRec] highlighted, press A under Yes to delete. 3 Press m. 4 Select Delete. 5 Press O or A under Memory. -or- Select Memory. Select Unlock to store messages, Java application data...
... Lock to confirm. Managing Memory To view the amount of these other items frees memory for voice records: 1 From the main menu, select VoiceRecord. 2 With [New VoiceRec] highlighted, press A under Yes to delete. 3 Press m. 4 Select Delete. 5 Press O or A under Memory. -or- Select Memory. Select Unlock to store messages, Java application data...

User Guide
Page 114
... of time a tone continues to set period of a security or provisioning problem. • Reset Defaults - controls how long the recent calls list displays after a set a new unlock code. or transferring data. • Phone Only -
... of time a tone continues to set period of a security or provisioning problem. • Reset Defaults - controls how long the recent calls list displays after a set a new unlock code. or transferring data. • Phone Only -

User Guide
Page 117
... a Temporary Profile To store a temporary profile as it is in front of profiles. Making more changes further updates the temporary profile, for as long as a new profile: 1 From the main menu, select Profiles. 107 When you do not store a temporary profile, it is based on, but reflects the changed settings. To...
... a Temporary Profile To store a temporary profile as it is in front of profiles. Making more changes further updates the temporary profile, for as long as a new profile: 1 From the main menu, select Profiles. 107 When you do not store a temporary profile, it is based on, but reflects the changed settings. To...

User Guide
Page 118
... values. 7 Press A under Create. 6 Scroll through the list of the profile it is based on a default profile. 5 Press A under Done. Select New. 3 Enter the name you want to give the profile. Scroll to the temporary profile. 3 Press m. 4 Select Store Changes. Profiles 2 Scroll to the ...temporary profile. 3 Press m. 4 Select Store As New. 5 Enter the name you want to give the profile. To overwrite the profile the temporary profile is based on : 1 From the main menu, ...
... values. 7 Press A under Create. 6 Scroll through the list of the profile it is based on a default profile. 5 Press A under Done. Select New. 3 Enter the name you want to give the profile. Scroll to the temporary profile. 3 Press m. 4 Select Store Changes. Profiles 2 Scroll to the ...temporary profile. 3 Press m. 4 Select Store As New. 5 Enter the name you want to give the profile. To overwrite the profile the temporary profile is based on : 1 From the main menu, ...


