User Guide
Page 2
...(s) described in this manual at : 1-800-461-4575 Canada 1-888-390-6456 TTY (Text Telephone) Motorola reserves the right to revise this publication and to make changes in content from Motorola, Inc. Motorola provides this guide without warranty of any derivative work (such as translation, transformation or adaptation) without written permission from time to time without obligation on the part of Motorola to , the...
...(s) described in this manual at : 1-800-461-4575 Canada 1-888-390-6456 TTY (Text Telephone) Motorola reserves the right to revise this publication and to make changes in content from Motorola, Inc. Motorola provides this guide without warranty of any derivative work (such as translation, transformation or adaptation) without written permission from time to time without obligation on the part of Motorola to , the...

User Guide
Page 4
MD4150 Series Handset Ringing Status LED Volume control Access Caller ID/ Scroll down Make/Answer call/ Switch between active calls Switch between Pulse (rotary)/Tone Mute/delete caller information Call second Handset Antenna Earphone jack Access Directory/ Scroll up Select menu options/ Transfer call/ Menu options End call/ Cancel command Redial last number called/ Insert Pauses Microphone Switch to hands-free mode Welcome ii
MD4150 Series Handset Ringing Status LED Volume control Access Caller ID/ Scroll down Make/Answer call/ Switch between active calls Switch between Pulse (rotary)/Tone Mute/delete caller information Call second Handset Antenna Earphone jack Access Directory/ Scroll up Select menu options/ Transfer call/ Menu options End call/ Cancel command Redial last number called/ Insert Pauses Microphone Switch to hands-free mode Welcome ii
User Guide
Page 7
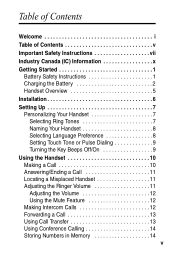
...1 Battery Safety Instructions 1 Charging the Battery 2 Handset Overview 5 Installation 6 Setting Up 7 Personalizing Your Handset 7 Selecting Ring Tones 7 Naming Your Handset 8 Selecting Language Preference 8 Setting Touch Tone or Pulse Dialing 9 Turning the Key Beeps Off/On 9 Using the Handset 10 Making a Call 10 Answering/Ending a Call 11 Locating a Misplaced Handset 11 Adjusting the Ringer Volume 11 Adjusting the Volume 12 Using the Mute Feature 12 Making Intercom Calls 12 Forwarding a Call 13 Using Call Transfer 13 Using Conference Calling 14 Storing Numbers in Memory...
...1 Battery Safety Instructions 1 Charging the Battery 2 Handset Overview 5 Installation 6 Setting Up 7 Personalizing Your Handset 7 Selecting Ring Tones 7 Naming Your Handset 8 Selecting Language Preference 8 Setting Touch Tone or Pulse Dialing 9 Turning the Key Beeps Off/On 9 Using the Handset 10 Making a Call 10 Answering/Ending a Call 11 Locating a Misplaced Handset 11 Adjusting the Ringer Volume 11 Adjusting the Volume 12 Using the Mute Feature 12 Making Intercom Calls 12 Forwarding a Call 13 Using Call Transfer 13 Using Conference Calling 14 Storing Numbers in Memory...
User Guide
Page 9
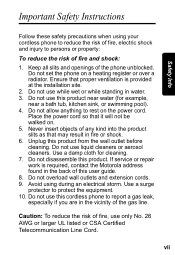
... shock: 1. Unplug this product. If service or repair work is provided at the installation site. 2. Do not use this cordless phone to rest on . 5. Use a damp cloth for example, near a bath tub, kitchen sink, or swimming pool). 4. Do not disassemble this product from the wall outlet before cleaning. Do not overload wall outlets and extension cords. 9. Use a surge protector to persons or property...
... shock: 1. Unplug this product. If service or repair work is provided at the installation site. 2. Do not use this cordless phone to rest on . 5. Use a damp cloth for example, near a bath tub, kitchen sink, or swimming pool). 4. Do not disassemble this product from the wall outlet before cleaning. Do not overload wall outlets and extension cords. 9. Use a surge protector to persons or property...

User Guide
Page 10
... extensive work to restore the product to normal operation. 7. Read and understand all warnings and instructions marked on an unstable cart, stand, or table. Installation Guidelines 1. This product may result in performance. Follow all instructions and save them for future reference. 2. viii Improper adjustment of the power supply to your home, consult your dealer or local power company. 5. Operate this cordless phone...
... extensive work to restore the product to normal operation. 7. Read and understand all warnings and instructions marked on an unstable cart, stand, or table. Installation Guidelines 1. This product may result in performance. Follow all instructions and save them for future reference. 2. viii Improper adjustment of the power supply to your home, consult your dealer or local power company. 5. Operate this cordless phone...

User Guide
Page 11
Caution: To maintain compliance with the FCC's RF exposure guidelines, place the base unit at least one phone in your home goes out. 10.To avoid interference to nearby appliances, do not place the base of the cordless phone on electricity, you should have at least 20 cm from nearby persons. Using other power supplies may damage the unit. 9. Because cordless phones operate on or near a TV, microwave oven, refrigerator, or VCR. ix Safety Info 8. Use only the power supply that isn't cordless, in case the power in your home that came with this unit.
Caution: To maintain compliance with the FCC's RF exposure guidelines, place the base unit at least one phone in your home goes out. 10.To avoid interference to nearby appliances, do not place the base of the cordless phone on electricity, you should have at least 20 cm from nearby persons. Using other power supplies may damage the unit. 9. Because cordless phones operate on or near a TV, microwave oven, refrigerator, or VCR. ix Safety Info 8. Use only the power supply that isn't cordless, in case the power in your home that came with this unit.
User Guide
Page 12
... with this cordless phone, you may connect to your telephone line and still have all devices connected to a compatible modular jack that is permissible to the premises wiring and telephone network must be connected to one line may be extended by the certification/registration number found on the label on the telephone base unit. You should make sure that registration was performed based on a Declaration of service in Industry...
... with this cordless phone, you may connect to your telephone line and still have all devices connected to a compatible modular jack that is permissible to the premises wiring and telephone network must be connected to one line may be extended by the certification/registration number found on the label on the telephone base unit. You should make sure that registration was performed based on a Declaration of service in Industry...
User Guide
Page 13
... the telecommunications company cause to request that the electrical ground connections of this cordless phone does not disable your alarm equipment. Hearing Aid Compatibility This telephone system meets Industry Canada standards for hearing aid compatibility. Operation is subject to this equipment should not attempt to the telephone line, ensure the installation of the power utility, telephone lines, and internal metallic water pipe system, if present...
... the telecommunications company cause to request that the electrical ground connections of this cordless phone does not disable your alarm equipment. Hearing Aid Compatibility This telephone system meets Industry Canada standards for hearing aid compatibility. Operation is subject to this equipment should not attempt to the telephone line, ensure the installation of the power utility, telephone lines, and internal metallic water pipe system, if present...

User Guide
Page 19
... the service with your telephone company. Getting Started 5 See "Personalizing Your Handset" on page 7 for all of your incoming calls, contact your local telephone company. • If you subscribe to familiarize yourself with the MD4150 series handset's display screen. Main Display Screen Muted microphone indicator Name and number display area Speakerphone indicator New call log entry indicator CID date and time information Low battery/ charging indicator Muted ringer indicator Note: Caller ID information is displayed for step-by-step instructions on setting preferences...
... the service with your telephone company. Getting Started 5 See "Personalizing Your Handset" on page 7 for all of your incoming calls, contact your local telephone company. • If you subscribe to familiarize yourself with the MD4150 series handset's display screen. Main Display Screen Muted microphone indicator Name and number display area Speakerphone indicator New call log entry indicator CID date and time information Low battery/ charging indicator Muted ringer indicator Note: Caller ID information is displayed for step-by-step instructions on setting preferences...
User Guide
Page 21
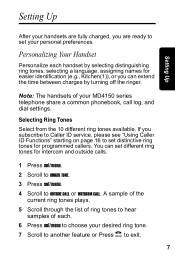
... to RINGER TONE. 3 Press sel/menu. 4 Scroll to set distinctive ring tones for programmed callers. A sample of the current ring tones plays. 5 Scroll through the list of ring tones to hear samples of your MD4150 series telephone share a common phonebook, call log, and dial settings. You can extend the time between charges by turning off the ringer. Setting Up Setting Up After your handsets are fully charged, you are ready to OUTSIDE CALL or INTERCOM CALL. Selecting Ring Tones...
... to RINGER TONE. 3 Press sel/menu. 4 Scroll to set distinctive ring tones for programmed callers. A sample of the current ring tones plays. 5 Scroll through the list of ring tones to hear samples of your MD4150 series telephone share a common phonebook, call log, and dial settings. You can extend the time between charges by turning off the ringer. Setting Up Setting Up After your handsets are fully charged, you are ready to OUTSIDE CALL or INTERCOM CALL. Selecting Ring Tones...
User Guide
Page 23
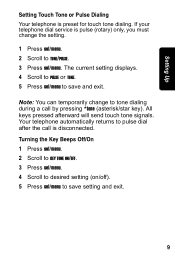
... tone signals. Setting Up Setting Touch Tone or Pulse Dialing Your telephone is pulse (rotary) only, you must change to pulse dial after the call by pressing *tone (asterisk/star key). The current setting displays. 4 Scroll to PULSE or TONE. 5 Press sel/menu to save and exit. Note: You can temporarily change the setting. 1 Press sel/menu. 2 Scroll to TONE/PULSE. 3 Press sel/menu. Turning the Key Beeps Off/On 1 Press sel/menu. 2 Scroll to KEY TONE...
... tone signals. Setting Up Setting Touch Tone or Pulse Dialing Your telephone is pulse (rotary) only, you must change to pulse dial after the call by pressing *tone (asterisk/star key). The current setting displays. 4 Scroll to PULSE or TONE. 5 Press sel/menu to save and exit. Note: You can temporarily change the setting. 1 Press sel/menu. 2 Scroll to TONE/PULSE. 3 Press sel/menu. Turning the Key Beeps Off/On 1 Press sel/menu. 2 Scroll to KEY TONE...
User Guide
Page 24
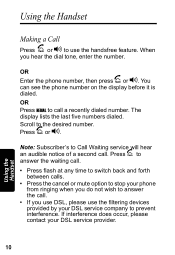
... answer the waiting call . • If you hear the dial tone, enter the number. When you use DSL, please use the handsfree feature. Press or v. The display lists the last five numbers dialed. If interference does occur, please contact your DSL service company to answer the call . • Press flash at any time to switch back and forth between calls. • Press the cancel or mute option to stop...
... answer the waiting call . • If you hear the dial tone, enter the number. When you use DSL, please use the handsfree feature. Press or v. The display lists the last five numbers dialed. If interference does occur, please contact your DSL service company to answer the call . • Press flash at any time to switch back and forth between calls. • Press the cancel or mute option to stop...

User Guide
Page 25
... setting. 11 Using the Handset Locating a Misplaced Handset Press PAGE on the Base Unit or Charger to end call . Both handsets beep for 60 seconds. Answering/Ending a Call A B Press or any key except , INTERCOM, or REDIAL to answer a call . Adjusting the Ringer Volume 1 Press sel/menu. 2 Scroll to RING VOLUME. 3 Press sel/menu. 4 Scroll to the desired volume level (1 - 6, or Off). 5 Press sel/menu to stop paging both handsets. B A OR Press or any key...
... setting. 11 Using the Handset Locating a Misplaced Handset Press PAGE on the Base Unit or Charger to end call . Both handsets beep for 60 seconds. Answering/Ending a Call A B Press or any key except , INTERCOM, or REDIAL to answer a call . Adjusting the Ringer Volume 1 Press sel/menu. 2 Scroll to RING VOLUME. 3 Press sel/menu. 4 Scroll to the desired volume level (1 - 6, or Off). 5 Press sel/menu to stop paging both handsets. B A OR Press or any key...
User Guide
Page 26
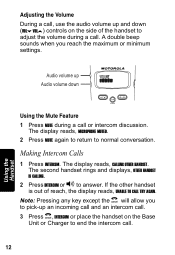
Making Intercom Calls 1 Press INTERCOM. B Note: Pressing any key except the will allow you reach the maximum or minimum settings. Using the Handset P Adjusting the Volume During a call, use the audio volume up an incoming call and an intercom call. The display reads, MICROPHONE MUTED. 2 Press MUTE again to return to answer. Audio volume up Audio volume down (VOLy VOLz) controls on the Base Unit or Charger to adjust the volume during a call or intercom discussion. If the other...
Making Intercom Calls 1 Press INTERCOM. B Note: Pressing any key except the will allow you reach the maximum or minimum settings. Using the Handset P Adjusting the Volume During a call, use the audio volume up an incoming call and an intercom call. The display reads, MICROPHONE MUTED. 2 Press MUTE again to return to answer. Audio volume up Audio volume down (VOLy VOLz) controls on the Base Unit or Charger to adjust the volume during a call or intercom discussion. If the other...

User Guide
Page 27
... the second handset to the first handset, rings for 30 seconds, and terminates automatically if not answered. 13 Using the Handset B 3 Press to speak with Bill Southers?") 1 Press and hold INTERCOM. The second handset rings and displays, OTHER HANDSET IS CALLING. CALLING OTHER HANDSET displays in the handset. The external call is not found or picked up within 30 seconds, the call returns to complete forwarding the call. Using Call Transfer Use Call Transfer...
... the second handset to the first handset, rings for 30 seconds, and terminates automatically if not answered. 13 Using the Handset B 3 Press to speak with Bill Southers?") 1 Press and hold INTERCOM. The second handset rings and displays, OTHER HANDSET IS CALLING. CALLING OTHER HANDSET displays in the handset. The external call is not found or picked up within 30 seconds, the call returns to complete forwarding the call. Using Call Transfer Use Call Transfer...

User Guide
Page 28
... Numbers in Memory Enter numbers directly into the phonebook, or add them from the caller ID, and redial lists. Enter up to 32 digits), or press REDIAL, scroll to STORE NEW ENTRY. 5 Press sel/menu. The display reads, ENTER NUMBER. 6 Enter the telephone number (up to 16 characters). 14 Using the Handset P Using Conference Calling A When one handset is on an external call, and is pressed on the second handset, a Conference Call...
... Numbers in Memory Enter numbers directly into the phonebook, or add them from the caller ID, and redial lists. Enter up to 32 digits), or press REDIAL, scroll to STORE NEW ENTRY. 5 Press sel/menu. The display reads, ENTER NUMBER. 6 Enter the telephone number (up to 16 characters). 14 Using the Handset P Using Conference Calling A When one handset is on an external call, and is pressed on the second handset, a Conference Call...
User Guide
Page 30
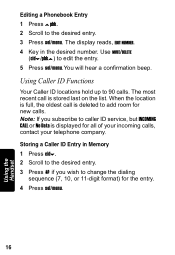
... hear a confirmation beep. When the location is full, the oldest call is displayed for new calls. The display reads, EDIT NUMBER. 4 Key in Memory 1 Press cidy. 2 Scroll to the desired entry. 3 Press # if you subscribe to edit the entry. 5 Press sel/menu. Using the Handset P Editing a Phonebook Entry 1 Press zpbk. 2 Scroll to 90 calls. Use MUTE/DELETE (cidy/pbkz) to caller ID service, but INCOMING CALL or No Data...
... hear a confirmation beep. When the location is full, the oldest call is displayed for new calls. The display reads, EDIT NUMBER. 4 Key in Memory 1 Press cidy. 2 Scroll to the desired entry. 3 Press # if you subscribe to edit the entry. 5 Press sel/menu. Using the Handset P Editing a Phonebook Entry 1 Press zpbk. 2 Scroll to 90 calls. Use MUTE/DELETE (cidy/pbkz) to caller ID service, but INCOMING CALL or No Data...

User Guide
Page 31
B 3 Press to dial the number. A long beep confirms the deletion. 17 Using the Handset A 4 Press or v to exit list. The display reads ERASE ALL NO YES? Reviewing Caller ID Lists 1 Press cidy SCROLL. 2 Scroll through the list of incoming calls. Dialing a Caller ID Listing 1 Press cidy. 2 Scroll to the desired entry. 3 Press # if you want to delete. 3 Press sel/menu. Deleting a Specific Caller ID Listing 1 Press cidy. 2 Scroll to...
B 3 Press to dial the number. A long beep confirms the deletion. 17 Using the Handset A 4 Press or v to exit list. The display reads ERASE ALL NO YES? Reviewing Caller ID Lists 1 Press cidy SCROLL. 2 Scroll through the list of incoming calls. Dialing a Caller ID Listing 1 Press cidy. 2 Scroll to the desired entry. 3 Press # if you want to delete. 3 Press sel/menu. Deleting a Specific Caller ID Listing 1 Press cidy. 2 Scroll to...
User Guide
Page 34
... Products. Abuse & Misuse. Products or Accessories with any hardware or software 20 or (d) nonconforming or non-Motorola housings, or parts, are excluded from coverage. Unauthorized Service or Modification. No warranty is excluded from coverage. Periodic maintenance, repair and replacement of Motorola, are excluded from coverage. Batteries. Defects or damages resulting from service, testing, adjustment, installation, maintenance, alteration, or modification in any...
... Products. Abuse & Misuse. Products or Accessories with any hardware or software 20 or (d) nonconforming or non-Motorola housings, or parts, are excluded from coverage. Unauthorized Service or Modification. No warranty is excluded from coverage. Periodic maintenance, repair and replacement of Motorola, are excluded from coverage. Batteries. Defects or damages resulting from service, testing, adjustment, installation, maintenance, alteration, or modification in any...
User Guide
Page 35
... description of the problem; (c) the name of your service provider, if applicable; (d) the name and location of the installation facility (if applicable), (e) your return mailing address on how to ship the Products, Accessories or Software, at no charge repair, or replace any Products, Accessories or Software that does not conform to personal contacts, games and ringer tones, will be corrected. Software...
... description of the problem; (c) the name of your service provider, if applicable; (d) the name and location of the installation facility (if applicable), (e) your return mailing address on how to ship the Products, Accessories or Software, at no charge repair, or replace any Products, Accessories or Software that does not conform to personal contacts, games and ringer tones, will be corrected. Software...


