Specs
Page 2
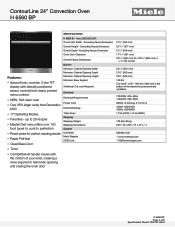
..." L 800.843.7231 8www.mieleusa.com 82020technologies.com H 6560 BP Page 2 of your wrist, creating a more ergonomic feel when opening and closing the oven door SPECIFICATIONS H 6560 B- Excluding Fascia Dimension Oven Door Clearance Overall Fascia Dimensions Built-In Minimum Cabinet Opening Width Minimum Cabinet Opening Depth Minimum Cabinet Opening Height Minimum Base Support Additional Cut-outs Required Electrical Electrical Requirements Power Cord Electrical Rating Total Amps Shipping Shipping Weight Shipping Dimensions Support Call Miele Miele Website 20/20 Link 213/4" (553 mm) 2211/16...
..." L 800.843.7231 8www.mieleusa.com 82020technologies.com H 6560 BP Page 2 of your wrist, creating a more ergonomic feel when opening and closing the oven door SPECIFICATIONS H 6560 B- Excluding Fascia Dimension Oven Door Clearance Overall Fascia Dimensions Built-In Minimum Cabinet Opening Width Minimum Cabinet Opening Depth Minimum Cabinet Opening Height Minimum Base Support Additional Cut-outs Required Electrical Electrical Requirements Power Cord Electrical Rating Total Amps Shipping Shipping Weight Shipping Dimensions Support Call Miele Miele Website 20/20 Link 213/4" (553 mm) 2211/16...
Product Manual
Page 2
... Model numbers ...21 Data plate ...21 Items included...21 Standard and optional accessories 21 Shelf runners...22 Baking tray, Roasting pan and Wire oven rack 22 FlexiClip telescopic runners HFC72 23 Oven controls ...26 Oven safety features 26 System lock 26 Safety shut-off 26 Cooling fan...26 Vented oven door 26 Safety Door Lock for Self Clean 26 PerfectClean treated surfaces 27 Self Clean ready accessories 27 Before using for the first time 28 General settings ...28 Heating the oven...
... Model numbers ...21 Data plate ...21 Items included...21 Standard and optional accessories 21 Shelf runners...22 Baking tray, Roasting pan and Wire oven rack 22 FlexiClip telescopic runners HFC72 23 Oven controls ...26 Oven safety features 26 System lock 26 Safety shut-off 26 Cooling fan...26 Vented oven door 26 Safety Door Lock for Self Clean 26 PerfectClean treated surfaces 27 Self Clean ready accessories 27 Before using for the first time 28 General settings ...28 Heating the oven...
Product Manual
Page 8
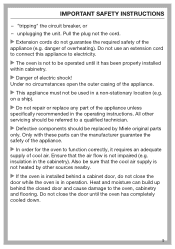
... it is imperative that the voltage and frequency listed on the data plate correspond with national and local safety regulations and the provided installation instructions. removing the fuse, 8 IMPORTANT SAFETY INSTRUCTIONS Installation, repair and maintenance work should be performed by a Miele authorized service technician in doubt. Before installation or service, disconnect the power supply to the work by unauthorized persons could be dangerous and...
... it is imperative that the voltage and frequency listed on the data plate correspond with national and local safety regulations and the provided installation instructions. removing the fuse, 8 IMPORTANT SAFETY INSTRUCTIONS Installation, repair and maintenance work should be performed by a Miele authorized service technician in doubt. Before installation or service, disconnect the power supply to the work by unauthorized persons could be dangerous and...
Product Manual
Page 9
... should be operated until the oven has completely cooled down. 9 Pull the plug not the cord. Extension cords do not close the door until it requires an adequate supply of electric shock! Also be sure that the air flow is in the cabinetry). Do not use an extension cord to connect this appliance to electricity. The oven is not heated by other servicing should...
... should be operated until the oven has completely cooled down. 9 Pull the plug not the cord. Extension cords do not close the door until it requires an adequate supply of electric shock! Also be sure that the air flow is in the cabinetry). Do not use an extension cord to connect this appliance to electricity. The oven is not heated by other servicing should...
Product Manual
Page 14
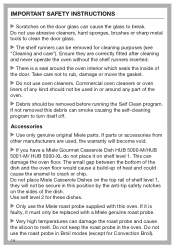
... or around the oven interior which seals the inside of heat and could cause the enamel to break. Do not keep the roast probe in Broil modes (except for these dishes. Only use the Miele roast probe supplied with a Miele genuine roast probe. Very high temperatures can cause the glass to crack or chip. IMPORTANT SAFETY INSTRUCTIONS Scratches on the door glass can damage the roast probe and cause...
... or around the oven interior which seals the inside of heat and could cause the enamel to break. Do not keep the roast probe in Broil modes (except for these dishes. Only use the Miele roast probe supplied with a Miele genuine roast probe. Very high temperatures can cause the glass to crack or chip. IMPORTANT SAFETY INSTRUCTIONS Scratches on the door glass can damage the roast probe and cause...
Product Manual
Page 26
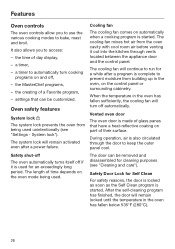
... the kitchen through the door to keep the outer panel cool. the MasterChef programs, - settings that have a heat-reflective coating on part of glass panes that can be customized. The cooling fan will remain activated even after a program is started . It also allows you to use the various cooking modes to bake, roast and broil. The cooling fan mixes hot air from being used unintentionally (see "Cleaning and care"). The door...
... the kitchen through the door to keep the outer panel cool. the MasterChef programs, - settings that have a heat-reflective coating on part of glass panes that can be customized. The cooling fan will remain activated even after a program is started . It also allows you to use the various cooking modes to bake, roast and broil. The cooling fan mixes hot air from being used unintentionally (see "Cleaning and care"). The door...

Product Manual
Page 28
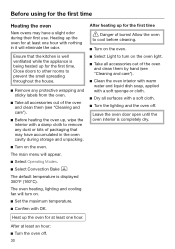
... basic settings which are needed before setting. Clock Format"). 28 The oven will then be used. Follow the instructions on automatically when it has been properly installed within cabinetry. If in doubt contact a qualified technician. Select the voltage. Confirm with OK. The time of Day - You will turn on the display. Before using for the first time General settings The oven must...
... basic settings which are needed before setting. Clock Format"). 28 The oven will then be used. Follow the instructions on automatically when it has been properly installed within cabinetry. If in doubt contact a qualified technician. Select the voltage. Confirm with OK. The time of Day - You will turn on the display. Before using for the first time General settings The oven must...
Product Manual
Page 30
... for at least an hour: Turn the oven off . Ensure that may have accumulated in it will eliminate the odor. After at least one hour with OK. The oven heating, lighting and cooling fan will appear. Select Operating Modes. Select Convection Bake The default temperature is completely dry. Leave the oven door open until the oven interior is displayed 350°F (160°C).
... for at least an hour: Turn the oven off . Ensure that may have accumulated in it will eliminate the odor. After at least one hour with OK. The oven heating, lighting and cooling fan will appear. Select Operating Modes. Select Convection Bake The default temperature is completely dry. Leave the oven door open until the oven interior is displayed 350°F (160°C).
Product Manual
Page 37
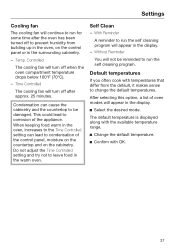
..., a list of the appliance. Time Controlled The cooling fan will turn off to leave food in the oven, on the cabinetry. When keeping food warm in the oven, increases to the Time Controlled setting can cause the cabinetry and the countertop to be reminded to run the self cleaning program. The default temperature is displayed along with the available temperature range. Change the default temperature. Confirm with temperatures...
..., a list of the appliance. Time Controlled The cooling fan will turn off to leave food in the oven, on the cabinetry. When keeping food warm in the oven, increases to the Time Controlled setting can cause the cabinetry and the countertop to be reminded to run the self cleaning program. The default temperature is displayed along with the available temperature range. Change the default temperature. Confirm with temperatures...
Product Manual
Page 44
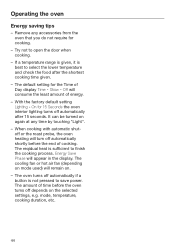
... end of cooking. Operating the oven Energy saving tips - If a temperature range is given, it is sufficient to open the door when cooking. - Energy Save Phase will remain on mode used) will appear in the display. The reqidual heat is best to save power. When cooking with automatic shutoff or the roast probe, the oven heating will consume the least amount of Day display Time - The default setting for cooking. - The oven turns off...
... end of cooking. Operating the oven Energy saving tips - If a temperature range is given, it is sufficient to open the door when cooking. - Energy Save Phase will remain on mode used) will appear in the display. The reqidual heat is best to save power. When cooking with automatic shutoff or the roast probe, the oven heating will consume the least amount of Day display Time - The default setting for cooking. - The oven turns off...
Product Manual
Page 59
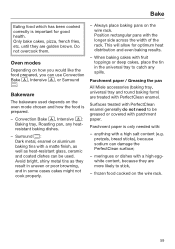
... enamel generally do not need to stick, - anything with PerfectClean enamel. Bake Eating food which has been cooked correctly is only needed with: - Do not overcook them. Convection Bake , Intensive : Baking tray, Roasting pan, any spills. This will allow for good health. Surround : Dark metal, enamel or aluminum baking tins with parchment paper. Parchment paper is important for optimum heat...
... enamel generally do not need to stick, - anything with PerfectClean enamel. Bake Eating food which has been cooked correctly is only needed with: - Do not overcook them. Convection Bake , Intensive : Baking tray, Roasting pan, any spills. This will allow for good health. Surround : Dark metal, enamel or aluminum baking tins with parchment paper. Parchment paper is important for optimum heat...
Product Manual
Page 67
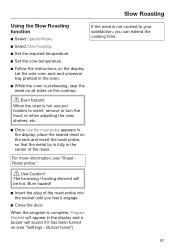
... the wire oven rack and universal tray preheat in the display, place the seared meat on (see "Roast Roast probe." The browning / broiling element will sound if it engage. Close the door. When the program is fully in the display and a buzzer will be hot. Slow Roasting Using the Slow Roasting function Select Special Modes. Select Slow Roasting. Set the required temperature. Set the core temperature. Follow the instructions...
... the wire oven rack and universal tray preheat in the display, place the seared meat on (see "Roast Roast probe." The browning / broiling element will sound if it engage. Close the door. When the program is fully in the display and a buzzer will be hot. Slow Roasting Using the Slow Roasting function Select Special Modes. Select Slow Roasting. Set the required temperature. Set the core temperature. Follow the instructions...

Product Manual
Page 71
... universal tray. Place the food on the appropriate shelf level (see the Broiling chart). Close the door. Turn the food halfway through cooking. When the oven is hot use pot holders to insert, remove or turn the food, or when adjusting the oven shelves, etc. Place the food on top. Select the required oven mode and temperature. Preheat the Browning / Broiling element...
... universal tray. Place the food on the appropriate shelf level (see the Broiling chart). Close the door. Turn the food halfway through cooking. When the oven is hot use pot holders to insert, remove or turn the food, or when adjusting the oven shelves, etc. Place the food on top. Select the required oven mode and temperature. Preheat the Browning / Broiling element...

Product Manual
Page 74
... apples, and cut into wedges. - dehydrating time 2-8 hours 3-8 hours 50-60 minutes * Because this program uses the fan, it . Clean mushrooms, then either halve or slice them. - Special Modes Dehydrate This program is important that you use the rack or perforated baking tray, if available. Select Special Modes. Select Dehydrate. If necessary, adjust the default temperature and set between 75-250...
... apples, and cut into wedges. - dehydrating time 2-8 hours 3-8 hours 50-60 minutes * Because this program uses the fan, it . Clean mushrooms, then either halve or slice them. - Special Modes Dehydrate This program is important that you use the rack or perforated baking tray, if available. Select Special Modes. Select Dehydrate. If necessary, adjust the default temperature and set between 75-250...
Product Manual
Page 75
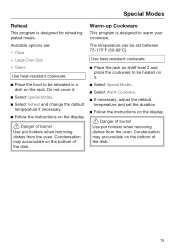
... the display. Danger of burns! Use pot holders when removing dishes from the oven. Use heat-resistant cookware. Place the rack on shelf level 2 and place the cookware to be heated on it . Select Special Modes. Select Reheat and change the default temperature if necessary. Follow the instructions on the rack. Special Modes Reheat This program is designed to warm...
... the display. Danger of burns! Use pot holders when removing dishes from the oven. Use heat-resistant cookware. Place the rack on shelf level 2 and place the cookware to be heated on it . Select Special Modes. Select Reheat and change the default temperature if necessary. Follow the instructions on the rack. Special Modes Reheat This program is designed to warm...

Product Manual
Page 76
... to proof dough. Pizza This program is designed specifically for baking pizza. The temperature can be set between 300-475°F (160-250°C). Select Special Modes. Select Pizza. If necessary, adjust the default temperature and set the duration. Follow the instructions on the display. 76 The temperature can be set between 75-125°F (30-50°...
... to proof dough. Pizza This program is designed specifically for baking pizza. The temperature can be set between 300-475°F (160-250°C). Select Special Modes. Select Pizza. If necessary, adjust the default temperature and set the duration. Follow the instructions on the display. 76 The temperature can be set between 75-125°F (30-50°...

Product Manual
Page 85
... h, a message will appear in the display and the start time set will vary depending on the door. Cleaning and care As soon as the start time has been reached, the oven heating and the cooling fan will sound if turned on automatically. The door will turn on (see "Settings - The start or end time can be changed up until the oven has cooled down before removing any residual soiling left in...
... h, a message will appear in the display and the start time set will vary depending on the door. Cleaning and care As soon as the start time has been reached, the oven heating and the cooling fan will sound if turned on automatically. The door will turn on (see "Settings - The start or end time can be changed up until the oven has cooled down before removing any residual soiling left in...
Product Manual
Page 88
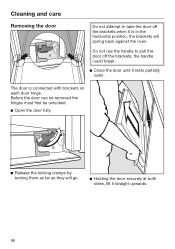
... Cleaning and care Removing the door Do not attempt to pull the door off the brackets when it is connected with brackets on each door hinge. Before the door can be removed the hinges must first be unlocked. Open the door fully. Release the locking clamps by turning them as far as they will spring back against the oven. Do not use the handle to take the door off the brackets...
... Cleaning and care Removing the door Do not attempt to pull the door off the brackets when it is connected with brackets on each door hinge. Before the door can be removed the hinges must first be unlocked. Open the door fully. Release the locking clamps by turning them as far as they will spring back against the oven. Do not use the handle to take the door off the brackets...
Product Manual
Page 98
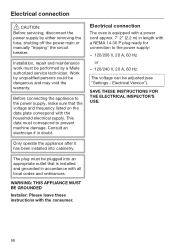
... the warranty. The plug must be adjusted (see "Settings - WARNING: THIS APPLIANCE MUST BE GROUNDED Installer: Please leave these instructions with all local codes and ordinances. Electrical connection CAUTION: Before servicing, disconnect the power supply by a Miele authorized service technician. Electrical connection The oven is installed and grounded in doubt. Work by unqualified persons could be performed by either removing the fuse, shutting off the power main or manually "tripping" the circuit breaker. Before connecting...
... the warranty. The plug must be adjusted (see "Settings - WARNING: THIS APPLIANCE MUST BE GROUNDED Installer: Please leave these instructions with all local codes and ordinances. Electrical connection CAUTION: Before servicing, disconnect the power supply by a Miele authorized service technician. Electrical connection The oven is installed and grounded in doubt. Work by unqualified persons could be performed by either removing the fuse, shutting off the power main or manually "tripping" the circuit breaker. Before connecting...

Product Manual
Page 99
Installation diagrams Appliance and cut-out dimensions Miele ovens can be installed flush or proud. For the more current specifications please visit the Miele website. 99 Undercounter installation 21 15/16" (558 mm) 23 5/8" (600 mm) ( 21 5/8" 550 mm) 7/8" 16"... mm) 21 1/2" (546 mm) Cut-out (4" x 22" / 100 mm x 560 mm) in the bottom of the cabinet for power cord and ventilation Power cord with plug * Oven with glass front ** Oven with your architect, designer and installer. Discuss your installation requirements with metal front Front design may vary depending on...
Installation diagrams Appliance and cut-out dimensions Miele ovens can be installed flush or proud. For the more current specifications please visit the Miele website. 99 Undercounter installation 21 15/16" (558 mm) 23 5/8" (600 mm) ( 21 5/8" 550 mm) 7/8" 16"... mm) 21 1/2" (546 mm) Cut-out (4" x 22" / 100 mm x 560 mm) in the bottom of the cabinet for power cord and ventilation Power cord with plug * Oven with glass front ** Oven with your architect, designer and installer. Discuss your installation requirements with metal front Front design may vary depending on...


