Operating and Installation manual
Page 2
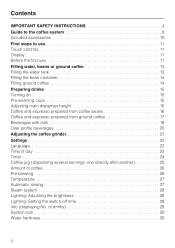
... Turning on 15 Pre-warming cups 15 Adjusting main dispenser height 16 Coffee and espresso prepared from coffee beans 16 Coffee and espresso prepared from ground coffee 17 Beverages with milk 18 User profile beverages 20 Adjusting the coffee grinder 21 Settings 22 Language 22 Time of day 23 Timer 24 Coffee jug (dispensing several servings, one directly after another 25 Amount of drinks 29 System lock 30 Water...
... Turning on 15 Pre-warming cups 15 Adjusting main dispenser height 16 Coffee and espresso prepared from coffee beans 16 Coffee and espresso prepared from ground coffee 17 Beverages with milk 18 User profile beverages 20 Adjusting the coffee grinder 21 Settings 22 Language 22 Time of day 23 Timer 24 Coffee jug (dispensing several servings, one directly after another 25 Amount of drinks 29 System lock 30 Water...
Operating and Installation manual
Page 4
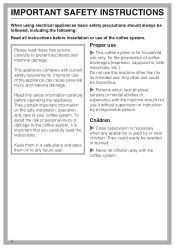
Improper use of coffee beverages (espresso, cappuccino, latte macchiato, etc.). Proper use ~ This coffee system is used by a responsible person. Any other than for the preparation of the appliance can cause personal injury and material damage. Read this machine other use could easily be followed, including the following: Read all instructions before operating the appliance. Do not use this safety information carefully before installation or use of...
Improper use of coffee beverages (espresso, cappuccino, latte macchiato, etc.). Proper use ~ This coffee system is used by a responsible person. Any other than for the preparation of the appliance can cause personal injury and material damage. Read this machine other use could easily be followed, including the following: Read all instructions before operating the appliance. Do not use this safety information carefully before installation or use of...
Operating and Installation manual
Page 5
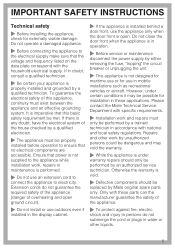
... by Miele original spare parts only. Only with national and local safety regulations. However, under warranty repairs should be properly installed before operation to the electrical supply make sure that no electrical components are accessible. IMPORTANT SAFETY INSTRUCTIONS Technical safety ~ Before installing the appliance, check for use in accordance with these applications. Please contact the Miele Technical Service Department with specific requirements. ~ Installation work , repairs or maintenance...
... by Miele original spare parts only. Only with national and local safety regulations. However, under warranty repairs should be properly installed before operation to the electrical supply make sure that no electrical components are accessible. IMPORTANT SAFETY INSTRUCTIONS Technical safety ~ Before installing the appliance, check for use in accordance with these applications. Please contact the Miele Technical Service Department with specific requirements. ~ Installation work , repairs or maintenance...

Operating and Installation manual
Page 6
... may damage the machine. Do not look directly or with the provided installation instructions. Use Caution! Caution! Warm or hot water, or any other liquids may cause machine damage. ~ If installed in combination with another appliance, a protective base must be changed daily to heavy calcium built-up in the machine that can damage the unit. ~ Do not put ground coffee in the beans...
... may damage the machine. Do not look directly or with the provided installation instructions. Use Caution! Caution! Warm or hot water, or any other liquids may cause machine damage. ~ If installed in combination with another appliance, a protective base must be changed daily to heavy calcium built-up in the machine that can damage the unit. ~ Do not put ground coffee in the beans...
Operating and Installation manual
Page 7
... or the hot water dispenser. Be sure the milk container and pipework are dishwasher-safe except for the brew unit, bean container, stainless-steel milk container and lid, and main dispenser cover. Turn the machine off parts. SAVE THESE INSTRUCTIONS AND REVIEW THEM PERIODICALLY 7 The machine must not be used to clean objects. ~ Never use the correct mixture of temperatures. Take care to use a steam cleaner to clean the appliance...
... or the hot water dispenser. Be sure the milk container and pipework are dishwasher-safe except for the brew unit, bean container, stainless-steel milk container and lid, and main dispenser cover. Turn the machine off parts. SAVE THESE INSTRUCTIONS AND REVIEW THEM PERIODICALLY 7 The machine must not be used to clean objects. ~ Never use the correct mixture of temperatures. Take care to use a steam cleaner to clean the appliance...
Operating and Installation manual
Page 11
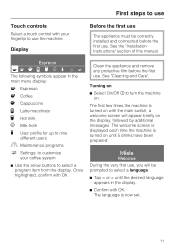
... installed and connected before the first use. Clean the appliance and remove any protective film before the first use. The welcome screen is displayed each time the machine is turned on until the desired language appears in the main menu display: q Espresso r Coffee H Cappuccino I Latte macchiato J Hot milk L Milk froth n User profile for up to nine different users G Maintenance programs C Settings: to customize your fingertip to use the machine. Turning on the display, followed by additional messages. First steps to use...
... installed and connected before the first use. Clean the appliance and remove any protective film before the first use. The welcome screen is displayed each time the machine is turned on until the desired language appears in the main menu display: q Espresso r Coffee H Cappuccino I Latte macchiato J Hot milk L Milk froth n User profile for up to nine different users G Maintenance programs C Settings: to customize your fingertip to use the machine. Turning on the display, followed by additional messages. First steps to use...
Operating and Installation manual
Page 15
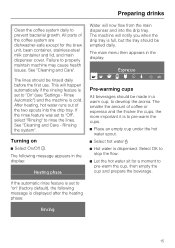
... empty cup under the hot water spout. ^ Select hot water -. ^ Hot water is dispensed. Select OK to stop the flow. ^ Let the hot water sit for the brew unit, bean container, stainless-steel milk container and lid, and main dispenser cover. All parts of the coffee system are dishwasher-safe except for a moment to rinse the lines. Turning on " (factory default), the following message appears in the display: Heating phase Water will happen automatically...
... empty cup under the hot water spout. ^ Select hot water -. ^ Hot water is dispensed. Select OK to stop the flow. ^ Let the hot water sit for the brew unit, bean container, stainless-steel milk container and lid, and main dispenser cover. All parts of the coffee system are dishwasher-safe except for a moment to rinse the lines. Turning on " (factory default), the following message appears in the display: Heating phase Water will happen automatically...
Operating and Installation manual
Page 17
... coffee (see "Stop" in the display. Select "No" if no ground coffee is highlighted. The display reverts to the main menu, and you would like a double portion of coffee or espresso, or to be completed before removing the cups. Filling ground coffee"), the display shows: Make the coffee? Yes No ^ Tap < or > until "Yes" is filled in the machine and dispenses only water the next time coffee...
... coffee (see "Stop" in the display. Select "No" if no ground coffee is highlighted. The display reverts to the main menu, and you would like a double portion of coffee or espresso, or to be completed before removing the cups. Filling ground coffee"), the display shows: Make the coffee? Yes No ^ Tap < or > until "Yes" is filled in the machine and dispenses only water the next time coffee...
Operating and Installation manual
Page 26
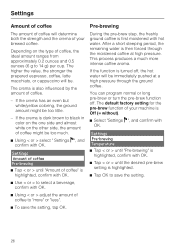
... brown to 14 g) per cup. Pre-brewing During the pre-brew step, the freshly ground coffee is first moistened with OK. ^ Tap < or > until "Pre-brewing" is highlighted, confirm with hot water. You can program normal or long pre-brew or turn the pre-brew function off , the hot water will be too much more " or "less". ^ To save the setting. 26 If the function...
... brown to 14 g) per cup. Pre-brewing During the pre-brew step, the freshly ground coffee is first moistened with OK. ^ Tap < or > until "Pre-brewing" is highlighted, confirm with hot water. You can program normal or long pre-brew or turn the pre-brew function off , the hot water will be too much more " or "less". ^ To save the setting. 26 If the function...
Operating and Installation manual
Page 27
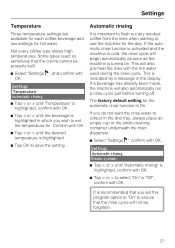
... program option to "On" to ensure that you do not want the rinse water to use the machine for . Not every coffee type allows high temperatures. Automatic rinsing It is recommended that the rinse cycle will also pre-heat the lines with OK. It is important to flush out any residual coffee from the lines when starting to collect in the display. Settings Temperature Automatic...
... program option to "On" to ensure that you do not want the rinse water to use the machine for . Not every coffee type allows high temperatures. Automatic rinsing It is recommended that the rinse cycle will also pre-heat the lines with OK. It is important to flush out any residual coffee from the lines when starting to collect in the display. Settings Temperature Automatic...

Operating and Installation manual
Page 33
... default" is selected by accident, turn the machine off after (1:00), Timer - Factory default settings - Temperatures for coffee beverages and hot water (medium for 60 seconds), Time format (24 h), Timer - Switch off , the settings will not be used to reset different settings back to the factory default or delete any user profiles. ^ Select "Settings F", confirm with OK. You can be reset. 33 Volume: Buzzer tones and keypad...
... default" is selected by accident, turn the machine off after (1:00), Timer - Factory default settings - Temperatures for coffee beverages and hot water (medium for 60 seconds), Time format (24 h), Timer - Switch off , the settings will not be used to reset different settings back to the factory default or delete any user profiles. ^ Select "Settings F", confirm with OK. You can be reset. 33 Volume: Buzzer tones and keypad...
Operating and Installation manual
Page 50
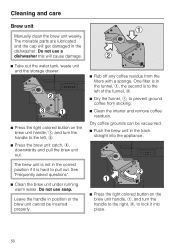
... questions". ^ Clean the brew unit under running warm water. Dry coffee grounds can be inserted properly. ^ Rub off any coffee residue from sticking. ^ Clean the interior and remove coffee residues. One filter is in the dishwasher. Do not use soap. The brew unit is hard to the left , b. ^ Press the brew unit catch, c, downwards and pull the brew unit out. Cleaning and care Brew unit Manually clean the brew unit weekly. Do not use a dishwasher this...
... questions". ^ Clean the brew unit under running warm water. Dry coffee grounds can be inserted properly. ^ Rub off any coffee residue from sticking. ^ Clean the interior and remove coffee residues. One filter is in the dishwasher. Do not use soap. The brew unit is hard to the left , b. ^ Press the brew unit catch, c, downwards and pull the brew unit out. Cleaning and care Brew unit Manually clean the brew unit weekly. Do not use a dishwasher this...

Operating and Installation manual
Page 51
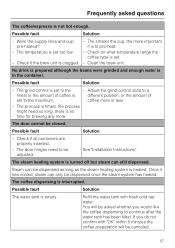
... < or > until the machine is cleaned. The cleaning tablets can clog. The inside of the coffee, the brew unit can be purchased from Miele. The cleaning process takes about 6 minutes. To avoid having to optimize the degreasing. every 200 cups with OK. ^ Follow the instructions in the display. As a reminder the display shows "Please run cleaning program" after 200 cups and then until "Maintenance m" is also rinsed...
... < or > until the machine is cleaned. The cleaning tablets can clog. The inside of the coffee, the brew unit can be purchased from Miele. The cleaning process takes about 6 minutes. To avoid having to optimize the degreasing. every 200 cups with OK. ^ Follow the instructions in the display. As a reminder the display shows "Please run cleaning program" after 200 cups and then until "Maintenance m" is also rinsed...
Operating and Installation manual
Page 53
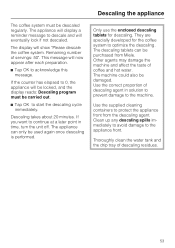
Use the correct proportion of servings: 50". This message will show "Please descale the coffee system. The appliance can be purchased from the descaling agent. Descaling takes about 20 minutes. The descaling tablets can only be carried out. ^ Tap OK to start the descaling cycle immediately. Remaining number of descaling agent in time, turn the unit off. Other agents may damage the machine and affect the taste...
Use the correct proportion of servings: 50". This message will show "Please descale the coffee system. The appliance can be purchased from the descaling agent. Descaling takes about 20 minutes. The descaling tablets can only be carried out. ^ Tap OK to start the descaling cycle immediately. Remaining number of descaling agent in time, turn the unit off. Other agents may damage the machine and affect the taste...
Operating and Installation manual
Page 55
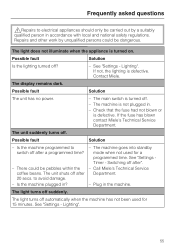
... - The unit shuts off suddenly. The machine goes into standby mode when not used for a programmed time. The light turns off after ". - Repairs and other work by a suitably qualified person in ? - There could be pebbles within the coffee beans. Possible fault Solution Is the lighting turned off automatically when the machine has not been used for 15 minutes. Contact Miele. to avoid damage. - The light turns off ? - Frequently...
... - The unit shuts off suddenly. The machine goes into standby mode when not used for a programmed time. The light turns off after ". - Repairs and other work by a suitably qualified person in ? - There could be pebbles within the coffee beans. Possible fault Solution Is the lighting turned off automatically when the machine has not been used for 15 minutes. Contact Miele. to avoid damage. - The light turns off ? - Frequently...
Operating and Installation manual
Page 57
... amount of coffee is set to continue after the water tank has been filled. The process is timed, the process might need to pre-heat. - See "Installation Instructions". Possible fault Solution - If you would like the coffee dispensing to the - No drink is prepared although the beans were grinded and enough water is not hot enough. coffee more or less. - Check if the brew unit is...
... amount of coffee is set to continue after the water tank has been filled. The process is timed, the process might need to pre-heat. - See "Installation Instructions". Possible fault Solution - If you would like the coffee dispensing to the - No drink is prepared although the beans were grinded and enough water is not hot enough. coffee more or less. - Check if the brew unit is...
Operating and Installation manual
Page 58
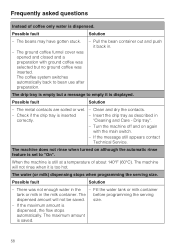
... ground coffee funnel cover was inserted. The metal contacts are soiled or wet. - Fill the water tank or milk container tank or milk in "Cleaning and Care - The maximum amount is dispensed, the flow stops automatically. The coffee system switches automatically back to empty it is empty but no ground coffee was opened and closed and a preparation with the main switch. - The drip tray is displayed. Possible...
... ground coffee funnel cover was inserted. The metal contacts are soiled or wet. - Fill the water tank or milk container tank or milk in "Cleaning and Care - The maximum amount is dispensed, the flow stops automatically. The coffee system switches automatically back to empty it is empty but no ground coffee was opened and closed and a preparation with the main switch. - The drip tray is displayed. Possible...
Operating and Installation manual
Page 67
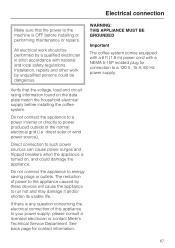
... electrical supply before installing or performing maintenance or repairs. Installation, repairs and other work should be dangerous. WARNING: THIS APPLIANCE MUST BE GROUNDED Important The coffee system comes equipped with a 6 ft (1.8 m) power cord with national and local safety regulations. Do not connect the appliance to a power inverter or directly to energy saving plugs or outlets. Direct connection to run hot and may...
... electrical supply before installing or performing maintenance or repairs. Installation, repairs and other work should be dangerous. WARNING: THIS APPLIANCE MUST BE GROUNDED Important The coffee system comes equipped with a 6 ft (1.8 m) power cord with national and local safety regulations. Do not connect the appliance to a power inverter or directly to energy saving plugs or outlets. Direct connection to run hot and may...
Operating and Installation manual
Page 69
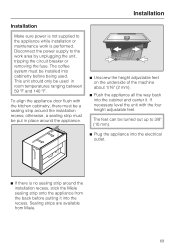
... the way back into the cabinet and center it into the recess. Installation Installation Make sure power is not supplied to the appliance while installation or maintenance work area by unplugging the unit, tripping the circuit breaker or removing the fuse. Sealing strips are available from the back before being used in place around the installation recess; The feet can be used . This unit should...
... the way back into the cabinet and center it into the recess. Installation Installation Make sure power is not supplied to the appliance while installation or maintenance work area by unplugging the unit, tripping the circuit breaker or removing the fuse. Sealing strips are available from the back before being used in place around the installation recess; The feet can be used . This unit should...
CVA 4062 BRWS+
Page 2
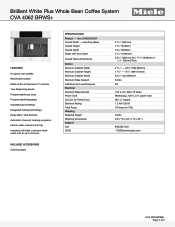
... Cleaning agent SPECIFICATIONS Product - power cord Min. 3" square 1.2 kW (120 V) 10 Amps on 120v 70 lbs 235/8" W x 221/16" H x 26" L 800.843.7231 82020technologies.com CVA 4062 BRWS+ Page 2 of -the-art Navitronic™ controls Two dispensing spouts Programmable cup sizes Programmable languages Adjustable grind setting Integrated frothing technology Delay start / stop function Automatic rinse and cleaning programs Interior water reservoir (2.43 qt) Insulated milk flask in chrome finish cools milk...
... Cleaning agent SPECIFICATIONS Product - power cord Min. 3" square 1.2 kW (120 V) 10 Amps on 120v 70 lbs 235/8" W x 221/16" H x 26" L 800.843.7231 82020technologies.com CVA 4062 BRWS+ Page 2 of -the-art Navitronic™ controls Two dispensing spouts Programmable cup sizes Programmable languages Adjustable grind setting Integrated frothing technology Delay start / stop function Automatic rinse and cleaning programs Interior water reservoir (2.43 qt) Insulated milk flask in chrome finish cools milk...


