
User Guide
Page 1
... Card 11 Downloading and Transferring Files 12 Safely Removing the Hardware .....19 Operation 20 • Turning the Power On/Off .........20 • To Listen to MP3s/WMAs ..........21 • Hold Switch 22 • Music Mixer Button 22 • To Pause Playback 23 • Forward/Reverse Skip 23 • High-Speed Music...; Setting the Music Mixer 38 • Viewing the System Info (About) ..39 • Setting the Parental Control ......40 Troubleshooting Guide 41 Specifications 42 Formatting the Player 43 Updating the Firmware 44 Resetting the Unit 44 1
... Card 11 Downloading and Transferring Files 12 Safely Removing the Hardware .....19 Operation 20 • Turning the Power On/Off .........20 • To Listen to MP3s/WMAs ..........21 • Hold Switch 22 • Music Mixer Button 22 • To Pause Playback 23 • Forward/Reverse Skip 23 • High-Speed Music...; Setting the Music Mixer 38 • Viewing the System Info (About) ..39 • Setting the Parental Control ......40 Troubleshooting Guide 41 Specifications 42 Formatting the Player 43 Updating the Firmware 44 Resetting the Unit 44 1

User Guide
Page 2
...heat sources; You should exercise extreme caution or discontinue use headphones while driving, cycling or operating any liquid onto or into the player. • Do not leave the player in a car with DRM or WAV tracks without permission is illegal in a location subject to play your headset at a high... hazardous situations. 2 ROAD SAFETY: • Do not use in damage or sound distortion. • Avoid spilling any motorized vehicle. on the player may create a traffic hazard and it is a violation of international copyright laws. PRECAUTIONS COPYRIGHT: • Distributing copies of...
...heat sources; You should exercise extreme caution or discontinue use headphones while driving, cycling or operating any liquid onto or into the player. • Do not leave the player in a car with DRM or WAV tracks without permission is illegal in a location subject to play your headset at a high... hazardous situations. 2 ROAD SAFETY: • Do not use in damage or sound distortion. • Avoid spilling any motorized vehicle. on the player may create a traffic hazard and it is a violation of international copyright laws. PRECAUTIONS COPYRIGHT: • Distributing copies of...

User Guide
Page 12
...the external memory card when the unit is compatible with DRM 9 using Windows Media Player 10, and safely remove your unit from the Internet or use encoding software to convert music that you can download digital music files from the computer. Once these files are stored on your computer you ...have on an audio CD into MP3 or WMA format using Windows Media Player 10, transfer MP3/WMA files and WMA files with the following pages to ...
...the external memory card when the unit is compatible with DRM 9 using Windows Media Player 10, and safely remove your unit from the Internet or use encoding software to convert music that you can download digital music files from the computer. Once these files are stored on your computer you ...have on an audio CD into MP3 or WMA format using Windows Media Player 10, transfer MP3/WMA files and WMA files with the following pages to ...

User Guide
Page 13
... the procedure on page 15 to transfer music files to your player, simply drag and drop MP3 or WMA files/folders from anywhere on page 17. 13 To add more files and songs to the player. You must use Windows Media Player 9 or 10 to the USB port on your computer to ...the "Removable Disk" window. 4. Connect your computer screen. 3. See page 19, "Safely Removing Your Player From the Computer" to disconnect. A "Removable Disk" window will not play back if you can transfer music files (MP3, WMA, WMA files with DRM 9 will automatically pop-up on your "My Computer" folder which ...
... the procedure on page 15 to transfer music files to your player, simply drag and drop MP3 or WMA files/folders from anywhere on page 17. 13 To add more files and songs to the player. You must use Windows Media Player 9 or 10 to the USB port on your computer to ...the "Removable Disk" window. 4. Connect your computer screen. 3. See page 19, "Safely Removing Your Player From the Computer" to disconnect. A "Removable Disk" window will not play back if you can transfer music files (MP3, WMA, WMA files with DRM 9 will automatically pop-up on your "My Computer" folder which ...

User Guide
Page 14
.... 4. You can also use a Macintosh computer with an operating system of your digital audio player located on your Macintosh. 3. Your player is ready to transfer audio files. 1. NOTE: This unit supports MP3 and WMA file formats. DOWNLOADING AND TRANSFERRING FILES (CONT.) TRANSFERRING AUDIO FILES TO ...YOUR DIGITAL AUDIO PLAYER USING A MACINTOSH COMPUTER Make sure to use the keyboard shortcuts by dragging it to the USB port on...
.... 4. You can also use a Macintosh computer with an operating system of your digital audio player located on your Macintosh. 3. Your player is ready to transfer audio files. 1. NOTE: This unit supports MP3 and WMA file formats. DOWNLOADING AND TRANSFERRING FILES (CONT.) TRANSFERRING AUDIO FILES TO ...YOUR DIGITAL AUDIO PLAYER USING A MACINTOSH COMPUTER Make sure to use the keyboard shortcuts by dragging it to the USB port on...

User Guide
Page 15
... WMA format. 2. NOTE: For Windows ME and Windows 2000, please use the corresponding Windows Media Player for the newly ripped music (MP3 format or Windows 15 Open the Windows Media Player 10 Browser, then click on the "Rip" icon on "Options"; Click on the "Tools" menu option at the top menu bar, then...
... WMA format. 2. NOTE: For Windows ME and Windows 2000, please use the corresponding Windows Media Player for the newly ripped music (MP3 format or Windows 15 Open the Windows Media Player 10 Browser, then click on the "Rip" icon on "Options"; Click on the "Tools" menu option at the top menu bar, then...
User Guide
Page 16
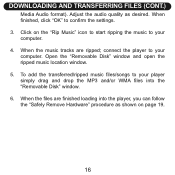
... as shown on the "Rip Music" icon to start ripping the music to your player simply drag and drop the MP3 and/or WMA files into the player, you can follow the "Safely Remove Hardware" procedure as desired. connect the player to your computer. 4. When the music tracks are finished loading into the "Removable...
... as shown on the "Rip Music" icon to start ripping the music to your player simply drag and drop the MP3 and/or WMA files into the player, you can follow the "Safely Remove Hardware" procedure as desired. connect the player to your computer. 4. When the music tracks are finished loading into the "Removable...

User Guide
Page 17
... 10" and click on the "Sync List" pull-down menu to locate the music files you wish to the player, follow the procedure described below using Windows Media Player 10. Before beginning the procedure please turn the unit on and connect the unit to the files. 17 DOWNLOADING AND ...TRANSFERRING FILES (CONT.) TRANSFERRING MP3/WMA FILES AND WMA FILES WITH DRM 9 USING WINDOWS MEDIA PLAYER 10 (FOR WINDOWS XP ONLY) To transfer MP3 files/WMA files/...
... 10" and click on the "Sync List" pull-down menu to locate the music files you wish to the player, follow the procedure described below using Windows Media Player 10. Before beginning the procedure please turn the unit on and connect the unit to the files. 17 DOWNLOADING AND ...TRANSFERRING FILES (CONT.) TRANSFERRING MP3/WMA FILES AND WMA FILES WITH DRM 9 USING WINDOWS MEDIA PLAYER 10 (FOR WINDOWS XP ONLY) To transfer MP3 files/WMA files/...

User Guide
Page 20
... TURNING THE POWER ON/OFF 1 1 2 1 2 2 Turn the unit on the number of songs that you transferred to the player. the Welcome screen will start playing. 20 Then the MP3/WMA track's information will appear in the display and playback will take several seconds to several minutes to update the... player's library or the music files depending on by sliding the Power/Hold switch 1 to the Off position or...
... TURNING THE POWER ON/OFF 1 1 2 1 2 2 Turn the unit on the number of songs that you transferred to the player. the Welcome screen will start playing. 20 Then the MP3/WMA track's information will appear in the display and playback will take several seconds to several minutes to update the... player's library or the music files depending on by sliding the Power/Hold switch 1 to the Off position or...

User Guide
Page 41
.... Raise the volume using the Navigation/Volume + button. methods. Insert headphones. The Player is not securely Make sure the player is OFF. WMA files with DRM. Power/Hold switch is connected. The MP3 or WMA files are not showing up. Recharge battery as described in this manual....The computer is not named The files must have the same the same as the MP3 file. securely connected. No lyrics file. See manual to On position. Insert *.lrc lyrics file in the player. The *.lrc file is not recognizing the player. name before the ".mp3"/".lrc". 41
.... Raise the volume using the Navigation/Volume + button. methods. Insert headphones. The Player is not securely Make sure the player is OFF. WMA files with DRM. Power/Hold switch is connected. The MP3 or WMA files are not showing up. Recharge battery as described in this manual....The computer is not named The files must have the same the same as the MP3 file. securely connected. No lyrics file. See manual to On position. Insert *.lrc lyrics file in the player. The *.lrc file is not recognizing the player. name before the ".mp3"/".lrc". 41


