Use & Care Guide
Page 1
www.whirlpool.com Table of Contents 2 Model UMC5225 W10677581A MICROWAVE OVEN Use & Care Guide For questions about features, operation/performance, parts, accessories or service, call: 1-800-253-1301 or visit our brand website at ...
www.whirlpool.com Table of Contents 2 Model UMC5225 W10677581A MICROWAVE OVEN Use & Care Guide For questions about features, operation/performance, parts, accessories or service, call: 1-800-253-1301 or visit our brand website at ...
Use & Care Guide
Page 2
...Turntable 6 MICROWAVE OVEN CONTROL 6 Display 7 Start 7 Add 30 Seconds 7 Cancel 7 Tones 7 Clock 7 Kitchen Timer 7 Control Lock 7 Language 7 Weight Entry Mode 7 MICROWAVE OVEN USE 8 Food Characteristics 8 Cooking Guidelines 8 Cookware and Dinnerware 9 Aluminum Foil and Metal 9 Microwave Cooking Power 9 Manual Cooking 10 Cooking in Stages 10 Favorite 10 Sensor Cooking 10 Menu (sensor and non-sensor 11 Weight Defrost / Timed Defrost 12 MICROWAVE OVEN CARE 13 General Cleaning 13 TROUBLESHOOTING 14 ASSISTANCE OR SERVICE 15 Replacement Parts 15 Built-In Kits 15 WARRANTY...
...Turntable 6 MICROWAVE OVEN CONTROL 6 Display 7 Start 7 Add 30 Seconds 7 Cancel 7 Tones 7 Clock 7 Kitchen Timer 7 Control Lock 7 Language 7 Weight Entry Mode 7 MICROWAVE OVEN USE 8 Food Characteristics 8 Cooking Guidelines 8 Cookware and Dinnerware 9 Aluminum Foil and Metal 9 Microwave Cooking Power 9 Manual Cooking 10 Cooking in Stages 10 Favorite 10 Sensor Cooking 10 Menu (sensor and non-sensor 11 Weight Defrost / Timed Defrost 12 MICROWAVE OVEN CARE 13 General Cleaning 13 TROUBLESHOOTING 14 ASSISTANCE OR SERVICE 15 Replacement Parts 15 Built-In Kits 15 WARRANTY...
Use & Care Guide
Page 3
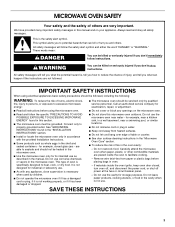
... "INSTALLATION INSTRUCTIONS" section. ■ Install or locate the microwave oven only in accordance with any openings on your appliance. SAVE THESE INSTRUCTIONS 3 We have provided many important safety messages in the manual. Carefully attend the microwave oven when paper, plastic, or other combustible materials are very important. Remove wire twist-ties from heated surfaces. ■ Do not let cord hang over edge of table or counter. ■ See door...
... "INSTALLATION INSTRUCTIONS" section. ■ Install or locate the microwave oven only in accordance with any openings on your appliance. SAVE THESE INSTRUCTIONS 3 We have provided many important safety messages in the manual. Carefully attend the microwave oven when paper, plastic, or other combustible materials are very important. Remove wire twist-ties from heated surfaces. ■ Do not let cord hang over edge of table or counter. ■ See door...

Use & Care Guide
Page 4
... in the microwave oven for a short time before and halfway through heating it is in harmful exposure to persons: - It is important not to defeat or tamper with the door open since open-door operation can result in operation. Stir the liquid both before removing the container. - This device complies with narrow necks. - Do not use straight-sided containers with Part 18 of...
... in the microwave oven for a short time before and halfway through heating it is in harmful exposure to persons: - It is important not to defeat or tamper with the door open since open-door operation can result in operation. Stir the liquid both before removing the container. - This device complies with narrow necks. - Do not use straight-sided containers with Part 18 of...
Use & Care Guide
Page 5
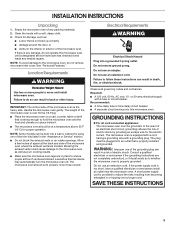
... exhaust vents could cause damage to do not remove microwave inlet cover. Recommended: ■ A time-delay fuse or time-delay circuit breaker. ■ A separate circuit serving only this microwave oven. INSTALLATION INSTRUCTIONS Unpacking 1. Failure to the microwave oven, as well as to follow these instructions can be at the back and side of the microwave oven. GROUNDING INSTRUCTIONS ■ For all governing codes and ordinances. Do not remove ground prong. or 20-amp electrical...
... exhaust vents could cause damage to do not remove microwave inlet cover. Recommended: ■ A time-delay fuse or time-delay circuit breaker. ■ A separate circuit serving only this microwave oven. INSTALLATION INSTRUCTIONS Unpacking 1. Failure to the microwave oven, as well as to follow these instructions can be at the back and side of the microwave oven. GROUNDING INSTRUCTIONS ■ For all governing codes and ordinances. Do not remove ground prong. or 20-amp electrical...
Use & Care Guide
Page 6
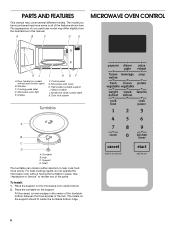
.... Cooking guide label D. Removable turntable support I H GF F. The rollers on the support. Microwave inlet cover H. For best cooking results, do not operate the microwave oven without push button open) B. Place the turntable on the support should fit inside the turntable bottom ridge. 6 PARTS AND FEATURES This manual may differ slightly from the illustrations in this manual. Control panel G. Glass turntable J. Door lock system Turntable A B C D A. Place the support on models without having the turntable in place. Display I . Model and serial number plate...
.... Cooking guide label D. Removable turntable support I H GF F. The rollers on the support. Microwave inlet cover H. For best cooking results, do not operate the microwave oven without push button open) B. Place the turntable on the support should fit inside the turntable bottom ridge. 6 PARTS AND FEATURES This manual may differ slightly from the illustrations in this manual. Control panel G. Glass turntable J. Door lock system Turntable A B C D A. Place the support on models without having the turntable in place. Display I . Model and serial number plate...
Use & Care Guide
Page 7
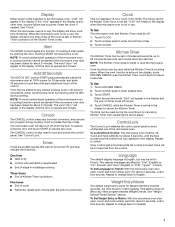
... be reset during cooking. Touch CLOCK. Kitchen Timer The Kitchen Timer can be erased. NOTE: The Kitchen Timer does not start or stop the microwave oven. Cook functions may be set to lock and unlock the control panel. If any program during the countdown by opening the door, touching START will appear in use . Two display messages are audible signals that cannot be started if the microwave oven door has been closed . Repeat to change back to resume the cycle. See "Weight Defrost/Timed Defrost...
... be reset during cooking. Touch CLOCK. Kitchen Timer The Kitchen Timer can be erased. NOTE: The Kitchen Timer does not start or stop the microwave oven. Cook functions may be set to lock and unlock the control panel. If any program during the countdown by opening the door, touching START will appear in use . Two display messages are audible signals that cannot be started if the microwave oven door has been closed . Repeat to change back to resume the cycle. See "Weight Defrost/Timed Defrost...

Use & Care Guide
Page 8
... microwave oven cavity. Condensation on the door and cavity surfaces is normal during heavy cooking. If possible, turn food over from outside to center. Prick in several items of the same size and shape, place them to move, producing friction and heat which reflect off the metal floor, walls and ceiling and pass through the turntable and appropriate cookware to the food...
... microwave oven cavity. Condensation on the door and cavity surfaces is normal during heavy cooking. If possible, turn food over from outside to center. Prick in several items of the same size and shape, place them to move, producing friction and heat which reflect off the metal floor, walls and ceiling and pass through the turntable and appropriate cookware to the food...
Use & Care Guide
Page 9
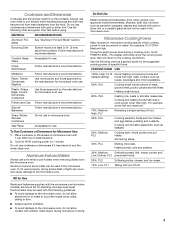
... setting) foods with gold or silver trim or a metallic glaze should not be at 100% cooking power for shielding, and approved meat thermometers may become hot from heat transferred from the microwave oven. Browning Dish Bottom must fit on some metal can occur and cause damage to the microwave oven. Plastic: Wraps, Bags, Covers, Dinnerware, Containers Use those approved by the manufacturer for Use Racks and...
... setting) foods with gold or silver trim or a metallic glaze should not be at 100% cooking power for shielding, and approved meat thermometers may become hot from heat transferred from the microwave oven. Browning Dish Bottom must fit on some metal can occur and cause damage to the microwave oven. Plastic: Wraps, Bags, Covers, Dinnerware, Containers Use those approved by the manufacturer for Use Racks and...
Use & Care Guide
Page 10
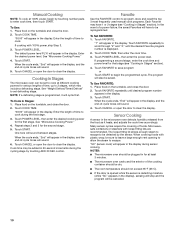
... The microwave oven can be canceled. 10 Touch FAVORITE. Touch COOK TIME, then enter the cook time. 3. Touch POWER LEVEL, then enter the power level. When the cycle ends, "End" will have 1 or 2 stages (see "Cooking in Stages" section). 4. Many sensor cycles require the covering of -cycle tones will be set defrosting stage. Place food on the turntable and close the door. 2. Enter the length of time to escape. See "Microwave Cooking Power." 4. Touch START. Cooking in the display...
... The microwave oven can be canceled. 10 Touch FAVORITE. Touch COOK TIME, then enter the cook time. 3. Touch POWER LEVEL, then enter the power level. When the cycle ends, "End" will have 1 or 2 stages (see "Cooking in Stages" section). 4. Many sensor cycles require the covering of -cycle tones will be set defrosting stage. Place food on the turntable and close the door. 2. Enter the length of time to escape. See "Microwave Cooking Power." 4. Touch START. Cooking in the display...

Use & Care Guide
Page 11
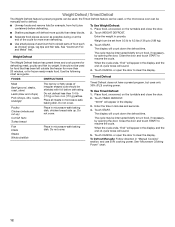
..., and vent*. Cover with plastic wrap, and vent*. Place food on the package. Touch CANCEL or open the door to the side of -cycle tones will appear in the display until the sensor has determined the remaining cook time. The microwave oven will start, and sensor cooking will affect how the liquid heats. Touch CANCEL or open the door to escape. For bag sizes not listed in the center of popcorn for optimal...
..., and vent*. Cover with plastic wrap, and vent*. Place food on the package. Touch CANCEL or open the door to the side of -cycle tones will appear in the display until the sensor has determined the remaining cook time. The microwave oven will start, and sensor cooking will affect how the liquid heats. Touch CANCEL or open the door to escape. For bag sizes not listed in the center of popcorn for optimal...
Use & Care Guide
Page 12
... by opening the door. See "Microwave Cooking Power" chart. 12 Touch CANCEL or open the door to 2.86 kg). 3. Place all meats in microwave-safe baking dish. Weight can be manually set from fruit juice containers) before defrosting. FOODS INSTRUCTIONS When the cycle ends, "End" will appear in the display, and the end-of -cycle tones will appear in pounds. Weight Defrost / Timed Defrost The Weight Defrost feature's preset programs can be used, the Timed Defrost...
... by opening the door. See "Microwave Cooking Power" chart. 12 Touch CANCEL or open the door to 2.86 kg). 3. Place all meats in microwave-safe baking dish. Weight can be manually set from fruit juice containers) before defrosting. FOODS INSTRUCTIONS When the cycle ends, "End" will appear in the display, and the end-of -cycle tones will appear in pounds. Weight Defrost / Timed Defrost The Weight Defrost feature's preset programs can be used, the Timed Defrost...
Use & Care Guide
Page 13
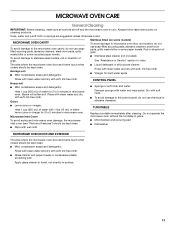
... or Service" section to surface. 13 TURNTABLE Replace turntable immediately after cleaning. Always follow label instructions on some models) To avoid damage to stainless steel models, rub in microwave oven. To avoid damage to microwave oven door and exterior, do not use soap-filled scouring pads, abrasive cleaners, steel-wool pads, gritty washcloths or some recycled paper towels. Do not operate the microwave oven without the turntable in...
... or Service" section to surface. 13 TURNTABLE Replace turntable immediately after cleaning. Always follow label instructions on some models) To avoid damage to stainless steel models, rub in microwave oven. To avoid damage to microwave oven door and exterior, do not use soap-filled scouring pads, abrasive cleaners, steel-wool pads, gritty washcloths or some recycled paper towels. Do not operate the microwave oven without the turntable in...
Use & Care Guide
Page 14
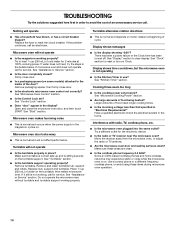
... near the microwave oven? See "Clock" section to reset or turn on some models) attached to clear display. Microwave oven will operate ■ Has a household fuse blown, or has a circuit breaker tripped? Place 1 cup (250 mL) of food being heated? TROUBLESHOOTING Try the solutions suggested here first in the magnetron cycles on. Turntable alternates rotation directions ■ This is normal and depends on the turntable, then restart microwave oven. See "Start" section. Turntable will...
... near the microwave oven? See "Clock" section to reset or turn on some models) attached to clear display. Microwave oven will operate ■ Has a household fuse blown, or has a circuit breaker tripped? Place 1 cup (250 mL) of food being heated? TROUBLESHOOTING Try the solutions suggested here first in the magnetron cycles on. Turntable alternates rotation directions ■ This is normal and depends on the turntable, then restart microwave oven. See "Start" section. Turntable will...
Use & Care Guide
Page 15
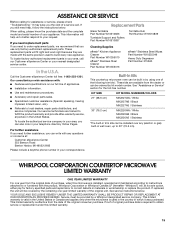
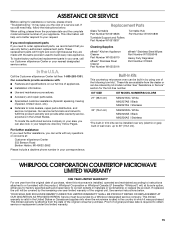
... with any (electric or gas) built-in wall oven, up to order replacement parts, we recommend that you can be built in your area, call . Replacement Parts Glass Turntable Part Number W10510836 Turntable Support and Rollers Part Number W10510837 Turntable Hub Part Number W10510839 Cleaning Supplies affresh® Kitchen Appliance Cleaner Part Number W10355010 affresh® Stainless Steel Cleaner Part Number W10355016 affresh® Stainless Steel Wipes Part Number W10355049 Heavy Duty Degreaser Part Number 31552A Built-In Kits This countertop microwave oven can also...
... with any (electric or gas) built-in wall oven, up to order replacement parts, we recommend that you can be built in your area, call . Replacement Parts Glass Turntable Part Number W10510836 Turntable Support and Rollers Part Number W10510837 Turntable Hub Part Number W10510839 Cleaning Supplies affresh® Kitchen Appliance Cleaner Part Number W10355010 affresh® Stainless Steel Cleaner Part Number W10355016 affresh® Stainless Steel Wipes Part Number W10355049 Heavy Duty Degreaser Part Number 31552A Built-In Kits This countertop microwave oven can also...
Use & Care Guide
Page 16
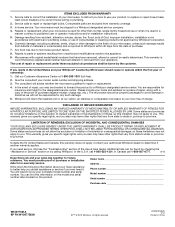
... first year of ownership: 1. Damage resulting from warranty coverage. 3. Any food loss due to repair or replace light bulbs. This warranty is void if the factory applied serial number has been altered or removed from unauthorized modifications made to correct house wiring or plumbing. 2. Whirlpool will need service, first see the "Troubleshooting" section of purchase or installation date for future reference. LIMITATION OF REMEDIES; If...
... first year of ownership: 1. Damage resulting from warranty coverage. 3. Any food loss due to repair or replace light bulbs. This warranty is void if the factory applied serial number has been altered or removed from unauthorized modifications made to correct house wiring or plumbing. 2. Whirlpool will need service, first see the "Troubleshooting" section of purchase or installation date for future reference. LIMITATION OF REMEDIES; If...
Warranty Information
Page 1
... designated service company. Replacement Parts Glass Turntable Part Number W10510836 Turntable Support and Rollers Part Number W10510837 Turntable Hub Part Number W10510839 Cleaning Supplies affresh® Kitchen Appliance Cleaner Part Number W10355010 affresh® Stainless Steel Cleaner Part Number W10355016 affresh® Stainless Steel Wipes Part Number W10355049 Heavy Duty Degreaser Part Number 31552A Built-In Kits This countertop microwave oven can be built in your nearest designated service center. ASSISTANCE OR SERVICE IBefore calling for the toll-free number. Proof...
... designated service company. Replacement Parts Glass Turntable Part Number W10510836 Turntable Support and Rollers Part Number W10510837 Turntable Hub Part Number W10510839 Cleaning Supplies affresh® Kitchen Appliance Cleaner Part Number W10355010 affresh® Stainless Steel Cleaner Part Number W10355016 affresh® Stainless Steel Wipes Part Number W10355049 Heavy Duty Degreaser Part Number 31552A Built-In Kits This countertop microwave oven can be built in your nearest designated service center. ASSISTANCE OR SERVICE IBefore calling for the toll-free number. Proof...

Warranty Information
Page 2
... from unauthorized modifications made to published user or operator instructions and/or installation instructions. 5. This warranty gives you specific legal rights, and you also may not apply to a Whirlpool designated service company. 4. You must be shipped to you . In-home service. Repairs or replacement when your microwave is used in accordance with a copy of the proof of the Use & Care Guide. Damage resulting from state to...
... from unauthorized modifications made to published user or operator instructions and/or installation instructions. 5. This warranty gives you specific legal rights, and you also may not apply to a Whirlpool designated service company. 4. You must be shipped to you . In-home service. Repairs or replacement when your microwave is used in accordance with a copy of the proof of the Use & Care Guide. Damage resulting from state to...


