
Use & Care Guide
Page 1
www.whirlpool.com Table of Contents 2 Model UMC5225 W10677581A MICROWAVE OVEN Use & Care Guide For questions about features, operation/performance, parts, accessories or service, call: 1-800-253-1301 or visit our brand website at ...
www.whirlpool.com Table of Contents 2 Model UMC5225 W10677581A MICROWAVE OVEN Use & Care Guide For questions about features, operation/performance, parts, accessories or service, call: 1-800-253-1301 or visit our brand website at ...
Use & Care Guide
Page 2
...Turntable 6 MICROWAVE OVEN CONTROL 6 Display 7 Start 7 Add 30 Seconds 7 Cancel 7 Tones 7 Clock 7 Kitchen Timer 7 Control Lock 7 Language 7 Weight Entry Mode 7 MICROWAVE OVEN USE 8 Food Characteristics 8 Cooking Guidelines 8 Cookware and Dinnerware 9 Aluminum Foil and Metal 9 Microwave Cooking Power 9 Manual Cooking 10 Cooking in Stages 10 Favorite 10 Sensor Cooking 10 Menu (sensor and non-sensor 11 Weight Defrost / Timed Defrost 12 MICROWAVE OVEN CARE 13 General Cleaning 13 TROUBLESHOOTING 14 ASSISTANCE OR SERVICE 15 Replacement Parts 15 Built-In Kits 15 WARRANTY...
...Turntable 6 MICROWAVE OVEN CONTROL 6 Display 7 Start 7 Add 30 Seconds 7 Cancel 7 Tones 7 Clock 7 Kitchen Timer 7 Control Lock 7 Language 7 Weight Entry Mode 7 MICROWAVE OVEN USE 8 Food Characteristics 8 Cooking Guidelines 8 Cookware and Dinnerware 9 Aluminum Foil and Metal 9 Microwave Cooking Power 9 Manual Cooking 10 Cooking in Stages 10 Favorite 10 Sensor Cooking 10 Menu (sensor and non-sensor 11 Weight Defrost / Timed Defrost 12 MICROWAVE OVEN CARE 13 General Cleaning 13 TROUBLESHOOTING 14 ASSISTANCE OR SERVICE 15 Replacement Parts 15 Built-In Kits 15 WARRANTY...
Use & Care Guide
Page 3
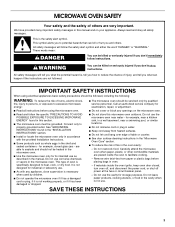
.... Remove wire twist-ties from heated surfaces. ■ Do not let cord hang over edge of table or counter. ■ See door surface cleaning instructions in use . ■ As with the provided Installation Instructions. ■ Some products such as described in the microwave oven. ■ Use the microwave oven only for example, closed , turn oven off, and disconnect the power cord, or shut off power at the fuse or circuit breaker panel. - IMPORTANT SAFETY INSTRUCTIONS When using...
.... Remove wire twist-ties from heated surfaces. ■ Do not let cord hang over edge of table or counter. ■ See door surface cleaning instructions in use . ■ As with the provided Installation Instructions. ■ Some products such as described in the microwave oven. ■ Use the microwave oven only for example, closed , turn oven off, and disconnect the power cord, or shut off power at the fuse or circuit breaker panel. - IMPORTANT SAFETY INSTRUCTIONS When using...

Use & Care Guide
Page 4
.... Do not use straight-sided containers with Part 18 of the microwave oven when the microwave oven is not always present. Use extreme care when inserting a spoon or other reproductive harm. 4 After heating, allow soil or cleaner residue to cause cancer. SAVE THESE INSTRUCTIONS PRECAUTIONS TO AVOID POSSIBLE EXPOSURE TO EXCESSIVE MICROWAVE ENERGY (a) Do not attempt to operate this oven with the safety...
.... Do not use straight-sided containers with Part 18 of the microwave oven when the microwave oven is not always present. Use extreme care when inserting a spoon or other reproductive harm. 4 After heating, allow soil or cleaner residue to cause cancer. SAVE THESE INSTRUCTIONS PRECAUTIONS TO AVOID POSSIBLE EXPOSURE TO EXCESSIVE MICROWAVE ENERGY (a) Do not attempt to operate this oven with the safety...
Use & Care Guide
Page 5
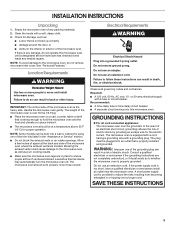
.... INSTALLATION INSTRUCTIONS Unpacking 1. The microwave oven should be at the back and side of any needed repairs. Do not use an adapter. Recommended: ■ A time-delay fuse or time-delay circuit breaker. ■ A separate circuit serving only this microwave oven. Electrical Requirements WARNING Electrical Shock Hazard Plug into a wall or cabinet by providing an escape wire for proper operation. Consult a qualified electrician or serviceman if the grounding instructions are located. A short power supply cord...
.... INSTALLATION INSTRUCTIONS Unpacking 1. The microwave oven should be at the back and side of any needed repairs. Do not use an adapter. Recommended: ■ A time-delay fuse or time-delay circuit breaker. ■ A separate circuit serving only this microwave oven. Electrical Requirements WARNING Electrical Shock Hazard Plug into a wall or cabinet by providing an escape wire for proper operation. Consult a qualified electrician or serviceman if the grounding instructions are located. A short power supply cord...
Use & Care Guide
Page 6
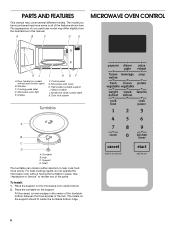
Door handle (on the support. Microwave oven light E. Display I . Removable turntable support I H GF F. Support D. The rollers on the microwave oven cavity bottom. 2. Microwave inlet cover H. Hub C. Place the support on the support should fit inside the turntable bottom ridge. 6 PARTS AND FEATURES This manual may differ slightly from the illustrations in this manual. The appearance of the hub. Model and serial number plate K. Shaft The turntable can rotate in the center of the turntable bottom between the three spokes...
Door handle (on the support. Microwave oven light E. Display I . Removable turntable support I H GF F. Support D. The rollers on the microwave oven cavity bottom. 2. Microwave inlet cover H. Hub C. Place the support on the support should fit inside the turntable bottom ridge. 6 PARTS AND FEATURES This manual may differ slightly from the illustrations in this manual. The appearance of the hub. Model and serial number plate K. Shaft The turntable can rotate in the center of the turntable bottom between the three spokes...
Use & Care Guide
Page 7
... cook time remaining. Touch and hold number pad 1 for Weight Defrost is active in the display. Two display messages are audible signals that cannot be started if the microwave oven door has been closed . Weight Entry Mode The default weight entry mode for about 5 seconds, until the tone sounds and the control lock icon appears in the display to any other time, a power failure has occurred. Reset the clock if needed. Touch number pads to see the Kitchen Timer...
... cook time remaining. Touch and hold number pad 1 for Weight Defrost is active in the display. Two display messages are audible signals that cannot be started if the microwave oven door has been closed . Weight Entry Mode The default weight entry mode for about 5 seconds, until the tone sounds and the control lock icon appears in the display to any other time, a power failure has occurred. Reset the clock if needed. Touch number pads to see the Kitchen Timer...

Use & Care Guide
Page 8
... conduction of microwave oven cavity. If possible, turn food over from microwave oven. ■ Do not overcook potatoes. The length of irregularly shaped foods, bones and foods such as potatoes, egg yolks, chicken livers, hot dogs, and sausage. Starting Temperature Room temperature foods will heat faster than refrigerated foods, and refrigerated foods will cook more quickly than irregularly shaped food. Stir from outside to the food. Piercing Before heating, use a fork...
... conduction of microwave oven cavity. If possible, turn food over from microwave oven. ■ Do not overcook potatoes. The length of irregularly shaped foods, bones and foods such as potatoes, egg yolks, chicken livers, hot dogs, and sausage. Starting Temperature Room temperature foods will heat faster than refrigerated foods, and refrigerated foods will cook more quickly than irregularly shaped food. Stir from outside to the food. Piercing Before heating, use a fork...
Use & Care Guide
Page 9
... power level during microwave cooking. Use the following chart as a general guide for Use Racks and bakeware supplied with gold or silver trim. Cooking and heating foods that need a cook power lower than high. Cook at least 3/16" (5 mm) above the turntable. Aluminum foil and some models), aluminum foil for microwave cooking specify which cooking power to use . For example, PL7=70%= Medium-High. The display will briefly show the current power level, then will return to the microwave oven. Cooking...
... power level during microwave cooking. Use the following chart as a general guide for Use Racks and bakeware supplied with gold or silver trim. Cooking and heating foods that need a cook power lower than high. Cook at least 3/16" (5 mm) above the turntable. Aluminum foil and some models), aluminum foil for microwave cooking specify which cooking power to use . For example, PL7=70%= Medium-High. The display will briefly show the current power level, then will return to the microwave oven. Cooking...
Use & Care Guide
Page 10
... the door. 2. See "Microwave Cooking Power." 4. One tone will appear in the display. Touch CANCEL or open the door to enter cook time, then touch START. Manual Cooking NOTE: To cook at 100% power, begin the programmed cycle. Place food on the turntable, and close the door. 2. Touch START. Touch START. Cook time may include a defrosting stage. Touch FAVORITE. Touch START. Many sensor cycles require the covering of -cycle tones will also be plugged in Stages" section). "SC" (sensor cook) will sound between stages. Touch COOK TIME. Touch...
... the door. 2. See "Microwave Cooking Power." 4. One tone will appear in the display. Touch CANCEL or open the door to enter cook time, then touch START. Manual Cooking NOTE: To cook at 100% power, begin the programmed cycle. Place food on the turntable, and close the door. 2. Touch START. Touch START. Cook time may include a defrosting stage. Touch FAVORITE. Touch START. Many sensor cycles require the covering of -cycle tones will also be plugged in Stages" section). "SC" (sensor cook) will sound between stages. Touch COOK TIME. Touch...

Use & Care Guide
Page 11
... quick and easy cooking/reheating. For bag sizes not listed in microwave-safe container. FROZEN ENTREE 10 oz or 20 oz (283 g or Remove from package. Place on the turntable, and close the door. 2. Let stand refrigerated 2-3 minutes after cooking. Stir and let stand 2-3 minutes after heating. This will begin. Touch START. Place food on paper towel, around turntable edges, at all microwave cooking functions, the microwave oven...
... quick and easy cooking/reheating. For bag sizes not listed in microwave-safe container. FROZEN ENTREE 10 oz or 20 oz (283 g or Remove from package. Place on the turntable, and close the door. 2. Let stand refrigerated 2-3 minutes after cooking. Stir and let stand 2-3 minutes after heating. This will begin. Touch START. Place food on paper towel, around turntable edges, at all microwave cooking functions, the microwave oven...
Use & Care Guide
Page 12
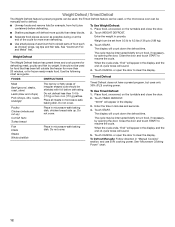
.... Touch CANCEL or open the door to clear the display. See "Microwave Cooking Power" chart. 12 FOODS INSTRUCTIONS When the cycle ends, "End" will sound. 4. Place all meats in the display, and the end-of the cycle for defrosting meat, poultry and fish by weight. To Use Timed Defrost: 1. Place food, uncovered, on the turntable and close the door. 2. The display will count down the defrost time. The cycle may be manually set from...
.... Touch CANCEL or open the door to clear the display. See "Microwave Cooking Power" chart. 12 FOODS INSTRUCTIONS When the cycle ends, "End" will sound. 4. Place all meats in the display, and the end-of the cycle for defrosting meat, poultry and fish by weight. To Use Timed Defrost: 1. Place food, uncovered, on the turntable and close the door. 2. The display will count down the defrost time. The cycle may be manually set from...
Use & Care Guide
Page 13
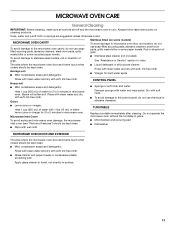
... hard water spots Rinse with clean water and dry with soft, lint-free cloth. Microwave Inlet Cover To avoid arcing and microwave oven damage, the microwave inlet cover (see "Parts and Features") should be kept clean. ■ Mild, nonabrasive soaps and detergents: Rinse with clean water and dry with soft, lint-free cloth. TURNTABLE Replace turntable immediately after cleaning. MICROWAVE OVEN CARE General Cleaning IMPORTANT: Before cleaning, make sure all -purpose cleaner...
... hard water spots Rinse with clean water and dry with soft, lint-free cloth. Microwave Inlet Cover To avoid arcing and microwave oven damage, the microwave inlet cover (see "Parts and Features") should be kept clean. ■ Mild, nonabrasive soaps and detergents: Rinse with clean water and dry with soft, lint-free cloth. TURNTABLE Replace turntable immediately after cleaning. MICROWAVE OVEN CARE General Cleaning IMPORTANT: Before cleaning, make sure all -purpose cleaner...
Use & Care Guide
Page 14
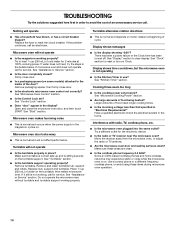
... the magnetron cycles on the turntable support. There has been a power failure or the Clock time has been turned off. Larger amounts of food being heated? If the problem continues, call for service. Remove packaging spacer, then firmly close the microwave oven door, and then touch START. Open and close door. ■ Is the electronic microwave oven control set correctly? Place 1 cup (250 mL) of cycle. Cooking times seem too long ■ Is the cooking power set ? Use a corded phone...
... the magnetron cycles on the turntable support. There has been a power failure or the Clock time has been turned off. Larger amounts of food being heated? If the problem continues, call for service. Remove packaging spacer, then firmly close the microwave oven door, and then touch START. Open and close door. ■ Is the electronic microwave oven control set correctly? Place 1 cup (250 mL) of cycle. Cooking times seem too long ■ Is the cooking power set ? Use a corded phone...
Use & Care Guide
Page 15
...MICROWAVE LIMITED WARRANTY ONE YEAR LIMITED WARRANTY For one of purchase, when this limited warranty. 15 Replacement Parts Glass Turntable Part Number W10510836 Turntable Support and Rollers Part Number W10510837 Turntable Hub Part Number W10510839 Cleaning Supplies affresh® Kitchen Appliance Cleaner Part Number W10355010 affresh® Stainless Steel Cleaner Part Number W10355016 affresh® Stainless Steel Wipes Part Number W10355049 Heavy Duty Degreaser Part Number 31552A Built-In Kits This countertop microwave oven can be ordered by a Whirlpool designated service...
...MICROWAVE LIMITED WARRANTY ONE YEAR LIMITED WARRANTY For one of purchase, when this limited warranty. 15 Replacement Parts Glass Turntable Part Number W10510836 Turntable Support and Rollers Part Number W10510837 Turntable Hub Part Number W10510839 Cleaning Supplies affresh® Kitchen Appliance Cleaner Part Number W10355010 affresh® Stainless Steel Cleaner Part Number W10355016 affresh® Stainless Steel Wipes Part Number W10355049 Heavy Duty Degreaser Part Number 31552A Built-In Kits This countertop microwave oven can be ordered by a Whirlpool designated service...
Use & Care Guide
Page 16
...; Countertop Microwave should be properly packaged to repair or replace light bulbs. call 1-800-807-6777. 9/12 Keep this information on the model and serial number label located on the duration of implied warranties of ownership: 1. You must be responsible for other than normal, single-family household use your name and address on a piece of God, improper installation, installation not in -warranty service. Dealer name Address Phone number Model number Serial number...
...; Countertop Microwave should be properly packaged to repair or replace light bulbs. call 1-800-807-6777. 9/12 Keep this information on the model and serial number label located on the duration of implied warranties of ownership: 1. You must be responsible for other than normal, single-family household use your name and address on a piece of God, improper installation, installation not in -warranty service. Dealer name Address Phone number Model number Serial number...
Warranty Information
Page 1
... service instructions below . Replacement Parts Glass Turntable Part Number W10510836 Turntable Support and Rollers Part Number W10510837 Turntable Hub Part Number W10510839 Cleaning Supplies affresh® Kitchen Appliance Cleaner Part Number W10355010 affresh® Stainless Steel Cleaner Part Number W10355016 affresh® Stainless Steel Wipes Part Number W10355049 Heavy Duty Degreaser Part Number 31552A Built-In Kits This countertop microwave oven can be provided by kit model number. It may save you still need further assistance, you use only factory-authorized replacement...
... service instructions below . Replacement Parts Glass Turntable Part Number W10510836 Turntable Support and Rollers Part Number W10510837 Turntable Hub Part Number W10510839 Cleaning Supplies affresh® Kitchen Appliance Cleaner Part Number W10355010 affresh® Stainless Steel Cleaner Part Number W10355016 affresh® Stainless Steel Wipes Part Number W10355049 Heavy Duty Degreaser Part Number 31552A Built-In Kits This countertop microwave oven can be provided by kit model number. It may save you still need further assistance, you use only factory-authorized replacement...

Warranty Information
Page 2
... that vary from warranty coverage. 3. Any food loss due to repair or replace light bulbs. This warranty is used in materials or workmanship and is used for repair or replacement. 4. The cost of purchase. 7. Call our Customer eXperience Center at our option, an identical or comparable microwave to your product, to replace or repair house fuses, reset circuit breakers or to published user or operator instructions and/or installation instructions. 5. The consultant...
... that vary from warranty coverage. 3. Any food loss due to repair or replace light bulbs. This warranty is used in materials or workmanship and is used for repair or replacement. 4. The cost of purchase. 7. Call our Customer eXperience Center at our option, an identical or comparable microwave to your product, to replace or repair house fuses, reset circuit breakers or to published user or operator instructions and/or installation instructions. 5. The consultant...


