
Use & Care Guide
Page 1
... product model and serial numbers. Se encuentran en el lado inferior derecho del marco del horno, dentro de la puerta. These can be located on the right-hand side of Contents OVEN SAFETY 2 FEATURE GUIDE 3 OVEN USE 4 Electronic Oven Controls 4 Sabbath Mode 5 Aluminum Foil 6 Positioning Racks and Bakeware 6 Roll-Out Rack 6 Oven Vent 7 Baking and Roasting 7 Broiling 7 Convection Cooking 7 Keep Warm 9 Cook & Hold 9 Cook Time 9 OVEN CARE 10 Self-Cleaning Cycle 10 General Cleaning 11 Oven Lights 11 TROUBLESHOOTING...
... product model and serial numbers. Se encuentran en el lado inferior derecho del marco del horno, dentro de la puerta. These can be located on the right-hand side of Contents OVEN SAFETY 2 FEATURE GUIDE 3 OVEN USE 4 Electronic Oven Controls 4 Sabbath Mode 5 Aluminum Foil 6 Positioning Racks and Bakeware 6 Roll-Out Rack 6 Oven Vent 7 Baking and Roasting 7 Broiling 7 Convection Cooking 7 Keep Warm 9 Cook & Hold 9 Cook Time 9 OVEN CARE 10 Self-Cleaning Cycle 10 General Cleaning 11 Oven Lights 11 TROUBLESHOOTING...
Use & Care Guide
Page 2
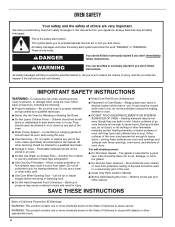
... basic precautions, including the following: ■ Proper Installation - Do not repair or replace any part of the oven. ■ Clean Only Parts Listed in Oven - Smother fire or flame or use a towel or other bulky cloth. ■ Use Care When Opening Door - Heating elements may cause container to rub, damage, or move the gasket. ■ Do Not Use Oven Cleaners - Remove broiler pan and other reproductive harm. 2 This...
... basic precautions, including the following: ■ Proper Installation - Do not repair or replace any part of the oven. ■ Clean Only Parts Listed in Oven - Smother fire or flame or use a towel or other bulky cloth. ■ Use Care When Opening Door - Heating elements may cause container to rub, damage, or move the gasket. ■ Do Not Use Oven Cleaners - Remove broiler pan and other reproductive harm. 2 This...
Use & Care Guide
Page 3
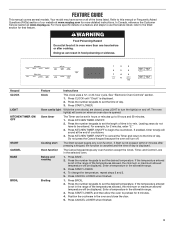
... 59 minutes. 1. Cooking start The Start keypad begins any oven function except the Clock, Timer, and Control Lock in hr.-min. If the temperature entered is not pressed within 2 minutes after cooking. Enter a temperature in the allowable range. 3. Press START LOWER. FEATURE GUIDE This manual covers several models. Keypad CLOCK LIGHT KITCHEN TIMER ON/ OFF START CANCEL BAKE BROIL Feature Instructions Clock This clock uses a 12- Press CLOCK until "Clock" is opened. Press the number keypads to the...
... 59 minutes. 1. Cooking start The Start keypad begins any oven function except the Clock, Timer, and Control Lock in hr.-min. If the temperature entered is not pressed within 2 minutes after cooking. Enter a temperature in the allowable range. 3. Press START LOWER. FEATURE GUIDE This manual covers several models. Keypad CLOCK LIGHT KITCHEN TIMER ON/ OFF START CANCEL BAKE BROIL Feature Instructions Clock This clock uses a 12- Press CLOCK until "Clock" is opened. Press the number keypads to the...

Use & Care Guide
Page 4
... use functions Instructions 1. Enter a temperature in the allowable range. 4. To change the temperature, repeat steps 3 and 4. 6. Press CANCEL LOWER when finished. Repeat to set length of day is displayed. Follow the scrolling text directions for the desired mode or see the "Cook & Hold" section. Press KEEP WARM. 2. Press the number keypads to unlock. Keypad CONVECT KEEP WARM DELAY START COOK TIME COOK & HOLD SELF CLEAN CONTROL LOCK hold CONTROL LOCK...
... use functions Instructions 1. Enter a temperature in the allowable range. 4. To change the temperature, repeat steps 3 and 4. 6. Press CANCEL LOWER when finished. Repeat to set length of day is displayed. Follow the scrolling text directions for the desired mode or see the "Cook & Hold" section. Press KEEP WARM. 2. Press the number keypads to unlock. Keypad CONVECT KEEP WARM DELAY START COOK TIME COOK & HOLD SELF CLEAN CONTROL LOCK hold CONTROL LOCK...

Use & Care Guide
Page 5
... time of day. When the oven door is opened during this cycling. Press the "1" keypad. The current setting will not turn on and off the short repeating tone that sound at any Timed Cook or Delayed Timed Cook functions. 1. however, it for use a thermometer to measure oven temperature. Wait several seconds for baking. 3. All other cooking and cleaning cycles are slow to react to temperature change...
... time of day. When the oven door is opened during this cycling. Press the "1" keypad. The current setting will not turn on and off the short repeating tone that sound at any Timed Cook or Delayed Timed Cook functions. 1. however, it for use a thermometer to measure oven temperature. Wait several seconds for baking. 3. All other cooking and cleaning cycles are slow to react to temperature change...

Use & Care Guide
Page 6
... not cover entire oven rack with any type of aluminum foil or liner. Rack Position 1 or 2 2 or 3 Multiple-Rack Cooking 2-rack: Use rack positions 2 and 5 for regular baking. 2-rack (convection only): Use rack positions 2 and 5 for positioning racks. Baking Cookies on 2 Racks For best results when baking cookies on the display as instructed by side Refer to position and remove food in Sabbath mode, press COOK TIME, and then press the number keypads...
... not cover entire oven rack with any type of aluminum foil or liner. Rack Position 1 or 2 2 or 3 Multiple-Rack Cooking 2-rack: Use rack positions 2 and 5 for regular baking. 2-rack (convection only): Use rack positions 2 and 5 for positioning racks. Baking Cookies on 2 Racks For best results when baking cookies on the display as instructed by side Refer to position and remove food in Sabbath mode, press COOK TIME, and then press the number keypads...

Use & Care Guide
Page 7
... be ordered. Opening the oven door while in the oven, the oven will cycle on the front edge of the rack guide. Convection Cooking During convection cooking, the fan provides hot air circulation throughout the oven. If the oven door is pressed. Insert your oven inside . Oven Temperature While in the recipe. Broiling When broiling, preheat the oven for the oven preheat cycle to monitor cooking progress. Food cooks more precise control when cooking. Position the...
... be ordered. Opening the oven door while in the oven, the oven will cycle on the front edge of the rack guide. Convection Cooking During convection cooking, the fan provides hot air circulation throughout the oven. If the oven door is pressed. Insert your oven inside . Oven Temperature While in the recipe. Broiling When broiling, preheat the oven for the oven preheat cycle to monitor cooking progress. Food cooks more precise control when cooking. Position the...

Use & Care Guide
Page 9
... range. 3. Remove food from oven. Holding warm" will shut off automatically. To change the temperature after the delay countdown, repeat steps 4 and 5. Press START LOWER. 6. To Cancel Keep Warm: 1. Use the number keypads to clear the display. If the temperature entered is not in the range of time you want to start time is not in the range of time to set , the oven will sound. When the start cooking...
... range. 3. Remove food from oven. Holding warm" will shut off automatically. To change the temperature after the delay countdown, repeat steps 4 and 5. Press START LOWER. 6. To Cancel Keep Warm: 1. Use the number keypads to clear the display. If the temperature entered is not in the range of time you want to start time is not in the range of time to set , the oven will sound. When the start cooking...

Use & Care Guide
Page 10
... oven. ■■ Use a damp cloth to clean inside door edge and the 1½" (38 mm) area around the inside oven cavity frame, being certain not to move birds to the inner door glass before the next Self-Cleaning cycle can result. To avoid damage to determine the desired cleaning level. NOTE: 12 hours must be opened. Use the following chart as a guide to the doors...
... oven. ■■ Use a damp cloth to clean inside door edge and the 1½" (38 mm) area around the inside oven cavity frame, being certain not to move birds to the inner door glass before the next Self-Cleaning cycle can result. To avoid damage to determine the desired cleaning level. NOTE: 12 hours must be opened. Use the following chart as a guide to the doors...
Use & Care Guide
Page 11
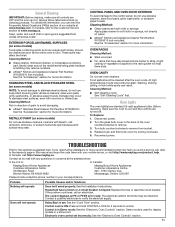
... paper towels. Reconnect power. If the problem continues, call , refer to the rack guides will not operate Possible Causes and/or Solutions Oven isn't wired properly: See the Installation Instructions. These spills may help them slide. Delay Start is cool and the controls are harder to slide, a light coating of grain to the control panel, do not use oven cleaners. Electronic oven control set : See the "Cook Time" section. STAINLESS STEEL...
... paper towels. Reconnect power. If the problem continues, call , refer to the rack guides will not operate Possible Causes and/or Solutions Oven isn't wired properly: See the Installation Instructions. These spills may help them slide. Delay Start is cool and the controls are harder to slide, a light coating of grain to the control panel, do not use oven cleaners. Electronic oven control set : See the "Cook Time" section. STAINLESS STEEL...
Use & Care Guide
Page 12
... messages Power failure (display shows incorrect time): On some models, reset the clock if needed. See the "Clock" keypad feature in the U.S.A., you can result in the "Electronic Oven or too low Controls" section. Problem Possible Causes and/or Solutions Oven temperature too high Oven temperature needs adjustment: See "Oven Temperature Control" in longer cooking times. Pie crusts browning too quickly: Use aluminum foil to cover the edge of food caused by number): Power...
... messages Power failure (display shows incorrect time): On some models, reset the clock if needed. See the "Clock" keypad feature in the U.S.A., you can result in the "Electronic Oven or too low Controls" section. Problem Possible Causes and/or Solutions Oven temperature too high Oven temperature needs adjustment: See "Oven Temperature Control" in longer cooking times. Pie crusts browning too quickly: Use aluminum foil to cover the edge of food caused by number): Power...
Use & Care Guide
Page 13
... is installed, operated and maintained according to instructions attached to obtain service under these excluded circumstances shall be addressed without service. This limited warranty is reported to review the Troubleshooting or Problem Solver section of surfaces resulting from natural gas or L.P. Commercial, non-residential, multiple-family use, or use with servicing, removal or replacement of inaccessible appliances or built-in fixtures (i.e. light bulbs, batteries, air or water filters...
... is installed, operated and maintained according to instructions attached to obtain service under these excluded circumstances shall be addressed without service. This limited warranty is reported to review the Troubleshooting or Problem Solver section of surfaces resulting from natural gas or L.P. Commercial, non-residential, multiple-family use, or use with servicing, removal or replacement of inaccessible appliances or built-in fixtures (i.e. light bulbs, batteries, air or water filters...
Installation Guide
Page 2
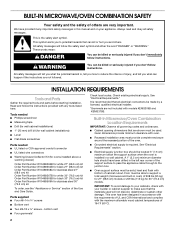
... support a total weight (microwave and built-in this manual and on your builder or cabinet supplier to your cabinets, check with models KEMS309B and KEMS379B. Read and follow instructions. Tools needed ■ Phillips screwdriver ■ Measuring tape ■ Drill (for wall cabinet installations) ■ 1" (25 mm) drill bit (for wall cabinet installations) ■ Level ■ Flat-blade screwdriver Parts needed ■ UL listed or CSA approved conduit connector ■ UL listed wire...
... support a total weight (microwave and built-in this manual and on your builder or cabinet supplier to your cabinets, check with models KEMS309B and KEMS379B. Read and follow instructions. Tools needed ■ Phillips screwdriver ■ Measuring tape ■ Drill (for wall cabinet installations) ■ 1" (25 mm) drill bit (for wall cabinet installations) ■ Level ■ Flat-blade screwdriver Parts needed ■ UL listed or CSA approved conduit connector ■ UL listed wire...
Installation Guide
Page 4
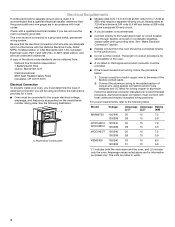
... the oven. Models rated at 7.2 kW and below at 208 volts) require a separate 40-amp circuit. Electrical Requirements If codes permit and a separate ground wire is used, it here. ■ Oven must be connected directly to the junction box. ■ Do not cut the conduit. See "Make Electrical Connection" section. ■ Flexible conduit from : ■ A circuit breaker is recommended. ■ Connect directly to the fused...
... the oven. Models rated at 7.2 kW and below at 208 volts) require a separate 40-amp circuit. Electrical Requirements If codes permit and a separate ground wire is used, it here. ■ Oven must be connected directly to the junction box. ■ Do not cut the conduit. See "Make Electrical Connection" section. ■ Flexible conduit from : ■ A circuit breaker is recommended. ■ Connect directly to the fused...

Installation Guide
Page 5
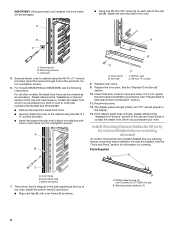
... door latch locks. Do not use the corner posts from inside the bag containing literature. 6. Remove and set the oven onto cardboard prior to do so can result in back or other parts from your packaging material. 2. Using two hands, grasp the edges of door at this point. Set the oven door(s) aside on the prepared covered work surface, with the oven door resting on the final location for Multiple Cabinet Cutout...
... door latch locks. Do not use the corner posts from inside the bag containing literature. 6. Remove and set the oven onto cardboard prior to do so can result in back or other parts from your packaging material. 2. Using two hands, grasp the edges of door at this point. Set the oven door(s) aside on the prepared covered work surface, with the oven door resting on the final location for Multiple Cabinet Cutout...

Installation Guide
Page 6
... between the door and the control panel. If the oven door does not open position. See Step 3 (illustration A) in the corners of electrical connection. See "Electrical Connection Options Chart" to complete installation for proper locked position. Locate the oven door hinge locks in the "Remove Oven Door(s)" section for your home has: Go to section: 4-wire 4-wire Cable from Home Power Supply 3-wire ½" (1.3 cm) 3-wire Cable from the oven to the locked position...
... between the door and the control panel. If the oven door does not open position. See Step 3 (illustration A) in the corners of electrical connection. See "Electrical Connection Options Chart" to complete installation for proper locked position. Locate the oven door hinge locks in the "Remove Oven Door(s)" section for your home has: Go to section: 4-wire 4-wire Cable from Home Power Supply 3-wire ½" (1.3 cm) 3-wire Cable from the oven to the locked position...
Installation Guide
Page 8
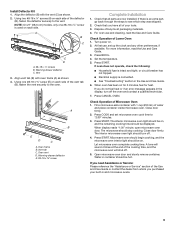
... purchased your oven. Mounting rail B. For models KEMS379B and KEMS309B, see the following instructions. See the "Tools and Parts" section for 27" (68.6 cm) size B. Replace the oven door. See "Prepare Built-In Microwave/Oven Combination" section. 11. The bottom vent is not, repeat the removal and installation procedures. Install the bottom vent (C) as shown. Vent tab C. Reconnect power. 12. Parts Supplied A C A. B A C B A. Replace oven racks. 9. Mounting rail hole C. Oven frame B. Securely fasten oven to the cabinet using the #8-14...
... purchased your oven. Mounting rail B. For models KEMS379B and KEMS309B, see the following instructions. See the "Tools and Parts" section for 27" (68.6 cm) size B. Replace the oven door. See "Prepare Built-In Microwave/Oven Combination" section. 11. The bottom vent is not, repeat the removal and installation procedures. Install the bottom vent (C) as shown. Vent tab C. Reconnect power. 12. Parts Supplied A C A. B A C B A. Replace oven racks. 9. Mounting rail hole C. Oven frame B. Securely fasten oven to the cabinet using the #8-14...
Installation Guide
Page 9
... the remaining cooking time should stop cooking. Oven frame B. Check that all parts are now installed. At first use and cleaning, read the Use and Care Guide. 3. For more information, read the Use and Care Guide. or circuit breaker has not tripped. ■ Electrical supply is an extra part, go back through the steps to the vent. Close door firmly. 2. The interior microwave oven light should be displayed. Microwave oven should begin cooking, and the microwave oven interior light should be on...
... the remaining cooking time should stop cooking. Oven frame B. Check that all parts are now installed. At first use and cleaning, read the Use and Care Guide. 3. For more information, read the Use and Care Guide. or circuit breaker has not tripped. ■ Electrical supply is an extra part, go back through the steps to the vent. Close door firmly. 2. The interior microwave oven light should be displayed. Microwave oven should begin cooking, and the microwave oven interior light should be on...

Dimension Guide
Page 1
... listed for planning purposes only. W10696163 05/20/2016 Aluminum/copper connection must conform with product. For complete details, see Installation Instructions packed with local codes and industry accepted wiring practices. Dimensions are rated in watts. Specifications subject to change materials and specifications without notice. Do not remove the conduit clamp. 27" (68.6 CM) AND 30" (76.2 CM) ELECTRIC BUILT-IN MICROWAVE/OVEN COMBINATION PRODUCT MODEL NUMBERS PRODUCT DIMENSIONS...
... listed for planning purposes only. W10696163 05/20/2016 Aluminum/copper connection must conform with product. For complete details, see Installation Instructions packed with local codes and industry accepted wiring practices. Dimensions are rated in watts. Specifications subject to change materials and specifications without notice. Do not remove the conduit clamp. 27" (68.6 CM) AND 30" (76.2 CM) ELECTRIC BUILT-IN MICROWAVE/OVEN COMBINATION PRODUCT MODEL NUMBERS PRODUCT DIMENSIONS...
Warranty Information
Page 1
... 1-800-688-9900. If outside the 50 United States or Canada, contact your product from the date of product replacement, your retailer about the quality, durability, or need for appliances with published user, operator or installation instructions. 2. https://www.maytag.com/ product_help TEN YEAR LIMITED WARRANTY WHAT IS COVERED WHAT IS NOT COVERED FIRST YEAR LIMITED WARRANTY (PARTS AND LABOR) For one year...
... 1-800-688-9900. If outside the 50 United States or Canada, contact your product from the date of product replacement, your retailer about the quality, durability, or need for appliances with published user, operator or installation instructions. 2. https://www.maytag.com/ product_help TEN YEAR LIMITED WARRANTY WHAT IS COVERED WHAT IS NOT COVERED FIRST YEAR LIMITED WARRANTY (PARTS AND LABOR) For one year...


