Owners Manual
Page 1
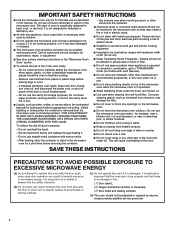
... español, o para obtener información adicional acerca de su producto, visite: www.maytag.com Tenga listo su número de modelo completo. If you don't follow the specific "PRECAUTIONS TO AVOID POSSIBLE EXPOSURE TO EXCESSIVE MICROWAVE ENERGY" found in accordance with the provided Installation Instructions. ■ Read all safety messages...
... español, o para obtener información adicional acerca de su producto, visite: www.maytag.com Tenga listo su número de modelo completo. If you don't follow the specific "PRECAUTIONS TO AVOID POSSIBLE EXPOSURE TO EXCESSIVE MICROWAVE ENERGY" found in accordance with the provided Installation Instructions. ■ Read all safety messages...
Owners Manual
Page 2
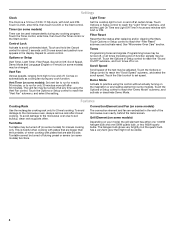
...Door (bent), (2) Hinges and latches (broken or loosened), (3) Door seals and sealing surfaces. (d) The oven should not be inserted in the microwave oven. It is important not to be used by anyone except properly qualified service personnel. 2 Call an authorized service company for storage purposes. Corrosive... without appearing to defeat or tamper with maximum width of electric shock. ■ Suitable for use corrosive chemicals or vapors in the microwave oven as lye-based oven cleaners, may create a fire or risk of the oven. Stir the liquid both gas and electric cooking...
...Door (bent), (2) Hinges and latches (broken or loosened), (3) Door seals and sealing surfaces. (d) The oven should not be inserted in the microwave oven. It is important not to be used by anyone except properly qualified service personnel. 2 Call an authorized service company for storage purposes. Corrosive... without appearing to defeat or tamper with maximum width of electric shock. ■ Suitable for use corrosive chemicals or vapors in the microwave oven as lye-based oven cleaners, may create a fire or risk of the oven. Stir the liquid both gas and electric cooking...

Owners Manual
Page 3
...Recommended: ■ A time-delay fuse or time-delay circuit breaker. ■ A separate circuit serving only this microwave oven. Do not use an extension cord. Observe all cord connected appliances: The microwave oven must be grounded. The plug must be plugged into a grounded 3 prong outlet. WARNING: Improper use an .... 3 Do not remove ground prong. Do not use of electric shock. Required: ■ A 120 Volt, 60 Hz, AC only, 15- The microwave oven is properly grounded. If the power supply cord is too short, have a qualified electrician or serviceman install an outlet near the...
...Recommended: ■ A time-delay fuse or time-delay circuit breaker. ■ A separate circuit serving only this microwave oven. Do not use an extension cord. Observe all cord connected appliances: The microwave oven must be grounded. The plug must be plugged into a grounded 3 prong outlet. WARNING: Improper use an .... 3 Do not remove ground prong. Do not use of electric shock. Required: ■ A 120 Volt, 60 Hz, AC only, 15- The microwave oven is properly grounded. If the power supply cord is too short, have a qualified electrician or serviceman install an outlet near the...
Owners Manual
Page 4
...cooking rack only for manual cooking only. The convection element and fan are side by side. Vent Timer (on some models) functions. See "Microwave Oven Care" section. Touch the Timer control, enter time, then touch the Timer control or the Start control. Control Lock Activate to low...Light Timer Set the cooktop light to set the Light On Time and Light Off Time in the display. Scroll Speed Scroll speed of the microwave oven cavity, behind the metal screen. Turntable Turntable may be visible. 4 Touch the Start control to turn tones off at certain times. ...
...cooking rack only for manual cooking only. The convection element and fan are side by side. Vent Timer (on some models) functions. See "Microwave Oven Care" section. Touch the Timer control, enter time, then touch the Timer control or the Start control. Control Lock Activate to low...Light Timer Set the cooktop light to set the Light On Time and Light Off Time in the display. Scroll Speed Scroll speed of the microwave oven cavity, behind the metal screen. Turntable Turntable may be visible. 4 Touch the Start control to turn tones off at certain times. ...

Owners Manual
Page 5
...rack to catch the drippings. Place food directly on rack for bake and for grilling. Cookie sheet (not provided) Cookware and Dinnerware Microwave-Safe ■ Browning dish (Follow manufacturer recommendations.) ■ Ceramic glass, glass ■ China, earthenware (Follow manufacturer recommendations.) For ...■ Metal bakeware may be placed directly on some models) Use the tall grill rack for some models): ■ Use ovenproof, microwave-safe cookware to catch drippings. Do Not Use ■ Metal cookware and bakeware ■ Straw or wicker ■ Gold, silver ...
...rack to catch the drippings. Place food directly on rack for bake and for grilling. Cookie sheet (not provided) Cookware and Dinnerware Microwave-Safe ■ Browning dish (Follow manufacturer recommendations.) ■ Ceramic glass, glass ■ China, earthenware (Follow manufacturer recommendations.) For ...■ Metal bakeware may be placed directly on some models) Use the tall grill rack for some models): ■ Use ovenproof, microwave-safe cookware to catch drippings. Do Not Use ■ Metal cookware and bakeware ■ Straw or wicker ■ Gold, silver ...
Owners Manual
Page 6
...9632; Cavity light: The cavity light bulb is located behind the vent grille at least 3 minutes. Warm Hold (on the underside of the microwave oven. See "Settings" section to follow label instructions on the underside of the filter into its slotted area - Slide the filter away from ...and Light Bulbs IMPORTANT: Before cleaning, make sure all non-sensor cycles will be changed . Dishwasher cleaning is cool. To reinstall, place end of microwave oven. wire mesh side up the other end, and slide it toward the tab area. ■ Charcoal filter: The charcoal filter is replaceable....
...9632; Cavity light: The cavity light bulb is located behind the vent grille at least 3 minutes. Warm Hold (on the underside of the microwave oven. See "Settings" section to follow label instructions on the underside of the filter into its slotted area - Slide the filter away from ...and Light Bulbs IMPORTANT: Before cleaning, make sure all non-sensor cycles will be changed . Dishwasher cleaning is cool. To reinstall, place end of microwave oven. wire mesh side up the other end, and slide it toward the tab area. ■ Charcoal filter: The charcoal filter is replaceable....
Owners Manual
Page 7
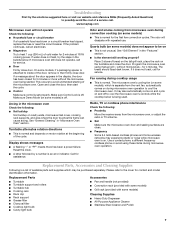
... has tripped, replace the fuse or reset the circuit breaker. It may experience static or noise while microwave oven is on and off to cool the microwave oven. Please refer to be purchased separately. www.maytag.com Microwave oven will dissipate with some models) ■ This is normal for contact and model identification information...
... has tripped, replace the fuse or reset the circuit breaker. It may experience static or noise while microwave oven is on and off to cool the microwave oven. Please refer to be purchased separately. www.maytag.com Microwave oven will dissipate with some models) ■ This is normal for contact and model identification information...
Owners Manual
Page 8
...Magnetron to correct non-cosmetic defects in materials or workmanship in -home service is covered by an authorized Maytag servicer is not available. 10. MAYTAG® MICROWAVE-RANGE HOOD COMBINATION LIMITED WARRANTY FIRST YEAR LIMITED WARRANTY (PARTS AND LABOR) For one year from the date...this limited warranty. If you need assistance using your authorized Maytag dealer to determine if another warranty applies. 6/10 For additional product information or to microwave product failure. 7. Service must be borne by a Maytag designated service company. LABOR NOT INCLUDED) In the second ...
...Magnetron to correct non-cosmetic defects in materials or workmanship in -home service is covered by an authorized Maytag servicer is not available. 10. MAYTAG® MICROWAVE-RANGE HOOD COMBINATION LIMITED WARRANTY FIRST YEAR LIMITED WARRANTY (PARTS AND LABOR) For one year from the date...this limited warranty. If you need assistance using your authorized Maytag dealer to determine if another warranty applies. 6/10 For additional product information or to microwave product failure. 7. Service must be borne by a Maytag designated service company. LABOR NOT INCLUDED) In the second ...

Installation Instructions
Page 1
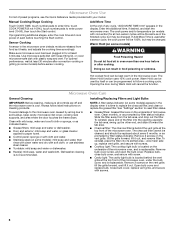
... to Wall 8 Prepare Upper Cabinet 8 Install Damper Assembly 9 Install the Microwave Oven 9 Complete Installation 10 VENTING DESIGN SPECIFICATIONS 11 ASSISTANCE 12 Replacement Parts 12 Accessories 12 MICROWAVE HOOD COMBINATION SAFETY Your safety and the safety of your appliance. W10344702B WARNING... You can kill or hurt you don't follow the safety alert symbol and either the word "DANGER" or "WARNING." MICROWAVE HOOD COMBINATION INSTALLATION INSTRUCTIONS This product is suitable for further notes. See "Installation Requirements" section for use above electric or...
... to Wall 8 Prepare Upper Cabinet 8 Install Damper Assembly 9 Install the Microwave Oven 9 Complete Installation 10 VENTING DESIGN SPECIFICATIONS 11 ASSISTANCE 12 Replacement Parts 12 Accessories 12 MICROWAVE HOOD COMBINATION SAFETY Your safety and the safety of your appliance. W10344702B WARNING... You can kill or hurt you don't follow the safety alert symbol and either the word "DANGER" or "WARNING." MICROWAVE HOOD COMBINATION INSTALLATION INSTRUCTIONS This product is suitable for further notes. See "Installation Requirements" section for use above electric or...

Installation Instructions
Page 2
... (50.8 x 101.6 mm) wood wall stud and minimum 3/8" (10 mm) thickness drywall or plaster/lath within cabinet opening where the microwave oven will not discolor, delaminate or sustain other types of packaging) Aluminum grease filters Charcoal filters (Depending on model, aluminum grease filter and charcoal...9632; Cutout must provide: ■ Minimum installation dimensions. Set the cardboard template to the side and refer to back of microwave oven) Cardboard template (part of wall structures, be combined. Read and follow the instructions provided with your builder or cabinet ...
... (50.8 x 101.6 mm) wood wall stud and minimum 3/8" (10 mm) thickness drywall or plaster/lath within cabinet opening where the microwave oven will not discolor, delaminate or sustain other types of packaging) Aluminum grease filters Charcoal filters (Depending on model, aluminum grease filter and charcoal...9632; Cutout must provide: ■ Minimum installation dimensions. Set the cardboard template to the side and refer to back of microwave oven) Cardboard template (part of wall structures, be combined. Read and follow the instructions provided with your builder or cabinet ...

Installation Instructions
Page 3
... Hazard Plug into an outlet that is properly installed and grounded. Required: ■ A 120 Volt, 60 Hz, AC only, 15- The microwave oven is equipped with a cord having a grounding wire with a fuse or circuit breaker. Consult a qualified electrician or serviceman if the grounding instructions...: Improper use an extension cord. If the power supply cord is too short, have a qualified electrician or serviceman install an outlet near the microwave oven. Do not use an adapter. Grounded 3 prong outlet *30" (76.2 cm) is typical for the electric current. Product Dimensions 17...
... Hazard Plug into an outlet that is properly installed and grounded. Required: ■ A 120 Volt, 60 Hz, AC only, 15- The microwave oven is equipped with a cord having a grounding wire with a fuse or circuit breaker. Consult a qualified electrician or serviceman if the grounding instructions...: Improper use an extension cord. If the power supply cord is too short, have a qualified electrician or serviceman install an outlet near the microwave oven. Do not use an adapter. Grounded 3 prong outlet *30" (76.2 cm) is typical for the electric current. Product Dimensions 17...

Installation Instructions
Page 4
... model, the mounting plate may be in the foam packaging, or it may be used. Tape the microwave oven door closed so that exhaust ports face the back of the microwave oven. For wall or roof venting, changes must be made to the work surface, cover the work ...1. A A. Reattach damper plate. Damper plate B. Remove any remaining contents from the microwave oven cavity. 2. Lift blower motor out of microwave oven. Keep damper plate and screws together and set aside. 3. Screws (in the top of microwave oven, and lower blower motor back into the slots in recessed holes) D A....
... model, the mounting plate may be in the foam packaging, or it may be used. Tape the microwave oven door closed so that exhaust ports face the back of the microwave oven. For wall or roof venting, changes must be made to the work surface, cover the work ...1. A A. Reattach damper plate. Damper plate B. Remove any remaining contents from the microwave oven cavity. 2. Lift blower motor out of microwave oven. Keep damper plate and screws together and set aside. 3. Screws (in the top of microwave oven, and lower blower motor back into the slots in recessed holes) D A....

Installation Instructions
Page 5
...." 5. Securely tighten screws. Screws C. Repeat Step 4 from "Wall Venting Installation Only." 4. Make sure damper plate tabs are inserted into microwave oven. Damper plate B. Repeat Step 2 from "Wall Venting Installation Only." 2. NOTE: If blower motor is not positioned with flat sides facing... the back of the microwave oven (as shown), performance will be reattached to back of microwave oven with 2 screws removed in Step 3 of "Wall Venting Installation Only." 5 A B C A. Damper ...
...." 5. Securely tighten screws. Screws C. Repeat Step 4 from "Wall Venting Installation Only." 4. Make sure damper plate tabs are inserted into microwave oven. Damper plate B. Repeat Step 2 from "Wall Venting Installation Only." 2. NOTE: If blower motor is not positioned with flat sides facing... the back of the microwave oven (as shown), performance will be reattached to back of microwave oven with 2 screws removed in Step 3 of "Wall Venting Installation Only." 5 A B C A. Damper ...

Installation Instructions
Page 6
... Stud at One End Hole Figure 3 Wall Studs at End Holes Figure 2 B C C C D B D A A A A E E E E F F NOTE: If wall stud is within the cabinet opening, do not install the microwave oven. 1. Wall stud centerlines D. Mounting plate center markers 6
... Stud at One End Hole Figure 3 Wall Studs at End Holes Figure 2 B C C C D B D A A A A E E E E F F NOTE: If wall stud is within the cabinet opening, do not install the microwave oven. 1. Wall stud centerlines D. Mounting plate center markers 6

Installation Instructions
Page 7
... of the upper cabinet. 9. Drill 3/4" (19 mm) holes through the mounting plate, closest to complete the 12" x 4" (30.5 x 10.2 cm) rectangle. Mark Rear Wall The microwave oven must be installed on both sides of the centerline, and mark. 10. Using measuring tape, find the wall stud centerline(s) drawn in steps 8 and...
... of the upper cabinet. 9. Drill 3/4" (19 mm) holes through the mounting plate, closest to complete the 12" x 4" (30.5 x 10.2 cm) rectangle. Mark Rear Wall The microwave oven must be installed on both sides of the centerline, and mark. 10. Using measuring tape, find the wall stud centerline(s) drawn in steps 8 and...

Installation Instructions
Page 8
... has a frame around it fits inside the frame, against the bottom of the upper cabinet, and attach with the holes in the top of the microwave oven. Drill 3/16" (5 mm) holes into the wall stud at One End Hole (Figure 3) 1. Leave enough space for the toggle nuts to go through the..." (5 mm) hole into the studs at One End Hole (Figure 3) 1. The template has trim lines to use as guides. ■ If the wall behind the microwave oven (as at the other hole drilled in Step 2 of "Installation for Wall Stud at Both End Holes (Figure 4) 1. Position mounting plate on the template...
... has a frame around it fits inside the frame, against the bottom of the upper cabinet, and attach with the holes in the top of the microwave oven. Drill 3/16" (5 mm) holes into the wall stud at One End Hole (Figure 3) 1. Leave enough space for the toggle nuts to go through the..." (5 mm) hole into the studs at One End Hole (Figure 3) 1. The template has trim lines to use as guides. ■ If the wall behind the microwave oven (as at the other hole drilled in Step 2 of "Installation for Wall Stud at Both End Holes (Figure 4) 1. Position mounting plate on the template...

Installation Instructions
Page 9
... supply cord. Place a washer on Upper Cabinet Template. 8. A. A B A. This hole is at the top, and the damper blade opens away from the microwave oven. B A A. Power supply cord bushing 6. Cut 3/4" (19 mm) hole at the circular shaded area "G" on the template. Using a keyhole saw, ...mm) holes. 2. Check that the damper blade hinge is for wall venting only) 1. Damper blade D. With front of the microwave oven is being handled. Push microwave oven against mounting plate and hold in the wall cutout. 6. Using 2 or more people to be installed around the supply ...
... supply cord. Place a washer on Upper Cabinet Template. 8. A. A B A. This hole is at the top, and the damper blade opens away from the microwave oven. B A A. Power supply cord bushing 6. Cut 3/4" (19 mm) hole at the circular shaded area "G" on the template. Using a keyhole saw, ...mm) holes. 2. Check that the damper blade hinge is for wall venting only) 1. Damper blade D. With front of the microwave oven is being handled. Push microwave oven against mounting plate and hold in the wall cutout. 6. Using 2 or more people to be installed around the supply ...

Installation Instructions
Page 10
... at most hardware stores. ■ Overtightening bolts may warp the top of mounting plate, and set aside on the turntable, and programming a cook time of microwave oven by operating the vent fan. 5. A B A. Then secure with at 100% power. A B C D E F A. Raised tabs B. Sheet metal screw D.... these instructions can result in place, insert bolts through the cabinet cutout so that the power supply cord is plugged into microwave oven. NOTE: If microwave oven does not need to be the same thickness as shown. Adjust mounting plate and retighten screws. 9. NOTES: ■...
... at most hardware stores. ■ Overtightening bolts may warp the top of mounting plate, and set aside on the turntable, and programming a cook time of microwave oven by operating the vent fan. 5. A B A. Then secure with at 100% power. A B C D E F A. Raised tabs B. Sheet metal screw D.... these instructions can result in place, insert bolts through the cabinet cutout so that the power supply cord is plugged into microwave oven. NOTE: If microwave oven does not need to be the same thickness as shown. Adjust mounting plate and retighten screws. 9. NOTES: ■...

Installation Instructions
Page 11
...round transition piece so that there is at least 3" (7.6 cm) high Recommended Standard Fittings The following length equivalents are not provided with microwave hood combination. ■ We do not recommend using duct tape to seal all joints in "Recommended Vent Length." Elbow (for architectural ...designer and builder/contractor reference only. Vent extension piece, at least 3" (7.6 cm) of clearance between the top of the microwave oven and the rectangular to Round Transition NOTE: The minimum 3" (7.6 cm) clearance must exist between the top of elbows to provide...
...round transition piece so that there is at least 3" (7.6 cm) high Recommended Standard Fittings The following length equivalents are not provided with microwave hood combination. ■ We do not recommend using duct tape to seal all joints in "Recommended Vent Length." Elbow (for architectural ...designer and builder/contractor reference only. Vent extension piece, at least 3" (7.6 cm) of clearance between the top of the microwave oven and the rectangular to Round Transition NOTE: The minimum 3" (7.6 cm) clearance must exist between the top of elbows to provide...

Installation Instructions
Page 12
...Upper Cabinet Template ■ Mounting Screw Kit (includes parts A-G in "Parts Supplied" in the User Instructions. You will need , add the equivalent lengths of the microwave oven. See "Recommended Standard Fittings" section for details. One 3¹⁄₄" x 10" (8.3 x 25.4 cm) 90° elbow = 25 ft (7.6... either type of the installation hardware needs to be found on the model and serial number plate, which is a list of the microwave oven opening . In addition, a rectangular 3" (7.6 cm) extension vent between the damper assembly and rectangular to round transition piece must...
...Upper Cabinet Template ■ Mounting Screw Kit (includes parts A-G in "Parts Supplied" in the User Instructions. You will need , add the equivalent lengths of the microwave oven. See "Recommended Standard Fittings" section for details. One 3¹⁄₄" x 10" (8.3 x 25.4 cm) 90° elbow = 25 ft (7.6... either type of the installation hardware needs to be found on the model and serial number plate, which is a list of the microwave oven opening . In addition, a rectangular 3" (7.6 cm) extension vent between the damper assembly and rectangular to round transition piece must...

