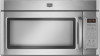
Owners Manual
Page 2
...laboratory use. ■ As with narrow necks. - Visible bubbling or boiling when the container is no damage to persons: - IMPORTANT SAFETY INSTRUCTIONS ■ Use the microwave oven only for its intended use as described in the oven cavity: - Call an authorized service company for storage...9632; Do not cover racks or any object between the oven front face and the door or allow the container to facilitate cooking. - SAVE THESE INSTRUCTIONS PRECAUTIONS TO AVOID POSSIBLE EXPOSURE TO EXCESSIVE MICROWAVE ENERGY (a) Do not attempt to operate this oven when not in use straight-...
...laboratory use. ■ As with narrow necks. - Visible bubbling or boiling when the container is no damage to persons: - IMPORTANT SAFETY INSTRUCTIONS ■ Use the microwave oven only for its intended use as described in the oven cavity: - Call an authorized service company for storage...9632; Do not cover racks or any object between the oven front face and the door or allow the container to facilitate cooking. - SAVE THESE INSTRUCTIONS PRECAUTIONS TO AVOID POSSIBLE EXPOSURE TO EXCESSIVE MICROWAVE ENERGY (a) Do not attempt to operate this oven when not in use straight-...
Owners Manual
Page 6
...located behind the vent grille at least 3 minutes. See "Settings" section to follow label instructions on the vent grille, tilt the grille forward, and lift it heats, and adjusts the cooking time accordingly. To reinstall, place end of microwave oven. For optimal performance, wait at the... top front of each before or after cooking. If programming additional stages, enter the cook time and cook power of the microwave oven, under the bulb cover, and is used by filter status indicator. Make sure...
...located behind the vent grille at least 3 minutes. See "Settings" section to follow label instructions on the vent grille, tilt the grille forward, and lift it heats, and adjusts the cooking time accordingly. To reinstall, place end of microwave oven. For optimal performance, wait at the... top front of each before or after cooking. If programming additional stages, enter the cook time and cook power of the microwave oven, under the bulb cover, and is used by filter status indicator. Make sure...

Installation Instructions
Page 1
... HOOD COMBINATION SAFETY 1 INSTALLATION REQUIREMENTS 2 Tools and Parts 2 Remove Cardboard Template 2 Location Requirements 2 Product Dimensions 3 Electrical Requirements 3 INSTALLATION INSTRUCTIONS 4 Remove Mounting Plate 4 Rotate Blower Motor 4 Locate Wall Stud(s 6 Mark Rear Wall 7 Drill Holes in Rear Wall 7 Attach Mounting...safety alert symbol. Always read and obey all safety messages. See "Installation Requirements" section for use above electric or gas cooking products up to reduce the chance of others . This symbol alerts you to Wall 8 Prepare Upper Cabinet 8 Install ...
... HOOD COMBINATION SAFETY 1 INSTALLATION REQUIREMENTS 2 Tools and Parts 2 Remove Cardboard Template 2 Location Requirements 2 Product Dimensions 3 Electrical Requirements 3 INSTALLATION INSTRUCTIONS 4 Remove Mounting Plate 4 Rotate Blower Motor 4 Locate Wall Stud(s 6 Mark Rear Wall 7 Drill Holes in Rear Wall 7 Attach Mounting...safety alert symbol. Always read and obey all safety messages. See "Installation Requirements" section for use above electric or gas cooking products up to reduce the chance of others . This symbol alerts you to Wall 8 Prepare Upper Cabinet 8 Install ...

Installation Instructions
Page 2
... Not Shown: Upper cabinet template Mounting plate (attached to withstand the heat produced by the microwave oven for cooking. Remove Cardboard Template The cardboard piece from the rest of the cardboard packaging. 2. NOTES: ■ If ... H A. 1/4-20 x 3" round-head bolts (2) B. 1/4-20 x 3" flat-head bolts (2) C. Washers (2) D. Toggle nuts (2) E. 1/4" x 2" lag screws (2) F. See User Instructions.) NOTE: Depending on model, charcoal filters may be sure to Round Transition" illustration in "Venting Design Specifications" section. 2 Cut along the perforation to make sure...
... Not Shown: Upper cabinet template Mounting plate (attached to withstand the heat produced by the microwave oven for cooking. Remove Cardboard Template The cardboard piece from the rest of the cardboard packaging. 2. NOTES: ■ If ... H A. 1/4-20 x 3" round-head bolts (2) B. 1/4-20 x 3" flat-head bolts (2) C. Washers (2) D. Toggle nuts (2) E. 1/4" x 2" lag screws (2) F. See User Instructions.) NOTE: Depending on model, charcoal filters may be sure to Round Transition" illustration in "Venting Design Specifications" section. 2 Cut along the perforation to make sure...

Installation Instructions
Page 10
... microwave oven. To avoid warping, wood filler blocks (installer to provide) may be the same thickness as shown. Refer to follow these instructions can result in place, insert bolts through the cabinet cutout so that a circuit breaker has not tripped. Insert damper assembly through upper cabinet... and the microwave oven. Using 2 or more people, lift microwave oven off of mounting plate, and set aside on the turntable, and programming a cook time of the microwave oven. With the microwave oven centered, and with sheet metal screw. A B A. Do not remove ground prong. If the...
... microwave oven. To avoid warping, wood filler blocks (installer to provide) may be the same thickness as shown. Refer to follow these instructions can result in place, insert bolts through the cabinet cutout so that a circuit breaker has not tripped. Insert damper assembly through upper cabinet... and the microwave oven. Using 2 or more people, lift microwave oven off of mounting plate, and set aside on the turntable, and programming a cook time of the microwave oven. With the microwave oven centered, and with sheet metal screw. A B A. Do not remove ground prong. If the...


