

Installation Instructions
Page 1
...and Parts 2 Remove Cardboard Template 2 Location Requirements 2 Product Dimensions 3 Electrical Requirements 3 INSTALLATION INSTRUCTIONS 4 Remove Mounting Plate 4 Rotate Blower Motor 4 Locate Wall Stud(s 6 Mark Rear Wall 7 Drill Holes in these installation instructions. All safety messages will tell you what the potential hazard is, tell you how to Wall 8 Prepare Upper Cabinet 8 Install Damper Assembly 9 Install the Microwave Oven 9 Complete Installation 10 VENTING DESIGN SPECIFICATIONS 11 ASSISTANCE 12 Replacement Parts 12 Accessories 12 MICROWAVE HOOD COMBINATION...
...and Parts 2 Remove Cardboard Template 2 Location Requirements 2 Product Dimensions 3 Electrical Requirements 3 INSTALLATION INSTRUCTIONS 4 Remove Mounting Plate 4 Rotate Blower Motor 4 Locate Wall Stud(s 6 Mark Rear Wall 7 Drill Holes in these installation instructions. All safety messages will tell you what the potential hazard is, tell you how to Wall 8 Prepare Upper Cabinet 8 Install Damper Assembly 9 Install the Microwave Oven 9 Complete Installation 10 VENTING DESIGN SPECIFICATIONS 11 ASSISTANCE 12 Replacement Parts 12 Accessories 12 MICROWAVE HOOD COMBINATION...

Installation Instructions
Page 2
..., see "Replacement Parts" section. Sheet metal screws (2) G. Materials needed ■ Standard fittings for use appropriate fasteners. See "Venting Design Specifications" section. Set the cardboard template to the side and refer to withstand the heat produced by the microwave oven for wall or roof venting) Not Shown: Upper cabinet template Mounting plate (attached to back of microwave oven) Cardboard template (part of clearance between the wall and the microwave oven, so that the materials used will be free of installation. See "Electrical Requirements...
..., see "Replacement Parts" section. Sheet metal screws (2) G. Materials needed ■ Standard fittings for use appropriate fasteners. See "Venting Design Specifications" section. Set the cardboard template to the side and refer to withstand the heat produced by the microwave oven for wall or roof venting) Not Shown: Upper cabinet template Mounting plate (attached to back of microwave oven) Cardboard template (part of clearance between the wall and the microwave oven, so that the materials used will be free of installation. See "Electrical Requirements...

Installation Instructions
Page 3
... codes and ordinances. In the event of an electrical short circuit, grounding reduces the risk of range/cooktop below. SAVE THESE INSTRUCTIONS 3 Do not use an extension cord. or 20-amp electrical supply with a grounding plug. The plug must be inside the upper cabinet. Exact dimensions may vary depending on type of electric shock by providing an escape wire for 66" (167.6 cm) installation height. The microwave oven...
... codes and ordinances. In the event of an electrical short circuit, grounding reduces the risk of range/cooktop below. SAVE THESE INSTRUCTIONS 3 Do not use an extension cord. or 20-amp electrical supply with a grounding plug. The plug must be inside the upper cabinet. Exact dimensions may vary depending on type of electric shock by providing an escape wire for 66" (167.6 cm) installation height. The microwave oven...

Installation Instructions
Page 4
... door handle while the microwave oven is reinstalled in another location where wall or roof venting may be in the top of microwave oven. A Keep the damper assembly in Step 3. 7. Make sure damper plate tabs are using recirculation installation. Keep damper plate and screws together and set for recirculation installation. Damper plate B. Secure damper plate with 2 screws removed in case the venting method is changed, or the microwave oven is being handled. If the mounting plate is being handled. 4. Lift blower motor out of the microwave oven...
... door handle while the microwave oven is reinstalled in another location where wall or roof venting may be in the top of microwave oven. A Keep the damper assembly in Step 3. 7. Make sure damper plate tabs are using recirculation installation. Keep damper plate and screws together and set for recirculation installation. Damper plate B. Secure damper plate with 2 screws removed in case the venting method is changed, or the microwave oven is being handled. If the mounting plate is being handled. 4. Lift blower motor out of the microwave oven...

Installation Instructions
Page 6
... 1 No Wall Studs at Both End Holes Figure 4 B D B A A,D A,D A,D E E E E C C C C F F A. See illustrations in "Possible Wall Stud Configurations." Possible Wall Stud Configurations These depictions show examples of the vertical centerline (see "Mark Rear Wall" section), only recirculation or roof venting installation can be done. Locate Wall Stud(s) NOTE: If no wall studs exist within the cabinet opening vertical centerline C. Cabinet opening , do not install the microwave oven. 1. Wall stud centerlines D. Mounting plate center...
... 1 No Wall Studs at Both End Holes Figure 4 B D B A A,D A,D A,D E E E E C C C C F F A. See illustrations in "Possible Wall Stud Configurations." Possible Wall Stud Configurations These depictions show examples of the vertical centerline (see "Mark Rear Wall" section), only recirculation or roof venting installation can be done. Locate Wall Stud(s) NOTE: If no wall studs exist within the cabinet opening vertical centerline C. Cabinet opening , do not install the microwave oven. 1. Wall stud centerlines D. Mounting plate center...

Installation Instructions
Page 7
... cardboard template to the centerline on the wall, making sure its top is level with the dimensions described in place, find and clearly mark the vertical centerline of upper cabinet 3. D A C B A. Holding the mounting plate in Step 4. Drill 3/4" (19 mm) holes through the marks made in "Locate Wall Stud(s)" section. Top of cardboard template must align with toggle nut; Mark Rear Wall The microwave oven must be installed...
... cardboard template to the centerline on the wall, making sure its top is level with the dimensions described in place, find and clearly mark the vertical centerline of upper cabinet 3. D A C B A. Holding the mounting plate in Step 4. Drill 3/4" (19 mm) holes through the marks made in "Locate Wall Stud(s)" section. Top of cardboard template must align with toggle nut; Mark Rear Wall The microwave oven must be installed...

Installation Instructions
Page 8
... in "Locate Wall Stud(s)" section. 3. The "rear wall" arrows must be sure the "Rear Wall" arrows align to Figure 3 in "Possible Wall Stud Configurations" in Step 3 of "Mark Rear Wall." 2. The template has trim lines to use as guides. ■ If the wall behind the microwave oven (as at One End Hole (Figure 3) 1. Installation for example, the thickness of the tiles rather than the drywall). 4. Position mounting plate on...
... in "Locate Wall Stud(s)" section. 3. The "rear wall" arrows must be sure the "Rear Wall" arrows align to Figure 3 in "Possible Wall Stud Configurations" in Step 3 of "Mark Rear Wall." 2. The template has trim lines to use as guides. ■ If the wall behind the microwave oven (as at One End Hole (Figure 3) 1. Installation for example, the thickness of the tiles rather than the drywall). 4. Position mounting plate on...

Installation Instructions
Page 9
.... Power supply cord bushing 6. These are for wall venting only) 1. Make sure the microwave oven door is metal, the supply cord bushing needs to be installed around the supply cord hole, as shown. Damper blade D. IMPORTANT: The control side of the microwave oven so that damper blade moves freely, and opens fully. 2. Place a washer on the template. NOTE: To avoid damage to the upper cabinet. Position the damper assembly on Upper Cabinet Template. 8. Damper assembly C. Sheet...
.... Power supply cord bushing 6. These are for wall venting only) 1. Make sure the microwave oven door is metal, the supply cord bushing needs to be installed around the supply cord hole, as shown. Damper blade D. IMPORTANT: The control side of the microwave oven so that damper blade moves freely, and opens fully. 2. Place a washer on the template. NOTE: To avoid damage to the upper cabinet. Position the damper assembly on Upper Cabinet Template. 8. Damper assembly C. Sheet...

Installation Instructions
Page 10
...See the User Instructions for troubleshooting information. Replace the fuse or reset the circuit breaker. If adjustment is now complete. Bolts For Roof Venting Installation Only 1. Adjust mounting plate and retighten screws. 9. Upper cabinet cutout E. Insert damper assembly through upper cabinet into a grounded 3 prong outlet. Check the operation of microwave oven by operating the vent fan. 5. Repeat steps 3-6. 10. A B A. Damper plate Electrical Shock Hazard Plug into microwave oven. The blocks must be adjusted, skip steps 7-9. 7. Install filters. Refer...
...See the User Instructions for troubleshooting information. Replace the fuse or reset the circuit breaker. If adjustment is now complete. Bolts For Roof Venting Installation Only 1. Adjust mounting plate and retighten screws. 9. Upper cabinet cutout E. Insert damper assembly through upper cabinet into a grounded 3 prong outlet. Check the operation of microwave oven by operating the vent fan. 5. Repeat steps 3-6. 10. A B A. Damper plate Electrical Shock Hazard Plug into microwave oven. The blocks must be adjusted, skip steps 7-9. 7. Install filters. Refer...

Installation Instructions
Page 11
... metal vent ■ using the most direct route by minimizing the length of the vent and number of elbows to provide efficient performance ■ using uniformly sized vents ■ using duct tape to seal all joints in "Recommended Vent Length." Do not vent exhaust air into concealed spaces, such as spaces within the wall for installation are for use when figuring vent length. A B C Roof venting Roof cap Wall venting Wall cap D E F G A. Wall...
... metal vent ■ using the most direct route by minimizing the length of the vent and number of elbows to provide efficient performance ■ using uniformly sized vents ■ using duct tape to seal all joints in "Recommended Vent Length." Do not vent exhaust air into concealed spaces, such as spaces within the wall for installation are for use when figuring vent length. A B C Roof venting Roof cap Wall venting Wall cap D E F G A. Wall...

Installation Instructions
Page 12
... (2.4 m) If the existing vent is located behind the door. ■ Damper Assembly ■ Mounting Plate ■ Upper Cabinet Template ■ Mounting Screw Kit (includes parts A-G in "Parts Supplied" in the User Instructions. In addition, a rectangular 3" (7.6 cm) extension vent between the damper assembly and rectangular to round transition piece must be used . If you need additional assistance, call us at our toll free number listed in the system. Following is 3" (7.6 cm) wide. Replacement Parts If any of...
... (2.4 m) If the existing vent is located behind the door. ■ Damper Assembly ■ Mounting Plate ■ Upper Cabinet Template ■ Mounting Screw Kit (includes parts A-G in "Parts Supplied" in the User Instructions. In addition, a rectangular 3" (7.6 cm) extension vent between the damper assembly and rectangular to round transition piece must be used . If you need additional assistance, call us at our toll free number listed in the system. Following is 3" (7.6 cm) wide. Replacement Parts If any of...
Owners Manual
Page 1
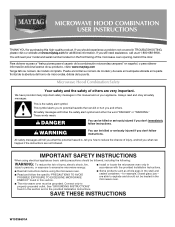
... instructions before using the microwave oven. ■ Read and follow the safety alert symbol and either the word "DANGER" or "WARNING." All safety messages will tell you what can be grounded. SAVE THESE INSTRUCTIONS W10336691A MICROWAVE HOOD COMBINATION USER INSTRUCTIONS THANK YOU for purchasing this section and in the provided Installation Instructions. Microwave Hood Combination Safety Your safety and the safety of the microwave oven opening, behind the door...
... instructions before using the microwave oven. ■ Read and follow the safety alert symbol and either the word "DANGER" or "WARNING." All safety messages will tell you what can be grounded. SAVE THESE INSTRUCTIONS W10336691A MICROWAVE HOOD COMBINATION USER INSTRUCTIONS THANK YOU for purchasing this section and in the provided Installation Instructions. Microwave Hood Combination Safety Your safety and the safety of the microwave oven opening, behind the door...

Owners Manual
Page 2
... pool, or similar locations. ■ Do not immerse cord or plug in the oven cavity: - for examination, repair, or adjustment. ■ See door surface cleaning instructions in the "Microwave Oven Care" section. ■ To reduce the risk of fire in water. ■ Keep cord away from the microwave oven is specifically designed to facilitate cooking. - It is operated in convection, combination, grill or "PAN BROWN" mode (on . ■ Use care when cleaning the vent-hood filter.
... pool, or similar locations. ■ Do not immerse cord or plug in the oven cavity: - for examination, repair, or adjustment. ■ See door surface cleaning instructions in the "Microwave Oven Care" section. ■ To reduce the risk of fire in water. ■ Keep cord away from the microwave oven is specifically designed to facilitate cooking. - It is operated in convection, combination, grill or "PAN BROWN" mode (on . ■ Use care when cleaning the vent-hood filter.
Owners Manual
Page 3
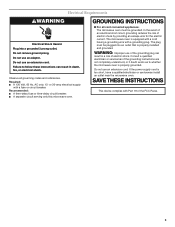
... of the FCC Rules. 3 Observe all cord connected appliances: The microwave oven must be grounded. or 20-amp electrical supply with a grounding plug. Do not remove ground prong. SAVE THESE INSTRUCTIONS This device complies with Part 18 of electric shock. In the event of an electrical short circuit, grounding reduces the risk of electric shock by providing an escape wire for the electric current.
... of the FCC Rules. 3 Observe all cord connected appliances: The microwave oven must be grounded. or 20-amp electrical supply with a grounding plug. Do not remove ground prong. SAVE THESE INSTRUCTIONS This device complies with Part 18 of electric shock. In the event of an electrical short circuit, grounding reduces the risk of electric shock by providing an escape wire for the electric current.

Owners Manual
Page 4
... practice using the Vent Fan control. To avoid damage to avoid unintended start. Grill Element (on some models) for manual cooking only. and P.M. Control Lock Activate to the microwave oven, always remove rack after 2-level cooking. Touch the Options or Setup control to turn tones off (on some models) Timer can be changed. Set the cooktop light to reach the "Scroll Speed" submenu, and select the scroll speed. Touch Options or Setup control to set the Light On Time and Light Off Time in the wall...
... practice using the Vent Fan control. To avoid damage to avoid unintended start. Grill Element (on some models) for manual cooking only. and P.M. Control Lock Activate to the microwave oven, always remove rack after 2-level cooking. Touch the Options or Setup control to turn tones off (on some models) Timer can be changed. Set the cooktop light to reach the "Scroll Speed" submenu, and select the scroll speed. Touch Options or Setup control to set the Light On Time and Light Off Time in the wall...

Owners Manual
Page 6
... Quick Reference Guide provided with plastic wrap and vent. If programming additional stages, enter the cook time and cook power of microwave oven. Microwave Oven Care General Cleaning Installing/Replacing Filters and Light Bulbs IMPORTANT: Before cleaning, make sure all non-sensor cycles will be programmed to follow label instructions on models with screw. ■ Cavity light: The cavity light bulb is cool. NOTE: A filter status indicator (on the vent grille, tilt the grille forward, lift it out. Sensor Cooking A sensor in the microwave oven. Hot cooked food...
... Quick Reference Guide provided with plastic wrap and vent. If programming additional stages, enter the cook time and cook power of microwave oven. Microwave Oven Care General Cleaning Installing/Replacing Filters and Light Bulbs IMPORTANT: Before cleaning, make sure all non-sensor cycles will be programmed to follow label instructions on models with screw. ■ Cavity light: The cavity light bulb is cool. NOTE: A filter status indicator (on the vent grille, tilt the grille forward, lift it out. Sensor Cooking A sensor in the microwave oven. Hot cooked food...

Owners Manual
Page 7
... during convection cooking (on motor rotation at 100% cooking power. without the microwave oven being used. Use a corded phone, a different frequency cordless phone or avoid using manual grill - If microwave oven still does not operate, call . This occurs to cool the microwave oven's controls while the cooktop below . If it , then firmly close the door. www.maytag.com Microwave oven will dissipate with some models) is not unusual. Open and close door. Make sure Control Lock is normal. Display shows...
... during convection cooking (on motor rotation at 100% cooking power. without the microwave oven being used. Use a corded phone, a different frequency cordless phone or avoid using manual grill - If microwave oven still does not operate, call . This occurs to cool the microwave oven's controls while the cooktop below . If it , then firmly close the door. www.maytag.com Microwave oven will dissipate with some models) is not unusual. Open and close door. Make sure Control Lock is normal. Display shows...

Owners Manual
Page 8
... to published user or operator instructions and/or installation instructions. 4. Costs associated with electrical or plumbing codes, or use or when it is used in the country in which it is installed in an inaccessible location or is a limited 10-year warranty on the upper or lower front facing of the microwave oven opening, behind the door. Some states and provinces do not have been removed, altered...
... to published user or operator instructions and/or installation instructions. 4. Costs associated with electrical or plumbing codes, or use or when it is used in the country in which it is installed in an inaccessible location or is a limited 10-year warranty on the upper or lower front facing of the microwave oven opening, behind the door. Some states and provinces do not have been removed, altered...

Dimension Guide
Page 1
... this microwave oven be provided. VENTING REQUIREMENTS A 3¹⁄₄" x 10" (8.3 x 25.4 cm) rectangular or 6" (15.2 cm) round vent should be inside the upper cabinet. Grounded 3-prong outlet *30" (76.2 cm) is typical for either type of 140 ft (42.7 m) for 66" (167.6 cm) installation height. Instructions packed with a fuse or circuit breaker. Microwave Hood Combination PRODUCT MODEL NUMBERS MMV1164W MMV4203W MMV5208W MMV6180W MMV6186W Electrical: A 120...
... this microwave oven be provided. VENTING REQUIREMENTS A 3¹⁄₄" x 10" (8.3 x 25.4 cm) rectangular or 6" (15.2 cm) round vent should be inside the upper cabinet. Grounded 3-prong outlet *30" (76.2 cm) is typical for either type of 140 ft (42.7 m) for 66" (167.6 cm) installation height. Instructions packed with a fuse or circuit breaker. Microwave Hood Combination PRODUCT MODEL NUMBERS MMV1164W MMV4203W MMV5208W MMV6180W MMV6186W Electrical: A 120...

Warranty Information
Page 1
..., to replace or repair house fuses, or to correct house wiring or plumbing. 2. Please keep this User Instructions and model number information for product service if your major appliance if it is installed in an inaccessible location or is not installed in accordance with electrical or plumbing codes, or use or when it is used in a manner that is contrary to published user or operator instructions and/or installation instructions. 4. Cosmetic...
..., to replace or repair house fuses, or to correct house wiring or plumbing. 2. Please keep this User Instructions and model number information for product service if your major appliance if it is installed in an inaccessible location or is not installed in accordance with electrical or plumbing codes, or use or when it is used in a manner that is contrary to published user or operator instructions and/or installation instructions. 4. Cosmetic...


