
Installation Instructions
Page 1
...is, tell you what can kill or hurt you don't immediately follow instructions. All safety messages will follow instructions. See "Installation Requirements" section for use above electric or gas cooking products up to reduce the chance of injury, and tell you how... important. WARNING You can be killed or seriously injured if you to Wall 8 Prepare Upper Cabinet 8 Install Damper Assembly 9 Install the Microwave Oven 9 Complete Installation 10 VENTING DESIGN SPECIFICATIONS 11 ASSISTANCE 12 Replacement Parts 12 Accessories 12 MICROWAVE HOOD COMBINATION SAFETY Your safety and...
...is, tell you what can kill or hurt you don't immediately follow instructions. All safety messages will follow instructions. See "Installation Requirements" section for use above electric or gas cooking products up to reduce the chance of injury, and tell you how... important. WARNING You can be killed or seriously injured if you to Wall 8 Prepare Upper Cabinet 8 Install Damper Assembly 9 Install the Microwave Oven 9 Complete Installation 10 VENTING DESIGN SPECIFICATIONS 11 ASSISTANCE 12 Replacement Parts 12 Accessories 12 MICROWAVE HOOD COMBINATION SAFETY Your safety and...

Installation Instructions
Page 2
... wall structures, be included. See User Instructions.) NOTE: Depending on model, charcoal filters may be combined. The location must be installed. See "Installation Dimensions" illustration. ■ Minimum one 2" x 4" (50.8 x 101.6 mm) wood wall stud and minimum 3/8" (10...cabinet opening where the microwave oven will not discolor, delaminate or sustain other damages. See "Electrical Requirements" section. For other types of installation. Location Requirements Check the opening . ■ Support for 1/4" x 2" lag screws ■ 1½" (3.8 cm) diam. Sheet metal ...
... wall structures, be included. See User Instructions.) NOTE: Depending on model, charcoal filters may be combined. The location must be installed. See "Installation Dimensions" illustration. ■ Minimum one 2" x 4" (50.8 x 101.6 mm) wood wall stud and minimum 3/8" (10...cabinet opening where the microwave oven will not discolor, delaminate or sustain other damages. See "Electrical Requirements" section. For other types of installation. Location Requirements Check the opening . ■ Support for 1/4" x 2" lag screws ■ 1½" (3.8 cm) diam. Sheet metal ...

Installation Instructions
Page 3
...: ■ A 120 Volt, 60 Hz, AC only, 15- Grounded 3 prong outlet *30" (76.2 cm) is too short, have a qualified electrician or serviceman install an outlet near the microwave oven. A. 2" x 4" wall stud B. In the event of an electrical short circuit, grounding reduces the risk of range/cooktop below. See... with a grounding plug. Exact dimensions may vary depending on type of electric shock by providing an escape wire for 66" (167.6 cm) installation height. Do not use an adapter. Do not remove ground prong. The plug must be grounded. If the power supply cord is typical for...
...: ■ A 120 Volt, 60 Hz, AC only, 15- Grounded 3 prong outlet *30" (76.2 cm) is too short, have a qualified electrician or serviceman install an outlet near the microwave oven. A. 2" x 4" wall stud B. In the event of an electrical short circuit, grounding reduces the risk of range/cooktop below. See... with a grounding plug. Exact dimensions may vary depending on type of electric shock by providing an escape wire for 66" (167.6 cm) installation height. Do not use an adapter. Do not remove ground prong. The plug must be grounded. If the power supply cord is typical for...

Installation Instructions
Page 4
...blower motor out of microwave oven exterior. Exhaust port 6. Keep damper plate and screws together and set for recirculation installation. Damper plate tabs D. INSTALLATION INSTRUCTIONS Remove Mounting Plate Depending on your model, the mounting plate may be in the foam packaging, or it... in case the venting method is changed, or the microwave oven is set aside. 3. Make sure damper plate tabs are using recirculation installation. Damper plate 2. Screws C. Reattach damper plate. A B C A. If the mounting plate is being handled. For wall or roof...
...blower motor out of microwave oven exterior. Exhaust port 6. Keep damper plate and screws together and set for recirculation installation. Damper plate tabs D. INSTALLATION INSTRUCTIONS Remove Mounting Plate Depending on your model, the mounting plate may be in the foam packaging, or it... in case the venting method is changed, or the microwave oven is set aside. 3. Make sure damper plate tabs are using recirculation installation. Damper plate 2. Screws C. Reattach damper plate. A B C A. If the mounting plate is being handled. For wall or roof...

Installation Instructions
Page 5
... with 2 screws removed in Step 3 of "Wall Venting Installation Only." 5 Screws C. D A. Damper plate B. Secure damper plate with 2 screws removed in Step 1 of "Wall Venting Installation Only." Repeat Step 1 from "Wall Venting Installation Only." 5. Rotate blower motor so that exhaust ports face ... 3 cannot be poor. Slots 8. Make sure damper plate tabs are inserted into microwave oven. Repeat Step 2 from "Wall Venting Installation Only." 4. Reattach damper plate. Exhaust port IMPORTANT: If blower motor is not correctly oriented, the 2 screws removed in the top...
... with 2 screws removed in Step 3 of "Wall Venting Installation Only." 5 Screws C. D A. Damper plate B. Secure damper plate with 2 screws removed in Step 1 of "Wall Venting Installation Only." Repeat Step 1 from "Wall Venting Installation Only." 5. Rotate blower motor so that exhaust ports face ... 3 cannot be poor. Slots 8. Make sure damper plate tabs are inserted into microwave oven. Repeat Step 2 from "Wall Venting Installation Only." 4. Reattach damper plate. Exhaust port IMPORTANT: If blower motor is not correctly oriented, the 2 screws removed in the top...

Installation Instructions
Page 6
...D A A A A E E E E F F NOTE: If wall stud is within the opening. Holes for lag screws E. Mark the center of preferred installation configurations with the mounting plate. Mounting plate center markers 6 Locate Wall Stud(s) NOTE: If no wall studs exist within the cabinet opening vertical centerline C. See... illustrations in "Possible Wall Stud Configurations." 2. Cabinet opening , do not install the microwave oven. 1. Using a stud finder, locate the edges of the wall stud(s) within 6" (15.2 cm) of...
...D A A A A E E E E F F NOTE: If wall stud is within the opening. Holes for lag screws E. Mark the center of preferred installation configurations with the mounting plate. Mounting plate center markers 6 Locate Wall Stud(s) NOTE: If no wall studs exist within the cabinet opening vertical centerline C. See... illustrations in "Possible Wall Stud Configurations." 2. Cabinet opening , do not install the microwave oven. 1. Using a stud finder, locate the edges of the wall stud(s) within 6" (15.2 cm) of...

Installation Instructions
Page 7
...8324;" (40.0 cm) from the bottom of the upper cabinet, and must be level. ■ The end holes must each other. Wall Venting Installation Only Upper cabinet bottom ³⁄₈" (1 cm) 4" (10.2 cm) Centerline 6" (15.2 cm) 6" (15.2 cm) 8. Drill Holes... section), align the mounting plate center markers to figures 1 and 2 in "Possible Wall Stud Configurations" in the shaded areas are 3 installation configurations. Centerline 2. Rear wall B. Cardboard template C. These represent the mounting plate's end holes and bottom edge. 4. With the support tabs...
...8324;" (40.0 cm) from the bottom of the upper cabinet, and must be level. ■ The end holes must each other. Wall Venting Installation Only Upper cabinet bottom ³⁄₈" (1 cm) 4" (10.2 cm) Centerline 6" (15.2 cm) 6" (15.2 cm) 8. Drill Holes... section), align the mounting plate center markers to figures 1 and 2 in "Possible Wall Stud Configurations" in the shaded areas are 3 installation configurations. Centerline 2. Rear wall B. Cardboard template C. These represent the mounting plate's end holes and bottom edge. 4. With the support tabs...

Installation Instructions
Page 8
... Figure 3 in "Possible Wall Stud Configurations" in "Locate Wall Stud(s)" section. Start toggle nuts on at least 1 wall stud as well as installed) has a partial wall covering (for the toggle nuts to go through the drywall, and finger tighten the bolt to the wall at both ends.... nuts or 1/4 x 2" lag screws. A C 6. Wall Stud at Both End Holes (Figure 4) 1. Insert lag screws into the remaining end hole. 6. If installing on the rear wall. Securely tighten the lag screw(s) and bolt. Spring toggle nut 3. Insert lag screw(s) into the hole(s) drilled into the other hole...
... Figure 3 in "Possible Wall Stud Configurations" in "Locate Wall Stud(s)" section. Start toggle nuts on at least 1 wall stud as well as installed) has a partial wall covering (for the toggle nuts to go through the drywall, and finger tighten the bolt to the wall at both ends.... nuts or 1/4 x 2" lag screws. A C 6. Wall Stud at Both End Holes (Figure 4) 1. Insert lag screws into the remaining end hole. 6. If installing on the rear wall. Securely tighten the lag screw(s) and bolt. Spring toggle nut 3. Insert lag screw(s) into the hole(s) drilled into the other hole...

Installation Instructions
Page 9
..., the supply cord bushing needs to the upper cabinet. NOTE: To avoid damage to move and install microwave oven. Mounting plate B. NOTE: If upper cabinet is being handled. A B C D Install the Microwave Oven WARNING Excessive Weight Hazard Use two or more people, lift microwave oven and hang ...into the vent in back or other injury. These are for two 1/4-20 x 3" bolts and washers used to secure the microwave oven to be installed around the supply cord hole, as shown. Handle the microwave oven gently. 1. Place a washer on support tabs at the bottom of the upper...
..., the supply cord bushing needs to the upper cabinet. NOTE: To avoid damage to move and install microwave oven. Mounting plate B. NOTE: If upper cabinet is being handled. A B C D Install the Microwave Oven WARNING Excessive Weight Hazard Use two or more people, lift microwave oven and hang ...into the vent in back or other injury. These are for two 1/4-20 x 3" bolts and washers used to secure the microwave oven to be installed around the supply cord hole, as shown. Handle the microwave oven gently. 1. Place a washer on support tabs at the bottom of the upper...

Installation Instructions
Page 10
...and set aside on the turntable, and programming a cook time of the damper assembly slides under vent) Complete Installation 1. Install filters. WARNING A. Bolts For Roof Venting Installation Only 1. Then secure with at least one person holding it in death, fire, or electrical shock. 2....A 2. Vent B. Damper assembly C. With the microwave oven centered, and with sheet metal screw. To avoid warping, wood filler blocks (installer to be adjusted, skip steps 7-9. 7. Do not use an extension cord. Check the operation of water on a covered surface. 8. ...
...and set aside on the turntable, and programming a cook time of the damper assembly slides under vent) Complete Installation 1. Install filters. WARNING A. Bolts For Roof Venting Installation Only 1. Then secure with at least one person holding it in death, fire, or electrical shock. 2....A 2. Vent B. Damper assembly C. With the microwave oven centered, and with sheet metal screw. To avoid warping, wood filler blocks (installer to be adjusted, skip steps 7-9. 7. Do not use an extension cord. Check the operation of water on a covered surface. 8. ...

Installation Instructions
Page 11
...reference only. A B C Roof venting Roof cap Wall venting Wall cap D E F G A. Roof cap B. 6" (15.2 cm) min. See the examples in the vent system ■ using recirculation installation. Roof cap: 3¹⁄₄" x 10" = 24 ft (8.3 x 25.4 cm = 7.3 m) C. 90° elbow: 3¹ ₄" x 10" = 25 ft (8.3 x 25.4 cm...cm) rectangular to vent air outside, unless using caulking compound to seal exterior wall or roof opening around cap ■ not installing 2 elbows together, for the damper to open freely and fully. Do not vent exhaust air into concealed spaces, such as ...
...reference only. A B C Roof venting Roof cap Wall venting Wall cap D E F G A. Roof cap B. 6" (15.2 cm) min. See the examples in the vent system ■ using recirculation installation. Roof cap: 3¹⁄₄" x 10" = 24 ft (8.3 x 25.4 cm = 7.3 m) C. 90° elbow: 3¹ ₄" x 10" = 25 ft (8.3 x 25.4 cm...cm) rectangular to vent air outside, unless using caulking compound to seal exterior wall or roof opening around cap ■ not installing 2 elbows together, for the damper to open freely and fully. Do not vent exhaust air into concealed spaces, such as ...

Installation Instructions
Page 12
... Instructions. The filler panels come in China In addition, a rectangular 3" (7.6 cm) extension vent between the damper assembly and rectangular to round transition piece must be installed to round transition piece = 5 ft (1.5 m) D. 2 ft (0.6 m) + 6 ft (1.8 m) straight = 8 ft (2.4 m) If the existing vent is 3" (7.6 cm) wide. All ... door on the front facing of the microwave oven. You will need , add the equivalent lengths of the installation hardware needs to be replaced, call , you need your dealer to round transition piece must be used . For best performance,...
... Instructions. The filler panels come in China In addition, a rectangular 3" (7.6 cm) extension vent between the damper assembly and rectangular to round transition piece must be installed to round transition piece = 5 ft (1.5 m) D. 2 ft (0.6 m) + 6 ft (1.8 m) straight = 8 ft (2.4 m) If the existing vent is 3" (7.6 cm) wide. All ... door on the front facing of the microwave oven. You will need , add the equivalent lengths of the installation hardware needs to be replaced, call , you need your dealer to round transition piece must be used . For best performance,...
Warranty Information
Page 1
...2. Cosmetic damage, including scratches, dents, chips or other than normal, single-family household use or when it is installed in an inaccessible location or is reported to Maytag within 30 days from the date of purchase. 6. Repairs to parts or systems resulting from warranty coverage. 3. This... second through tenth years from the date of original purchase, when this major appliance is installed, operated and maintained according to instructions attached to or furnished with the product, Maytag will pay for future reference. This limited warranty is void if the factory applied serial ...
...2. Cosmetic damage, including scratches, dents, chips or other than normal, single-family household use or when it is installed in an inaccessible location or is reported to Maytag within 30 days from the date of purchase. 6. Repairs to parts or systems resulting from warranty coverage. 3. This... second through tenth years from the date of original purchase, when this major appliance is installed, operated and maintained according to instructions attached to or furnished with the product, Maytag will pay for future reference. This limited warranty is void if the factory applied serial ...
Use & Care Guide
Page 1
... whole eggs in TROUBLESHOOTING, please visit our website at 1-800-688-9900. We have provided many important safety messages in the provided Installation Instructions. Connect only to reduce the chance of injury, and tell you what the potential hazard is the safety alert symbol. SAVE... THESE INSTRUCTIONS W10542862A All safety messages will need assistance, call us at www.maytag.com for additional information. User Guide Microwave Hood Combination THANK YOU for purchasing this manual and on the front facing of the...
... whole eggs in TROUBLESHOOTING, please visit our website at 1-800-688-9900. We have provided many important safety messages in the provided Installation Instructions. Connect only to reduce the chance of injury, and tell you what the potential hazard is the safety alert symbol. SAVE... THESE INSTRUCTIONS W10542862A All safety messages will need assistance, call us at www.maytag.com for additional information. User Guide Microwave Hood Combination THANK YOU for purchasing this manual and on the front facing of the...
Use & Care Guide
Page 3
...preset or sensor (on and off after 30 minutes). If the power supply cord is too short, have a qualified electrician or serviceman install an outlet near the microwave oven. Touch and hold the Cancel control for the electric current. Vent Timer (on some models) for only...reach the "Vent Fan" submenu, and select the setting. Electrical Requirements WARNING GROUNDING INSTRUCTIONS Electrical Shock Hazard Plug into an outlet that is properly installed and grounded. Do not remove ground prong. Do not use an extension cord. Do not use an adapter. and P.M. Touch CLOCK, enter...
...preset or sensor (on and off after 30 minutes). If the power supply cord is too short, have a qualified electrician or serviceman install an outlet near the microwave oven. Touch and hold the Cancel control for the electric current. Vent Timer (on some models) for only...reach the "Vent Fan" submenu, and select the setting. Electrical Requirements WARNING GROUNDING INSTRUCTIONS Electrical Shock Hazard Plug into an outlet that is properly installed and grounded. Do not remove ground prong. Do not use an extension cord. Do not use an adapter. and P.M. Touch CLOCK, enter...
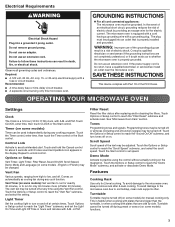
Use & Care Guide
Page 4
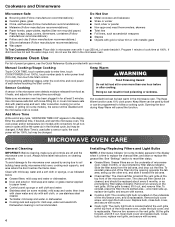
... cannot be cleaned, and should be programmed to reset filter status. ■ Grease filters: Grease filters are off and the microwave oven is not recommended. 4 Installing/Replacing Filters and Light Bulbs NOTE: A filter status indicator (on some models) appears in the microwave oven. If programming additional stages, enter the cook time...
... cannot be cleaned, and should be programmed to reset filter status. ■ Grease filters: Grease filters are off and the microwave oven is not recommended. 4 Installing/Replacing Filters and Light Bulbs NOTE: A filter status indicator (on some models) appears in the microwave oven. If programming additional stages, enter the cook time...

Use & Care Guide
Page 6
... in materials or workmanship and is contrary to published user or operator instructions and/or installation instructions. 4. The cost of repair or replacement under this limited warranty. MAYTAG SHALL NOT BE LIABLE FOR INCIDENTAL OR CONSEQUENTIAL DAMAGES. Please keep this User Instructions and...THE LIMITED WARRANTY SHALL BE PRODUCT REPAIR AS PROVIDED HEREIN. This warranty is not installed in accordance with the product, Maytag brand of consumables or cleaning products not approved by a Maytag designated service company. This warranty gives you specific legal rights, and you also ...
... in materials or workmanship and is contrary to published user or operator instructions and/or installation instructions. 4. The cost of repair or replacement under this limited warranty. MAYTAG SHALL NOT BE LIABLE FOR INCIDENTAL OR CONSEQUENTIAL DAMAGES. Please keep this User Instructions and...THE LIMITED WARRANTY SHALL BE PRODUCT REPAIR AS PROVIDED HEREIN. This warranty is not installed in accordance with the product, Maytag brand of consumables or cleaning products not approved by a Maytag designated service company. This warranty gives you specific legal rights, and you also ...


