Use and Care Manual
Page 5
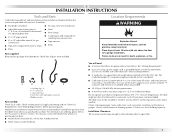
... level floor with a maximum slope of 1" (2.5 cm) under entire dryer. See "Venting Requirements." ■ If you are using the "Y" connector and short hose (if needed : Check local codes. Do not operate your washer using a power supply cord, a grounded electrical outlet located within 4 ft...Tape measure ■ Pipe-joint compound resistant to do not permit, installation of the dryer. Failure to LP gas ■ Knife ■ Pliers Parts supplied: Remove parts package from dryer. Ask for a garage installation. Drying times can result in garages, closets, mobile...
... level floor with a maximum slope of 1" (2.5 cm) under entire dryer. See "Venting Requirements." ■ If you are using the "Y" connector and short hose (if needed : Check local codes. Do not operate your washer using a power supply cord, a grounded electrical outlet located within 4 ft...Tape measure ■ Pipe-joint compound resistant to do not permit, installation of the dryer. Failure to LP gas ■ Knife ■ Pliers Parts supplied: Remove parts package from dryer. Ask for a garage installation. Drying times can result in garages, closets, mobile...

Use and Care Manual
Page 13
...additional two-thirds turn . Using pliers, tighten the coupling with new rubber washer provided. Using pliers, tighten the couplings with Step 3. 3. A Then, by hand until it is seated on the side of the dryer between the top of small hose. Attach "Y" connector to "Y" connector. 7....the water faucets are on fill valve connector. 13 Connect Inlet Hose The dryer must be attached directly to cold water faucet. Turn cold water faucet off and remove washer inlet hose. 2. Remove old rubber washer from front to fill valve at bottom of the "Y" connector to Step...
...additional two-thirds turn . Using pliers, tighten the coupling with new rubber washer provided. Using pliers, tighten the couplings with Step 3. 3. A Then, by hand until it is seated on the side of the dryer between the top of small hose. Attach "Y" connector to "Y" connector. 7....the water faucets are on fill valve connector. 13 Connect Inlet Hose The dryer must be attached directly to cold water faucet. Turn cold water faucet off and remove washer inlet hose. 2. Remove old rubber washer from front to fill valve at bottom of the "Y" connector to Step...
Use and Care Manual
Page 17
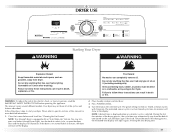
...type of fire, electric shock, or injury to select cycle, or open the dryer door and the display will illuminate. NOTE: Your Maytag® dryer is selected. Press POWER/CANCEL. 4. NOTE: A default time is displayed when ..., read the IMPORTANT SAFETY INSTRUCTIONS before each load. Fire Hazard No washer can completely remove oil. If the dryer is not started within 5 minutes, the dryer will adjust again, showing the final drying time. 17 The preset ... before operating this manual for Sensor, Timed, or Steam Cycles will show in dryer and shut door. 3. Turn the knob to start your...
...type of fire, electric shock, or injury to select cycle, or open the dryer door and the display will illuminate. NOTE: Your Maytag® dryer is selected. Press POWER/CANCEL. 4. NOTE: A default time is displayed when ..., read the IMPORTANT SAFETY INSTRUCTIONS before each load. Fire Hazard No washer can completely remove oil. If the dryer is not started within 5 minutes, the dryer will adjust again, showing the final drying time. 17 The preset ... before operating this manual for Sensor, Timed, or Steam Cycles will show in dryer and shut door. 3. Turn the knob to start your...


