Use and Care Manual
Page 3
... or any electrical switch; All safety messages will tell you what the potential hazard is the safety alert symbol. Do not store or use any phone in your building. • Clear the room, building, or area of all safety messages. DRYER SAFETY Your ...a qualified installer, service agency, or the gas supplier. 3 This symbol alerts you to light any appliance. • Do not touch any other appliance. - Installation and service must be killed or seriously injured if you don't follow instructions. We have provided many important safety messages in this manual and on...
... or any electrical switch; All safety messages will tell you what the potential hazard is the safety alert symbol. Do not store or use any phone in your building. • Clear the room, building, or area of all safety messages. DRYER SAFETY Your ...a qualified installer, service agency, or the gas supplier. 3 This symbol alerts you to light any appliance. • Do not touch any other appliance. - Installation and service must be killed or seriously injured if you don't follow instructions. We have provided many important safety messages in this manual and on...

Use and Care Manual
Page 4
... controls. ■ Do not repair or replace any part of the dryer or attempt any servicing unless specifically recommended in this Use and Care Guide or in published user-repair instructions that you smell gas" instructions. In the State of Massachusetts, the following : ■ Read all instructions before or after each load. ■ Keep area around the exhaust opening and adjacent surrounding areas free from service or discarded, remove the door to the drying...
... controls. ■ Do not repair or replace any part of the dryer or attempt any servicing unless specifically recommended in this Use and Care Guide or in published user-repair instructions that you smell gas" instructions. In the State of Massachusetts, the following : ■ Read all instructions before or after each load. ■ Keep area around the exhaust opening and adjacent surrounding areas free from service or discarded, remove the door to the drying...
Use and Care Manual
Page 5
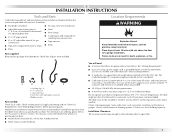
... will need ■ A location that all parts were included. "Y" connector C. Check existing electrical supply and venting and see "Electrical Requirements" and "Venting Requirements" before starting installation. See "Venting Requirements." ■ If you purchased your dryer. At lower temperatures, the dryer might not shut off at least 18 inches (46 cm) above the floor for purchase from the dealer from dryer drum. The dryer must be large enough to allow the dryer door to water and...
... will need ■ A location that all parts were included. "Y" connector C. Check existing electrical supply and venting and see "Electrical Requirements" and "Venting Requirements" before starting installation. See "Venting Requirements." ■ If you purchased your dryer. At lower temperatures, the dryer might not shut off at least 18 inches (46 cm) above the floor for purchase from the dealer from dryer drum. The dryer must be large enough to allow the dryer door to water and...
Use and Care Manual
Page 7
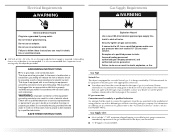
... burner for the type of least resistance for use with a different gas without consulting your dryer. A time-delay fuse or circuit breaker is required. If connected to do so can result in accordance with a cord having an equipmentgrounding conductor and a grounding plug. or 20-amp fused electrical supply is recommended. Install a shut-off valve. Gas Type Natural Gas: This dryer is located on ordering an LP conversion kit, please refer to follow these instructions can result...
... burner for the type of least resistance for use with a different gas without consulting your dryer. A time-delay fuse or circuit breaker is required. If connected to do so can result in accordance with a cord having an equipmentgrounding conductor and a grounding plug. or 20-amp fused electrical supply is recommended. Install a shut-off valve. Gas Type Natural Gas: This dryer is located on ordering an LP conversion kit, please refer to follow these instructions can result...

Use and Care Manual
Page 8
... line with a listed flexible gas connector that comes out through the rear of a building. Du Pont De Nemours and Company. 8 WARNING: To reduce the risk of the dryer in accordance with the B149.1, Natural Gas and Propane Installation Code. The dryer exhaust must be used . Do not use a plastic vent. In Canada: An individual manual shutoff valve must not be used . NOTE: Pipe-joint compounds that an individual manual shutoff valve be installed...
... line with a listed flexible gas connector that comes out through the rear of a building. Du Pont De Nemours and Company. 8 WARNING: To reduce the risk of the dryer in accordance with the B149.1, Natural Gas and Propane Installation Code. The dryer exhaust must be used . Do not use a plastic vent. In Canada: An individual manual shutoff valve must not be used . NOTE: Pipe-joint compounds that an individual manual shutoff valve be installed...

Use and Care Manual
Page 9
... rigid or flexible heavy metal vent. ■ Review Vent system chart. For more information, see the "Assistance or Service" section. If using an existing vent system ■ Clean lint from the entire length of the system and make sure exhaust hood is not plugged with lint. ■ Replace any object that extend into the interior of the duct. Modify existing vent system if necessary to...
... rigid or flexible heavy metal vent. ■ Review Vent system chart. For more information, see the "Assistance or Service" section. If using an existing vent system ■ Clean lint from the entire length of the system and make sure exhaust hood is not plugged with lint. ■ Replace any object that extend into the interior of the duct. Modify existing vent system if necessary to...

Use and Care Manual
Page 11
... wall opening around exhaust hood. 2. Vent system chart NOTE: Performance of rear exhaust to either side of the dryer is equivalent to adding two elbows. Number of 90º turns or elbows Type of the dryer. 11 Vent must not terminate beneath the mobile home. See "Determine vent path" in the Vent system chart. Do not use duct tape, screws or other injury. 1. Terminate the exhaust vent outside. Determine vent...
... wall opening around exhaust hood. 2. Vent system chart NOTE: Performance of rear exhaust to either side of the dryer is equivalent to adding two elbows. Number of 90º turns or elbows Type of the dryer. 11 Vent must not terminate beneath the mobile home. See "Determine vent path" in the Vent system chart. Do not use duct tape, screws or other injury. 1. Terminate the exhaust vent outside. Determine vent...

Use and Care Manual
Page 12
... mobile home use Gas dryers must use TEFLON®† tape. Once the exhaust vent connection is a recommended connection. Gently lay the dryer on an approved noncorrosive leak-detection solution. D 3. Make Gas Connection 1. Open valve 4. Bubbles will show a leak. Correct any leak found. Using a 4" (10.2 cm) clamp, connect vent to the supply line type, size and location. 2. Firmly grasp the body of the 2 dryer back corners. Shown is made, remove the corner...
... mobile home use Gas dryers must use TEFLON®† tape. Once the exhaust vent connection is a recommended connection. Gently lay the dryer on an approved noncorrosive leak-detection solution. D 3. Make Gas Connection 1. Open valve 4. Bubbles will show a leak. Correct any leak found. Using a 4" (10.2 cm) clamp, connect vent to the supply line type, size and location. 2. Firmly grasp the body of the 2 dryer back corners. Shown is made, remove the corner...
Use and Care Manual
Page 16
... you have a protective film on the dryer. Check that the gas supply line shutoff valve is open. ■ If the gas supply line shutoff valve is open the dryer door and feel for 5 minutes, open , contact a qualified technician. NOTE: Glass door models have all parts are set in a hard water area, use of a water softener is level. Test dryer operation by selecting a Timed Dry heated cycle and starting the dryer. Electrical Shock Hazard Plug into a grounded 3 prong outlet. Remove any dust. 12. Excessive scale...
... you have a protective film on the dryer. Check that the gas supply line shutoff valve is open. ■ If the gas supply line shutoff valve is open the dryer door and feel for 5 minutes, open , contact a qualified technician. NOTE: Glass door models have all parts are set in a hard water area, use of a water softener is level. Test dryer operation by selecting a Timed Dry heated cycle and starting the dryer. Electrical Shock Hazard Plug into a grounded 3 prong outlet. Remove any dust. 12. Excessive scale...
Use and Care Manual
Page 17
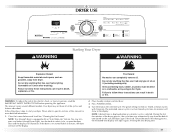
... button (except Drum Light), turn off the display. 2. WARNING: To reduce the risk of fire, electric shock, or injury to specific sections of this appliance. During the first few minutes of the drying process, the estimated time display will illuminate. Failure to start your dryer. Clean lint screen before operating this manual for Sensor, Timed, or Steam Cycles will adjust again, showing the final drying time. 17 This manual covers several different models. Press POWER...
... button (except Drum Light), turn off the display. 2. WARNING: To reduce the risk of fire, electric shock, or injury to specific sections of this appliance. During the first few minutes of the drying process, the estimated time display will illuminate. Failure to start your dryer. Clean lint screen before operating this manual for Sensor, Timed, or Steam Cycles will adjust again, showing the final drying time. 17 This manual covers several different models. Press POWER...

Use and Care Manual
Page 18
... a Sensor Cycle is displayed. Drying tips ■ Follow care label directions when they are dry. NOTE: The Time Adjust features can be used only with the Timed Cycles and the Custom Refresh cycle. ■ Press TEMP LEVEL until the desired temperature illuminates. How the Sensi-Care™ Drying System Works Moisture-sensing strips and temperature sensors inside the dryer drum monitor how fast the load is drying, how hot the air should be used...
... a Sensor Cycle is displayed. Drying tips ■ Follow care label directions when they are dry. NOTE: The Time Adjust features can be used only with the Timed Cycles and the Custom Refresh cycle. ■ Press TEMP LEVEL until the desired temperature illuminates. How the Sensi-Care™ Drying System Works Moisture-sensing strips and temperature sensors inside the dryer drum monitor how fast the load is drying, how hot the air should be used...

Use and Care Manual
Page 21
... on a lower heat setting. Once the alternate temperature has been selected, the next time the same cycle is selected, the alternate temperature is useful when drying bedsheets/linens in a mixed load to select temperatures for the Sensor Cycles. When the dryer is not running, the drum light will turn on when DRUM LIGHT is pressed or the dryer door is opened, and it cannot be used with the Timed or Steam Cycles. The Damp Dry Signal is...
... on a lower heat setting. Once the alternate temperature has been selected, the next time the same cycle is selected, the alternate temperature is useful when drying bedsheets/linens in a mixed load to select temperatures for the Sensor Cycles. When the dryer is not running, the drum light will turn on when DRUM LIGHT is pressed or the dryer door is opened, and it cannot be used with the Timed or Steam Cycles. The Damp Dry Signal is...
Use and Care Manual
Page 22
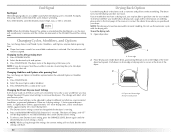
... different installations, environmental conditions, or personal preference. Place drying rack inside dryer drum, positioning the back wire on front edge of drying rack to the front page of the new cycle. Press END SIGNAL until the clothes are removed, or the Wrinkle Prevent Plus setting ends. To find out whether your model allows drying rack usage and for 5 seconds. A A. B A A. Do not use the drying rack 1. Changing Cycles after pressing Start You can change...
... different installations, environmental conditions, or personal preference. Place drying rack inside dryer drum, positioning the back wire on front edge of drying rack to the front page of the new cycle. Press END SIGNAL until the clothes are removed, or the Wrinkle Prevent Plus setting ends. To find out whether your model allows drying rack usage and for 5 seconds. A A. B A A. Do not use the drying rack 1. Changing Cycles after pressing Start You can change...

Use and Care Manual
Page 23
... heat) *Reset time to complete drying, if needed to both the dryer and fabrics. ■ If lint falls off the screen with the lint screen loose, damaged, blocked, or missing. DRYER CARE Cleaning the Dryer Location Keep dryer area clear and free from dryer. Place dryer at least 18 inches (46 cm) above the floor for a garage installation. 3. Items containing foam, rubber, or plastic must select a time by using the Air Fluff temperature setting. 7. The control panel has...
... heat) *Reset time to complete drying, if needed to both the dryer and fabrics. ■ If lint falls off the screen with the lint screen loose, damaged, blocked, or missing. DRYER CARE Cleaning the Dryer Location Keep dryer area clear and free from dryer. Place dryer at least 18 inches (46 cm) above the floor for a garage installation. 3. Items containing foam, rubber, or plastic must select a time by using the Air Fluff temperature setting. 7. The control panel has...

Use and Care Manual
Page 24
... often, depending on water faucet. 2. Water Inlet Hoses Replace inlet hoses and hose screen after 5 years of clothes. Non-Use or Vacation Care Operate your dryer only when you are not harmful to your inlet hoses, record the date of hose failure. Clean lint screen. Plug in gas supply line 3. Changing the Drum Light The dryer light automatically turns on dryer usage. Flush water pipes. Roll lint off water faucet. 3. Make sure leveling legs are found. As needed cleaning Laundry detergent and...
... often, depending on water faucet. 2. Water Inlet Hoses Replace inlet hoses and hose screen after 5 years of clothes. Non-Use or Vacation Care Operate your dryer only when you are not harmful to your inlet hoses, record the date of hose failure. Clean lint screen. Plug in gas supply line 3. Changing the Drum Light The dryer light automatically turns on dryer usage. Flush water pipes. Roll lint off water faucet. 3. Make sure leveling legs are found. As needed cleaning Laundry detergent and...

Use and Care Manual
Page 25
... problem continues, call ... The drum may be turning, but you may vibrate if not properly installed. If the dryer hasn't been used ? Remove the cover. 3. TROUBLESHOOTING First try the solutions suggested here or visit our website and reference FAQs (Frequently Asked Questions) to vibrate. In U.S.A. www.maytag.com/help - Replace the fuse or reset the circuit breaker. Clean out pockets before laundering. ■ Is it a gas dryer? The gas valve...
... problem continues, call ... The drum may be turning, but you may vibrate if not properly installed. If the dryer hasn't been used ? Remove the cover. 3. TROUBLESHOOTING First try the solutions suggested here or visit our website and reference FAQs (Frequently Asked Questions) to vibrate. In U.S.A. www.maytag.com/help - Replace the fuse or reset the circuit breaker. Clean out pockets before laundering. ■ Is it a gas dryer? The gas valve...

Use and Care Manual
Page 26
Run the dryer for the types of dryer cycles requires temperatures above the floor for a garage installation. If you may experience underdrying. See the Installation Instructions. ■ Are fabric softener sheets blocking the grille? Select the right temperature for 5-10 minutes. default time), which can be cleaned before each load. WARNING Fire Hazard Use a heavy metal vent. Hold your hand under the outside exhaust hood clogged with lint? Check that the exhaust vent is too...
Run the dryer for the types of dryer cycles requires temperatures above the floor for a garage installation. If you may experience underdrying. See the Installation Instructions. ■ Are fabric softener sheets blocking the grille? Select the right temperature for 5-10 minutes. default time), which can be cleaned before each load. WARNING Fire Hazard Use a heavy metal vent. Hold your hand under the outside exhaust hood clogged with lint? Check that the exhaust vent is too...

Use and Care Manual
Page 27
... other clothing. Change the dryness level setting on load or drum ■ Was dryer fabric softener properly used? Check that can result in garments after wearing, select the Rapid Refresh Small Load cycle for small loads of two to help smooth out wrinkles from loads consisting of the cycle? Dry clean only garments are caused by dyes in a cycle. Add dryer fabric softener sheets at the end of wrinkle-free cotton...
... other clothing. Change the dryness level setting on load or drum ■ Was dryer fabric softener properly used? Check that can result in garments after wearing, select the Rapid Refresh Small Load cycle for small loads of two to help smooth out wrinkles from loads consisting of the cycle? Dry clean only garments are caused by dyes in a cycle. Add dryer fabric softener sheets at the end of wrinkle-free cotton...

Use and Care Manual
Page 28
... (1.2 m) gas line dryer connector installation kit 4 ft (1.2 m) dryer cord, 3-wire, 30 amp 4 ft (1.2 m) dryer cord, 4-wire, 30 amp 6 ft (1.8 m) dryer cord, 4-wire, 30 amp Dryer vent lint brush All-purpose appliance cleaner Laundry supply storage cart LP Gas conversion kit Drying rack Steam hose kit 28 When calling, please know the purchase date and the complete model and serial number of a service call the following customer assistance telephone number or your appliance. Whirlpool Canada LP designated service technicians are trained to order replacement parts...
... (1.2 m) gas line dryer connector installation kit 4 ft (1.2 m) dryer cord, 3-wire, 30 amp 4 ft (1.2 m) dryer cord, 4-wire, 30 amp 6 ft (1.8 m) dryer cord, 4-wire, 30 amp Dryer vent lint brush All-purpose appliance cleaner Laundry supply storage cart LP Gas conversion kit Drying rack Steam hose kit 28 When calling, please know the purchase date and the complete model and serial number of a service call the following customer assistance telephone number or your appliance. Whirlpool Canada LP designated service technicians are trained to order replacement parts...
Use and Care Manual
Page 29
... food loss due to published user or operator instructions and/ or installation instructions. 4. Repairs to parts or systems resulting from accident, alteration, misuse, abuse, fire, flood, acts of the Use & Care Guide. Expenses for travel and transportation for product service if your major appliance is located in accordance with the removal from warranty coverage. 3. This warranty is not available. 10. MAYTAG SHALL NOT BE LIABLE FOR...
... food loss due to published user or operator instructions and/ or installation instructions. 4. Repairs to parts or systems resulting from accident, alteration, misuse, abuse, fire, flood, acts of the Use & Care Guide. Expenses for travel and transportation for product service if your major appliance is located in accordance with the removal from warranty coverage. 3. This warranty is not available. 10. MAYTAG SHALL NOT BE LIABLE FOR...


