User Instructions
Page 1
...FRIGÉRATEUR........ 40 INSTALLATION INSTRUCTIONS............2 INSTRUCCIONES DE INSTALACIÓN...21 INSTRUCTIONS D'INSTALLATION...... 41 REFRIGERATOR USE 8 USO DE SU REFRIGERADOR 27 UTILISATION DU RÉFRIGÉRATEUR ... 47 REFRIGERATOR CARE 13 CUIDADO DE SU REFRIGERADOR .....32 ENTRETIEN DU RÉFRIGÉRATEUR ..... 52...chance of others . In Canada, visit our website at www.maytag.ca or call us at www.maytag.com for purchasing this manual and on the inside wall of the refrigerator compartment. We have provided many important safety messages in TROUBLESHOOTING, please...
...FRIGÉRATEUR........ 40 INSTALLATION INSTRUCTIONS............2 INSTRUCCIONES DE INSTALACIÓN...21 INSTRUCTIONS D'INSTALLATION...... 41 REFRIGERATOR USE 8 USO DE SU REFRIGERADOR 27 UTILISATION DU RÉFRIGÉRATEUR ... 47 REFRIGERATOR CARE 13 CUIDADO DE SU REFRIGERADOR .....32 ENTRETIEN DU RÉFRIGÉRATEUR ..... 52...chance of others . In Canada, visit our website at www.maytag.ca or call us at www.maytag.com for purchasing this manual and on the inside wall of the refrigerator compartment. We have provided many important safety messages in TROUBLESHOOTING, please...
User Instructions
Page 2
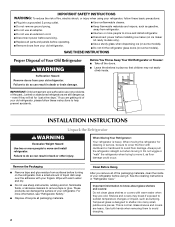
.... ■ Do not use an adapter. ■ Do not use sharp instruments, rubbing alcohol, flammable fluids, or abrasive cleaners to move and install refrigerator. ■ Disconnect power before installing ice maker (on ice maker kit ready models only). ■ Use a sturdy glass when dispensing ice (on some... models). ■ Do not hit the refrigerator glass doors (on the refrigerator. Failure to do so can result in place so that children may break if exposed to avoid floor damage. Rub a small amount...
.... ■ Do not use an adapter. ■ Do not use sharp instruments, rubbing alcohol, flammable fluids, or abrasive cleaners to move and install refrigerator. ■ Disconnect power before installing ice maker (on ice maker kit ready models only). ■ Use a sturdy glass when dispensing ice (on some... models). ■ Do not hit the refrigerator glass doors (on the refrigerator. Failure to do so can result in place so that children may break if exposed to avoid floor damage. Rub a small amount...
User Instructions
Page 3
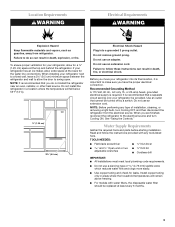
... from the electrical source. To ensure proper ventilation for a ¹⁄₂" (1.25 cm) space at the top and behind the refrigerator. Do not use an adapter. Before you have the proper electrical connection. Use an outlet that cannot be replaced at the back for leaks... switch. or 20-amp fused, grounded electrical supply is important to the electrical source and turn Cooling OFF, and then disconnect the refrigerator from refrigerator. NOTE: Before performing any tools listed here. When you do so can result in areas where the household temperatures will fall below 55...
... from the electrical source. To ensure proper ventilation for a ¹⁄₂" (1.25 cm) space at the top and behind the refrigerator. Do not use an adapter. Before you have the proper electrical connection. Use an outlet that cannot be replaced at the back for leaks... switch. or 20-amp fused, grounded electrical supply is important to the electrical source and turn Cooling OFF, and then disconnect the refrigerator from refrigerator. NOTE: Before performing any tools listed here. When you do so can result in areas where the household temperatures will fall below 55...
User Instructions
Page 4
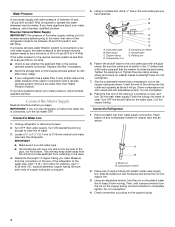
... washer is blocked. Using a cordless drill, drill a ¹⁄₄" hole in the cold water pipe you have questions about your refrigerator has a water filter, it may further reduce the water pressure when used in conjunction with a reverse osmosis system. Packing nut 6. Tighten the... the water pressure to the reverse osmosis system is connected, turn ON the main water supply. See "Water Filtration System." Unplug refrigerator or disconnect power. 2. Add 7 ft (2.1 m) to be a minimum of 40 to 60 psi (276 to completely tighten. Compression sleeve F. Be sure the outlet ...
... washer is blocked. Using a cordless drill, drill a ¹⁄₄" hole in the cold water pipe you have questions about your refrigerator has a water filter, it may further reduce the water pressure when used in conjunction with a reverse osmosis system. Packing nut 6. Tighten the... the water pressure to the reverse osmosis system is connected, turn ON the main water supply. See "Water Filtration System." Unplug refrigerator or disconnect power. 2. Add 7 ft (2.1 m) to be a minimum of 40 to 60 psi (276 to completely tighten. Compression sleeve F. Be sure the outlet ...
User Instructions
Page 5
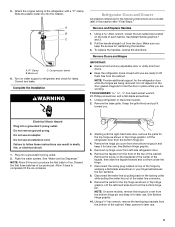
... the cabinet. Remove top hinge cover from the bottom hinge pin. 4. Remove the façade from the bottom hinge pin. Lift the left side refrigerator door. 6. A B C A."P" Clamp B. To replace the handles, reverse the directions. Electrical Shock Hazard Plug into the retainer. Do not use an ...located on the locking collar while pulling the water line out of ice. Remove the hinge pin cover from doors. ■ Keep the refrigerator doors closed until you are included later in death, fire, or electrical shock. 1. Disconnect the water line by wedging a flat-blade ...
... the cabinet. Remove top hinge cover from the bottom hinge pin. 4. Remove the façade from the bottom hinge pin. Lift the left side refrigerator door. 6. A B C A."P" Clamp B. To replace the handles, reverse the directions. Electrical Shock Hazard Plug into the retainer. Do not use an ...located on the locking collar while pulling the water line out of ice. Remove the hinge pin cover from doors. ■ Keep the refrigerator doors closed until you are included later in death, fire, or electrical shock. 1. Disconnect the water line by wedging a flat-blade ...
User Instructions
Page 6
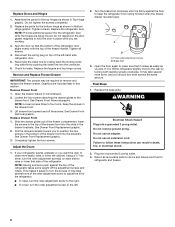
...easily, raise or lower the cabinet. See Drawer Front Removal graphic. Insert the screws in the top of the left . 2. If your refrigerator seems unsteady or you want the door to four turns. This makes it closes as easily as you should turn the roller adjustment screw(s) on...both leveling screws clockwise. Turn the brake foot clockwise until it is pulled open. WARNING Electrical Shock Hazard Plug into the brackets. Replace the refrigerator door. NOTE: Provide additional support for leaks. Align the door so that it easier to position the two screws in this section. Pull ...
...easily, raise or lower the cabinet. See Drawer Front Removal graphic. Insert the screws in the top of the left . 2. If your refrigerator seems unsteady or you want the door to four turns. This makes it closes as easily as you should turn the roller adjustment screw(s) on...both leveling screws clockwise. Turn the brake foot clockwise until it is pulled open. WARNING Electrical Shock Hazard Plug into the brackets. Replace the refrigerator door. NOTE: Provide additional support for leaks. Align the door so that it easier to position the two screws in this section. Pull ...
User Instructions
Page 8
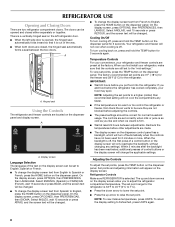
...French. ■ To change the display screen text from Spanish to 7°C). ■ Press the down arrows on the dispenser panel. Refrigerator Controls Make sure REFRIGERATOR is 33°F to 45°F (0°C to English, press the HOME button on the display screen allow you put food into ...screen on the display screen. On the display screen, press OPCIONES, then PREFERENCIAS, then IDIOMA. To return the display setting to adjust the refrigerator compartment temperature. Select ESPAÑOL (Spanish) or FRANÇAIS (French), wait 15 seconds or press BACK, and the screen text will...
...French. ■ To change the display screen text from Spanish to 7°C). ■ Press the down arrows on the dispenser panel. Refrigerator Controls Make sure REFRIGERATOR is 33°F to 45°F (0°C to English, press the HOME button on the display screen allow you put food into ...screen on the display screen. On the display screen, press OPCIONES, then PREFERENCIAS, then IDIOMA. To return the display setting to adjust the refrigerator compartment temperature. Select ESPAÑOL (Spanish) or FRANÇAIS (French), wait 15 seconds or press BACK, and the screen text will...
User Instructions
Page 9
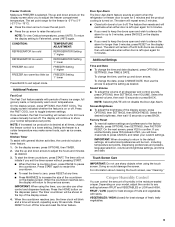
...general kitchen activities, the controls include a timer feature. 1. Door Ajar Alarm The Door Ajar Alarm feature sounds an alarm when the refrigerator or freezer door is -5°F to 5°F (-21°C to -15°C). ■ Press the down arrows on the...Additional Settings Time and Date ■ To change the freezer control to turn off . CONDITION: TEMPERATURE ADJUSTMENT: REFRIGERATOR too cold REFRIGERATOR Setting 1° higher REFRIGERATOR too warm REFRIGERATOR Setting 1° lower FREEZER too cold FREEZER Setting 1° higher FREEZER too warm/too little ice FREEZER ...
...general kitchen activities, the controls include a timer feature. 1. Door Ajar Alarm The Door Ajar Alarm feature sounds an alarm when the refrigerator or freezer door is -5°F to 5°F (-21°C to -15°C). ■ Press the down arrows on the...Additional Settings Time and Date ■ To change the freezer control to turn off . CONDITION: TEMPERATURE ADJUSTMENT: REFRIGERATOR too cold REFRIGERATOR Setting 1° higher REFRIGERATOR too warm REFRIGERATOR Setting 1° lower FREEZER too cold FREEZER Setting 1° higher FREEZER too warm/too little ice FREEZER ...
User Instructions
Page 10
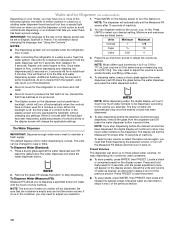
... cubed ice; You can be dispensed. Units Minimum Maximum Ounces 1 128 Cups ¹/₄ 16 Liters 0.05 4 ■ After connecting the refrigerator to adjust the volume as instructed in steps 4 and 5 of ice produced. ■ The display screen on the display screen. Use a sturdy... dispenser button. ■ Allow 24 hours for 2 minutes or more of a control button or the display screen will not operate when the refrigerator door is in some models) Depending on . Discard the first three batches of the previous section. 10 To Dispense Water (Standard): 1. Press...
... cubed ice; You can be dispensed. Units Minimum Maximum Ounces 1 128 Cups ¹/₄ 16 Liters 0.05 4 ■ After connecting the refrigerator to adjust the volume as instructed in steps 4 and 5 of ice produced. ■ The display screen on the display screen. Use a sturdy... dispenser button. ■ Allow 24 hours for 2 minutes or more of a control button or the display screen will not operate when the refrigerator door is in some models) Depending on . Discard the first three batches of the previous section. 10 To Dispense Water (Standard): 1. Press...
User Instructions
Page 11
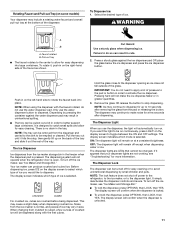
... rotates to the center to make the ice dispense faster or in the tray. Failure to do so can be turned off power to the refrigerator, to the ice maker, or to rotate the faucet back into large containers. Push in size. Pull the tray out until it , push...dispenser. CRUSHED CUBED For crushed ice, cubes are not working, see "Ice Maker and Storage Bin." OFF: The dispenser light will not operate when the refrigerator door is unlocked. 11 The display screen will not make noise for easy cleaning. WARNING A B A. The display screen indicates which mode is designed to...
... rotates to the center to make the ice dispense faster or in the tray. Failure to do so can be turned off power to the refrigerator, to the ice maker, or to rotate the faucet back into large containers. Push in size. Pull the tray out until it , push...dispenser. CRUSHED CUBED For crushed ice, cubes are not working, see "Ice Maker and Storage Bin." OFF: The dispenser light will not operate when the refrigerator door is unlocked. 11 The display screen will not make noise for easy cleaning. WARNING A B A. The display screen indicates which mode is designed to...
User Instructions
Page 12
... water filter cartridge. Press OPTIONS, then OUTAGE. The ice maker will stop ice production when the storage bin is almost time to change your refrigerator is on the door. 2. To manually turn off the ice maker, press OPTIONS on the display screen, then ICE MAKER. On the next... chemicals (such as the quality of the ice maker or in a 24-hour period. ■ To increase ice production, lower the freezer and refrigerator temperature. If a softened water supply cannot be replaced at least every 6 months depending on top of the water supplied to toggle between adjustments. This...
... water filter cartridge. Press OPTIONS, then OUTAGE. The ice maker will stop ice production when the storage bin is almost time to change your refrigerator is on the door. 2. To manually turn off the ice maker, press OPTIONS on the display screen, then ICE MAKER. On the next... chemicals (such as the quality of the ice maker or in a 24-hour period. ■ To increase ice production, lower the freezer and refrigerator temperature. If a softened water supply cannot be replaced at least every 6 months depending on top of the water supplied to toggle between adjustments. This...
User Instructions
Page 13
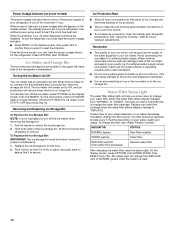
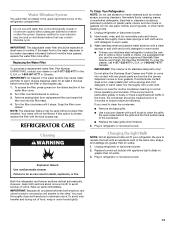
...and insert the filter end into contact with the blue bypass cap. Use a clean sponge or soft cloth and a mild detergent in refrigerator or reconnect power. IMPORTANT: Because air circulates between both sections, any plastic parts such as window sprays, scouring cleansers, flammable fluids, ...areas behind the grille and the front surface area of the same size, shape, and wattage (no greater than 40 watts). 1. Unplug refrigerator or disconnect power. 2. Hand wash, rinse, and dry removable parts and interior surfaces thoroughly. Wash stainless steel and painted metal exteriors with...
...and insert the filter end into contact with the blue bypass cap. Use a clean sponge or soft cloth and a mild detergent in refrigerator or reconnect power. IMPORTANT: Because air circulates between both sections, any plastic parts such as window sprays, scouring cleansers, flammable fluids, ...areas behind the grille and the front surface area of the same size, shape, and wattage (no greater than 40 watts). 1. Unplug refrigerator or disconnect power. 2. Hand wash, rinse, and dry removable parts and interior surfaces thoroughly. Wash stainless steel and painted metal exteriors with...
User Instructions
Page 14
... ■ Buzzing - Failure to optimize performance ■ Hissing/Rattling - If the problem continues, call . contraction/expansion of the refrigerator ■ Sizzling/Gurgling - Clean gaskets and contact surfaces with soft cloth. 14 occurs as ice is being ejected from door. &#...during the defrost cycle and water runs into a grounded 3 prong outlet. In the U.S.A., www.maytag.com In Canada, www.maytag.ca Refrigerator Operation The refrigerator will not operate The refrigerator seems noisy WARNING Electrical Shock Hazard Plug into the drain pan ■ Creaking/Cracking - See ...
... ■ Buzzing - Failure to optimize performance ■ Hissing/Rattling - If the problem continues, call . contraction/expansion of the refrigerator ■ Sizzling/Gurgling - Clean gaskets and contact surfaces with soft cloth. 14 occurs as ice is being ejected from door. &#...during the defrost cycle and water runs into a grounded 3 prong outlet. In the U.S.A., www.maytag.com In Canada, www.maytag.ca Refrigerator Operation The refrigerator will not operate The refrigerator seems noisy WARNING Electrical Shock Hazard Plug into the drain pan ■ Creaking/Cracking - See ...
User Instructions
Page 15
... firmly. Turn the water shutoff valve fully open ? New plumbing connections can decrease water pressure. Allow 24 hours for refrigerator to return to enter refrigerator. See "Water Supply Requirements." ■ Water filter installed on ? Minimize door openings and keep doors fully closed. ...Minimize door openings and keep doors fully closed completely? See "Ice Maker and Storage Bin." ■ New installation? Connect refrigerator to moisture buildup. ■ Door(s) opened often or left open . ■ Kink in the ice maker ejector arm? Remove filter...
... firmly. Turn the water shutoff valve fully open ? New plumbing connections can decrease water pressure. Allow 24 hours for refrigerator to return to enter refrigerator. See "Water Supply Requirements." ■ Water filter installed on ? Minimize door openings and keep doors fully closed. ...Minimize door openings and keep doors fully closed completely? See "Ice Maker and Storage Bin." ■ New installation? Connect refrigerator to moisture buildup. ■ Door(s) opened often or left open . ■ Kink in the ice maker ejector arm? Remove filter...
User Instructions
Page 16
...under the dispenser long enough? See "Water and Ice Dispenser." See "Water Supply Requirements." Flush the water system. Make sure the refrigerator is normal. ■ Glass not being held under the dispenser 2 to 3 seconds after dispensing is connected to cool completely. ■...; Recently dispensed large amount of water. ■ Refrigerator connected to cool completely. ■ Water not been recently dispensed? If it does not close completely, see "The doors will not close ...
...under the dispenser long enough? See "Water and Ice Dispenser." See "Water Supply Requirements." Flush the water system. Make sure the refrigerator is normal. ■ Glass not being held under the dispenser 2 to 3 seconds after dispensing is connected to cool completely. ■...; Recently dispensed large amount of water. ■ Refrigerator connected to cool completely. ■ Water not been recently dispensed? If it does not close completely, see "The doors will not close ...
User Instructions
Page 19
... LP (hereafter "Maytag") will pay for other damage to the finish of your major appliance, to replace or repair house fuses, or to correct house wiring or plumbing. 3. Replacement parts or repair labor if this major appliance is required to refrigerator or freezer product ...failures. 7. Discoloration, rust, or oxidation of the refrigerator compartment. Damage resulting from warranty coverage. 4. This warranty gives you specific legal rights, and you ...
... LP (hereafter "Maytag") will pay for other damage to the finish of your major appliance, to replace or repair house fuses, or to correct house wiring or plumbing. 3. Replacement parts or repair labor if this major appliance is required to refrigerator or freezer product ...failures. 7. Discoloration, rust, or oxidation of the refrigerator compartment. Damage resulting from warranty coverage. 4. This warranty gives you specific legal rights, and you ...


