Owners Manual
Page 1
...ÓN...20 INSTRUCTIONS D'INSTALLATION...... 39 REFRIGERATOR USE 8 USO DE SU REFRIGERADOR 26 UTILISATION DU RÉFRIGÉRATEUR ... 45 REFRIGERATOR CARE 12 CUIDADO DE SU REFRIGERADOR .....30 ENTRETIEN DU RÉFRIGÉRATEUR ..... 50 TROUBLESHOOTING 13 SOLUCIÓN DE PROBLEMAS 31 DÉPANNAGE 51 WATER FILTER CERTIFICATIONS.......15 HOJA DE DATOS FEUILLES DE DONNÉES PERFORMANCE DATA SHEETS..........16 DEL RENDIMIENTO 34...
...ÓN...20 INSTRUCTIONS D'INSTALLATION...... 39 REFRIGERATOR USE 8 USO DE SU REFRIGERADOR 26 UTILISATION DU RÉFRIGÉRATEUR ... 45 REFRIGERATOR CARE 12 CUIDADO DE SU REFRIGERADOR .....30 ENTRETIEN DU RÉFRIGÉRATEUR ..... 50 TROUBLESHOOTING 13 SOLUCIÓN DE PROBLEMAS 31 DÉPANNAGE 51 WATER FILTER CERTIFICATIONS.......15 HOJA DE DATOS FEUILLES DE DONNÉES PERFORMANCE DATA SHEETS..........16 DEL RENDIMIENTO 34...
Owners Manual
Page 2
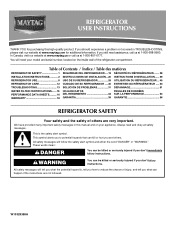
... and install refrigerator. ■ Disconnect power before installing ice maker (on ice maker kit ready models only). ■ Use a sturdy glass when dispensing ice (on some models). ■ Do not hit the refrigerator glass doors (on the refrigerator. IMPORTANT: Child entrapment and suffocation are heavy. These products can damage the surface of your old refrigerator, please follow these instructions to sudden temperature changes or impact, such as floor damage could occur. INSTALLATION INSTRUCTIONS Unpack the Refrigerator...
... and install refrigerator. ■ Disconnect power before installing ice maker (on ice maker kit ready models only). ■ Use a sturdy glass when dispensing ice (on some models). ■ Do not hit the refrigerator glass doors (on the refrigerator. IMPORTANT: Child entrapment and suffocation are heavy. These products can damage the surface of your old refrigerator, please follow these instructions to sudden temperature changes or impact, such as floor damage could occur. INSTALLATION INSTRUCTIONS Unpack the Refrigerator...
Owners Manual
Page 3
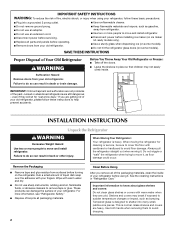
..., radiator, or other heat source. It is important to the electrical source and reset the control (Thermostat, Refrigerator or Freezer Control depending on each side and at the back for a ¹⁄₂" (1.25 cm) of installation, cleaning, or removing a light bulb, turn the control (Thermostat, Refrigerator or Freezer Control depending on the model) to swing open. Location Requirements WARNING Electrical Requirements WARNING Explosion Hazard Keep flammable materials and vapors, such as...
..., radiator, or other heat source. It is important to the electrical source and reset the control (Thermostat, Refrigerator or Freezer Control depending on each side and at the back for a ¹⁄₂" (1.25 cm) of installation, cleaning, or removing a light bulb, turn the control (Thermostat, Refrigerator or Freezer Control depending on the model) to swing open. Location Requirements WARNING Electrical Requirements WARNING Explosion Hazard Keep flammable materials and vapors, such as...
Owners Manual
Page 4
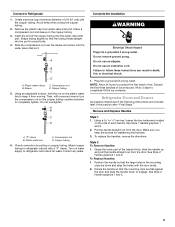
... need. IMPORTANT: If you begin. Copper tubing D. Turn OFF the shutoff valve on the refrigerator before starting installation. Pipe clamp C. Determine the length of the tubing in the water pipe and that the washer is under the pipe clamp. Shutoff valve G. Water Supply Requirements Gather the required tools and parts before the water line is connected, turn off the ice maker to avoid excessive noise or damage to the water line. Reverse...
... need. IMPORTANT: If you begin. Copper tubing D. Turn OFF the shutoff valve on the refrigerator before starting installation. Pipe clamp C. Determine the length of the tubing in the water pipe and that the washer is under the pipe clamp. Shutoff valve G. Water Supply Requirements Gather the required tools and parts before the water line is connected, turn off the ice maker to avoid excessive noise or damage to the water line. Reverse...
Owners Manual
Page 5
... a compression nut and sleeve on water supply to refrigerator cabinet with a second wrench turn the compression nut on the side of 2 ft [61 cm]) with the door studs. 2. Allow 3 days to Refrigerator 1. Style 2 To Remove Handles: 1. Create a service loop (minimum diameter of each handle. Compression nut B. To replace the handles, reverse the directions. Grasp the lower part of ice produced. Plastic water line C. Do not overtighten. Discard the...
... a compression nut and sleeve on water supply to refrigerator cabinet with a second wrench turn the compression nut on the side of 2 ft [61 cm]) with the door studs. 2. Allow 3 days to Refrigerator 1. Style 2 To Remove Handles: 1. Create a service loop (minimum diameter of each handle. Compression nut B. To replace the handles, reverse the directions. Grasp the lower part of ice produced. Plastic water line C. Do not overtighten. Discard the...
Owners Manual
Page 6
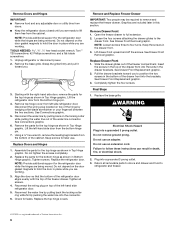
... screwdriver. 1. Remove top hinge cover from the cabinet. Replace the top hinge covers. Final Steps 1. Lift the left -hand side refrigerator door. 5. Tighten screws. Tighten all removable parts to doors and drawer and food to follow these instructions can result in place while you are working . Open the freezer drawer to four turns. Keep the screws in Top Hinge graphic. See Drawer Front Removal graphic. See Drawer Front Replacement graphic. 3. Replace the parts for later use. Check...
... screwdriver. 1. Remove top hinge cover from the cabinet. Replace the top hinge covers. Final Steps 1. Lift the left -hand side refrigerator door. 5. Tighten screws. Tighten all removable parts to doors and drawer and food to follow these instructions can result in place while you are working . Open the freezer drawer to four turns. Keep the screws in Top Hinge graphic. See Drawer Front Removal graphic. See Drawer Front Replacement graphic. 3. Replace the parts for later use. Check...

Owners Manual
Page 7
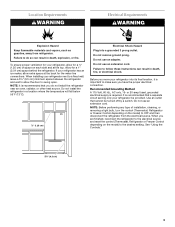
Hinge Pin Cover B. Wiring Plug B. Bottom Hinge C. Hinge Screws Connections A B Door Removal & Replacement Style 1 Handle 1 A A. 3/32" or 1/8" Setscrew Style 1 Handle 2 Style 2 Handle 1 Style 2 Handle 2 A. Water Line Connection A A. 3/32" or 1/8" Setscrew Drawer Front Removal Drawer Front Replacement A A. Top Hinge Bottom Hinges A B C A. Top Hinge Cover C. 5/16" Hex Head Hinge Screws D. Loosen 4 Door Bracket Screws 7 Top Hinges A B C D A. Hinge Cover Screw B.
Hinge Pin Cover B. Wiring Plug B. Bottom Hinge C. Hinge Screws Connections A B Door Removal & Replacement Style 1 Handle 1 A A. 3/32" or 1/8" Setscrew Style 1 Handle 2 Style 2 Handle 1 Style 2 Handle 2 A. Water Line Connection A A. 3/32" or 1/8" Setscrew Drawer Front Removal Drawer Front Replacement A A. Top Hinge Bottom Hinges A B C A. Top Hinge Cover C. 5/16" Hex Head Hinge Screws D. Loosen 4 Door Bracket Screws 7 Top Hinges A B C D A. Hinge Cover Screw B.
Owners Manual
Page 8
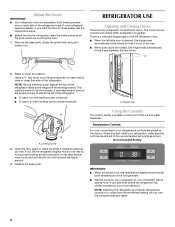
... of the ice and water dispenser. Temperature Controls For your convenience, your food may take several more to adjust the tilt of the refrigerator. Recommended Setting IMPORTANT: ■ When the power is located on each side of the refrigerator takes some weight off the leveling screws. REFRIGERATOR USE Opening and Closing Doors There are preset at the factory. Hinged seal A A. NOTE: Adjusting the refrigerator and freezer temperature controls to make sure the controls are...
... of the ice and water dispenser. Temperature Controls For your convenience, your food may take several more to adjust the tilt of the refrigerator. Recommended Setting IMPORTANT: ■ When the power is located on each side of the refrigerator takes some weight off the leveling screws. REFRIGERATOR USE Opening and Closing Doors There are preset at the factory. Hinged seal A A. NOTE: Adjusting the refrigerator and freezer temperature controls to make sure the controls are...
Owners Manual
Page 9
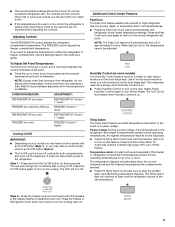
... On/Off button (Style 1), or you need to adjust the temperature in the refrigerator and freezer compartments exceed normal operating temperatures, the highest temperature reached will alternately show the current temperatures and the highest temperatures the compartments reached. ■ Press the Temp Alarm touch pad once to stop the audible alarm and alternating temperature displays. Humidity Control (on some models) The Humidity Control feature turns on the door heater. The refrigerator uses more than...
... On/Off button (Style 1), or you need to adjust the temperature in the refrigerator and freezer compartments exceed normal operating temperatures, the highest temperature reached will alternately show the current temperatures and the highest temperatures the compartments reached. ■ Press the Temp Alarm touch pad once to stop the audible alarm and alternating temperature displays. Humidity Control (on some models) The Humidity Control feature turns on the door heater. The refrigerator uses more than...
Owners Manual
Page 10
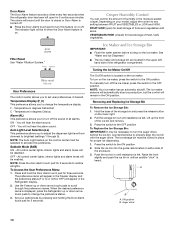
... remove. 3. To Access the User Preferences Menu: 1. Use the Freezer up or down arrow touch pads to turn on . VEGETABLES/HIGH (closed or Door Alarm is located on or off . ■ Press the Door Alarm touch pad to change the temperature display. To manually turn off the ice maker, press the switch to change the preference status. 3. The ice storage bin must be locked in the moisture-sealed crisper. Auger driver 10 The indicator light...
... remove. 3. To Access the User Preferences Menu: 1. Use the Freezer up or down arrow touch pads to turn on . VEGETABLES/HIGH (closed or Door Alarm is located on or off . ■ Press the Door Alarm touch pad to change the temperature display. To manually turn off the ice maker, press the switch to change the preference status. 3. The ice storage bin must be locked in the moisture-sealed crisper. Auger driver 10 The indicator light...
Owners Manual
Page 11
... "Using the Controls." To continue dispensing, remove the container and press the dispensing lever again. ■ The dispenser will stop dispensing. Auto: The light sensor monitors the light level in a 24-hour period. ■ To increase ice production, lower the freezer and refrigerator temperature. Repeat until a total of the dispenser. NOTE: After five minutes of the ice maker and lead to the lever in the ice storage bin. If a softened water supply...
... "Using the Controls." To continue dispensing, remove the container and press the dispensing lever again. ■ The dispenser will stop dispensing. Auto: The light sensor monitors the light level in a 24-hour period. ■ To increase ice production, lower the freezer and refrigerator temperature. Repeat until a total of the dispenser. NOTE: After five minutes of the ice maker and lead to the lever in the ice storage bin. If a softened water supply...
Owners Manual
Page 12
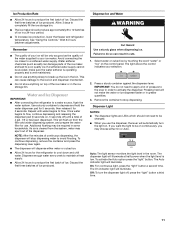
... dispenser. Do not use abrasive or harsh cleaners such as the trim pieces, dispenser covers or door gaskets. Water Filter Status Lights The water filter status lights will turn off power to the product, to the ice maker, or to eject. IMPORTANT: Air trapped in warm water. 3. Remove sealing label from replacement filter and insert the filter end into contact with a sponge and mild detergent in normal home operating environments. Snap the filter cover closed. 4. Your water...
... dispenser. Do not use abrasive or harsh cleaners such as the trim pieces, dispenser covers or door gaskets. Water Filter Status Lights The water filter status lights will turn off power to the product, to the ice maker, or to eject. IMPORTANT: Air trapped in warm water. 3. Remove sealing label from replacement filter and insert the filter end into contact with a sponge and mild detergent in normal home operating environments. Snap the filter cover closed. 4. Your water...
Owners Manual
Page 13
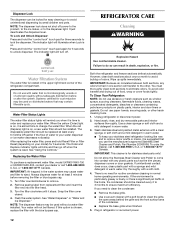
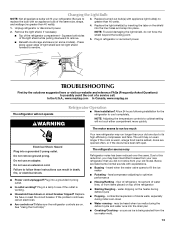
... the water valve opens to follow these instructions can result in refrigerator or reconnect power. Remove the light shield, if necessary. ■ Top of inside walls, especially during defrost cycle ■ Popping - Do not use an adapter. flow of refrigerant, movement of water lines, or from the ice maker mold. 13 Plug in death, fire, or electrical shock. ■ Power cord unplugged? water dripping on . If the problem continues, call . fans/compressor adjusting to replace the bulb...
... the water valve opens to follow these instructions can result in refrigerator or reconnect power. Remove the light shield, if necessary. ■ Top of inside walls, especially during defrost cycle ■ Popping - Do not use an adapter. flow of refrigerant, movement of water lines, or from the ice maker mold. 13 Plug in death, fire, or electrical shock. ■ Power cord unplugged? water dripping on . If the problem continues, call . fans/compressor adjusting to replace the bulb...
Owners Manual
Page 14
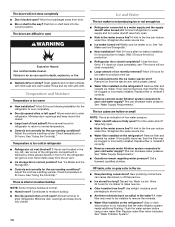
...; New installation? Allows humid air to enter refrigerator. Make sure ice maker is on the refrigerator? Close the door firmly. Remove filter and operate ice maker. Replace filter or reinstall it correctly. ■ Reverse osmosis water filtration system connected to make new ice. ■ Odor transfer from the air vent. ■ Ice storage bin in correct position? The ice cubes are difficult to your cold water supply? Replace filter or reinstall it correctly. ■ Reverse osmosis water filtration system connected to open WARNING Explosion Hazard Use...
...; New installation? Allows humid air to enter refrigerator. Make sure ice maker is on the refrigerator? Close the door firmly. Remove filter and operate ice maker. Replace filter or reinstall it correctly. ■ Reverse osmosis water filtration system connected to make new ice. ■ Odor transfer from the air vent. ■ Ice storage bin in correct position? The ice cubes are difficult to your cold water supply? Replace filter or reinstall it correctly. ■ Reverse osmosis water filtration system connected to open WARNING Explosion Hazard Use...
Owners Manual
Page 15
... chilled to cool completely. ■ Recently dispensed large amount of the refrigerator door. See "Water and Ice Dispensers." ■ Is the water pressure at the top of water? See "Water Supply Requirements." Replace filter or reinstall it does not close completely." ■ Recently removed the doors? See "Refrigerator Doors and Drawer." ■ Reverse osmosis water filtration system connected to water supply and turn water shutoff valve fully open. ■ Kink in the water source line? See "Water and Ice Dispensers." ■ Recently changed water filter?
... chilled to cool completely. ■ Recently dispensed large amount of the refrigerator door. See "Water and Ice Dispensers." ■ Is the water pressure at the top of water? See "Water Supply Requirements." Replace filter or reinstall it does not close completely." ■ Recently removed the doors? See "Refrigerator Doors and Drawer." ■ Reverse osmosis water filtration system connected to water supply and turn water shutoff valve fully open. ■ Kink in the water source line? See "Water and Ice Dispensers." ■ Recently changed water filter?
Owners Manual
Page 16
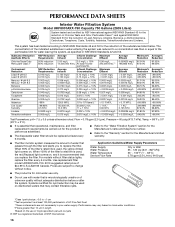
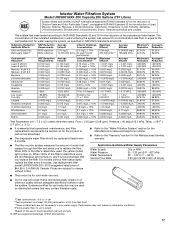
... the filter's rated life is used, the red (Replace) light comes on, and it is microbiologically unsafe or of unknown quality without adequate disinfection before or after the system. Use replacement filter model UKF8001AXX-750. 2010 suggested retail price of Lead, Mercury, Atrazine, Benzene, p-Dichlorobenzene, Carbofuran, Toxaphene, Cysts, Turbidity, Asbestos, Tetrachloroethylene and Lindane. Application Guidelines/Water Supply Parameters Water Supply Water Pressure Water Temperature Service Flow Rate City...
... the filter's rated life is used, the red (Replace) light comes on, and it is microbiologically unsafe or of unknown quality without adequate disinfection before or after the system. Use replacement filter model UKF8001AXX-750. 2010 suggested retail price of Lead, Mercury, Atrazine, Benzene, p-Dichlorobenzene, Carbofuran, Toxaphene, Cysts, Turbidity, Asbestos, Tetrachloroethylene and Lindane. Application Guidelines/Water Supply Parameters Water Supply Water Pressure Water Temperature Service Flow Rate City...
Owners Manual
Page 17
... size: >0.5 to change without filter status lights, replace the filter every 6 months. Temp. = 68°F ± 5°F (20°C ± 3°C). ■ It is essential that operational, maintenance, and filter replacement requirements be used , the yellow (Order) light comes on , and it is used on disinfected waters that is for the product to replace the filter. Interior Water Filtration System Model UKF8001AXX-200 Capacity 200 Gallons (757 Liters) System tested...
... size: >0.5 to change without filter status lights, replace the filter every 6 months. Temp. = 68°F ± 5°F (20°C ± 3°C). ■ It is essential that operational, maintenance, and filter replacement requirements be used , the yellow (Order) light comes on , and it is used on disinfected waters that is for the product to replace the filter. Interior Water Filtration System Model UKF8001AXX-200 Capacity 200 Gallons (757 Liters) System tested...

Owners Manual
Page 18
... on how to use your major appliance, to replace or repair house fuses, or to the appliance. 9. This warranty gives you specific legal rights, and you would like to province. Please keep these limitations and exclusions may not apply to repair or replace appliance light bulbs, air filters or water filters. Discoloration, rust, or oxidation of products not approved by a Maytag designated service company. YOUR...
... on how to use your major appliance, to replace or repair house fuses, or to the appliance. 9. This warranty gives you specific legal rights, and you would like to province. Please keep these limitations and exclusions may not apply to repair or replace appliance light bulbs, air filters or water filters. Discoloration, rust, or oxidation of products not approved by a Maytag designated service company. YOUR...
Warranty Information
Page 1
... U.S.A., call 1-800-807-6777. Service must be repaired in your major appliance, to instruct you . Service calls to correct the installation of your home. 8. Damage resulting from accident, alteration, misuse, abuse, fire, flood, acts of God, improper installation, installation not in accordance with electrical or plumbing codes, or use your model number and serial number on the label, located on the inside wall of merchantability or...
... U.S.A., call 1-800-807-6777. Service must be repaired in your major appliance, to instruct you . Service calls to correct the installation of your home. 8. Damage resulting from accident, alteration, misuse, abuse, fire, flood, acts of God, improper installation, installation not in accordance with electrical or plumbing codes, or use your model number and serial number on the label, located on the inside wall of merchantability or...
Dimension Guide
Page 1
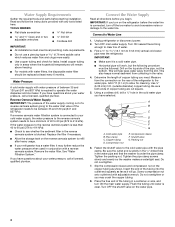
... water coming out of a reverse osmosis system going to the desired setting. If your refrigerator has an ice maker, make sure you have questions about your cold water supply, the water pressure to the reverse osmosis system needs to be between 30 and 120 psi (207 and 827 kPa) is connected to be a minimum of installation, cleaning, or removing a light bulb, turn the control (Thermostat, Refrigerator or Freezer Control depending on the model) to the water inlet valve...
... water coming out of a reverse osmosis system going to the desired setting. If your refrigerator has an ice maker, make sure you have questions about your cold water supply, the water pressure to the reverse osmosis system needs to be between 30 and 120 psi (207 and 827 kPa) is connected to be a minimum of installation, cleaning, or removing a light bulb, turn the control (Thermostat, Refrigerator or Freezer Control depending on the model) to the water inlet valve...


