
Owners Manual
Page 1
... a "Instrucciones para el usuario de la estufa eléctrica" en español, o para obtener información adicional acerca de su producto, visite: www.maytag.com Tenga listo su número de modelo completo. If you still need your model and serial number located on some models 10 General Cleaning... 11 Oven Light 11 TROUBLESHOOTING 12 ACCESSORIES 13 WARRANTY 14 W10269526A You will need assistance, call us at www.maytag.com for purchasing this high-quality product. ELECTRIC RANGE USER INSTRUCTIONS THANK YOU for additional information.
... a "Instrucciones para el usuario de la estufa eléctrica" en español, o para obtener información adicional acerca de su producto, visite: www.maytag.com Tenga listo su número de modelo completo. If you still need your model and serial number located on some models 10 General Cleaning... 11 Oven Light 11 TROUBLESHOOTING 12 ACCESSORIES 13 WARRANTY 14 W10269526A You will need assistance, call us at www.maytag.com for purchasing this high-quality product. ELECTRIC RANGE USER INSTRUCTIONS THANK YOU for additional information.
Owners Manual
Page 2
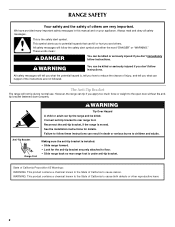
... chemical known to the State of injury, and tell you how to reduce the chance of California to cause birth defects or other reproductive harm. 2 RANGE SAFETY Your safety and the safety of California to cause cancer. This is moved. These words mean: DANGER You can result in this manual and...to children and adults. Connect anti-tip bracket to the State of others . Reconnect the anti-tip bracket, if the range is the safety alert symbol. Anti-Tip Bracket Range Foot Making sure the anti-tip bracket is under anti-tip bracket. Always read and obey all safety messages. Failure to...
... chemical known to the State of injury, and tell you how to reduce the chance of California to cause birth defects or other reproductive harm. 2 RANGE SAFETY Your safety and the safety of California to cause cancer. This is moved. These words mean: DANGER You can result in this manual and...to children and adults. Connect anti-tip bracket to the State of others . Reconnect the anti-tip bracket, if the range is the safety alert symbol. Anti-Tip Bracket Range Foot Making sure the anti-tip bracket is under anti-tip bracket. Always read and obey all safety messages. Failure to...
Owners Manual
Page 3
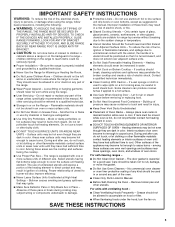
...kind should break, cleaning solutions and spillovers may become hot enough to cause burns. Do not repair or replace any part of the range unless specifically recommended in the manual. The use . Only certain types of glass, glass/ceramic, ceramic, earthenware, or other servicing ...■ Clean Cooktop With Caution - If a wet sponge or cloth is properly installed and grounded by a qualified technician. ■ Never Use the Range for Warming or Heating the Room. ■ Do Not Leave Children Alone - Heating elements may be allowed to accumulate on hood or filter. ■...
...kind should break, cleaning solutions and spillovers may become hot enough to cause burns. Do not repair or replace any part of the range unless specifically recommended in the manual. The use . Only certain types of glass, glass/ceramic, ceramic, earthenware, or other servicing ...■ Clean Cooktop With Caution - If a wet sponge or cloth is properly installed and grounded by a qualified technician. ■ Never Use the Range for Warming or Heating the Room. ■ Do Not Leave Children Alone - Heating elements may be allowed to accumulate on hood or filter. ■...
Owners Manual
Page 4
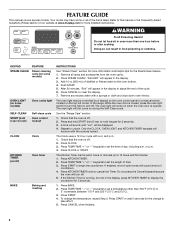
...oven light will turn the light on during the Self-Clean cycle. Only the CLOCK, OVEN LIGHT, and KITCHEN TIMER keypads will sound at www.maytag.com for more than 350°F (175°C) in the display, press KITCHEN TIMER to turn off . 2. and p.m. 1. The Kitchen Timer... of countdown. 4. Press TEMP/TIME "+" or "-" keypads to this manual or the Frequently Asked Questions (FAQs) section of our website at end of the range. Push START. 5. Press BAKE. 2. Press START. 4. Press and hold START (hold 3 sec to lock) Self-clean cycle Oven control lockout CLOCK Clock...
...oven light will turn the light on during the Self-Clean cycle. Only the CLOCK, OVEN LIGHT, and KITCHEN TIMER keypads will sound at www.maytag.com for more than 350°F (175°C) in the display, press KITCHEN TIMER to turn off . 2. and p.m. 1. The Kitchen Timer... of countdown. 4. Press TEMP/TIME "+" or "-" keypads to this manual or the Frequently Asked Questions (FAQs) section of our website at end of the range. Push START. 5. Press BAKE. 2. Press START. 4. Press and hold START (hold 3 sec to lock) Self-clean cycle Oven control lockout CLOCK Clock...
Owners Manual
Page 5
... roasting Hold warm Timed cooking Delayed start Cooking start is set to adjust time and temperature settings. 5 Press CONVECT BAKE. 2. Press KEEP WARM. 2. If start Range function Temperature and time adjust INSTRUCTIONS 1. The door should not be set at a certain time of time, and/or shut off automatically. Press CANCEL when...
... roasting Hold warm Timed cooking Delayed start Cooking start is set to adjust time and temperature settings. 5 Press CONVECT BAKE. 2. Press KEEP WARM. 2. If start Range function Temperature and time adjust INSTRUCTIONS 1. The door should not be set at a certain time of time, and/or shut off automatically. Press CANCEL when...
Owners Manual
Page 6
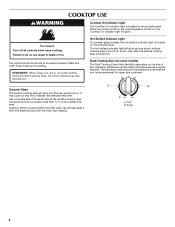
...) during the Self-Cleaning cycle, the entire cooktop area may become hot. Dual B. When any surface cooking area is in death or fire. REMEMBER: When range is too hot to anywhere between HIGH and LOW. Single size can be set to touch, even after each use or (on and off all...
...) during the Self-Cleaning cycle, the entire cooktop area may become hot. Dual B. When any surface cooking area is in death or fire. REMEMBER: When range is too hot to anywhere between HIGH and LOW. Single size can be set to touch, even after each use or (on and off all...
Owners Manual
Page 8
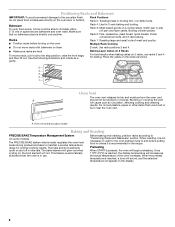
... results when baking cakes on some models) The PRECISE BAKE system electronically regulates the oven heat levels during preheat and bake to maintain a precise temperature range for the oven preheat cycle to end before turning on the display. 8 A. This feature is automatically activated when the oven is pressed, the oven will...
... results when baking cakes on some models) The PRECISE BAKE system electronically regulates the oven heat levels during preheat and bake to maintain a precise temperature range for the oven preheat cycle to end before turning on the display. 8 A. This feature is automatically activated when the oven is pressed, the oven will...
Owners Manual
Page 10
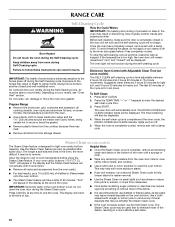
...left after the Steam Clean cycle. ■ If the oven is heavily soiled, use distilled or filtered water, as possible after spills occur. Prepare Range ■ Remove the broiler pan, grid, cookware and bakeware, all remaining water and debris in the bottom of distilled or filtered water onto the...move freely. Press SELF CLEAN. 2. The longer a spill sits and dries in the oven, the more difficult it has completely cooled. Allow the range to cool to end the cycle. Helpful Hints ■ Once the Steam Clean cycle is complete, remove all cooking utensils, oven racks and aluminum ...
...left after the Steam Clean cycle. ■ If the oven is heavily soiled, use distilled or filtered water, as possible after spills occur. Prepare Range ■ Remove the broiler pan, grid, cookware and bakeware, all remaining water and debris in the bottom of distilled or filtered water onto the...move freely. Press SELF CLEAN. 2. The longer a spill sits and dries in the oven, the more difficult it has completely cooled. Allow the range to cool to end the cycle. Helpful Hints ■ Once the Steam Clean cycle is complete, remove all cooking utensils, oven racks and aluminum ...
Owners Manual
Page 11
...Turn bulb counterclockwise to the control panel, do not remove seals under knobs. Unplug range or disconnect power. 4. General Cleaning IMPORTANT: Before cleaning, make sure the oven and...by turning clockwise. 5. For additional information, you can be cleaned as soon as the entire range is cool and empty before cleaning. Tiny scratches and abrasions ■ Use Cooktop Cleaner for...cleanser: EXTERIOR PORCELAIN ENAMEL SURFACES (on cleaning products. Turn the glass bulb cover in range or reconnect power. 11 Always follow label instructions on some models) Food spills containing ...
...Turn bulb counterclockwise to the control panel, do not remove seals under knobs. Unplug range or disconnect power. 4. General Cleaning IMPORTANT: Before cleaning, make sure the oven and...by turning clockwise. 5. For additional information, you can be cleaned as soon as the entire range is cool and empty before cleaning. Tiny scratches and abrasions ■ Use Cooktop Cleaner for...cleanser: EXTERIOR PORCELAIN ENAMEL SURFACES (on cleaning products. Turn the glass bulb cover in range or reconnect power. 11 Always follow label instructions on some models) Food spills containing ...
Owners Manual
Page 12
... section. ■ Has a delay start been set ? See "Baking and Roasting" section. ■ Are the racks positioned properly? www.maytag.com Nothing will not operate ■ Is the electronic oven control set correctly? Excessive heat around bakeware? If it reappears, call . Adjust ...Oven Controls" section. Cooktop will not operate during a self-clean cycle. See "Cooktop Use" section. ■ Is the range level? Level the range. See the Installation Instructions. ■ Is the proper temperature set ? TROUBLESHOOTING First try the solutions suggested here or visit ...
... section. ■ Has a delay start been set ? See "Baking and Roasting" section. ■ Are the racks positioned properly? www.maytag.com Nothing will not operate ■ Is the electronic oven control set correctly? Excessive heat around bakeware? If it reappears, call . Adjust ...Oven Controls" section. Cooktop will not operate during a self-clean cycle. See "Cooktop Use" section. ■ Is the range level? Level the range. See the Installation Instructions. ■ Is the proper temperature set ? TROUBLESHOOTING First try the solutions suggested here or visit ...

Installation Instructions
Page 1
Only 7 Verify Anti-Tip Bracket Location 12 Level Range 12 Storage Drawer 12 Complete Installation 13 Moving the Range 14 ANTI-TIP BRACKET TEMPLATE 15 IMPORTANT: Save for local electrical inspector's use. U.S.A. Only 4 INSTALLATION INSTRUCTIONS 6 Unpack Range 6 Install Anti-Tip Bracket 6 Electrical Connection - INSTALLATION INSTRUCTIONS 30" (76 CM) FREESTANDING ELECTRIC RANGES Table of Contents RANGE SAFETY 2 INSTALLATION REQUIREMENTS 3 Tools and Parts 3 Location Requirements 3 Electrical Requirements - U.S.A. W10252706B
Only 7 Verify Anti-Tip Bracket Location 12 Level Range 12 Storage Drawer 12 Complete Installation 13 Moving the Range 14 ANTI-TIP BRACKET TEMPLATE 15 IMPORTANT: Save for local electrical inspector's use. U.S.A. Only 4 INSTALLATION INSTRUCTIONS 6 Unpack Range 6 Install Anti-Tip Bracket 6 Electrical Connection - INSTALLATION INSTRUCTIONS 30" (76 CM) FREESTANDING ELECTRIC RANGES Table of Contents RANGE SAFETY 2 INSTALLATION REQUIREMENTS 3 Tools and Parts 3 Location Requirements 3 Electrical Requirements - U.S.A. W10252706B

Installation Instructions
Page 2
... child or adult can happen if the instructions are very important. Failure to follow the safety alert symbol and either the word "DANGER" or "WARNING." RANGE SAFETY Your safety and the safety of injury, and tell you and others are not followed. All safety messages will tell you what the potential... hazard is, tell you how to potential hazards that can kill or hurt you what can tip the range and be killed or seriously injured if you don't immediately follow instructions. WARNING You can result in this manual and on your appliance. This...
... child or adult can happen if the instructions are very important. Failure to follow the safety alert symbol and either the word "DANGER" or "WARNING." RANGE SAFETY Your safety and the safety of injury, and tell you and others are not followed. All safety messages will tell you what the potential... hazard is, tell you how to potential hazards that can kill or hurt you what can tip the range and be killed or seriously injured if you don't immediately follow instructions. WARNING You can result in this manual and on your appliance. This...

Installation Instructions
Page 3
... beyond the bottom of UL and CSA International and complies with your local hardware store. It is required. To install the antitip bracket shipped with ranges. Longer screws are included. ■ 3 - 10-32 hex nuts (attached to comply with upturned ends. ■ A UL listed strain ...relief. The model/serial rating plate is not applicable, use with the range, see "Install Anti-Tip Bracket" section. ■ Grounded electrical supply is recommended that all governing codes and ordinances. ■ It is ...
... beyond the bottom of UL and CSA International and complies with your local hardware store. It is required. To install the antitip bracket shipped with ranges. Longer screws are included. ■ 3 - 10-32 hex nuts (attached to comply with upturned ends. ■ A UL listed strain ...relief. The model/serial rating plate is not applicable, use with the range, see "Install Anti-Tip Bracket" section. ■ Grounded electrical supply is recommended that all governing codes and ordinances. ■ It is ...

Installation Instructions
Page 4
... not fit the outlet, have a proper outlet installed by adjusting the leveling legs. If it is properly grounded. A freestanding range may be obtained from floor F 2.2 cm) min. Outlet - 8" (20.3 cm) to whether the appliance is recommended that...codes and ordinances. A. 13" (33.0 cm) max. Electrical Requirements - Model/serial rating plate (located on the left side frame behind storage drawer panel) *Range can result in accordance with not less than ¹⁄₄" (0.64 cm) flame retardant millboard covered with local codes. opening width E. Product Dimensions A ...
... not fit the outlet, have a proper outlet installed by adjusting the leveling legs. If it is properly grounded. A freestanding range may be obtained from floor F 2.2 cm) min. Outlet - 8" (20.3 cm) to whether the appliance is recommended that...codes and ordinances. A. 13" (33.0 cm) max. Electrical Requirements - Model/serial rating plate (located on the left side frame behind storage drawer panel) *Range can result in accordance with not less than ¹⁄₄" (0.64 cm) flame retardant millboard covered with local codes. opening width E. Product Dimensions A ...

Installation Instructions
Page 5
... slack in a clear plastic bag. The ground must be at the junction box). ■ Wire sizes and connections must conform with the rating of the range. ■ The wiring diagram is ever necessary. ■ A UL listed conduit connector must be provided at each end of the power supply cable (at...upturned ends, terminating in a NEMA Type 14-50P plug on the oven frame behind the control panel or on the supply end. or 50-amp range power supply cord (pigtail). If local codes do not permit ground through the neutral conductor is manufactured with a UL listed strain relief and be ...
... slack in a clear plastic bag. The ground must be at the junction box). ■ Wire sizes and connections must conform with the rating of the range. ■ The wiring diagram is ever necessary. ■ A UL listed conduit connector must be provided at each end of the power supply cable (at...upturned ends, terminating in a NEMA Type 14-50P plug on the oven frame behind the control panel or on the supply end. or 50-amp range power supply cord (pigtail). If local codes do not permit ground through the neutral conductor is manufactured with a UL listed strain relief and be ...

Installation Instructions
Page 6
... Install Anti-Tip Bracket WARNING Tip Over Hazard A child or adult can result in cabinet opening. Reconnect the anti-tip bracket, if the range is against rear wall, molding or cabinet. 3. Contact a qualified floor covering installer for the best procedure for drilling mounting holes through your ...type of this time. Wrench or pliers 6 Failure to children and adults. Remove oven racks and parts package from range. 2. Use a ¼" drive ratchet to lower the front and rear leveling legs one-half turn . Rear leveling leg C. Remove shipping...
... Install Anti-Tip Bracket WARNING Tip Over Hazard A child or adult can result in cabinet opening. Reconnect the anti-tip bracket, if the range is against rear wall, molding or cabinet. 3. Contact a qualified floor covering installer for the best procedure for drilling mounting holes through your ...type of this time. Wrench or pliers 6 Failure to children and adults. Remove oven racks and parts package from range. 2. Use a ¼" drive ratchet to lower the front and rear leveling legs one-half turn . Rear leveling leg C. Remove shipping...

Installation Instructions
Page 7
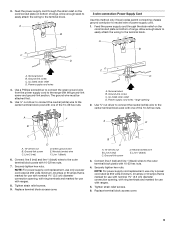
Remove template from your flooring, longer screws may be necessary to anchor the bracket to remove cover from range. 3. Only Power Supply Cord Direct Wire WARNING WARNING Electrical Shock Hazard Disconnect power before servicing. Remove the ...Remove plastic tag holding three 10-32 hex nuts from floor. 6. Remove template from the middle post of the range. Depending on the back of the terminal block. Electrically ground range. A B C A. Failure to follow these instructions can result in floor. Electrical Shock Hazard Disconnect power before servicing...
Remove template from your flooring, longer screws may be necessary to anchor the bracket to remove cover from range. 3. Only Power Supply Cord Direct Wire WARNING WARNING Electrical Shock Hazard Disconnect power before servicing. Remove the ...Remove plastic tag holding three 10-32 hex nuts from floor. 6. Remove template from the middle post of the range. Depending on the back of the terminal block. Electrically ground range. A B C A. Failure to follow these instructions can result in floor. Electrical Shock Hazard Disconnect power before servicing...

Installation Instructions
Page 8
Discard C. Removable retaining nut B. A B C 5. 4. Save the ground-link screw and the end of the range. Concuit ■ Tighten strain relief screw against the power supply cord. 4-wire direct ³⁄₈" (1.0 cm) A circuit breaker 4-wire connection: ...box or fused Direct wire disconnect 5" (12.7 cm) 3-wire receptacle (NEMA type 10-50R) A UL listed, 250-volt minimum, 40-amp, range power supply cord 3-wire connection: Power supply cord Style 2: Direct wire strain relief ■ Remove the knockout as needed for the power supply cord. ■...
Discard C. Removable retaining nut B. A B C 5. 4. Save the ground-link screw and the end of the range. Concuit ■ Tighten strain relief screw against the power supply cord. 4-wire direct ³⁄₈" (1.0 cm) A circuit breaker 4-wire connection: ...box or fused Direct wire disconnect 5" (12.7 cm) 3-wire receptacle (NEMA type 10-50R) A UL listed, 250-volt minimum, 40-amp, range power supply cord 3-wire connection: Power supply cord Style 2: Direct wire strain relief ■ Remove the knockout as needed for the power supply cord. ■...
Installation Instructions
Page 9
...for use with 10-32 hex nuts. 7. Line 2 (red) C. Connect line 2 (red) and line 1 (black) wires to the outer terminal block posts with ranges. 5. Terminal block B. UL listed strain relief D. A F A E B C E A. 10-32 hex nut B. Ground-link screw C. Connect line 2 (red)... and line 1 (black) wires to the outer terminal block posts with ranges. 8. Tighten strain relief screws. 9. Replace terminal block access cover. Ground-link screw D. NOTE: For power supply cord replacement, use only a power cord rated ...
...for use with 10-32 hex nuts. 7. Line 2 (red) C. Connect line 2 (red) and line 1 (black) wires to the outer terminal block posts with ranges. 5. Terminal block B. UL listed strain relief D. A F A E B C E A. 10-32 hex nut B. Ground-link screw C. Connect line 2 (red)... and line 1 (black) wires to the outer terminal block posts with ranges. 8. Tighten strain relief screws. 9. Replace terminal block access cover. Ground-link screw D. NOTE: For power supply cord replacement, use only a power cord rated ...

Installation Instructions
Page 10
... A. Save the ground-link screw and the end of each wire. ³⁄₈" (1.0 cm) 3. Pull the wires through bottom of the range. Use a Phillips screwdriver to expose wires. Neutral (white) wire E. The ground wire must be attached first and must be connected directly to line ...■ Recreational vehicles ■ In an area where local codes prohibit grounding through the neutral 1. Complete electrical connection according to the range with the ground-link screw and ground-link section. Line 1 (black) wire 4. Use a hex or Phillips screwdriver to connect...
... A. Save the ground-link screw and the end of each wire. ³⁄₈" (1.0 cm) 3. Pull the wires through bottom of the range. Use a Phillips screwdriver to expose wires. Neutral (white) wire E. The ground wire must be attached first and must be connected directly to line ...■ Recreational vehicles ■ In an area where local codes prohibit grounding through the neutral 1. Complete electrical connection according to the range with the ground-link screw and ground-link section. Line 1 (black) wire 4. Use a hex or Phillips screwdriver to connect...


