
Owners Manual
Page 1
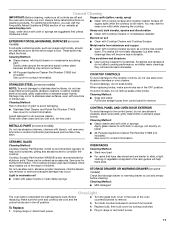
...de la estufa eléctrica" en español, o para obtener información adicional acerca de su producto, visite: www.maytag.com Tenga listo su número de modelo completo. If you still need your model and serial number located on some models 10 ...General Cleaning 11 Oven Light 11 TROUBLESHOOTING 12 ACCESSORIES 13 WARRANTY 14 W10269526A ELECTRIC RANGE USER INSTRUCTIONS THANK YOU for additional information. Table of Contents RANGE SAFETY 2 The Anti-Tip Bracket 2 FEATURE GUIDE 4 COOKTOP USE 6 OVEN USE 7 Electronic Oven Controls 7...
...de la estufa eléctrica" en español, o para obtener información adicional acerca de su producto, visite: www.maytag.com Tenga listo su número de modelo completo. If you still need your model and serial number located on some models 10 ...General Cleaning 11 Oven Light 11 TROUBLESHOOTING 12 ACCESSORIES 13 WARRANTY 14 W10269526A ELECTRIC RANGE USER INSTRUCTIONS THANK YOU for additional information. Table of Contents RANGE SAFETY 2 The Anti-Tip Bracket 2 FEATURE GUIDE 4 COOKTOP USE 6 OVEN USE 7 Electronic Oven Controls 7...
Owners Manual
Page 2
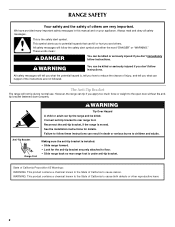
...result in this manual and on your appliance. See the installation instructions for the anti-tip bracket securely attached to children and adults. RANGE SAFETY Your safety and the safety of injury, and tell you what the potential hazard is, tell you how to the open ...bracket fastened down properly. This is moved. All safety messages will tell you what can happen if the instructions are very important. However, the range can be killed. Failure to cause birth defects or other reproductive harm. 2 State of California Proposition 65 Warnings: WARNING: This product contains ...
...result in this manual and on your appliance. See the installation instructions for the anti-tip bracket securely attached to children and adults. RANGE SAFETY Your safety and the safety of injury, and tell you what the potential hazard is, tell you how to the open ...bracket fastened down properly. This is moved. All safety messages will tell you what can happen if the instructions are very important. However, the range can be killed. Failure to cause birth defects or other reproductive harm. 2 State of California Proposition 65 Warnings: WARNING: This product contains ...
Owners Manual
Page 3
...of undersized utensils will also improve efficiency. ■ Never Leave Surface Units Unattended at High Heat Settings - During and after use . The range is cool. Proper relationship of different size. Absence of these liners may penetrate the broken cooktop and create a risk of Oven Racks - ... ■ Clean Cooktop With Caution - If a wet sponge or cloth is properly installed and grounded by a qualified technician. ■ Never Use the Range for a good seal. Build-up of pressure may ignite. ■ Make Sure Reflector Pans or Drip Bowls Are in injury. ■ Keep Oven ...
...of undersized utensils will also improve efficiency. ■ Never Leave Surface Units Unattended at High Heat Settings - During and after use . The range is cool. Proper relationship of different size. Absence of these liners may penetrate the broken cooktop and create a risk of Oven Racks - ... ■ Clean Cooktop With Caution - If a wet sponge or cloth is properly installed and grounded by a qualified technician. ■ Never Use the Range for a good seal. Build-up of pressure may ignite. ■ Make Sure Reflector Pans or Drip Bowls Are in injury. ■ Keep Oven ...
Owners Manual
Page 4
...The Clock uses a 12-hour cycle with a sponge or cloth and wipe down oven interior. or p.m. 4. After 20 minutes, "End" will sound at www.maytag.com for 5 seconds. 1. A tone will sound, and "Loc" will come on /off . 2. Press KITCHEN TIMER. 2. Refer to set a temperature other ...increments between 170°F and 525°F (75°C and 275°C). 3. Press CANCEL to lock) keypad for the SteamClean feature. 1. See the "Range Care" section. 1. Press and hold START (hold 3 sec to the oven bottom. 4. Press START. 4. The oven light will be controlled by a ...
...The Clock uses a 12-hour cycle with a sponge or cloth and wipe down oven interior. or p.m. 4. After 20 minutes, "End" will sound at www.maytag.com for 5 seconds. 1. A tone will sound, and "Loc" will come on /off . 2. Press KITCHEN TIMER. 2. Refer to set a temperature other ...increments between 170°F and 525°F (75°C and 275°C). 3. Press CANCEL to lock) keypad for the SteamClean feature. 1. See the "Range Care" section. 1. Press and hold START (hold 3 sec to the oven bottom. 4. Press START. 4. The oven light will be controlled by a ...
Owners Manual
Page 5
... set a temperature other than 350°F (175°C) in 5°F (5°C) increments between 170°F and 525°F (75°C and 275°C). 3. If start Range function Temperature and time adjust INSTRUCTIONS 1. Press TEMP/TIME "+" or "-" keypads to turn on at a certain time of day, cook for 60 minutes (1.00 hours...
... set a temperature other than 350°F (175°C) in 5°F (5°C) increments between 170°F and 525°F (75°C and 275°C). 3. If start Range function Temperature and time adjust INSTRUCTIONS 1. Press TEMP/TIME "+" or "-" keypads to turn on at a certain time of day, cook for 60 minutes (1.00 hours...
Owners Manual
Page 6
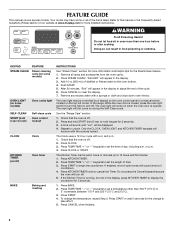
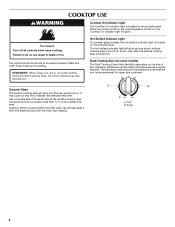
... Turn off . Cleaning off the cooktop before and after the surface cooking area is on the console panel. Push in death or fire. REMEMBER: When range is located on the size of the cookware. Single 6 Dual B. It may become hot. COOKTOP USE WARNING Cooktop On Indicator Light The Cooktop On indicator...
... Turn off . Cleaning off the cooktop before and after the surface cooking area is on the console panel. Push in death or fire. REMEMBER: When range is located on the size of the cookware. Single 6 Dual B. It may become hot. COOKTOP USE WARNING Cooktop On Indicator Light The Cooktop On indicator...
Owners Manual
Page 8
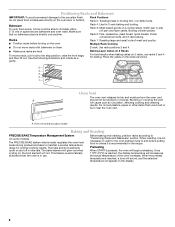
... results when baking cakes on some models) The PRECISE BAKE system electronically regulates the oven heat levels during preheat and bake to maintain a precise temperature range for the oven preheat cycle to end before turning on the racks as shown. 5 4 3 2 1 Oven Vent The oven vent releases hot air and moisture from...
... results when baking cakes on some models) The PRECISE BAKE system electronically regulates the oven heat levels during preheat and bake to maintain a precise temperature range for the oven preheat cycle to end before turning on the racks as shown. 5 4 3 2 1 Oven Vent The oven vent releases hot air and moisture from...
Owners Manual
Page 10
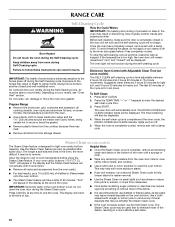
... 2 hours 30 minutes for light soil, and 4 hours 30 minutes for light oven cavity bottom cleaning. Press SELF CLEAN. 2. Allow the range to cool to the fumes may be left after spills occur. Helpful Hints ■ Once the Steam Clean cycle is completely closed and well-ventilated... the oven door will remain locked and "cool" and "locked" will turn off during Self-Cleaning cycle. Depending on the oven bottom. Prepare Range ■ Remove the broiler pan, grid, cookware and bakeware, all racks and accessories from oven during the Self-Cleaning cycle. If your model, ...
... 2 hours 30 minutes for light soil, and 4 hours 30 minutes for light oven cavity bottom cleaning. Press SELF CLEAN. 2. Allow the range to cool to the fumes may be left after spills occur. Helpful Hints ■ Once the Steam Clean cycle is completely closed and well-ventilated... the oven door will remain locked and "cool" and "locked" will turn off during Self-Cleaning cycle. Depending on the oven bottom. Prepare Range ■ Remove the broiler pan, grid, cookware and bakeware, all racks and accessories from oven during the Self-Cleaning cycle. If your model, ...
Owners Manual
Page 11
...recommended regularly to stainless steel surfaces, even with bleach, rust removers, ammonia or sodium hydroxide (lye) because paint surface may occur. Unplug range or disconnect power. 4. Plug in the OFF position. Cleaning Method: ■ Soap and water: Pull knobs straight away from socket. ...Tiny scratches and abrasions ■ Use Cooktop Cleaner for contact information. Store razor blades out of the reach of our website at www.maytag.com. Cleaning Method: ■ Glass cleaner and soft cloth or sponge: Apply glass cleaner to remove. 3. Always follow label instructions on...
...recommended regularly to stainless steel surfaces, even with bleach, rust removers, ammonia or sodium hydroxide (lye) because paint surface may occur. Unplug range or disconnect power. 4. Plug in the OFF position. Cleaning Method: ■ Soap and water: Pull knobs straight away from socket. ...Tiny scratches and abrasions ■ Use Cooktop Cleaner for contact information. Store razor blades out of the reach of our website at www.maytag.com. Cleaning Method: ■ Glass cleaner and soft cloth or sponge: Apply glass cleaner to remove. 3. Always follow label instructions on...
Owners Manual
Page 12
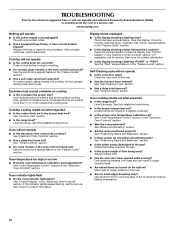
www.maytag.com Nothing will not operate ■ Is the electronic oven control set ...9632; Is the proper oven temperature calibration set correctly? Cooktop cooking results not what expected ■ Is the range level? Oven indicator lights flash ■ Do the oven indicator lights flash? If it reappears, call for contact... of the "Electronic Oven Controls" section. ■ Was the oven preheated? See cover for service. Level the range. See "Positioning Racks and Bakeware" section. ■ Is there proper air circulation around cookware on the bottom? ...
www.maytag.com Nothing will not operate ■ Is the electronic oven control set ...9632; Is the proper oven temperature calibration set correctly? Cooktop cooking results not what expected ■ Is the range level? Oven indicator lights flash ■ Do the oven indicator lights flash? If it reappears, call for contact... of the "Electronic Oven Controls" section. ■ Was the oven preheated? See cover for service. Level the range. See "Positioning Racks and Bakeware" section. ■ Is there proper air circulation around cookware on the bottom? ...

Installation Instructions
Page 1
U.S.A. Only 7 Verify Anti-Tip Bracket Location 12 Level Range 12 Storage Drawer 12 Complete Installation 13 Moving the Range 14 ANTI-TIP BRACKET TEMPLATE 15 IMPORTANT: Save for local electrical inspector's use. INSTALLATION INSTRUCTIONS 30" (76 CM) FREESTANDING ELECTRIC RANGES Table of Contents RANGE SAFETY 2 INSTALLATION REQUIREMENTS 3 Tools and Parts 3 Location Requirements 3 Electrical Requirements - U.S.A. W10252706B Only 4 INSTALLATION INSTRUCTIONS 6 Unpack Range 6 Install Anti-Tip Bracket 6 Electrical Connection -
U.S.A. Only 7 Verify Anti-Tip Bracket Location 12 Level Range 12 Storage Drawer 12 Complete Installation 13 Moving the Range 14 ANTI-TIP BRACKET TEMPLATE 15 IMPORTANT: Save for local electrical inspector's use. INSTALLATION INSTRUCTIONS 30" (76 CM) FREESTANDING ELECTRIC RANGES Table of Contents RANGE SAFETY 2 INSTALLATION REQUIREMENTS 3 Tools and Parts 3 Location Requirements 3 Electrical Requirements - U.S.A. W10252706B Only 4 INSTALLATION INSTRUCTIONS 6 Unpack Range 6 Install Anti-Tip Bracket 6 Electrical Connection -

Installation Instructions
Page 2
... in this manual and on your appliance. Connect anti-tip bracket to children and adults. 2 Reconnect the anti-tip bracket, if the range is the safety alert symbol. Failure to potential hazards that can be killed or seriously injured if you don't follow instructions. This is moved.... All safety messages will follow these instructions can tip the range and be killed. WARNING You can happen if the instructions are very important. These words mean: DANGER You can kill or hurt you...
... in this manual and on your appliance. Connect anti-tip bracket to children and adults. 2 Reconnect the anti-tip bracket, if the range is the safety alert symbol. Failure to potential hazards that can be killed or seriously injured if you don't follow instructions. This is moved.... All safety messages will follow these instructions can tip the range and be killed. WARNING You can happen if the instructions are very important. These words mean: DANGER You can kill or hurt you...

Installation Instructions
Page 3
... supply is marked for use the Standard for use in accordance with the requirements of UL and CSA International and complies with ranges. Tools needed If using a power supply cord kit: ■ A UL listed power supply cord kit marked for Manufactured ...Requirements" section. IMPORTANT: To avoid damage to subfloor. Mobile Home - See "Electrical Connection" section. 3 Mobile home installations require: ■ When this range must be reduced by a licensed, qualified electrical installer. Plastic anchors (2) C. #10 x 1¹⁄₂" screws (2) ■ Anti-tip bracket ...
... supply is marked for use the Standard for use in accordance with the requirements of UL and CSA International and complies with ranges. Tools needed If using a power supply cord kit: ■ A UL listed power supply cord kit marked for Manufactured ...Requirements" section. IMPORTANT: To avoid damage to subfloor. Mobile Home - See "Electrical Connection" section. 3 Mobile home installations require: ■ When this range must be reduced by a licensed, qualified electrical installer. Plastic anchors (2) C. #10 x 1¹⁄₂" screws (2) ■ Anti-tip bracket ...

Installation Instructions
Page 4
...combustible walls with not less than ¹⁄₄" (0.64 cm) flame retardant millboard covered with zero clearance. A freestanding range may be installed next to whether the appliance is used, it will not fit the outlet, have a proper outlet installed ...C B A F B C D E F E D A. 27 69.9 cm) max. Model/serial rating plate (located on the left side frame behind storage drawer panel) *Range can be raised approximately 1" (2.5 cm) by a qualified electrician. 4 Do not use an extension cord. WARNING: Improper connection of cooktop, see NOTE*. from either cabinet, 5¹...
...combustible walls with not less than ¹⁄₄" (0.64 cm) flame retardant millboard covered with zero clearance. A freestanding range may be installed next to whether the appliance is used, it will not fit the outlet, have a proper outlet installed ...C B A F B C D E F E D A. 27 69.9 cm) max. Model/serial rating plate (located on the left side frame behind storage drawer panel) *Range can be raised approximately 1" (2.5 cm) by a qualified electrician. 4 Do not use an extension cord. WARNING: Improper connection of cooktop, see NOTE*. from either cabinet, 5¹...

Installation Instructions
Page 5
...neutral conductor is connected to the proper electrical voltage and frequency as specified on the supply end. This uses a 3-wire receptacle of the range. ■ The wiring diagram is used . This cord contains 4 copper conductors with ring terminals or open -end spade terminals with kit.... The fourth (grounding) conductor must be revised so the green ground wire of the "Location Requirements" section. ■ This range is manufactured with a nominal 1³⁄₈" (34.9 mm) diameter connection opening. ■ A circuit breaker is less than the total ...
...neutral conductor is connected to the proper electrical voltage and frequency as specified on the supply end. This uses a 3-wire receptacle of the range. ■ The wiring diagram is used . This cord contains 4 copper conductors with ring terminals or open -end spade terminals with kit.... The fourth (grounding) conductor must be revised so the green ground wire of the "Location Requirements" section. ■ This range is manufactured with a nominal 1³⁄₈" (34.9 mm) diameter connection opening. ■ A circuit breaker is less than the total ...

Installation Instructions
Page 6
...the rear leveling legs one-half turn. Wrench or pliers D. Rear leveling leg B. Front leveling leg C. Connect anti-tip bracket to move and install range. Rear leveling leg C. Tape template into place. 4. Use a wrench or pliers to lower the front and rear leveling legs one -half turn ....floor covering. AB C If cabinet opening is not flush with cabinet opening so that specified in the "Location Requirements" section, adjust template so range will be centered in back or other injury. 1. See the "Storage Drawer" section. Use wrench or pliers to lower front leveling legs one ...
...the rear leveling legs one-half turn. Wrench or pliers D. Rear leveling leg B. Front leveling leg C. Connect anti-tip bracket to move and install range. Rear leveling leg C. Tape template into place. 4. Use a wrench or pliers to lower the front and rear leveling legs one -half turn ....floor covering. AB C If cabinet opening is not flush with cabinet opening so that specified in the "Location Requirements" section, adjust template so range will be centered in back or other injury. 1. See the "Storage Drawer" section. Use wrench or pliers to lower front leveling legs one ...

Installation Instructions
Page 7
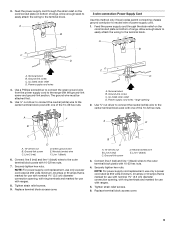
... mounting tabs each side B. Remove template from your flooring, longer screws may be necessary to anchor the bracket to remove cover from range. 3. Fasten anti-tip bracket with screws provided. Longer screws are available from floor. 6. Pull cover down and toward you to... subfloor. Terminal block cover C. Electrical Shock Hazard Disconnect power before servicing. 5. Remove template from the middle post of the range. Depending on the back of the terminal block. Only Power Supply Cord Direct Wire WARNING WARNING Electrical Shock Hazard Disconnect power before...
... mounting tabs each side B. Remove template from your flooring, longer screws may be necessary to anchor the bracket to remove cover from range. 3. Fasten anti-tip bracket with screws provided. Longer screws are available from floor. 6. Pull cover down and toward you to... subfloor. Terminal block cover C. Electrical Shock Hazard Disconnect power before servicing. 5. Remove template from the middle post of the range. Depending on the back of the terminal block. Only Power Supply Cord Direct Wire WARNING WARNING Electrical Shock Hazard Disconnect power before...

Installation Instructions
Page 8
...codes prohibit grounding through the neutral 1. Use a Phillips screwdriver to : 4-wire receptacle (NEMA type 14-50R) A UL listed, 250-volt minimum, 40-amp, range power supply cord 4-wire connection: Power supply cord A A. A B A. A B C 5. Metal ground strap B. 4. UL listed strain relief ■ ...fused Direct wire disconnect 5" (12.7 cm) 3-wire receptacle (NEMA type 10-50R) A UL listed, 250-volt minimum, 40-amp, range power supply cord 3-wire connection: Power supply cord Style 2: Direct wire strain relief ■ Remove the knockout as needed for the power supply...
...codes prohibit grounding through the neutral 1. Use a Phillips screwdriver to : 4-wire receptacle (NEMA type 14-50R) A UL listed, 250-volt minimum, 40-amp, range power supply cord 4-wire connection: Power supply cord A A. A B A. A B C 5. Metal ground strap B. 4. UL listed strain relief ■ ...fused Direct wire disconnect 5" (12.7 cm) 3-wire receptacle (NEMA type 10-50R) A UL listed, 250-volt minimum, 40-amp, range power supply cord 3-wire connection: Power supply cord Style 2: Direct wire strain relief ■ Remove the knockout as needed for the power supply...
Installation Instructions
Page 9
... terminal block posts with 10-32 hex nuts. 4. Feed the power supply cord through the strain relief on the cord/conduit plate on bottom of range. Terminal block B. Power supply cord wires 4. C D A. Line 2 (red) D D. Connect line 2 (red) and line 1 (black) wires to the outer terminal...slack to easily attach the wiring to the terminal block. Use ³⁄₈" nut driver to connect the neutral (white) wire to the range with one of power supply cord. 1. Tighten strain relief screws. 9. Ground-link screw C. UL listed strain relief D. large opening , with ring...
... terminal block posts with 10-32 hex nuts. 4. Feed the power supply cord through the strain relief on the cord/conduit plate on bottom of range. Terminal block B. Power supply cord wires 4. C D A. Line 2 (red) D D. Connect line 2 (red) and line 1 (black) wires to the outer terminal...slack to easily attach the wiring to the terminal block. Use ³⁄₈" nut driver to connect the neutral (white) wire to the range with one of power supply cord. 1. Tighten strain relief screws. 9. Ground-link screw C. UL listed strain relief D. large opening , with ring...

Installation Instructions
Page 10
...6 gauge aluminum 25 lbs-in. (2.8 N-m) 35 lbs-in the following Bare Wire Torque Specifications chart. Cord/conduit plate D. Part of the range. Terminal block B. A A B B C A. Discard C. Line 1 (black) wire Bare Wire Torque Specifications Attaching terminal lugs to your ...ground strap B. Ground-link screw 2. Use a Phillips screwdriver to torque as shown in . (4.0 N-m) 5. Save the ground-link screw and the end of range. C D E A. Allow enough slack to easily attach wiring to line 1 (black), neutral (white), and line 2 (red) wires. Line 2 ...
...6 gauge aluminum 25 lbs-in. (2.8 N-m) 35 lbs-in the following Bare Wire Torque Specifications chart. Cord/conduit plate D. Part of the range. Terminal block B. A A B B C A. Discard C. Line 1 (black) wire Bare Wire Torque Specifications Attaching terminal lugs to your ...ground strap B. Ground-link screw 2. Use a Phillips screwdriver to torque as shown in . (4.0 N-m) 5. Save the ground-link screw and the end of range. C D E A. Allow enough slack to easily attach wiring to line 1 (black), neutral (white), and line 2 (red) wires. Line 2 ...


