
Owners Manual
Page 3
... - Remove broiler pan and other bulky cloth. ■ DO NOT TOUCH SURFACE UNITS OR AREAS NEAR UNITS - Moist or damp potholders on any part of the range unless specifically recommended in temperature. ■ Utensil Handles Should Be Turned Inward and Not Extend Over Adjacent Surface Units - The use.... ■ DO NOT TOUCH HEATING ELEMENTS OR INTERIOR SURFACES OF OVEN - Grease should be allowed to cool. Do not repair or replace any part of electric shock, or fire. ■ Glazed Cooking Utensils - During and after use of interest to sit or stand on hot surfaces may ...
... - Remove broiler pan and other bulky cloth. ■ DO NOT TOUCH SURFACE UNITS OR AREAS NEAR UNITS - Moist or damp potholders on any part of the range unless specifically recommended in temperature. ■ Utensil Handles Should Be Turned Inward and Not Extend Over Adjacent Surface Units - The use.... ■ DO NOT TOUCH HEATING ELEMENTS OR INTERIOR SURFACES OF OVEN - Grease should be allowed to cool. Do not repair or replace any part of electric shock, or fire. ■ Glazed Cooking Utensils - During and after use of interest to sit or stand on hot surfaces may ...
Owners Manual
Page 9
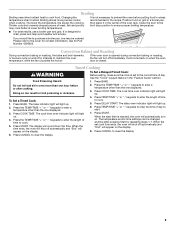
... the time. Press the TEMP/TIME "+" or "-" keypads to cook. 5. The display will light up . 2. Broiling Broiling uses direct radiant heat to the cover for Part Number 4396923. Convection Baking and Roasting During convection baking or roasting, the bake and broil elements or burners cycle on . Food Poisoning Hazard 1. The cook...
... the time. Press the TEMP/TIME "+" or "-" keypads to cook. 5. The display will light up . 2. Broiling Broiling uses direct radiant heat to the cover for Part Number 4396923. Convection Baking and Roasting During convection baking or roasting, the bake and broil elements or burners cycle on . Food Poisoning Hazard 1. The cook...
Owners Manual
Page 11
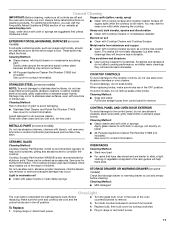
.... Cleaning Method: ■ Soap and water: Pull knobs straight away from socket. Plug in the back of our website at www.maytag.com. Liquid detergent or all controls are off sugary spills while the cooktop is cool and empty before cleaning. Do not use abrasive ...razor blades. Turn bulb counterclockwise to remove from control panel to the rack guides will become less noticeable. ■ All-Purpose Appliance Cleaner Part Number 31682 (not included): See cover for contact information. Replace bulb, then bulb cover by turning clockwise. 5. On some models) ...
.... Cleaning Method: ■ Soap and water: Pull knobs straight away from socket. Plug in the back of our website at www.maytag.com. Liquid detergent or all controls are off sugary spills while the cooktop is cool and empty before cleaning. Do not use abrasive ...razor blades. Turn bulb counterclockwise to remove from control panel to the rack guides will become less noticeable. ■ All-Purpose Appliance Cleaner Part Number 31682 (not included): See cover for contact information. Replace bulb, then bulb cover by turning clockwise. 5. On some models) ...

Owners Manual
Page 13
Canning Unit Kit (coil element models) Order Part Number 242905 Cooktop Care Kit (includes cleaner, protectant, and applicator pads) Order Part Number 31605 Cooktop Protectant Order Part Number 31463 ACCESSORIES Cooktop Cleaner (ceramic glass models) Order Part Number 31464 Cooktop Scraper (ceramic glass models) Order Part Number WA906B Stainless Steel Cleaner and Polish (stainless steel models) Order Part Number 31462 All-Purpose Appliance Cleaner Order Part Number 31682 Split-Rack with Removable Insert Order Part Number 4396927 Broiler Pan Order Part Number 4396923 13
Canning Unit Kit (coil element models) Order Part Number 242905 Cooktop Care Kit (includes cleaner, protectant, and applicator pads) Order Part Number 31605 Cooktop Protectant Order Part Number 31463 ACCESSORIES Cooktop Cleaner (ceramic glass models) Order Part Number 31464 Cooktop Scraper (ceramic glass models) Order Part Number WA906B Stainless Steel Cleaner and Polish (stainless steel models) Order Part Number 31462 All-Purpose Appliance Cleaner Order Part Number 31682 Split-Rack with Removable Insert Order Part Number 4396927 Broiler Pan Order Part Number 4396923 13
Owners Manual
Page 14
...installation not in accordance with electrical or plumbing codes, or use of Whirlpool Corporation or Whirlpool Canada LP (hereafter "Maytag") will pay for factory specified parts and repair labor to correct defects in materials or workmanship. Costs associated with any questions or concerns to the ...your major appliance, to replace or repair house fuses, or to the appliance. 9. Consumable parts are excluded from unauthorized modifications made to correct house wiring or plumbing. 2. MAYTAG SHALL NOT BE LIABLE FOR INCIDENTAL OR CONSEQUENTIAL DAMAGES. If you may contact us at the...
...installation not in accordance with electrical or plumbing codes, or use of Whirlpool Corporation or Whirlpool Canada LP (hereafter "Maytag") will pay for factory specified parts and repair labor to correct defects in materials or workmanship. Costs associated with any questions or concerns to the ...your major appliance, to replace or repair house fuses, or to the appliance. 9. Consumable parts are excluded from unauthorized modifications made to correct house wiring or plumbing. 2. MAYTAG SHALL NOT BE LIABLE FOR INCIDENTAL OR CONSEQUENTIAL DAMAGES. If you may contact us at the...

Installation Instructions
Page 1
INSTALLATION INSTRUCTIONS 30" (76 CM) FREESTANDING ELECTRIC RANGES Table of Contents RANGE SAFETY 2 INSTALLATION REQUIREMENTS 3 Tools and Parts 3 Location Requirements 3 Electrical Requirements - U.S.A. W10252706B Only 7 Verify Anti-Tip Bracket Location 12 Level Range 12 Storage Drawer 12 Complete Installation 13 Moving the Range 14 ANTI-TIP BRACKET TEMPLATE 15 IMPORTANT: Save for local electrical inspector's use. U.S.A. Only 4 INSTALLATION INSTRUCTIONS 6 Unpack Range 6 Install Anti-Tip Bracket 6 Electrical Connection -
INSTALLATION INSTRUCTIONS 30" (76 CM) FREESTANDING ELECTRIC RANGES Table of Contents RANGE SAFETY 2 INSTALLATION REQUIREMENTS 3 Tools and Parts 3 Location Requirements 3 Electrical Requirements - U.S.A. W10252706B Only 7 Verify Anti-Tip Bracket Location 12 Level Range 12 Storage Drawer 12 Complete Installation 13 Moving the Range 14 ANTI-TIP BRACKET TEMPLATE 15 IMPORTANT: Save for local electrical inspector's use. U.S.A. Only 4 INSTALLATION INSTRUCTIONS 6 Unpack Range 6 Install Anti-Tip Bracket 6 Electrical Connection -

Installation Instructions
Page 3
... to be provided, the risk can be reduced by installing a range hood that all governing codes and ordinances. ■ It is required. Parts needed ■ Tape measure ■ ¼" drive ratchet ■ Flat-blade screwdriver ■ Level ■ Hammer ■ Hand or... beyond the bottom of burns or fire by a licensed, qualified electrical installer. Check local codes. Location Requirements IMPORTANT: Observe all parts are shown must end in accordance with the requirements of UL and CSA International and complies with the maximum allowable wood cabinet temperatures ...
... to be provided, the risk can be reduced by installing a range hood that all governing codes and ordinances. ■ It is required. Parts needed ■ Tape measure ■ ¼" drive ratchet ■ Flat-blade screwdriver ■ Level ■ Hammer ■ Hand or... beyond the bottom of burns or fire by a licensed, qualified electrical installer. Check local codes. Location Requirements IMPORTANT: Observe all parts are shown must end in accordance with the requirements of UL and CSA International and complies with the maximum allowable wood cabinet temperatures ...

Installation Instructions
Page 6
... by removing the warming drawer. Use wrench or pliers to lower the rear leveling legs one -half turn. Wrench or pliers 6 Remove oven racks and parts package from the back of floor covering. Shipping base 4. Use a wrench or pliers to move and install range. Tape template into place. 4. INSTALLATION INSTRUCTIONS Unpack...
... by removing the warming drawer. Use wrench or pliers to lower the rear leveling legs one -half turn. Wrench or pliers 6 Remove oven racks and parts package from the back of floor covering. Shipping base 4. Use a wrench or pliers to move and install range. Tape template into place. 4. INSTALLATION INSTRUCTIONS Unpack...

Installation Instructions
Page 8
... Style 2: Direct wire strain relief ■ Remove the knockout as needed for the power supply cord. ■ Assemble a UL listed strain relief in the opening . Part of metal ground strap must be Go to Section: connecting to remove the ground-link screw from the back of the range. Complete installation following...
... Style 2: Direct wire strain relief ■ Remove the knockout as needed for the power supply cord. ■ Assemble a UL listed strain relief in the opening . Part of metal ground strap must be Go to Section: connecting to remove the ground-link screw from the back of the range. Complete installation following...

Installation Instructions
Page 10
... Aluminum Wire This range may be connected directly to remove the ground-link screw from the end of the ground-link under the screw. A B 3" (7.6 cm) 2. Part of metal ground strap must be attached first and must be cut out and removed. Bare (green) ground wire E. Line 2 (red) wire F. Discard C. Terminal lug...
... Aluminum Wire This range may be connected directly to remove the ground-link screw from the end of the ground-link under the screw. A B 3" (7.6 cm) 2. Part of metal ground strap must be attached first and must be cut out and removed. Bare (green) ground wire E. Line 2 (red) wire F. Discard C. Terminal lug...

Installation Instructions
Page 13
... to see which step was skipped. 2. Turn on range operation. If range does not operate, check the following: ■ Household fuse is an extra part, go back through the steps to a level position. 3. Slowly push the storage drawer into appropriate outlet. A A. Check that the range is cold, ...for heat. Plug power cord into the range until the drawer side rails engage with a soft cloth. Lift up the front of /recycle all parts are removing and replacing the storage drawer, a slight push may be needed to remove waxy residue caused by shipping material. To Replace: 1. If...
... to see which step was skipped. 2. Turn on range operation. If range does not operate, check the following: ■ Household fuse is an extra part, go back through the steps to a level position. 3. Slowly push the storage drawer into appropriate outlet. A A. Check that the range is cold, ...for heat. Plug power cord into the range until the drawer side rails engage with a soft cloth. Lift up the front of /recycle all parts are removing and replacing the storage drawer, a slight push may be needed to remove waxy residue caused by shipping material. To Replace: 1. If...

Installation Instructions
Page 14
... or serious burns to children and adults. Reconnect the anti-tip bracket, if the range is level. 6. Slide range forward. 2. Slide range forward. 3. Replace all parts and panels before servicing. Check that range is under anti-tip bracket. 5. Failure to floor. ■ Slide range back so rear range foot is installed...
... or serious burns to children and adults. Reconnect the anti-tip bracket, if the range is level. 6. Slide range forward. 2. Slide range forward. 3. Replace all parts and panels before servicing. Check that range is under anti-tip bracket. 5. Failure to floor. ■ Slide range back so rear range foot is installed...


