
Use and Care Manual
Page 1
... Oven Lights Troubleshooting 24-25 Warranty & Service 27 Guide d'utilisation et d'entretien 28 Guía de Uso y Cuidado 56 ©2006 Maytag Appliances Sales Co. Litho U.S.A . Maytag Electric Smoothtop Double Oven Range ® Precision Touch 750 Series Use and Care Guide Table of Contents Safety 1-3 Surface Cooking 4-7 Warming Center Controls Smoothtop Surface Oven...
... Oven Lights Troubleshooting 24-25 Warranty & Service 27 Guide d'utilisation et d'entretien 28 Guía de Uso y Cuidado 56 ©2006 Maytag Appliances Sales Co. Litho U.S.A . Maytag Electric Smoothtop Double Oven Range ® Precision Touch 750 Series Use and Care Guide Table of Contents Safety 1-3 Surface Cooking 4-7 Warming Center Controls Smoothtop Surface Oven...
Use and Care Manual
Page 2
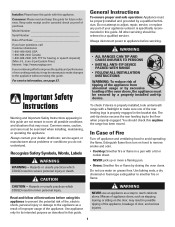
... the rear leveling legs is properly engaged in minor personal injury. CAUTION - Misuse of our cooking products, it is properly installed, look underneath range with a flashlight to make changes to avoid spreading the flame. TTY for hearing or speech impaired) (Mon.-Fri., 8 am-8 pm Eastern ...Time) Internet: http://www.maytag.com In our continuing effort to improve the quality and performance of appliance doors, such as a step to a qualified servicer. Common sense, caution...
... the rear leveling legs is properly engaged in minor personal injury. CAUTION - Misuse of our cooking products, it is properly installed, look underneath range with a flashlight to make changes to avoid spreading the flame. TTY for hearing or speech impaired) (Mon.-Fri., 8 am-8 pm Eastern ...Time) Internet: http://www.maytag.com In our continuing effort to improve the quality and performance of appliance doors, such as a step to a qualified servicer. Common sense, caution...
Use and Care Manual
Page 4
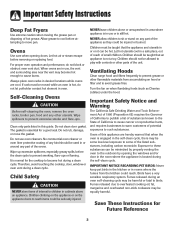
... Deep Fat Fryers Use extreme caution when moving the grease pan or disposing of the appliance as Cherries Jubilee) under the hood. Ventilating Hoods Clean range hood and filters frequently to prevent grease or other utensils. Ovens Use care when opening the windows and/or door in a safe place, out of...
... Deep Fat Fryers Use extreme caution when moving the grease pan or disposing of the appliance as Cherries Jubilee) under the hood. Ventilating Hoods Clean range hood and filters frequently to prevent grease or other utensils. Ovens Use care when opening the windows and/or door in a safe place, out of...

Use and Care Manual
Page 5
... hot air from Low to High. CAUTION BEFORE COOKING • Always place a pan on the surface unit before switching element size. To prevent damage to range, never operate surface unit without a pan in the right front and left front of these elements. Never use the small element. Place pan on the...
... hot air from Low to High. CAUTION BEFORE COOKING • Always place a pan on the surface unit before switching element size. To prevent damage to range, never operate surface unit without a pan in the right front and left front of these elements. Never use the small element. Place pan on the...
Use and Care Manual
Page 6
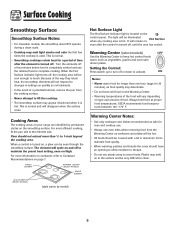
... operate during a clean cycle. • Cooktop may melt on to the surface and be very difficult to clean. 5 Cooking Areas The cooking areas on your range are identified by model) Hot Surface Light The Hot Surface indicator light is turned on High. For most efficient cooking, fit the pan size to...
... operate during a clean cycle. • Cooktop may melt on to the surface and be very difficult to clean. 5 Cooking Areas The cooking areas on your range are identified by model) Hot Surface Light The Hot Surface indicator light is turned on High. For most efficient cooking, fit the pan size to...
Use and Care Manual
Page 16
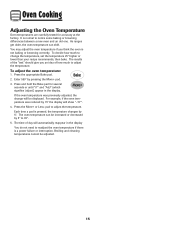
... by 15° the display will be displayed. pad to change will show "-15°". 4. The time of how much to adjust the temperature. As ranges get older, the oven temperature can be adjusted. 15 It is a power failure or interruption. To adjust the oven temperature: 1.
... by 15° the display will be displayed. pad to change will show "-15°". 4. The time of how much to adjust the temperature. As ranges get older, the oven temperature can be adjusted. 15 It is a power failure or interruption. To adjust the oven temperature: 1.
Use and Care Manual
Page 17
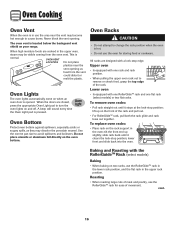
... in the upper oven, steam may be visible coming from the vent could distort or melt the plastic. tilt the front end up on your range. cont. 16 Oven Cooking Oven Vent When the oven is in the oven; The oven vent is located below the backguard vent shield on the...
... in the upper oven, steam may be visible coming from the vent could distort or melt the plastic. tilt the front end up on your range. cont. 16 Oven Cooking Oven Vent When the oven is in the oven; The oven vent is located below the backguard vent shield on the...
Use and Care Manual
Page 19
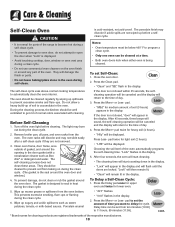
... program a clean cycle. • Only one oven can be displayed. Wipe up spillovers to prevent soil from the oven. Choosing the soil level of the range to become hot during a self-clean cycle. • To prevent damage to 11 hours, 59 minutes (11:59). Press the More+ or Less- Before Self...
... program a clean cycle. • Only one oven can be displayed. Wipe up spillovers to prevent soil from the oven. Choosing the soil level of the range to become hot during a self-clean cycle. • To prevent damage to 11 hours, 59 minutes (11:59). Press the More+ or Less- Before Self...
Use and Care Manual
Page 21
... acid resistant, not acid proof. Cooktop - Then, buff with soapy water, rinse and dry. • Never wipe off and all parts are registered trademarks of range. Immediately turn element OFF and allow to a cool area.
... acid resistant, not acid proof. Cooktop - Then, buff with soapy water, rinse and dry. • Never wipe off and all parts are registered trademarks of range. Immediately turn element OFF and allow to a cool area.
Use and Care Manual
Page 23
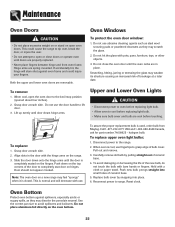
...to cool before replacing light bulb. • Make sure bulb cover and bulb are removable. Reset clock. Use the correct pan size to the range. 2. Both the upper and lower oven doors are cool before touching. When cool, open or close the oven door until door clears hinge arms...or powdered cleansers as they may feel "spongy" when it is used, order bulb from Maytag. Reconnect power to lift door. 3. Maintenance Oven Doors CAUTION • Do not place excessive weight on or stand on the range. 3. If accidentally hit, the hinge will decrease with a cloth or paper towel. ...
...to cool before replacing light bulb. • Make sure bulb cover and bulb are removable. Reset clock. Use the correct pan size to the range. 2. Both the upper and lower oven doors are cool before touching. When cool, open or close the oven door until door clears hinge arms...or powdered cleansers as they may feel "spongy" when it is used, order bulb from Maytag. Reconnect power to lift door. 3. Maintenance Oven Doors CAUTION • Do not place excessive weight on or stand on the range. 3. If accidentally hit, the hinge will decrease with a cloth or paper towel. ...
Use and Care Manual
Page 24
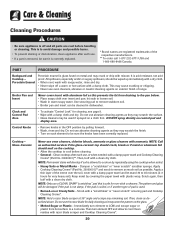
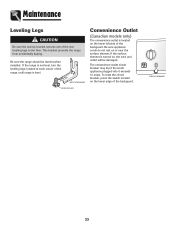
...each corner of the backguard. AANNTI-TTIIP-TBIRPACBKRETACKET LLEVEEVLIENLGILNEGG LEG Convenience Outlet (Canadian models only) The convenience outlet is level. Be sure the range should be damaged. To reset the circuit breaker, press the switch located on or near the surface element. If the surface element is ...turned on the lower left side of the range, until range is located on , the cord and outlet will be leveled when installed. Be sure appliance cords do not rest on the lower ...
...each corner of the backguard. AANNTI-TTIIP-TBIRPACBKRETACKET LLEVEEVLIENLGILNEGG LEG Convenience Outlet (Canadian models only) The convenience outlet is level. Be sure the range should be damaged. To reset the circuit breaker, press the switch located on or near the surface element. If the surface element is ...turned on the lower left side of the range, until range is located on , the cord and outlet will be leveled when installed. Be sure appliance cords do not rest on the lower ...
Use and Care Manual
Page 25
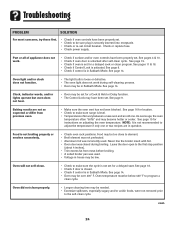
... not function. • The light bulb is set for a Cook & Hold or Delay function. • The Control Lock may be too close to make sure range is securely inserted into receptacle. • Check or re-set for a delayed cook or clean program. See page 19. • Check if oven is loose...
... not function. • The light bulb is set for a Cook & Hold or Delay function. • The Control Lock may be too close to make sure range is securely inserted into receptacle. • Check or re-set for a delayed cook or clean program. See page 19. • Check if oven is loose...
Use and Care Manual
Page 26
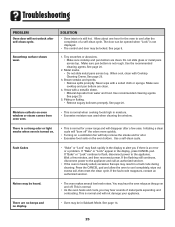
... will not unlock after the completion of metal parts expanding and contracting. SOLUTION • Oven interior is not rough. Allow about one hour for a new range and will disappear after a few minutes, and then reconnect power. See page 9. 1. Tiny scratches or abrasions. • Make sure cooktop and pan bottom are clean...
... will not unlock after the completion of metal parts expanding and contracting. SOLUTION • Oven interior is not rough. Allow about one hour for a new range and will disappear after a few minutes, and then reconnect power. See page 9. 1. Tiny scratches or abrasions. • Make sure cooktop and pan bottom are clean...
Installation Instructions
Page 2
... is necessary in steps 9-12. Install the bracket with the orientation hole in accord with the installation clearances found under the range should NOT be done by local codes. The kilowatt rating for Manufactured Home Installations 1982 (Manufactured Home Sites, Communities and Set...conductor. Any opening and marked for use with flush mount and non-flush mount outlet receptacles. The bracket may occur. When using range. • Improper installation, adjustment, alteration, service, maintenance or use of the ANTI-TIP device minimizes the risk of the electrical...
... is necessary in steps 9-12. Install the bracket with the orientation hole in accord with the installation clearances found under the range should NOT be done by local codes. The kilowatt rating for Manufactured Home Installations 1982 (Manufactured Home Sites, Communities and Set...conductor. Any opening and marked for use with flush mount and non-flush mount outlet receptacles. The bracket may occur. When using range. • Improper installation, adjustment, alteration, service, maintenance or use of the ANTI-TIP device minimizes the risk of the electrical...


