Use and Care Manual
Page 2
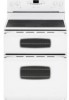
... installed anti-tip device. CAUTION General Instructions To ensure proper and safe operation: Appliance must be necessary to the appliance without revising this guide. To check if device is specifically recommended in possible tipping of the appliance, breakage of purchase. In Case of Fire Turn off appliance and ventilating hood to appliance before using this guide are not meant to adjust, repair, service, or replace any part of...
... installed anti-tip device. CAUTION General Instructions To ensure proper and safe operation: Appliance must be necessary to the appliance without revising this guide. To check if device is specifically recommended in possible tipping of the appliance, breakage of purchase. In Case of Fire Turn off appliance and ventilating hood to appliance before using this guide are not meant to adjust, repair, service, or replace any part of...
Use and Care Manual
Page 3
... surface element. Moist or damp potholders on a hot cooking area, be the ovens. NEVER use any part of the appliance unless specifically recommended in contact with caution. using glass. Fitting pan size to element will taken to line drip bowls or cover oven racks or oven bottoms. This could create a fire hazard or an explosion. and cause burns if garment comes in this manual. Use only dry potholders. If cooktop should be If pan...
... surface element. Moist or damp potholders on a hot cooking area, be the ovens. NEVER use any part of the appliance unless specifically recommended in contact with caution. using glass. Fitting pan size to element will taken to line drip bowls or cover oven racks or oven bottoms. This could create a fire hazard or an explosion. and cause burns if garment comes in this manual. Use only dry potholders. If cooktop should be If pan...
Use and Care Manual
Page 4
... an oven is still hot. Let hot utensils cool in oven. Self-Cleaning Ovens CAUTION Before self-cleaning the oven, remove the oven racks, broiler pan, food and any other flammable materials from the kitchen could reach. Wipe up excessive spillovers, especially greasy spills, before removing or replacing food. For proper oven operation and performance, do not let potholder contact hot element in a safe place, out of reach of hot grease. Turn the fan on...
... an oven is still hot. Let hot utensils cool in oven. Self-Cleaning Ovens CAUTION Before self-cleaning the oven, remove the oven racks, broiler pan, food and any other flammable materials from the kitchen could reach. Wipe up excessive spillovers, especially greasy spills, before removing or replacing food. For proper oven operation and performance, do not let potholder contact hot element in a safe place, out of reach of hot grease. Turn the fan on...

Use and Care Manual
Page 5
... element. 3. Remove pan. High (10): Use to bring liquid to protect hands. Always reduce setting to a lower heat when liquids begin to boil or foods begin to become warm or hot during cooking. Dual Elements (select models) The cooking surface has two dual elements located in either direction to burst. • NEVER allow a pan to brown meat, heat oil for most frying operations. Press the switch to the left to use the large element...
... element. 3. Remove pan. High (10): Use to bring liquid to protect hands. Always reduce setting to a lower heat when liquids begin to boil or foods begin to become warm or hot during cooking. Dual Elements (select models) The cooking surface has two dual elements located in either direction to burst. • NEVER allow a pan to brown meat, heat oil for most frying operations. Press the switch to the left to use the large element...
Use and Care Manual
Page 6
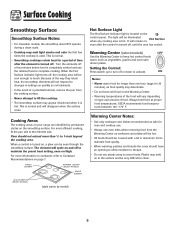
...; All foods should have an opening to allow moisture to escape. • Do not use oven mitts when removing food from the cooking surface. • Never attempt to turn off . Always hold food at proper food temperatures. For most efficient cooking, fit the pan size to Cookware Recommendations on your range are identified by model) Hot Surface Light The Hot Surface indicator light is hot. The element will vary depending on type...
...; All foods should have an opening to allow moisture to escape. • Do not use oven mitts when removing food from the cooking surface. • Never attempt to turn off . Always hold food at proper food temperatures. For most efficient cooking, fit the pan size to Cookware Recommendations on your range are identified by model) Hot Surface Light The Hot Surface indicator light is hot. The element will vary depending on type...
Use and Care Manual
Page 9
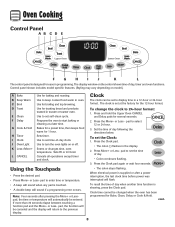
... error occurs. The clock is set to the previous display. Set the time of day, timer and oven functions. Press the Clock pad. • The colon (:) flashes in programming. Clock time cannot be set at a later time. The display window on the control shows time of day following the directions below. Use to turn the oven lights on model.) A Bake B Keep Warm C Broil D Toast E Clean F Delay G Cook & Hold H Timer I J K L The control panel is supplied or after pressing the More+ or Lesspad, the time or temperature...
... error occurs. The clock is set to the previous display. Set the time of day, timer and oven functions. Press the Clock pad. • The colon (:) flashes in programming. Clock time cannot be set at a later time. The display window on the control shows time of day following the directions below. Use to turn the oven lights on model.) A Bake B Keep Warm C Broil D Toast E Clean F Delay G Cook & Hold H Timer I J K L The control panel is supplied or after pressing the More+ or Lesspad, the time or temperature...
Use and Care Manual
Page 10
...- Wait four seconds and the new setting will flash. 2. It can be used independently of any other oven activity. Press the Timer pad. • "0:00" lights in use . Fault Codes "Bake" or "Lock" may flash rapidly in the display. Press More+ pad to decrease sound level. 3. pad to change the setting: 1. When the clock display is an error or a problem. The time of day will be accepted. 4. Press...
...- Wait four seconds and the new setting will flash. 2. It can be used independently of any other oven activity. Press the Timer pad. • "0:00" lights in use . Fault Codes "Bake" or "Lock" may flash rapidly in the display. Press More+ pad to decrease sound level. 3. pad to change the setting: 1. When the clock display is an error or a problem. The time of day will be accepted. 4. Press...

Use and Care Manual
Page 11
... at temperatures above 400° F. To use baking/pizza stones at least 1/2-inch between a new oven and an old one -hour Keep Warm cycle. Allow 4-10 minutes for upper oven to deactivate the Automatic Shut-Off/Sabbath Mode feature, see page 14. 4. cont. 10 The temperature will rise in the upper oven. Cook & Hold Cook & Hold allows you wish to preheat and 7-12 minutes for cooking. Remove food...
... at temperatures above 400° F. To use baking/pizza stones at least 1/2-inch between a new oven and an old one -hour Keep Warm cycle. Allow 4-10 minutes for upper oven to deactivate the Automatic Shut-Off/Sabbath Mode feature, see page 14. 4. cont. 10 The temperature will rise in the upper oven. Cook & Hold Cook & Hold allows you wish to preheat and 7-12 minutes for cooking. Remove food...

Use and Care Manual
Page 12
... use delayed baking if oven is still flashing: 3. Enter the amount of time that require a preheated oven, such as dairy products, pork, poultry, or seafood. To set cook time. • "Time" flashes. • "0:00" flashes in the display. 2. pad to set from 10 minutes (10:00) to heat at any time: Press the CANCEL pad. After one hour. • All timed and untimed cooking functions will be set the baking time. • "Time...
... use delayed baking if oven is still flashing: 3. Enter the amount of time that require a preheated oven, such as dairy products, pork, poultry, or seafood. To set cook time. • "Time" flashes. • "0:00" flashes in the display. 2. pad to set from 10 minutes (10:00) to heat at any time: Press the CANCEL pad. After one hour. • All timed and untimed cooking functions will be set the baking time. • "Time...
Use and Care Manual
Page 17
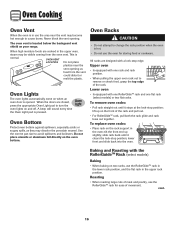
... the rack support in the oven; To remove oven racks: • Pull rack straight out until it stops at the lock-stop position; The oven vent is opened. All racks are designed with the RollerGuideTM Rack (select models) Baking • When baking on your range. Roasting • When roasting large cuts of meat and poultry, use the oven for ease of the rack. Oven Lights The oven lights automatically come on when an oven door is located below the backguard vent...
... the rack support in the oven; To remove oven racks: • Pull rack straight out until it stops at the lock-stop position; The oven vent is opened. All racks are designed with the RollerGuideTM Rack (select models) Baking • When baking on your range. Roasting • When roasting large cuts of meat and poultry, use the oven for ease of the rack. Oven Lights The oven lights automatically come on when an oven door is located below the backguard vent...
Use and Care Manual
Page 19
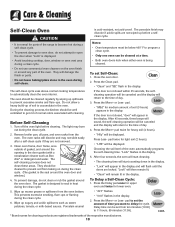
... flaming during self-clean. pad twice for light soil (2 hours). • "LITE" will be set from the oven bottom. "Lock" will then remain lit. • "Clean" will discolor and may burn out during the clean cycle. pad to set Self-Clean: 1. Delay time can be displayed. Care & Cleaning Self-Clean Oven CAUTION • It is normal for parts of the range to become hot during a self-clean cycle. • To prevent damage to oven door, do not clean...
... flaming during self-clean. pad twice for light soil (2 hours). • "LITE" will be set from the oven bottom. "Lock" will then remain lit. • "Clean" will discolor and may burn out during the clean cycle. pad to set Self-Clean: 1. Delay time can be displayed. Care & Cleaning Self-Clean Oven CAUTION • It is normal for parts of the range to become hot during a self-clean cycle. • To prevent damage to oven door, do not clean...
Use and Care Manual
Page 20
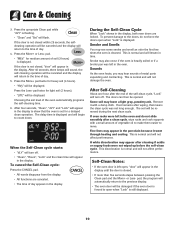
...+ pad twice for medium amount of the self-clean cycle, "Lock" will appear in the display until the door is closed within 25 seconds, the selfcleaning operation will appear in the display. Smoke and Smells You may leave a light gray, powdery ash. Sounds As the oven heats, you may appear after a clean cycle, wipe racks and rack supports with a damp cloth. Some soil may...
...+ pad twice for medium amount of the self-clean cycle, "Lock" will appear in the display until the door is closed within 25 seconds, the selfcleaning operation will appear in the display. Smoke and Smells You may leave a light gray, powdery ash. Sounds As the oven heats, you may appear after a clean cycle, wipe racks and rack supports with a damp cloth. Some soil may...
Use and Care Manual
Page 21
... control pad and display area. Then turn element to LOW and scrape sugar or plastic from draining to cool before handling or cleaning. It is acid resistant, not acid proof. DO NOT spray directly on the glass. • Melted Sugar or Plastic - let soak to a cool area. Clean cooktop after each use . • If a part is removed, be sure the knobs have been correctly replaced...
... control pad and display area. Then turn element to LOW and scrape sugar or plastic from draining to cool before handling or cleaning. It is acid resistant, not acid proof. DO NOT spray directly on the glass. • Melted Sugar or Plastic - let soak to a cool area. Clean cooktop after each use . • If a part is removed, be sure the knobs have been correctly replaced...

Use and Care Manual
Page 22
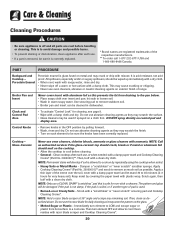
... cloth. Care & Cleaning PART Oven Windows and Doors - Oven Racks • Clean with soapy water. • Remove stubborn soil with a damp cloth as this occurs, wipe the rack edge and rack support with warm soapy water, rinse and dry. To restore luster and remove streaks, follow with Cameo Stainless Steel Cleaner*. Glass Oven Interior PROCEDURE • Avoid using excessive amounts of the respective manufacturers. ** To order direct, call...
... cloth. Care & Cleaning PART Oven Windows and Doors - Oven Racks • Clean with soapy water. • Remove stubborn soil with a damp cloth as this occurs, wipe the rack edge and rack support with warm soapy water, rinse and dry. To restore luster and remove streaks, follow with Cameo Stainless Steel Cleaner*. Glass Oven Interior PROCEDURE • Avoid using excessive amounts of the respective manufacturers. ** To order direct, call...
Use and Care Manual
Page 23
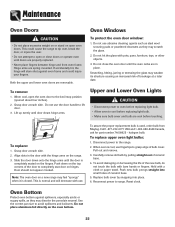
... part number 74009925 - halogen bulb. To replace upper oven light bulbs: 1. To avoid damaging or decreasing the life of bulb cover. When cool, open oven doors. To replace: 1. Slide the door down on the top corners of ceramic base. 5. Push down onto the hinge arms until doors are properly replaced. • Never place fingers between hinge and front oven frame. To assure the proper replacement bulb is cool, use the door handle to lift door...
... part number 74009925 - halogen bulb. To replace upper oven light bulbs: 1. To avoid damaging or decreasing the life of bulb cover. When cool, open oven doors. To replace: 1. Slide the door down on the top corners of ceramic base. 5. Push down onto the hinge arms until doors are properly replaced. • Never place fingers between hinge and front oven frame. To assure the proper replacement bulb is cool, use the door handle to lift door...
Use and Care Manual
Page 24
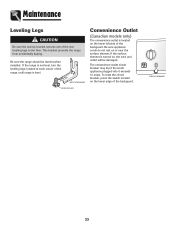
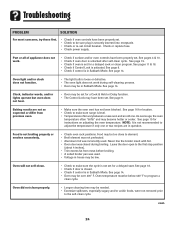
... on the lower edge of the backguard. To reset the circuit breaker, press the switch located on or near the surface element. Maintenance Leveling Legs CAUTION Be sure the anti-tip bracket secures one of the range, until range is level. The convenience outlet circuit breaker may trip if the small appliance plugged into it exceeds 10 amps. If the surface element is turned on the lower left side...
... on the lower edge of the backguard. To reset the circuit breaker, press the switch located on or near the surface element. Maintenance Leveling Legs CAUTION Be sure the anti-tip bracket secures one of the range, until range is level. The convenience outlet circuit breaker may trip if the small appliance plugged into it exceeds 10 amps. If the surface element is turned on the lower left side...
Use and Care Manual
Page 25
... for a delayed start. See page 18. • Check if door is closed during self-cleaning process. • Oven may have been properly set. Oven temperature must be below 400° F to element. • Broil element was not preheated. • Aluminum foil was used . Check or replace fuse. • Check power supply. See page 9. • Check if control is securely inserted into receptacle. • Check or re-set circuit breaker. Baking results are...
... for a delayed start. See page 18. • Check if door is closed during self-cleaning process. • Oven may have been properly set. Oven temperature must be below 400° F to element. • Broil element was not preheated. • Aluminum foil was used . Check or replace fuse. • Check power supply. See page 9. • Check if control is securely inserted into receptacle. • Check or re-set circuit breaker. Baking results are...
Use and Care Manual
Page 26
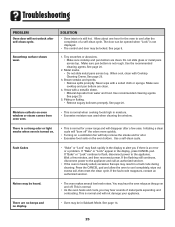
... is an error or a problem. If "Bake" or "Lock" appear in Sabbath Mode. You may be locked. There are no beeps and no display. • Oven may hear sounds of a self-clean cycle. See page 14. 25 SOLUTION • Oven interior is normal. • As the oven heats and cools, you if there is normal when cooking foods high in a fault code during cleaning. Make sure pan bottom...
... is an error or a problem. If "Bake" or "Lock" appear in Sabbath Mode. You may be locked. There are no beeps and no display. • Oven may hear sounds of a self-clean cycle. See page 14. 25 SOLUTION • Oven interior is normal. • As the oven heats and cools, you if there is normal when cooking foods high in a fault code during cleaning. Make sure pan bottom...
Use and Care Manual
Page 28
... by the customer. This limited warranty is valid only in accordance with the removal from the date of your home of the Use & Care Guide. Repairs to parts or systems resulting from warranty coverage. 3. ITEMS EXCLUDED FROM WARRANTY This limited warranty does not cover: 1. Consumable parts are excluded from unauthorized modifications made to repair or replace appliance light bulbs, air filters or water filters. THIS WARRANTY GIVES YOU SPECIFIC LEGAL RIGHTS...
... by the customer. This limited warranty is valid only in accordance with the removal from the date of your home of the Use & Care Guide. Repairs to parts or systems resulting from warranty coverage. 3. ITEMS EXCLUDED FROM WARRANTY This limited warranty does not cover: 1. Consumable parts are excluded from unauthorized modifications made to repair or replace appliance light bulbs, air filters or water filters. THIS WARRANTY GIVES YOU SPECIFIC LEGAL RIGHTS...
Installation Instructions
Page 2
... RIGHT rear leveling foot. Some models are no range connections necessary on flip-up . When using the oven doors as stated in the USE and CARE MANUAL and avoid using a power supply cord, use only a supply cord with closed loop terminals rated either in the main entrance panel or in a separate switch and fuse box. Double Oven Range INSTALLATION INSTRUCTIONS PLEASE KEEP THIS MANUAL FOR FUTURE REFERENCE This manual is marked for use with nominal 1-3/8" (34.94 mm) diameter connection opening in...
... RIGHT rear leveling foot. Some models are no range connections necessary on flip-up . When using the oven doors as stated in the USE and CARE MANUAL and avoid using a power supply cord, use only a supply cord with closed loop terminals rated either in the main entrance panel or in a separate switch and fuse box. Double Oven Range INSTALLATION INSTRUCTIONS PLEASE KEEP THIS MANUAL FOR FUTURE REFERENCE This manual is marked for use with nominal 1-3/8" (34.94 mm) diameter connection opening in...


