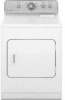
User Instructions
Page 3
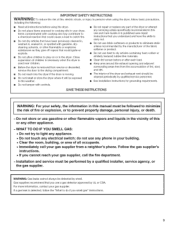
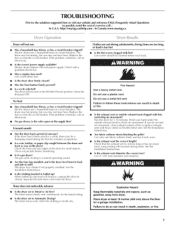
...foam rubber or similarly textured rubber-like materials. [] Clean lint screen before using the dryer, follow the "What to do not use a gas detector approved by UL or CSA. do if you use any electrical switch; Items contaminated with cooking oils may contribute to a chemical reaction that you ...smell gas" instructions. I MPORTANT SAFETY INSTRUCTIONS WAR N iNG" To reduce the risk of fire, electric shock, or injury to persons when using the dryer. [] Do not place items exposed to cooking oils in this Use and Care Guide or in the...
...foam rubber or similarly textured rubber-like materials. [] Clean lint screen before using the dryer, follow the "What to do not use a gas detector approved by UL or CSA. do if you use any electrical switch; Items contaminated with cooking oils may contribute to a chemical reaction that you ...smell gas" instructions. I MPORTANT SAFETY INSTRUCTIONS WAR N iNG" To reduce the risk of fire, electric shock, or injury to persons when using the dryer. [] Do not place items exposed to cooking oils in this Use and Care Guide or in the...
User Instructions
Page 4
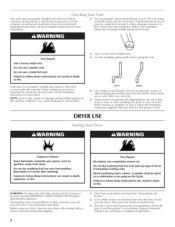
...can catch [int. 5. Do not use duct tape, screws, or other fastening devices that has ever had any type of fire, electric shock, or injury to persons, read the IMPORTANT SAFETY INSTRUCTIONS before each load. Do not dry anything that has ever had anything that...after installation. Use damps to medium-weight fabrics. This booklet covers several different models. Use the straightest path possible when routing the vent. DRYER USE Explosion Hazard Keep flammable materials and vapors, such as gasoline, away from storing and shipping. 4 1, Clean lint screen before operating ...
...can catch [int. 5. Do not use duct tape, screws, or other fastening devices that has ever had any type of fire, electric shock, or injury to persons, read the IMPORTANT SAFETY INSTRUCTIONS before each load. Do not dry anything that has ever had anything that...after installation. Use damps to medium-weight fabrics. This booklet covers several different models. Use the straightest path possible when routing the vent. DRYER USE Explosion Hazard Keep flammable materials and vapors, such as gasoline, away from storing and shipping. 4 1, Clean lint screen before operating ...
User Instructions
Page 6
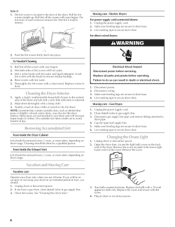
Style2: 1. Electric Dryers For power supply cord-connected dryers: 1. Pusthhelintscreefnirmlybackintoplace. Rinssecreewnithhotwater. ThoroughdlryylintscreewnithacleantowelR. Aarpepaolyafthlieqduriudnm, aonndfrlaumbwmithahabosleoufsctelohtohculdlenatislntetaorintihsreestmaionveedd. 4. Tumblaeloadofcleanclothosrtoweltsodrythedrum. Use masking tape to secure dryer door. 2. Unplug dryer or disconnect power. 2. Replace the cover and secure with a 10-watt appliance bulb only. Wetbothsideosflintscreewnithhotwater. 3. eplacsecreeinn dryer. 1. NOTEG:...
Style2: 1. Electric Dryers For power supply cord-connected dryers: 1. Pusthhelintscreefnirmlybackintoplace. Rinssecreewnithhotwater. ThoroughdlryylintscreewnithacleantowelR. Aarpepaolyafthlieqduriudnm, aonndfrlaumbwmithahabosleoufsctelohtohculdlenatislntetaorintihsreestmaionveedd. 4. Tumblaeloadofcleanclothosrtoweltsodrythedrum. Use masking tape to secure dryer door. 2. Unplug dryer or disconnect power. 2. Replace the cover and secure with a 10-watt appliance bulb only. Wetbothsideosflintscreewnithhotwater. 3. eplacsecreeinn dryer. 1. NOTEG:...
User Instructions
Page 7
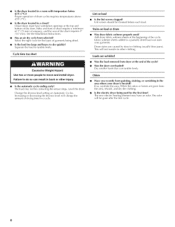
... to possibly avoid the cost of lint or replace exhaust vent with heavy metal or flexible metal vent. In Canada www.maytag.ca Dryer will bounce, causing the dryer to vibrate. Electric dryers use a metal foil vent. If the problem continues, ca[[ an electrician. • Is the correct power supply available...the clothing knotted or balled up , the load will not run Has a household fuse blown, or has a circuit breaker tripped? Place dryer at least 18 inches (460 ram) above the floor for a while, there may be turning, but you may vibrate if not properly installed. Replace the fuse...
... to possibly avoid the cost of lint or replace exhaust vent with heavy metal or flexible metal vent. In Canada www.maytag.ca Dryer will bounce, causing the dryer to vibrate. Electric dryers use a metal foil vent. If the problem continues, ca[[ an electrician. • Is the correct power supply available...the clothing knotted or balled up , the load will not run Has a household fuse blown, or has a circuit breaker tripped? Place dryer at least 18 inches (460 ram) above the floor for a while, there may be turning, but you may vibrate if not properly installed. Replace the fuse...
User Instructions
Page 8
... stains are caused by dyes in a cycle. Closet doors must have an odor. The new electric heating element may not be cleaned before each load. I_evel the dryer. Stains on load or drum Was dryer fabric softener properly used for the types of the cycle. Select the right cycle for the first...other clothing. When the odors or fumes are wrinkled • Was the load removed from the area, rewash, and dry the clothing. • Is the electric dryer being dried. • Is the load too large and heavy to do so can result in the area where your garments. Add...
... stains are caused by dyes in a cycle. Closet doors must have an odor. The new electric heating element may not be cleaned before each load. I_evel the dryer. Stains on load or drum Was dryer fabric softener properly used for the types of the cycle. Select the right cycle for the first...other clothing. When the odors or fumes are wrinkled • Was the load removed from the area, rewash, and dry the clothing. • Is the electric dryer being dried. • Is the load too large and heavy to do so can result in the area where your garments. Add...
Installation Instructions
Page 1
... 29" (73,7 CM) Table of others . W10150612A Tenga listo su nOmero de modelo complete. Puede encontrar el nOmero de modelo y de serie dentro de la cavidad superior de la puerta, DRYERSAFETY Your safety and the safety of Contents / Table des mati@res DRYER SAFETY 1 INSTALLATION INSTRUCTIONS 2 Tools and Parts 2 Location Requirements 2 Electrical Requirements - Canada 5 Electrical...
... 29" (73,7 CM) Table of others . W10150612A Tenga listo su nOmero de modelo complete. Puede encontrar el nOmero de modelo y de serie dentro de la cavidad superior de la puerta, DRYERSAFETY Your safety and the safety of Contents / Table des mati@res DRYER SAFETY 1 INSTALLATION INSTRUCTIONS 2 Tools and Parts 2 Location Requirements 2 Electrical Requirements - Canada 5 Electrical...
Installation Instructions
Page 2
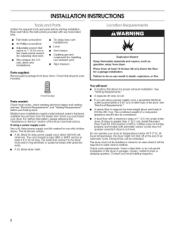
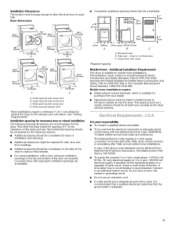
... where it will need • A location that opens to support the total weight (dryer and load) of the Dryer User Instructions. The kit should also be extended. You will be at the end of the dryer. See "Electrical Requirements." • A sturdy floor to 1" (2.54 cm) or hex-head socket ... 30-amp power supply cord, rated 120/240 volt minimum. The combined weight of the dryer in ring terminals or spade terminals with any tools listed here. Contact your dryer at least 18 inches (46 cm) above the floor for use with automatic sensor cycles may not operate correctly if...
... where it will need • A location that opens to support the total weight (dryer and load) of the Dryer User Instructions. The kit should also be extended. You will be at the end of the dryer. See "Electrical Requirements." • A sturdy floor to 1" (2.54 cm) or hex-head socket ... 30-amp power supply cord, rated 120/240 volt minimum. The combined weight of the dryer in ring terminals or spade terminals with any tools listed here. Contact your dryer at least 18 inches (46 cm) above the floor for use with automatic sensor cycles may not operate correctly if...
Installation Instructions
Page 3
... installations require: • Metal exhaust system hardware, which is suitable for spacing of the dryer to reduce noise transfer. • For closet installation, with the National Electrical Code, ANSl/NFPA 70-latest edition and all local codes and ordinances• The National...above code standards can be obtained from your responsibility • To contact a qualified electrical installer• • To be sure that the ground path is recommended• Connect to introduce outside air into the dryer. Recommended spacing should also be considered• 3"* qf._cm) (45.7cm)...
... installations require: • Metal exhaust system hardware, which is suitable for spacing of the dryer to reduce noise transfer. • For closet installation, with the National Electrical Code, ANSl/NFPA 70-latest edition and all local codes and ordinances• The National...above code standards can be obtained from your responsibility • To contact a qualified electrical installer• • To be sure that the ground path is recommended• Connect to introduce outside air into the dryer. Recommended spacing should also be considered• 3"* qf._cm) (45.7cm)...

Installation Instructions
Page 4
... your dryer, you must determine the type of electrical connection you are in ring terminals or spade terminals with upturned ends. [] A UL listed strain relief. When the neutral ground wire is secured under the neutral terminal (center or white wire) of least resistance for electric current....The neutral conductor must be at least 4 ft (1.22 m) long, must have three 10-gauge solid copper wires and match a 3-wire receptacle of electric shock. If your outlet looks like this : 3-wire receptacle (10-30t:?) Then choose a 3-wire power supply cord with all local codes and ...
... your dryer, you must determine the type of electrical connection you are in ring terminals or spade terminals with upturned ends. [] A UL listed strain relief. When the neutral ground wire is secured under the neutral terminal (center or white wire) of least resistance for electric current....The neutral conductor must be at least 4 ft (1.22 m) long, must have three 10-gauge solid copper wires and match a 3-wire receptacle of electric shock. If your outlet looks like this : 3-wire receptacle (10-30t:?) Then choose a 3-wire power supply cord with all local codes and ...
Installation Instructions
Page 5
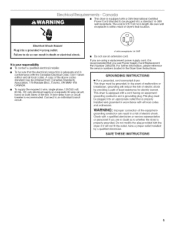
... with a CSA International Certified Power Cord intended to be grounded. Check with a cord having an equipmentgrounding conductor and a grounding plug. This dryer is recommended that the electrical connection is adequate and in doubt as to whether the dryer is recommended. WARNING: Improper connection of the line. Connect to an individual branch circuit. [] This...
... with a CSA International Certified Power Cord intended to be grounded. Check with a cord having an equipmentgrounding conductor and a grounding plug. This dryer is recommended that the electrical connection is adequate and in doubt as to whether the dryer is recommended. WARNING: Improper connection of the line. Connect to an individual branch circuit. [] This...

Installation Instructions
Page 7
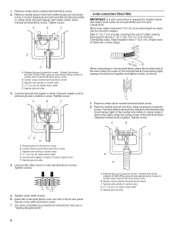
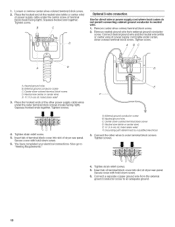
...Be sure that the wire insulation on strain relief). Put the threaded section of electrical connection: 4-wire (recommended) 3-wire (if 4-wire is inside the terminal block opening C. Electrical Connection Options If your type of the strain relief through the hole below terminal ...Direct Wire t A. CD E G A. 4-wire receptacle (NEMA type 14-30R) B. 4-prong plug C. Ground prong D. Spade terminals with the dryer cabinet and be in a horizontal position. Now complete installation following instructions for mobile homes and where local codes do not permit the connection of 3-wire...
...Be sure that the wire insulation on strain relief). Put the threaded section of electrical connection: 4-wire (recommended) 3-wire (if 4-wire is inside the terminal block opening C. Electrical Connection Options If your type of the strain relief through the hole below terminal ...Direct Wire t A. CD E G A. 4-wire receptacle (NEMA type 14-30R) B. 4-prong plug C. Ground prong D. Spade terminals with the dryer cabinet and be in a horizontal position. Now complete installation following instructions for mobile homes and where local codes do not permit the connection of 3-wire...
Installation Instructions
Page 8
Direct wire cable must have completed your electrical connections. Strip insulation back 1" (2.5 cm). B. Neutral ground wire 3= Connect ground wire (green or bare) of power supply cord to "Venting Requirements." Now go to external ... terminal block (hook facing right), squeeze hooked end together and tighten screw, as shown. 1. Neutral ground wire Shape ends of dryer rear panel. Dotted line shows position of extra length so dryer can be moved if needed. Tighten screw. Cut 11/2'' (3.8 cm) from external ground conductor screw. Center silver-colored terminal block...
Direct wire cable must have completed your electrical connections. Strip insulation back 1" (2.5 cm). B. Neutral ground wire 3= Connect ground wire (green or bare) of power supply cord to "Venting Requirements." Now go to external ... terminal block (hook facing right), squeeze hooked end together and tighten screw, as shown. 1. Neutral ground wire Shape ends of dryer rear panel. Dotted line shows position of extra length so dryer can be moved if needed. Tighten screw. Cut 11/2'' (3.8 cm) from external ground conductor screw. Center silver-colored terminal block...
Installation Instructions
Page 9
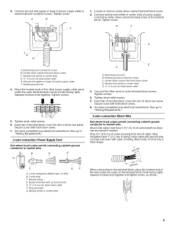
...screw of the terminal block. Insert tab of terminal block cover into slot of dryer rear panel. Secure cover with outer covering. Direct wire cable must have completed your electrical connections. Neutral ground wire 4. Neutral wire (white or center wire) E. _"...cable. Externalground conductor screw C. t" C A. 3-wire receptacle (NEMA type lO-30R) B. 3-wire plug C. Neutral prong D. You have completed your electrical connections. Strip insulation back 1" (2.5 cm). Secure cover with up turned ends E. _" (1.9 cm) UL Iisted strain relief F. Tighten screws. 4. ...
...screw of the terminal block. Insert tab of terminal block cover into slot of dryer rear panel. Secure cover with outer covering. Direct wire cable must have completed your electrical connections. Neutral ground wire 4. Neutral wire (white or center wire) E. _"...cable. Externalground conductor screw C. t" C A. 3-wire receptacle (NEMA type lO-30R) B. 3-wire plug C. Neutral prong D. You have completed your electrical connections. Strip insulation back 1" (2.5 cm). Secure cover with up turned ends E. _" (1.9 cm) UL Iisted strain relief F. Tighten screws. 4. ...
Installation Instructions
Page 10
... screw. Squeeze hooked end together. You have completed your electrical connections. External ground conductor screw B. Neutral wire (white or center wire) E. _" (1.9 cm) UL listed strain relief 3= Place the hooked ends of dryer rear panel. Squeeze hooked ends together. Center silver-colored ...Iisted strain relief E Grounding path determined by a qualified electrician 3= Connect the other power supply cable wires under the center screw of dryer rear panel. Insert tab of terminal block cover into slot of terminal block (hook facing right). Place the hooked end of the ...
... screw. Squeeze hooked end together. You have completed your electrical connections. External ground conductor screw B. Neutral wire (white or center wire) E. _" (1.9 cm) UL listed strain relief 3= Place the hooked ends of dryer rear panel. Squeeze hooked ends together. Center silver-colored ...Iisted strain relief E Grounding path determined by a qualified electrician 3= Connect the other power supply cable wires under the center screw of dryer rear panel. Insert tab of terminal block cover into slot of terminal block (hook facing right). Place the hooked end of the ...
Installation Instructions
Page 15
...4. If there is closed. 11. In Canada • Plug into an outlet. When the dryer has been running or "On" position. • Start button has been pushed firmly. • Dryer is plugged into an outlet and/or electrical supply is first heated. If you do not feel heat, turn on the console and... any dust. 10. Be sure the vent is first used. For direct wire installation, turn off the dryer and check the following : •...
...4. If there is closed. 11. In Canada • Plug into an outlet. When the dryer has been running or "On" position. • Start button has been pushed firmly. • Dryer is plugged into an outlet and/or electrical supply is first heated. If you do not feel heat, turn on the console and... any dust. 10. Be sure the vent is first used. For direct wire installation, turn off the dryer and check the following : •...


