
Installation Guide
Page 3
... instructions provided with riser Leveling legs (4) for installing new exhaust vent) Tin snips (new vent installations) 1/4" nut driver (recommended) Tape measure 5' (1.52 m) inlet hose Rubber washer Parts package is located in your dryer. Tools needed : (Not supplied with dryer) Refer to your "Use and Care Guide" for information about accessories available...
... instructions provided with riser Leveling legs (4) for installing new exhaust vent) Tin snips (new vent installations) 1/4" nut driver (recommended) Tape measure 5' (1.52 m) inlet hose Rubber washer Parts package is located in your dryer. Tools needed : (Not supplied with dryer) Refer to your "Use and Care Guide" for information about accessories available...
Installation Guide
Page 4
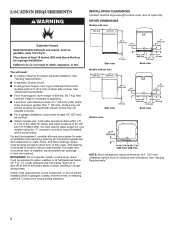
....6 kPa). See "Venting Requirements." 4 Lower temperatures may not operate correctly. ■■ For a garage installation, place dryer at temperatures below 45° F (7° C). Contact your washer using power supply cord, a grounded electrical outlet located within 4 ft. (1.2 m) of the water fill valves, and water pressure of automatic sensor cycles, resulting in longer...
....6 kPa). See "Venting Requirements." 4 Lower temperatures may not operate correctly. ■■ For a garage installation, place dryer at temperatures below 45° F (7° C). Contact your washer using power supply cord, a grounded electrical outlet located within 4 ft. (1.2 m) of the water fill valves, and water pressure of automatic sensor cycles, resulting in longer...

Installation Guide
Page 15
Maytag Vent System Chart Number of 90° elbows Type of vent to secure vent, because they can result. 15 Check and see if rubber washer is seated on faucet. Screw on connector. 3. Screw on coupling by hand until it is seated on coupling by hand until it is...connected to seal exterior wall opening around exhaust hood. 2. Turn cold water off, remove and replace rubber washer Turn cold water faucet off and remove washer inlet hose. Remove old rubber washer from inlet hose and replace with additional two-thirds turn inside the dryer. Attach short hose and "Y" connector...
Maytag Vent System Chart Number of 90° elbows Type of vent to secure vent, because they can result. 15 Check and see if rubber washer is seated on faucet. Screw on connector. 3. Screw on coupling by hand until it is seated on coupling by hand until it is...connected to seal exterior wall opening around exhaust hood. 2. Turn cold water off, remove and replace rubber washer Turn cold water faucet off and remove washer inlet hose. Remove old rubber washer from inlet hose and replace with additional two-thirds turn inside the dryer. Attach short hose and "Y" connector...

Installation Guide
Page 16
... cold water faucet One end of dryer back panel. Using pliers, tighten the couplings an additional two-thirds turn . Attach other side of "Y" connector. Attach washer cold inlet hose to other end of long hose to the coupling can result. 16 4. Damage to fill valve at bottom of the long hose...
... cold water faucet One end of dryer back panel. Using pliers, tighten the couplings an additional two-thirds turn . Attach other side of "Y" connector. Attach washer cold inlet hose to other end of long hose to the coupling can result. 16 4. Damage to fill valve at bottom of the long hose...


