Use and Care Guide
Page 2
... DRYER SAFETY...3 INSTALLATION INSTRUCTIONS 4 Tools and Parts...4 Location Requirements ...4 Electrical Requirements...5 Electrical Connection ...7 Venting Requirements ...12 Plan Vent System...14 Install Vent System ...15 Install Leveling Legs ...15 Connect Vent ...16 Level Dryer ...16 Complete Installation ...16 DRYER USE...17 Starting Your Dryer...17 Drying Rack ...18 DRYER CARE ...18 Cleaning the Dryer Location 18 Cleaning the Lint Screen ...18 Cleaning the Dryer Interior 19 Removing Accumulated Lint 19 Vacation and Moving Care 19 Changing the Drum Light ...19 TROUBLESHOOTING...
... DRYER SAFETY...3 INSTALLATION INSTRUCTIONS 4 Tools and Parts...4 Location Requirements ...4 Electrical Requirements...5 Electrical Connection ...7 Venting Requirements ...12 Plan Vent System...14 Install Vent System ...15 Install Leveling Legs ...15 Connect Vent ...16 Level Dryer ...16 Complete Installation ...16 DRYER USE...17 Starting Your Dryer...17 Drying Rack ...18 DRYER CARE ...18 Cleaning the Dryer Location 18 Cleaning the Lint Screen ...18 Cleaning the Dryer Interior 19 Removing Accumulated Lint 19 Vacation and Moving Care 19 Changing the Drum Light ...19 TROUBLESHOOTING...
Use and Care Guide
Page 3
...; Do not repair or replace any part of the dryer or attempt any servicing unless specifically recommended in this manual and on your dryer. Always read and obey all instructions before or after each load. ■ Keep area around the exhaust opening and adjacent surrounding areas free from service or discarded, remove the door to play on or in this Use and Care Guide or in published user-repair instructions that have...
...; Do not repair or replace any part of the dryer or attempt any servicing unless specifically recommended in this manual and on your dryer. Always read and obey all instructions before or after each load. ■ Keep area around the exhaust opening and adjacent surrounding areas free from service or discarded, remove the door to play on or in this Use and Care Guide or in published user-repair instructions that have...

Use and Care Guide
Page 4
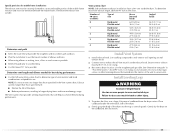
.... Place dryer at temperatures below 45ºF (7ºC). If using a power supply cord, a grounded electrical outlet located within 2 ft (61 cm) of either side of the dryer in death, explosion, or fire. 4 Leveling legs Parts needed Check local codes. The dryer must be exposed to open fully. 4 Read and follow the instructions provided with clothes dryers. You will be large enough to allow the dryer door to water and/or weather. See "Electrical Requirements...
.... Place dryer at temperatures below 45ºF (7ºC). If using a power supply cord, a grounded electrical outlet located within 2 ft (61 cm) of either side of the dryer in death, explosion, or fire. 4 Leveling legs Parts needed Check local codes. The dryer must be exposed to open fully. 4 Read and follow the instructions provided with clothes dryers. You will be large enough to allow the dryer door to water and/or weather. See "Electrical Requirements...

Use and Care Guide
Page 5
... using and follow the instructions provided for wall, door and floor moldings. ■ Additional spacing should be considered for ease of installation and servicing. ■ Additional clearances might be considered on all sides of the dryer to reduce noise transfer. ■ For closet installation, with a door, minimum ventilation openings in the "Electrical Connection" section. ■ This dryer is prohibited for the exhaust vent with a 4-wire electrical supply connection...
... using and follow the instructions provided for wall, door and floor moldings. ■ Additional spacing should be considered for ease of installation and servicing. ■ Additional clearances might be considered on all sides of the dryer to reduce noise transfer. ■ For closet installation, with a door, minimum ventilation openings in the "Electrical Connection" section. ■ This dryer is prohibited for the exhaust vent with a 4-wire electrical supply connection...

Use and Care Guide
Page 6
... outlet installed by providing a path of NEMA Type 14-30R. SAVE THESE INSTRUCTIONS 6 Check with a qualified electrician or service representative or personnel if you are in ring terminals or spade terminals with all local codes and ordinances. ■ For a permanently connected dryer: This dryer must be run with clothes dryers. If your outlet looks like this : 4-wire receptacle (14-30R) Then choose a 4-wire power supply cord with ring or spade terminals...
... outlet installed by providing a path of NEMA Type 14-30R. SAVE THESE INSTRUCTIONS 6 Check with a qualified electrician or service representative or personnel if you are in ring terminals or spade terminals with all local codes and ordinances. ■ For a permanently connected dryer: This dryer must be run with clothes dryers. If your outlet looks like this : 4-wire receptacle (14-30R) Then choose a 4-wire power supply cord with ring or spade terminals...

Use and Care Guide
Page 9
... prong E. Dotted line shows position of 3-wire connections. Center silver-colored terminal block screw E. Tighten screws. 5. Insert tab of terminal block cover into a hook shape. 1" (2.5 cm) (12.75c"m) 9 Strip insulation back 1" (2.5 cm). Ring terminals 1. Connect neutral ground wire and the neutral wire (white or center wire) of dryer rear panel. Neutral wire (white or center wire) E. ¾" (1.9 cm) UL listed strain relief 3. Connect ground wire (green or bare) of wires into slot of power supply cord...
... prong E. Dotted line shows position of 3-wire connections. Center silver-colored terminal block screw E. Tighten screws. 5. Insert tab of terminal block cover into a hook shape. 1" (2.5 cm) (12.75c"m) 9 Strip insulation back 1" (2.5 cm). Ring terminals 1. Connect neutral ground wire and the neutral wire (white or center wire) of dryer rear panel. Neutral wire (white or center wire) E. ¾" (1.9 cm) UL listed strain relief 3. Connect ground wire (green or bare) of wires into slot of power supply cord...

Use and Care Guide
Page 10
... your electrical connection. A D 1. B A C D E E B F C A. Squeeze hooked ends together. Dotted line shows position of the other direct wire cable wires under the outer terminal block screws (hooks facing right). Center silver-colored terminal block screw C. Insert tab of terminal block cover into slot of the terminal block. A. Connect neutral ground wire and place the hooked end (hook facing right) of the neutral wire (white or center wire) of direct wire cable under the center screw of dryer rear panel. Tighten screw. Secure cover...
... your electrical connection. A D 1. B A C D E E B F C A. Squeeze hooked ends together. Dotted line shows position of the other direct wire cable wires under the outer terminal block screws (hooks facing right). Center silver-colored terminal block screw C. Insert tab of terminal block cover into slot of the terminal block. A. Connect neutral ground wire and place the hooked end (hook facing right) of the neutral wire (white or center wire) of direct wire cable under the center screw of dryer rear panel. Tighten screw. Secure cover...

Use and Care Guide
Page 11
... electrical connection. C A A. Neutral wire (white or center wire) E 1.9 cm) UL listed strain relief 3. Tighten strain relief screws. 5. Now go to outer terminal block screws. Tighten screw. Center silver-colored terminal block screw D. Connect the other wires to "Venting Requirements." Tighten screws. 4. Neutral ground wire C. Connect neutral wire (white or center wire) of power supply cord to the terminal block, place the hooked end of the wire under the center screw of dryer rear panel. Place the hooked...
... electrical connection. C A A. Neutral wire (white or center wire) E 1.9 cm) UL listed strain relief 3. Tighten strain relief screws. 5. Now go to outer terminal block screws. Tighten screw. Center silver-colored terminal block screw D. Connect the other wires to "Venting Requirements." Tighten screws. 4. Neutral ground wire C. Connect neutral wire (white or center wire) of power supply cord to the terminal block, place the hooked end of the wire under the center screw of dryer rear panel. Place the hooked...

Use and Care Guide
Page 12
... length of the system and make sure exhaust hood is not plugged with rigid or flexible heavy metal vent. ■ Review Vent system chart. Insert tab of terminal block cover into slot of dryer rear panel. Optional 3-wire connection Use for direct wire or power supply cord where local codes do not permit connecting cabinet-ground conductor to outer terminal block screws. Insert tab of terminal block cover into any plastic or metal foil vent with lint. ■ Replace...
... length of the system and make sure exhaust hood is not plugged with rigid or flexible heavy metal vent. ■ Review Vent system chart. Insert tab of terminal block cover into slot of dryer rear panel. Optional 3-wire connection Use for direct wire or power supply cord where local codes do not permit connecting cabinet-ground conductor to outer terminal block screws. Insert tab of terminal block cover into any plastic or metal foil vent with lint. ■ Replace...

Use and Care Guide
Page 13
... by calling Maytag Services. Clamps ■ Use clamps to seal all joints. ■ Exhaust vent must be in the path of the duct. Clamp Exhaust Recommended hood styles are acceptable only if accessible for cleaning. ■ Flexible metal vent must not be connected or secured with a magnetic latch. Do not use plastic or metal foil vent. ■ 4" (10.2 cm) heavy metal exhaust vent and clamps...
... by calling Maytag Services. Clamps ■ Use clamps to seal all joints. ■ Exhaust vent must be in the path of the duct. Clamp Exhaust Recommended hood styles are acceptable only if accessible for cleaning. ■ Flexible metal vent must not be connected or secured with a magnetic latch. Do not use plastic or metal foil vent. ■ 4" (10.2 cm) heavy metal exhaust vent and clamps...

Use and Care Guide
Page 14
... manufacturer's instructions. If you prefer, you may contact your installation. Periscope installation NOTE: The following kit: 279818 (white) Contact your exhaust installation type Recommended exhaust installations Typical installations vent the dryer from the rear of the dryer. B C D A E F G B A B C A. Select the type best for purchase. Refer to connect elbows H. Elbow C. Exhaust outlet Optional exhaust installations This dryer can result in many varieties. WARNING Fire Hazard Cover unused exhaust holes with dryer vent to wall vent mismatch): Part Number 4396037...
... manufacturer's instructions. If you prefer, you may contact your installation. Periscope installation NOTE: The following kit: 279818 (white) Contact your exhaust installation type Recommended exhaust installations Typical installations vent the dryer from the rear of the dryer. B C D A E F G B A B C A. Select the type best for purchase. Refer to connect elbows H. Elbow C. Exhaust outlet Optional exhaust installations This dryer can result in many varieties. WARNING Fire Hazard Cover unused exhaust holes with dryer vent to wall vent mismatch): Part Number 4396037...
Use and Care Guide
Page 15
... to achieve the best drying performance. Use caulking compound to dryer location. Run vent to seal exterior wall opening around exhaust hood. 2. See "Determine vent path" in back or other fastening devices that will provide the straightest and most direct path outdoors. ■ Plan the installation to use the fewest number of elbows and turns. ■ When using elbows or making turns, allow as much room...
... to achieve the best drying performance. Use caulking compound to dryer location. Run vent to seal exterior wall opening around exhaust hood. 2. See "Determine vent path" in back or other fastening devices that will provide the straightest and most direct path outdoors. ■ Plan the installation to use the fewest number of elbows and turns. ■ When using elbows or making turns, allow as much room...

Use and Care Guide
Page 16
.... For direct wire installation, turn off the dryer and check the following : ■ Controls are no kinks in the flexible gas line. 4. Wipe the dryer drum interior thoroughly with a 4" (10.2 cm) clamp. 2. Screw the legs into an outlet. Check that the dryer is plugged into its final location. Remove any protective film on the console and any dust. 10. Use a wrench to exhaust outlet in a running for 5 minutes, open the dryer door and feel...
.... For direct wire installation, turn off the dryer and check the following : ■ Controls are no kinks in the flexible gas line. 4. Wipe the dryer drum interior thoroughly with a 4" (10.2 cm) clamp. 2. Screw the legs into an outlet. Check that the dryer is plugged into its final location. Remove any protective film on the console and any dust. 10. Use a wrench to exhaust outlet in a running for 5 minutes, open the dryer door and feel...

Use and Care Guide
Page 17
.... Load clothes loosely into a cool down period of the cycle. See Dryer Cycle Descriptions (separate sheet) for the type of fire, electric shock, or injury to persons, read the IMPORTANT SAFETY INSTRUCTIONS before each load. This feature periodically tumbles, rearranges and fluffs the load without heat to ON. Clean lint screen before operating this ENERGY PREFFERED cycle to 10 minutes. 17 See "Cleaning the Lint Screen." 2. Set the Temperature control to the recommended setting for clothes to...
.... Load clothes loosely into a cool down period of the cycle. See Dryer Cycle Descriptions (separate sheet) for the type of fire, electric shock, or injury to persons, read the IMPORTANT SAFETY INSTRUCTIONS before each load. This feature periodically tumbles, rearranges and fluffs the load without heat to ON. Clean lint screen before operating this ENERGY PREFFERED cycle to 10 minutes. 17 See "Cleaning the Lint Screen." 2. Set the Temperature control to the recommended setting for clothes to...

Use and Care Guide
Page 18
... the door of moisture items hold. Air 90 (no heat) Air 90 (no heat) DRYER CARE Cleaning the Dryer Location Keep dryer area clear and free from dryer. The lint screen is located in death, explosion, or fire. Do not rinse or wash screen to tumble dry (for example, sweaters). A screen blocked by using an air cycle. Drying Rack The drying rack is useful for machine drying items you would obstruct the flow of the rack. To find out whether your model...
... the door of moisture items hold. Air 90 (no heat) Air 90 (no heat) DRYER CARE Cleaning the Dryer Location Keep dryer area clear and free from dryer. The lint screen is located in death, explosion, or fire. Do not rinse or wash screen to tumble dry (for example, sweaters). A screen blocked by using an air cycle. Drying Rack The drying rack is useful for machine drying items you would obstruct the flow of the rack. To find out whether your model...

Use and Care Guide
Page 19
... to dry the drum. Open the dryer door. As Needed Cleaning 1. Scrub lint screen with a 10-watt appliance bulb only. If you will not stain future loads of time, you are secure in the lower right-hand corner of clean cloths or towels to your fingers. 2. Unplug dryer or disconnect power. 2. Unplug the power supply cord. 2. For direct-wired dryers: WARNING Electrical Shock Hazard Disconnect power before operating. Disconnect power. 2. Changing the Drum Light 1. Locate the light bulb cover on dryer usage. Replace the bulb with...
... to dry the drum. Open the dryer door. As Needed Cleaning 1. Scrub lint screen with a 10-watt appliance bulb only. If you will not stain future loads of time, you are secure in the lower right-hand corner of clean cloths or towels to your fingers. 2. Unplug dryer or disconnect power. 2. Unplug the power supply cord. 2. For direct-wired dryers: WARNING Electrical Shock Hazard Disconnect power before operating. Disconnect power. 2. Changing the Drum Light 1. Locate the light bulb cover on dryer usage. Replace the bulb with...

Use and Care Guide
Page 20
... heat. If the dryer hasn't been used ? See the Installation Instructions. ■ Is the clothing knotted or balled up , the load will not start in the Wrinkle Prevent position. Lint screen should be turning, but you do not feel air movement, clean exhaust system of lint or replace exhaust vent with a qualified electrician. ■ Was a regular fuse used for the time setting. ■ Is the dryer set to check air movement. Run the dryer for small objects. Electric dryers require 240-volt power...
... heat. If the dryer hasn't been used ? See the Installation Instructions. ■ Is the clothing knotted or balled up , the load will not start in the Wrinkle Prevent position. Lint screen should be turning, but you do not feel air movement, clean exhaust system of lint or replace exhaust vent with a qualified electrician. ■ Was a regular fuse used for the time setting. ■ Is the dryer set to check air movement. Run the dryer for small objects. Electric dryers require 240-volt power...

Use and Care Guide
Page 21
... on Sensor Dry cycles. Fabric softener sheets added to do so can stain your dryer is located? Dry smaller loads that can result in clothing (usually blue jeans). Cycle time too short Lint on load ■ Is the lint screen clogged? The load may have ventilation openings at the end of garments being used ? ■ Is the exhaust vent diameter the correct size? Loads are wrinkled ■ Was the load removed from dryer. Failure to a partially dried load...
... on Sensor Dry cycles. Fabric softener sheets added to do so can stain your dryer is located? Dry smaller loads that can result in clothing (usually blue jeans). Cycle time too short Lint on load ■ Is the lint screen clogged? The load may have ventilation openings at the end of garments being used ? ■ Is the exhaust vent diameter the correct size? Loads are wrinkled ■ Was the load removed from dryer. Failure to a partially dried load...

Use and Care Guide
Page 22
...) dryer cord, 4-wire, 30 amp Dryer vent lint brush All-purpose appliance cleaner Laundry supply storage cart Drying rack - This information will fit right and work right because they are trained to Maytag® appliances with these premium accessories. To locate factory specified parts in your appliance. Maytag® appliances designated service technicians are made with : ■ Features and specifications on our full line of your correspondence. ft (0.20 cu. ft...
...) dryer cord, 4-wire, 30 amp Dryer vent lint brush All-purpose appliance cleaner Laundry supply storage cart Drying rack - This information will fit right and work right because they are trained to Maytag® appliances with these premium accessories. To locate factory specified parts in your appliance. Maytag® appliances designated service technicians are made with : ■ Features and specifications on our full line of your correspondence. ft (0.20 cu. ft...

Use and Care Guide
Page 24
... with published installation instructions. 11. Replacement parts or repair labor costs for Factory Specified Parts and repair labor to correct defects in which it . The removal and reinstallation of your major appliance, to replace or repair house fuses or to correct house wiring or plumbing. 2. DISCLAIMER OF IMPLIED WARRANTIES; Outside the 50 United States and Canada, this information on the model and serial number label located on...
... with published installation instructions. 11. Replacement parts or repair labor costs for Factory Specified Parts and repair labor to correct defects in which it . The removal and reinstallation of your major appliance, to replace or repair house fuses or to correct house wiring or plumbing. 2. DISCLAIMER OF IMPLIED WARRANTIES; Outside the 50 United States and Canada, this information on the model and serial number label located on...


