Owners Manual
Page 1
... reduce the chance of others . You will need assistance, call us at www.maytag.com for purchasing this manual and on your model and serial number located on some models 5 OVEN CARE 6 Self-Cleaning Cycle (on the oven frame behind the oven door. This symbol alerts you still need your appliance. All safety messages will follow...
... reduce the chance of others . You will need assistance, call us at www.maytag.com for purchasing this manual and on your model and serial number located on some models 5 OVEN CARE 6 Self-Cleaning Cycle (on the oven frame behind the oven door. This symbol alerts you still need your appliance. All safety messages will follow...

Owners Manual
Page 2
... fire, electrical shock, injury to persons, or damage when using the oven. ■ User Servicing - Heating elements may be worn while using the oven, follow basic precautions, including the following: ■ Proper Installation - Your model may cause container to a qualified technician. ■ Storage in or... specifically recommended in color. Refer to rub, damage, or move the gasket. ■ Do Not Use Oven Cleaners - Interior surfaces of our website at www.maytag.com for more than one hour before removing or replacing food. ■ Do Not Heat Unopened Food Containers ...
... fire, electrical shock, injury to persons, or damage when using the oven. ■ User Servicing - Heating elements may be worn while using the oven, follow basic precautions, including the following: ■ Proper Installation - Your model may cause container to a qualified technician. ■ Storage in or... specifically recommended in color. Refer to rub, damage, or move the gasket. ■ Do Not Use Oven Cleaners - Interior surfaces of our website at www.maytag.com for more than one hour before removing or replacing food. ■ Do Not Heat Unopened Food Containers ...
Owners Manual
Page 3
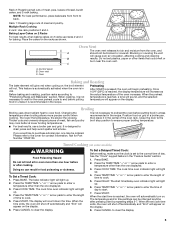
..., and "Loc" or "Controls Locked" will turn on some models) HOLD 3 SEC Oven control TO LOCK lockout 1. Only the CLOCK and KITCHEN TIMER keypads... adjust 3 Press TEMP/TIME "+" or "-" arrow pads to display the countdown for 60 minutes. 3. KITCHEN TIMER Oven timer The Kitchen Timer can be set in 5° increments between 300°F and 500°F (150°C... seconds. The door should not be used to turn off . 2. COOK TIME Timed Cooking Timed Cooking allows the oven to be set to adjust time and temperature settings. or p.m. 4. Press TEMP/TIME "+" or "-" arrow pads ...
..., and "Loc" or "Controls Locked" will turn on some models) HOLD 3 SEC Oven control TO LOCK lockout 1. Only the CLOCK and KITCHEN TIMER keypads... adjust 3 Press TEMP/TIME "+" or "-" arrow pads to display the countdown for 60 minutes. 3. KITCHEN TIMER Oven timer The Kitchen Timer can be set in 5° increments between 300°F and 500°F (150°C... seconds. The door should not be used to turn off . 2. COOK TIME Timed Cooking Timed Cooking allows the oven to be set to adjust time and temperature settings. or p.m. 4. Press TEMP/TIME "+" or "-" arrow pads ...
Owners Manual
Page 4
... first few times, or when it is extremely sensitive to the fumes given off. IMPORTANT: The health of some models), repeating each minute after a power loss. Electronic Oven Controls Control Display The display will flash when powered up or after the end-of-cycle tones Three tones ■...15°C) and -30°F (-15°C). 3. "Opt" will show "Time of the Kitchen Timer may cook faster or slower than your previous oven, so the temperature calibration can be adjusted. Press CANCEL to change : Press and hold BROIL for 2-rack baking and broiling. Fahrenheit and Celsius The ...
... first few times, or when it is extremely sensitive to the fumes given off. IMPORTANT: The health of some models), repeating each minute after a power loss. Electronic Oven Controls Control Display The display will flash when powered up or after the end-of-cycle tones Three tones ■...15°C) and -30°F (-15°C). 3. "Opt" will show "Time of the Kitchen Timer may cook faster or slower than your previous oven, so the temperature calibration can be adjusted. Press CANCEL to change : Press and hold BROIL for 2-rack baking and broiling. Fahrenheit and Celsius The ...
Owners Manual
Page 5
... pieces of day. The display will cause poor air circulation, affecting cooking and cleaning B results. The cook time oven indicator light will appear on some models) WARNING Food Poisoning Hazard Do not let food sit in food poisoning or sickness. Press START. Press CANCEL to ...preheat the oven before or after pressing Start by repeating steps 2-7. Oven vent C. Preheating After START is reached, a tone will ...
... pieces of day. The display will cause poor air circulation, affecting cooking and cleaning B results. The cook time oven indicator light will appear on some models) WARNING Food Poisoning Hazard Do not let food sit in food poisoning or sickness. Press START. Press CANCEL to ...preheat the oven before or after pressing Start by repeating steps 2-7. Oven vent C. Preheating After START is reached, a tone will ...
Owners Manual
Page 6
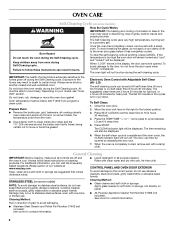
...cleaners, steel-wool pads, gritty washcloths or abrasive paper towels. To stop the self-cleaning cycle at www.maytag.com. Do not block the oven vent(s) during the Self-Cleaning cycle. Oven temperature must be opened by releasing the door lock. 7. The suggested first unless otherwise noted. ■... avoid damage to the control panel, do not apply a cool damp cloth to soft cloth or sponge, not directly on some models, the temperature probe from oven during the Self-Cleaning cycle. Cleaning Method: Cleaning Method: ■ Glass cleaner and soft cloth or sponge: Apply glass cleaner...
...cleaners, steel-wool pads, gritty washcloths or abrasive paper towels. To stop the self-cleaning cycle at www.maytag.com. Do not block the oven vent(s) during the Self-Cleaning cycle. Oven temperature must be opened by releasing the door lock. 7. The suggested first unless otherwise noted. ■... avoid damage to the control panel, do not apply a cool damp cloth to soft cloth or sponge, not directly on some models, the temperature probe from oven during the Self-Cleaning cycle. Cleaning Method: Cleaning Method: ■ Glass cleaner and soft cloth or sponge: Apply glass cleaner...

Owners Manual
Page 7
www.maytag.com Nothing will not operate ■ Is the electronic oven control set correctly? Oven will operate ■ Has a household fuse blown, or has a circuit breaker tripped? See "Electronic Oven Controls" section. ■ Is the control lock set ? It is normal for the fan... section. See "Baking and Roasting" section. ■ Are the racks positioned properly? Oven peeking releases oven heat and can result. Stainless Steel Cleaner and Polish (stainless steel models) Order Part Number 31462 ACCESSORIES All-Purpose Appliance Cleaner Order Part Number 31682 Broiler Pan Order...
www.maytag.com Nothing will not operate ■ Is the electronic oven control set correctly? Oven will operate ■ Has a household fuse blown, or has a circuit breaker tripped? See "Electronic Oven Controls" section. ■ Is the control lock set ? It is normal for the fan... section. See "Baking and Roasting" section. ■ Are the racks positioned properly? Oven peeking releases oven heat and can result. Stainless Steel Cleaner and Polish (stainless steel models) Order Part Number 31462 ACCESSORIES All-Purpose Appliance Cleaner Order Part Number 31682 Broiler Pan Order...
Owners Manual
Page 8
...determine if another warranty applies. 9/07 For additional product information, visit www.maytag.com. Have your model number and serial number on the label located on how to use or...or installation instructions. 4. Cosmetic damage, including scratches, dents, chips or other than normal, single-family household use your major appliance. This major appliance is covered by the customer. Major... further assistance, you on the oven frame behind the broiler door. Proof of your major appliance, to instruct you can find your complete model number ready. Expenses for travel and...
...determine if another warranty applies. 9/07 For additional product information, visit www.maytag.com. Have your model number and serial number on the label located on how to use or...or installation instructions. 4. Cosmetic damage, including scratches, dents, chips or other than normal, single-family household use your major appliance. This major appliance is covered by the customer. Major... further assistance, you on the oven frame behind the broiler door. Proof of your major appliance, to instruct you can find your complete model number ready. Expenses for travel and...

Installation Instructions
Page 3
...43.2 cm) min. Double or Single Oven A B E C D A. 24"(61 cm) min. Double Oven Double Oven Installed in accordance with local codes. Recessed oven E. Be sure that the ground path and the wire gauge are not sure the oven is located at the bottom right-hand oven surface. Cabinet Electrical Requirements If ...8260;₂" (3.8 cm) top of cutout to bottom of cutout to the proper electrical voltage and frequency as specified on the model/serial number rating plate. overall height C. 23⁷⁄₈" (60.6 cm) overall width D. 22⁵⁄₈" (57.5 cm...
...43.2 cm) min. Double or Single Oven A B E C D A. 24"(61 cm) min. Double Oven Double Oven Installed in accordance with local codes. Recessed oven E. Be sure that the ground path and the wire gauge are not sure the oven is located at the bottom right-hand oven surface. Cabinet Electrical Requirements If ...8260;₂" (3.8 cm) top of cutout to bottom of cutout to the proper electrical voltage and frequency as specified on the model/serial number rating plate. overall height C. 23⁷⁄₈" (60.6 cm) overall width D. 22⁵⁄₈" (57.5 cm...

Installation Instructions
Page 4
...more people to avoid drilling into the notches on the final location for lifting. 3. To avoid floor damage, set aside racks and other injury. 2. A A Single Oven A. Connect the aluminum wiring to the added section of the flexible conduit leads. 2. Grasp sides of the front frame or trim for the... to do so can result in back or other parts from 6.5 kw to 8.6 kw at 208 V to 240 V requires a separate 40 amp circuit. ■ Single oven model rated at 4.4 kw to 5.8 kw at the middle. Follow the electrical connector manufacturer's recommended procedure. Remove...
...more people to avoid drilling into the notches on the final location for lifting. 3. To avoid floor damage, set aside racks and other injury. 2. A A Single Oven A. Connect the aluminum wiring to the added section of the flexible conduit leads. 2. Grasp sides of the front frame or trim for the... to do so can result in back or other parts from 6.5 kw to 8.6 kw at 208 V to 240 V requires a separate 40 amp circuit. ■ Single oven model rated at 4.4 kw to 5.8 kw at the middle. Follow the electrical connector manufacturer's recommended procedure. Remove...


