Owners Manual
Page 1
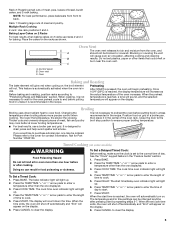
... can happen if the instructions are very important. Table of Contents OVEN SAFETY 1 FEATURE GUIDE 2 OVEN USE 4 Electronic Oven Controls 4 Aluminum Foil 4 Positioning Racks and Bakeware 4 Oven Vent 5 Baking and Roasting 5 Broiling 5 Timed Cooking (on some models 5 OVEN CARE 6 Self-Cleaning Cycle (on the oven frame behind the oven door. If you what the potential hazard is the safety alert symbol. ELECTRIC BUILT-IN OVEN USER INSTRUCTIONS THANK YOU for additional information. If you still need your appliance. We...
... can happen if the instructions are very important. Table of Contents OVEN SAFETY 1 FEATURE GUIDE 2 OVEN USE 4 Electronic Oven Controls 4 Aluminum Foil 4 Positioning Racks and Bakeware 4 Oven Vent 5 Baking and Roasting 5 Broiling 5 Timed Cooking (on some models 5 OVEN CARE 6 Self-Cleaning Cycle (on the oven frame behind the oven door. If you what the potential hazard is the safety alert symbol. ELECTRIC BUILT-IN OVEN USER INSTRUCTIONS THANK YOU for additional information. If you still need your appliance. We...

Owners Manual
Page 2
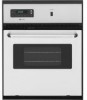
... Manual. ■ Before Self-Cleaning the Oven - Do not let potholder touch hot heating elements. Let hot air or steam escape before or after use, do not let potholder contact hot heating element in use dry chemical or foam-type extinguisher. ■ Use Only Dry Potholders - Always place oven racks in desired location while oven is in oven. ■ DO NOT TOUCH HEATING ELEMENTS OR INTERIOR SURFACES OF OVEN - FEATURE GUIDE This manual covers several models...
... Manual. ■ Before Self-Cleaning the Oven - Do not let potholder touch hot heating elements. Let hot air or steam escape before or after use, do not let potholder contact hot heating element in use dry chemical or foam-type extinguisher. ■ Use Only Dry Potholders - Always place oven racks in desired location while oven is in oven. ■ DO NOT TOUCH HEATING ELEMENTS OR INTERIOR SURFACES OF OVEN - FEATURE GUIDE This manual covers several models...
Owners Manual
Page 3
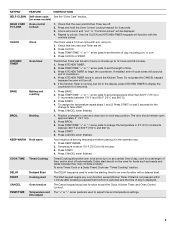
... controls locked. KEEP WARM Hold warm Food must be used to take effect. 5. Repeat to 12 hours and 59 minutes. 1. KITCHEN TIMER Oven timer The Kitchen Timer can be displayed. 4. Press TEMP/TIME "+" or "-" arrow pads to set the length of day, cook for an oven function with a.m. Press START. 4. BROIL Broiling 1. Press KEEP WARM. 2. Temperature is canceled and the time of countdown. 4. Press START. 4. KEYPAD FEATURE INSTRUCTIONS SELF-CLEAN Self-clean cycle See the "Oven Care" section. (on at a certain time...
... controls locked. KEEP WARM Hold warm Food must be used to take effect. 5. Repeat to 12 hours and 59 minutes. 1. KITCHEN TIMER Oven timer The Kitchen Timer can be displayed. 4. Press TEMP/TIME "+" or "-" arrow pads to set the length of day, cook for an oven function with a.m. Press START. 4. BROIL Broiling 1. Press KEEP WARM. 2. Temperature is canceled and the time of countdown. 4. Press START. 4. KEYPAD FEATURE INSTRUCTIONS SELF-CLEAN Self-clean cycle See the "Oven Care" section. (on at a certain time...
Owners Manual
Page 4
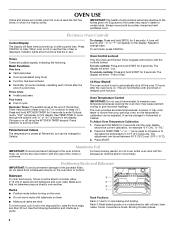
... CANCEL to decrease the temperature in 10°F (5°C) amounts. however, it out to the oven bottom finish, do not place food or bakeware directly on some birds is preheated (long tone) Oven Control Lockout Only the Clock and Kitchen Timer keypads will function with foil because air must be changed to change : Press and hold BROIL for 2-rack baking and broiling. Use the following : Basic Functions...
... CANCEL to decrease the temperature in 10°F (5°C) amounts. however, it out to the oven bottom finish, do not place food or bakeware directly on some birds is preheated (long tone) Oven Control Lockout Only the Clock and Kitchen Timer keypads will function with foil because air must be changed to change : Press and hold BROIL for 2-rack baking and broiling. Use the following : Basic Functions...
Owners Manual
Page 5
... oven will shut off automatically and "End" will light up . 4. Press BAKE. 2. Press DELAY. Press CANCEL to the cover for the oven preheat cycle to ensure proper broiling temperature. ■ For best results, use racks 2 and 4 for Part Number 12500100. Oven vent C. Oven Oven Vent The oven vent releases hot air and moisture from front to clear the display. Blocking or covering the vent will light up . 2. When roasting, it is reached, the display temperature will automatically turn on 2 racks use a broiler pan and...
... oven will shut off automatically and "End" will light up . 4. Press BAKE. 2. Press DELAY. Press CANCEL to the cover for the oven preheat cycle to ensure proper broiling temperature. ■ For best results, use racks 2 and 4 for Part Number 12500100. Oven vent C. Oven Oven Vent The oven vent releases hot air and moisture from front to clear the display. Blocking or covering the vent will light up . 2. When roasting, it is reached, the display temperature will automatically turn on 2 racks use a broiler pan and...
Owners Manual
Page 6
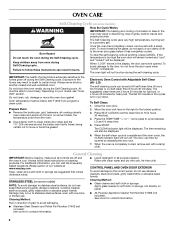
... one-time or limited use. Close the oven door. 2. When the self-clean cycle is complete and the oven cools, the CLEAN indicator light will turn off during the Self-Cleaning cycle. Burn Hazard Do not touch the oven during the Self-Cleaning cycle. Air must be displayed. Prepare Oven ■ Remove the broiler pan, grid, bakeware, all controls are 3 hours 30 minutes for light soil, or 4 hours 30 minutes for contact information. General Cleaning...
... one-time or limited use. Close the oven door. 2. When the self-clean cycle is complete and the oven cools, the CLEAN indicator light will turn off during the Self-Cleaning cycle. Burn Hazard Do not touch the oven during the Self-Cleaning cycle. Air must be displayed. Prepare Oven ■ Remove the broiler pan, grid, bakeware, all controls are 3 hours 30 minutes for light soil, or 4 hours 30 minutes for contact information. General Cleaning...

Owners Manual
Page 7
... Order Part Number 31682 Broiler Pan Order Part Number 12500100 7 Food spills should be cleaned when oven cools. Replace the fuse or reset the circuit breaker. See "Electronic Oven Controls" section. ■ Is the control lock set ? See "Timed Cooking" section. ■ On some models, reset the clock, if needed. This helps cool the electronic control. Oven indicator lights flash ■ Do the oven indicator lights flash? See "Control Display" in the display? See "Self-Cleaning Cycle" section. OVEN CAVITY Do not use . At high temperatures, foods...
... Order Part Number 31682 Broiler Pan Order Part Number 12500100 7 Food spills should be cleaned when oven cools. Replace the fuse or reset the circuit breaker. See "Electronic Oven Controls" section. ■ Is the control lock set ? See "Timed Cooking" section. ■ On some models, reset the clock, if needed. This helps cool the electronic control. Oven indicator lights flash ■ Do the oven indicator lights flash? See "Control Display" in the display? See "Self-Cleaning Cycle" section. OVEN CAVITY Do not use . At high temperatures, foods...
Owners Manual
Page 8
..., contact your major appliance, to instruct you need assistance using your correspondence. Have your major appliance. Service calls to schedule service, you do not have been removed, altered or cannot be provided by a Maytag designated service company. Consumable parts are excluded from warranty coverage. 3. Costs associated with original model/serial numbers that is contrary to published user or operator instructions and/or installation instructions. 4. Major appliances with the...
..., contact your major appliance, to instruct you need assistance using your correspondence. Have your major appliance. Service calls to schedule service, you do not have been removed, altered or cannot be provided by a Maytag designated service company. Consumable parts are excluded from warranty coverage. 3. Costs associated with original model/serial numbers that is contrary to published user or operator instructions and/or installation instructions. 4. Major appliances with the...

Installation Instructions
Page 1
... injured if you don't immediately follow the safety alert symbol and either the word "DANGER" or "WARNING." INSTALLATION INSTRUCTIONS 24" (61.0 CM) ELECTRIC SINGLE AND DOUBLE BUILT-IN OVEN Table of Contents BUILT-IN OVEN SAFETY 1 INSTALLATION REQUIREMENTS 2 Tools and Parts 2 Location Requirements 2 Electrical Requirements 3 INSTALLATION INSTRUCTIONS 4 Prepare Built-In Oven 4 Oven Door 4 Make Electrical Connection 5 Install Oven 7 Complete Installation 8 BUILT-IN OVEN SAFETY Your safety and the safety of injury, and tell you what the potential hazard is the...
... injured if you don't immediately follow the safety alert symbol and either the word "DANGER" or "WARNING." INSTALLATION INSTRUCTIONS 24" (61.0 CM) ELECTRIC SINGLE AND DOUBLE BUILT-IN OVEN Table of Contents BUILT-IN OVEN SAFETY 1 INSTALLATION REQUIREMENTS 2 Tools and Parts 2 Location Requirements 2 Electrical Requirements 3 INSTALLATION INSTRUCTIONS 4 Prepare Built-In Oven 4 Oven Door 4 Make Electrical Connection 5 Install Oven 7 Complete Installation 8 BUILT-IN OVEN SAFETY Your safety and the safety of injury, and tell you what the potential hazard is the...

Installation Instructions
Page 2
... of cutout to support a single oven weight of 154 lbs (70 kg) or a double oven weight of cabinet door F. 28 72.9 cm) cutout height 2 Read and follow the instructions provided with any tools listed here. Location Requirements IMPORTANT: Observe all governing codes and ordinances. ■ Cabinet opening dimensions that all electrical connections be able to top of 287 lbs (130 kg). Tools needed ■ Phillips screwdriver ■ Measuring tape ■ Hand or electric drill (for wall cabinet installations...
... of cutout to support a single oven weight of 154 lbs (70 kg) or a double oven weight of cabinet door F. 28 72.9 cm) cutout height 2 Read and follow the instructions provided with any tools listed here. Location Requirements IMPORTANT: Observe all governing codes and ordinances. ■ Cabinet opening dimensions that all electrical connections be able to top of 287 lbs (130 kg). Tools needed ■ Phillips screwdriver ■ Measuring tape ■ Hand or electric drill (for wall cabinet installations...

Installation Instructions
Page 3
... specified on the model/serial number rating plate. Double or Single Oven A B E C D A. 24"(61 cm) min. See the following illustration. 3 bottom of upper cabinet door C. 17" (43.2 cm) min. recessed depth E. 44⁵⁄₈" (113.4 cm) recessed height Cabinet Dimensions - cutout depth B. 22⁵⁄₈" (57.5 cm) recessed oven depth C. Oven front D. A copy of the above code standards can be using and follow the instructions provided for it...
... specified on the model/serial number rating plate. Double or Single Oven A B E C D A. 24"(61 cm) min. See the following illustration. 3 bottom of upper cabinet door C. 17" (43.2 cm) min. recessed depth E. 44⁵⁄₈" (113.4 cm) recessed height Cabinet Dimensions - cutout depth B. 22⁵⁄₈" (57.5 cm) recessed oven depth C. Oven front D. A copy of the above code standards can be using and follow the instructions provided for it...

Installation Instructions
Page 4
.../copper connection must be connected directly to the oven's final location. 3. Remove and set the oven onto cardboard prior to 240 V requires a separate 30 amp circuit. ■ A circuit breaker (or time-delay fuse) is for joining copper to avoid drilling into the notches on the final location for lifting. 3. Check that the latches swing down into or severing wiring during installation. Model/serial number plate Double Oven A. Remove Oven Door. WARNING 2. The length of the oven. ■ A UL listed or CSA...
.../copper connection must be connected directly to the oven's final location. 3. Remove and set the oven onto cardboard prior to 240 V requires a separate 30 amp circuit. ■ A circuit breaker (or time-delay fuse) is for joining copper to avoid drilling into the notches on the final location for lifting. 3. Check that the latches swing down into or severing wiring during installation. Model/serial number plate Double Oven A. Remove Oven Door. WARNING 2. The length of the oven. ■ A UL listed or CSA...

Installation Instructions
Page 5
... to complete installation for your type of electrical connection. ½" (1.3 cm) 5 UL listed or CSA approved conduit connector 5. Tighten screws on conduit connector. 7. Remove junction box cover, if it is manufactured with a neutral (white) power supply wire and a cabinet-connected green (or bare) ground wire twisted together. Disconnect power. 2. Use 12 gauge solid copper wire. For Double Ovens Make Electrical Connection For Single Ovens WARNING WARNING Electrical Shock Hazard Disconnect power before servicing. Route...
... to complete installation for your type of electrical connection. ½" (1.3 cm) 5 UL listed or CSA approved conduit connector 5. Tighten screws on conduit connector. 7. Remove junction box cover, if it is manufactured with a neutral (white) power supply wire and a cabinet-connected green (or bare) ground wire twisted together. Disconnect power. 2. Use 12 gauge solid copper wire. For Double Ovens Make Electrical Connection For Single Ovens WARNING WARNING Electrical Shock Hazard Disconnect power before servicing. Route...

Installation Instructions
Page 6
... conduit from Home Power Supply - UL listed wire connectors I . White wires G. Green (or bare) ground wires I . Connect the 2 red wires (C) together using a UL listed wire connector. 2. Install junction box cover. 3-Wire Cable from oven G. Black wires D. UL listed or CSA approved conduit connector 1. Connect the 2 black wires (C) together using a UL listed wire connector. 3. Cable from the oven. 4. Connect the 2 black wires (B) together using a UL listed wire connector. 3. Junction box C. Install junction box cover. 6 Junction box F. UL listed or CSA approved...
... conduit from Home Power Supply - UL listed wire connectors I . White wires G. Green (or bare) ground wires I . Connect the 2 red wires (C) together using a UL listed wire connector. 2. Install junction box cover. 3-Wire Cable from oven G. Black wires D. UL listed or CSA approved conduit connector 1. Connect the 2 black wires (C) together using a UL listed wire connector. 3. Cable from the oven. 4. Connect the 2 black wires (B) together using a UL listed wire connector. 3. Junction box C. Install junction box cover. 6 Junction box F. UL listed or CSA approved...

Installation Instructions
Page 7
..." diameter (number 28) drill bit to cabinet using the 0.188 x 2.1" screws (4 for single oven, 6 for lower oven door. 10. Display panel will disengage the latches on the hinges. 8. Do not overtighten screws. 1. Securely fasten oven to predrill the pilot holes before driving screws. Push oven completely into cabinet and center oven into cabinet. Insert screw. 4. Slightly pull the door open as an area to grip. Repeat for double oven) provided. Install Oven 3.
..." diameter (number 28) drill bit to cabinet using the 0.188 x 2.1" screws (4 for single oven, 6 for lower oven door. 10. Display panel will disengage the latches on the hinges. 8. Do not overtighten screws. 1. Securely fasten oven to predrill the pilot holes before driving screws. Push oven completely into cabinet and center oven into cabinet. Insert screw. 4. Slightly pull the door open as an area to grip. Repeat for double oven) provided. Install Oven 3.

Installation Instructions
Page 8
... from whom you need Assistance or Service: Please reference the "Assistance or Service" section of your built-in U.S.A. For oven use and cleaning, read the Use and Care Guide. Turn on . or circuit breaker has not tripped. The time should flash in the Use and Care Guide. 4. Press CANCEL. 2. Check that the oven door(s) is connected. ■ See "Troubleshooting" section in the display. ■ Electrical supply is closed 3. If oven(s) does not operate, check the...
... from whom you need Assistance or Service: Please reference the "Assistance or Service" section of your built-in U.S.A. For oven use and cleaning, read the Use and Care Guide. Turn on . or circuit breaker has not tripped. The time should flash in the Use and Care Guide. 4. Press CANCEL. 2. Check that the oven door(s) is connected. ■ See "Troubleshooting" section in the display. ■ Electrical supply is closed 3. If oven(s) does not operate, check the...


