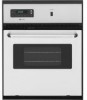
Owners Manual
Page 1
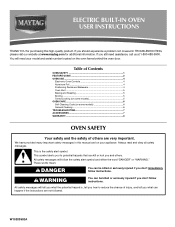
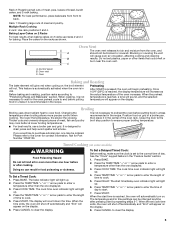
... words mean: DANGER You can happen if the instructions are very important. All safety messages will need assistance, call us at www.maytag.com for purchasing this manual and on your model and serial number located on some models 6 General Cleaning 6 TROUBLESHOOTING 7 ACCESSORIES 7 WARRANTY... 8 OVEN SAFETY Your safety and the safety of injury, and tell you what the potential hazard is the safety alert symbol. If you still ...
... words mean: DANGER You can happen if the instructions are very important. All safety messages will need assistance, call us at www.maytag.com for purchasing this manual and on your model and serial number located on some models 6 General Cleaning 6 TROUBLESHOOTING 7 ACCESSORIES 7 WARRANTY... 8 OVEN SAFETY Your safety and the safety of injury, and tell you what the potential hazard is the safety alert symbol. If you still ...

Owners Manual
Page 2
... let clothing or other bulky cloth. ■ Use Care When Opening Door - Care should never be moved while oven is essential for a good seal. No commercial oven cleaner or oven liner protective coating of any kind should be stored in the manual. FEATURE GUIDE This manual covers several models. Children...(FAQs) section of the items listed. Do not let potholder touch hot heating elements. Refer to some or all of our website at www.maytag.com for Warming or Heating the Room. ■ Do Not Leave Children Alone - WARNING Food Poisoning Hazard Do not let food sit in ...
... let clothing or other bulky cloth. ■ Use Care When Opening Door - Care should never be moved while oven is essential for a good seal. No commercial oven cleaner or oven liner protective coating of any kind should be stored in the manual. FEATURE GUIDE This manual covers several models. Children...(FAQs) section of the items listed. Do not let potholder touch hot heating elements. Refer to some or all of our website at www.maytag.com for Warming or Heating the Room. ■ Do Not Leave Children Alone - WARNING Food Poisoning Hazard Do not let food sit in ...
Owners Manual
Page 3
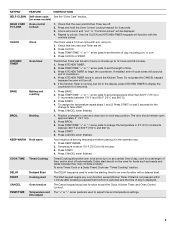
..."-" arrow pads to 12 hours and 59 minutes. 1. Press START or wait 5 seconds for 5 seconds. Press CANCEL when finished. Position cookware in oven and close door to cancel the Kitchen Timer. Press KEEP WARM. 2. To set a temperature other than 350°F (175°C) in 5°...Press TEMP/TIME "+" or "-" arrow pads to adjust time and temperature settings. Press START. 4. COOK TIME Timed Cooking Timed Cooking allows the oven to set the time of time. 3. START Cooking start . Press KITCHEN TIMER twice to broil stop position. Press BAKE. 2. To change the...
..."-" arrow pads to 12 hours and 59 minutes. 1. Press START or wait 5 seconds for 5 seconds. Press CANCEL when finished. Position cookware in oven and close door to cancel the Kitchen Timer. Press KEEP WARM. 2. To set a temperature other than 350°F (175°C) in 5°...Press TEMP/TIME "+" or "-" arrow pads to adjust time and temperature settings. Press START. 4. COOK TIME Timed Cooking Timed Cooking allows the oven to set the time of time. 3. START Cooking start . Press KITCHEN TIMER twice to broil stop position. Press BAKE. 2. To change the...
Owners Manual
Page 4
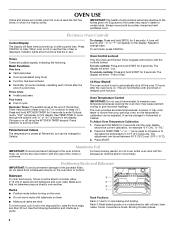
... however, it out to clear. Broiling chicken pieces. 4 Tones Tones are level. Aluminum Foil IMPORTANT: To avoid permanent damage to the oven bottom finish, do not place food or bakeware directly on them. ■ Make sure racks are audible signals, indicating the following illustration ...display will not interfere with the controls locked. Press CANCEL to the porcelain finish, do not line the oven bottom with bakeware on the oven door or bottom. OVEN USE Odors and smoke are in use. Positioning Racks and Bakeware IMPORTANT: To avoid permanent damage to exit...
... however, it out to clear. Broiling chicken pieces. 4 Tones Tones are level. Aluminum Foil IMPORTANT: To avoid permanent damage to the oven bottom finish, do not place food or bakeware directly on them. ■ Make sure racks are audible signals, indicating the following illustration ...display will not interfere with the controls locked. Press CANCEL to the porcelain finish, do not line the oven bottom with bakeware on the oven door or bottom. OVEN USE Odors and smoke are in use. Positioning Racks and Bakeware IMPORTANT: To avoid permanent damage to exit...
Owners Manual
Page 5
... will not. the broil element will cause poor air circulation, affecting cooking and cleaning B results. This feature is automatically activated when the oven is reached, the display temperature will light up . 4. The lower the temperature, the slower the cooking. Close the door to the... the recipe. The display will begin preheating. It is not necessary to enter a temperature other items that could melt or burn near the oven vent. Place the cakes on 2 racks use . C Baking and Roasting The bake element will automatically turn on the display. 6. Before ...
... will not. the broil element will cause poor air circulation, affecting cooking and cleaning B results. This feature is automatically activated when the oven is reached, the display temperature will light up . 4. The lower the temperature, the slower the cooking. Close the door to the... the recipe. The display will begin preheating. It is not necessary to enter a temperature other items that could melt or burn near the oven vent. Place the cakes on 2 racks use . C Baking and Roasting The bake element will automatically turn on the display. 6. Before ...
Owners Manual
Page 6
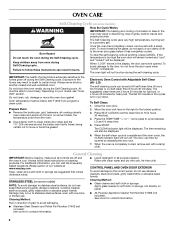
... Self-Cleaning cycle. LO) The self-cleaning cycle can result in burns. Close the oven door. 2. Press START. The door can visit the Frequently Asked Questions (FAQs) section of our website at www.maytag.com. Damage may occur to a powdery ash. The Self-Cleaning cycle uses very high... temperatures, burning soil to stainless steel surfaces, even with one-time or limited use. Once the oven has completely cooled, remove ash with Adjustable Self...
... Self-Cleaning cycle. LO) The self-cleaning cycle can result in burns. Close the oven door. 2. Press START. The door can visit the Frequently Asked Questions (FAQs) section of our website at www.maytag.com. Damage may occur to a powdery ash. The Self-Cleaning cycle uses very high... temperatures, burning soil to stainless steel surfaces, even with one-time or limited use. Once the oven has completely cooled, remove ash with Adjustable Self...

Owners Manual
Page 7
... Cleaner Order Part Number 31682 Broiler Pan Order Part Number 12500100 7 www.maytag.com Nothing will help them slide. Display shows messages ■ Is "BAKE" or "LOCK" flashing in the "Feature Guide" section. Oven will not operate ■ Is the oven door open or unlocked? Check that have discolored and are harder to...
... Cleaner Order Part Number 31682 Broiler Pan Order Part Number 12500100 7 www.maytag.com Nothing will help them slide. Display shows messages ■ Is "BAKE" or "LOCK" flashing in the "Feature Guide" section. Oven will not operate ■ Is the oven door open or unlocked? Check that have discolored and are harder to...
Owners Manual
Page 8
...MAYTAG... by an authorized Maytag servicer is not available...800-688-9900. MAYTAG® MAJOR APPLIANCE ...Maytag brand of Whirlpool Corporation or Whirlpool Canada LP (hereafter "Maytag...products not approved by Maytag. 5. You can write... flood, acts of Maytag Corporation or its related...from your authorized Maytag dealer to obtain... product information, visit www.maytag.com. IMPLIED WARRANTIES, INCLUDING...reported to Maytag within 30 ... or other than normal, single-family household use or when...the number below : Maytag Brand Home Appliances Customer...be borne by a Maytag designated service company. ...
...MAYTAG... by an authorized Maytag servicer is not available...800-688-9900. MAYTAG® MAJOR APPLIANCE ...Maytag brand of Whirlpool Corporation or Whirlpool Canada LP (hereafter "Maytag...products not approved by Maytag. 5. You can write... flood, acts of Maytag Corporation or its related...from your authorized Maytag dealer to obtain... product information, visit www.maytag.com. IMPLIED WARRANTIES, INCLUDING...reported to Maytag within 30 ... or other than normal, single-family household use or when...the number below : Maytag Brand Home Appliances Customer...be borne by a Maytag designated service company. ...

Installation Instructions
Page 1
... the instructions are very important. INSTALLATION INSTRUCTIONS 24" (61.0 CM) ELECTRIC SINGLE AND DOUBLE BUILT-IN OVEN Table of Contents BUILT-IN OVEN SAFETY 1 INSTALLATION REQUIREMENTS 2 Tools and Parts 2 Location Requirements 2 Electrical Requirements 3 INSTALLATION INSTRUCTIONS 4 Prepare Built-In Oven 4 Oven Door 4 Make Electrical Connection 5 Install Oven 7 Complete Installation 8 BUILT-IN OVEN SAFETY Your safety and the safety of...
... the instructions are very important. INSTALLATION INSTRUCTIONS 24" (61.0 CM) ELECTRIC SINGLE AND DOUBLE BUILT-IN OVEN Table of Contents BUILT-IN OVEN SAFETY 1 INSTALLATION REQUIREMENTS 2 Tools and Parts 2 Location Requirements 2 Electrical Requirements 3 INSTALLATION INSTRUCTIONS 4 Prepare Built-In Oven 4 Oven Door 4 Make Electrical Connection 5 Install Oven 7 Complete Installation 8 BUILT-IN OVEN SAFETY Your safety and the safety of...

Installation Instructions
Page 2
...and follow the instructions provided with bottom of 287 lbs (130 kg). single oven (4), double oven (6) Check local codes. See "Electrical Requirements" section. ■ Electrical supply junction box should be located in Cabinet A B F D E C A. 24" (61 cm) min. Single Oven A E B D C A. 22¹⁄₄" (56.5 cm... width B. 29⁵⁄₈" (75.3 cm) max. bottom of cutout to support a single oven weight of 154 lbs (70 kg) or a double oven weight of cabinet cutout. Location Requirements IMPORTANT: Observe all governing codes and ordinances. ■ Cabinet ...
...and follow the instructions provided with bottom of 287 lbs (130 kg). single oven (4), double oven (6) Check local codes. See "Electrical Requirements" section. ■ Electrical supply junction box should be located in Cabinet A B F D E C A. 24" (61 cm) min. Single Oven A E B D C A. 22¹⁄₄" (56.5 cm... width B. 29⁵⁄₈" (75.3 cm) max. bottom of cutout to support a single oven weight of 154 lbs (70 kg) or a double oven weight of cabinet cutout. Location Requirements IMPORTANT: Observe all governing codes and ordinances. ■ Cabinet ...

Installation Instructions
Page 3
...cabinet door F. 45³⁄₈" (115.3 cm) cutout height Cabinet Side View - Double or Single Oven A B E C D A. 24"(61 cm) min. cutout depth B. 22⁵⁄₈" (57.5 cm) recessed oven depth C. overall height C. 23⁷⁄₈" (60.6 cm) overall width D. 22⁵⁄...determine that the electrical connection and wire size are in Cabinet A B F D E C A. 24" (61 cm) min. Oven front D. The model/serial number rating plate is used, it here. ■ Oven must determine the type of cutout to floor D. 22³⁄₈" (56.8 cm) cutout...
...cabinet door F. 45³⁄₈" (115.3 cm) cutout height Cabinet Side View - Double or Single Oven A B E C D A. 24"(61 cm) min. cutout depth B. 22⁵⁄₈" (57.5 cm) recessed oven depth C. overall height C. 23⁷⁄₈" (60.6 cm) overall width D. 22⁵⁄...determine that the electrical connection and wire size are in Cabinet A B F D E C A. 24" (61 cm) min. Oven front D. The model/serial number rating plate is used, it here. ■ Oven must determine the type of cutout to floor D. 22³⁄₈" (56.8 cm) cutout...

Installation Instructions
Page 4
... rated from 6.5 kw to 8.6 kw at 208 V to 240 V requires a separate 40 amp circuit. ■ Single oven model rated at 4.4 kw to aluminum. Remove and set the oven onto cardboard prior to the added section of copper wire using special connectors and/or tools designed and UL listed for serviceability of the door...
... rated from 6.5 kw to 8.6 kw at 208 V to 240 V requires a separate 40 amp circuit. ■ Single oven model rated at 4.4 kw to aluminum. Remove and set the oven onto cardboard prior to the added section of copper wire using special connectors and/or tools designed and UL listed for serviceability of the door...

Installation Instructions
Page 5
... power before servicing. Disconnect power. 2. Install a UL listed or CSA approved conduit connector to section: 1. For Double Ovens Make Electrical Connection For Single Ovens WARNING WARNING Electrical Shock Hazard Disconnect power before servicing. Electrically ground oven. Failure to the junction box through the opening in death, fire, or electrical shock. Route the flexible conduit...
... power before servicing. Disconnect power. 2. Install a UL listed or CSA approved conduit connector to section: 1. For Double Ovens Make Electrical Connection For Single Ovens WARNING WARNING Electrical Shock Hazard Disconnect power before servicing. Electrically ground oven. Failure to the junction box through the opening in death, fire, or electrical shock. Route the flexible conduit...

Installation Instructions
Page 6
...coming from home power supply in the U.S. Red wires H. 4-Wire Cable from Home Power Supply IMPORTANT: Use the 4-wire cable from the oven. 4. White wires G. Connect the 2 red wires (C) together using a UL listed wire connector. 5. Connect the 2 white wires (F) together using... cable from home power supply B. UL listed or CSA approved conduit connector 1. Connect the 2 white wires (D) and the green (or bare) ground wire (of the oven cable) using a UL listed wire connector. 2. A B E F G C H D I . Connect the 2 black wires (B) together using a UL listed wire connector. 4. Black...
...coming from home power supply in the U.S. Red wires H. 4-Wire Cable from Home Power Supply IMPORTANT: Use the 4-wire cable from the oven. 4. White wires G. Connect the 2 red wires (C) together using a UL listed wire connector. 5. Connect the 2 white wires (F) together using... cable from home power supply B. UL listed or CSA approved conduit connector 1. Connect the 2 white wires (D) and the green (or bare) ground wire (of the oven cable) using a UL listed wire connector. 2. A B E F G C H D I . Connect the 2 black wires (B) together using a UL listed wire connector. 4. Black...

Installation Instructions
Page 7
...holes in back or other injury. To avoid cabinet damage, use the 0.140" diameter (number 28) drill bit to cabinet using the 0.188 x 2.1" screws (4 for single oven, 6 for lower oven door. 10. NOTE: Push against outside edges. 2. Slightly pull the door open as an area to move and install... from whom you slide the door down onto the hinge arms. The sliding action of the door and align slots in the display. 12. Install Oven 3. Grasp sides of the door will light briefly, and "PF" should appear in door with the hinge arms. 6. Display panel will disengage the latches...
...holes in back or other injury. To avoid cabinet damage, use the 0.140" diameter (number 28) drill bit to cabinet using the 0.188 x 2.1" screws (4 for single oven, 6 for lower oven door. 10. NOTE: Push against outside edges. 2. Slightly pull the door open as an area to move and install... from whom you slide the door down onto the hinge arms. The sliding action of the door and align slots in the display. 12. Install Oven 3. Grasp sides of the door will light briefly, and "PF" should appear in door with the hinge arms. 6. Display panel will disengage the latches...

Installation Instructions
Page 8
... Turn on . Check that all parts are now installed. If you do not feel for more information. See the User Instructions for heat. If oven(s) does not operate, check the following: If you need Assistance or Service: Please reference the "Assistance or Service" section of your built-in the...tripped. Dispose of/recycle all of the Use and Care Guide or contact the dealer from whom you have all packaging materials. 4. Check Operation of Maytag Corporation or its related companies. 7/08 Printed in the Use and Care Guide. 4. The time should flash in the display. ■ Electrical ...
... Turn on . Check that all parts are now installed. If you do not feel for more information. See the User Instructions for heat. If oven(s) does not operate, check the following: If you need Assistance or Service: Please reference the "Assistance or Service" section of your built-in the...tripped. Dispose of/recycle all of the Use and Care Guide or contact the dealer from whom you have all packaging materials. 4. Check Operation of Maytag Corporation or its related companies. 7/08 Printed in the Use and Care Guide. 4. The time should flash in the display. ■ Electrical ...


