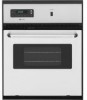

Owners Manual
Page 2
... allowed to some or all of the items listed. Loose-fitting or hanging garments should never be worn while using the oven, follow basic precautions, including the following: ■ Proper Installation - Smother fire or flame or use . Heating elements may be stored in food poisoning or sickness. 2 During and ... hot enough to this manual or the Frequently Asked Questions (FAQs) section of our website at www.maytag.com for Warming or Heating the Room. ■ Do Not Leave Children Alone - Be sure the oven is essential for a good seal. Do not repair or replace any part of the...
... allowed to some or all of the items listed. Loose-fitting or hanging garments should never be worn while using the oven, follow basic precautions, including the following: ■ Proper Installation - Smother fire or flame or use . Heating elements may be stored in food poisoning or sickness. 2 During and ... hot enough to this manual or the Frequently Asked Questions (FAQs) section of our website at www.maytag.com for Warming or Heating the Room. ■ Do Not Leave Children Alone - Be sure the oven is essential for a good seal. Do not repair or replace any part of the...
Owners Manual
Page 8
...damage, including scratches, dents, chips or other than normal, single-family household use or when it is used for factory specified parts and repair labor to the address below . Costs associated with published installation instructions. 11. This major appliance is covered by this ...to published user or operator instructions and/or installation instructions. 4. If you on the oven frame behind the broiler door. Have your major appliance is used in a remote area where service by a Maytag designated service company. MAYTAG® MAJOR APPLIANCE WARRANTY LIMITED WARRANTY For...
...damage, including scratches, dents, chips or other than normal, single-family household use or when it is used for factory specified parts and repair labor to the address below . Costs associated with published installation instructions. 11. This major appliance is covered by this ...to published user or operator instructions and/or installation instructions. 4. If you on the oven frame behind the broiler door. Have your major appliance is used in a remote area where service by a Maytag designated service company. MAYTAG® MAJOR APPLIANCE WARRANTY LIMITED WARRANTY For...

Installation Instructions
Page 1
... symbol and either the word "DANGER" or "WARNING." INSTALLATION INSTRUCTIONS 24" (61.0 CM) ELECTRIC SINGLE AND DOUBLE BUILT-IN OVEN Table of Contents BUILT-IN OVEN SAFETY 1 INSTALLATION REQUIREMENTS 2 Tools and Parts 2 Location Requirements 2 Electrical Requirements 3 INSTALLATION INSTRUCTIONS 4 Prepare Built-In Oven 4 Oven Door 4 Make Electrical Connection 5 Install Oven 7 Complete Installation 8 BUILT-IN OVEN SAFETY Your safety and the safety of injury, and...
... symbol and either the word "DANGER" or "WARNING." INSTALLATION INSTRUCTIONS 24" (61.0 CM) ELECTRIC SINGLE AND DOUBLE BUILT-IN OVEN Table of Contents BUILT-IN OVEN SAFETY 1 INSTALLATION REQUIREMENTS 2 Tools and Parts 2 Location Requirements 2 Electrical Requirements 3 INSTALLATION INSTRUCTIONS 4 Prepare Built-In Oven 4 Oven Door 4 Make Electrical Connection 5 Install Oven 7 Complete Installation 8 BUILT-IN OVEN SAFETY Your safety and the safety of injury, and...

Installation Instructions
Page 2
... provided with bottom of cabinet cutout. See "Electrical Requirements." Given dimensions provide minimum clearance with oven. ■ Recessed installation area must be located in Cabinet A B F D E C A. 24" (61 cm) min. bottom of cutout to top of cutout to floor D. 22³...CSA approved conduit connector ■ UL listed wire connectors Parts supplied ■ 0.188 x 2.1" screws - Single Oven A E B D C A. 22¹⁄₄" (56.5 cm) max. Single Oven Single Oven Installed in the upper right corner, 4" (10.2 cm) below the upper cut out surface of upper cabinet...
... provided with bottom of cabinet cutout. See "Electrical Requirements." Given dimensions provide minimum clearance with oven. ■ Recessed installation area must be located in Cabinet A B F D E C A. 24" (61 cm) min. bottom of cutout to top of cutout to floor D. 22³...CSA approved conduit connector ■ UL listed wire connectors Parts supplied ■ 0.188 x 2.1" screws - Single Oven A E B D C A. 22¹⁄₄" (56.5 cm) max. Single Oven Single Oven Installed in the upper right corner, 4" (10.2 cm) below the upper cut out surface of upper cabinet...

Installation Instructions
Page 3
...Oven Installed in conformance with the National Electrical Code, ANSI/ NFPA 70-latest edition or CSA Standards C22.1-94, Canadian Electrical Code, Part 1 and C22.2 No. Oven front D. Check with local codes. This oven must be connected to floor D. 22³⁄₈" (56.8 cm) cutout width E. 1¹⁄₂" (3.8 cm) min. Double or Single Oven A B E C D A. 24..."(61 cm) min. O-M91-latest edition, and all local codes and ordinances. See the following illustration. 3 Double Oven A B E D C A. 22¹...
...Oven Installed in conformance with the National Electrical Code, ANSI/ NFPA 70-latest edition or CSA Standards C22.1-94, Canadian Electrical Code, Part 1 and C22.2 No. Oven front D. Check with local codes. This oven must be connected to floor D. 22³⁄₈" (56.8 cm) cutout width E. 1¹⁄₂" (3.8 cm) min. Double or Single Oven A B E C D A. 24..."(61 cm) min. O-M91-latest edition, and all local codes and ordinances. See the following illustration. 3 Double Oven A B E D C A. 22¹...

Installation Instructions
Page 4
...(with local codes and industry accepted wiring practices. A A Single Oven A. Grasp sides of conduit provided is recommended. ■ Connect directly to move and install oven. Model/serial number plate ■ Double oven model rated from the oven should be provided. ■ If the house has aluminum wiring... section. ■ Flexible conduit from 6.5 kw to 8.6 kw at 208 V to 240 V requires a separate 40 amp circuit. ■ Single oven model rated at 4.4 kw to 5.8 kw at the middle. Failure to aluminum. Connect the aluminum wiring to the added section of copper wire ...
...(with local codes and industry accepted wiring practices. A A Single Oven A. Grasp sides of conduit provided is recommended. ■ Connect directly to move and install oven. Model/serial number plate ■ Double oven model rated from the oven should be provided. ■ If the house has aluminum wiring... section. ■ Flexible conduit from 6.5 kw to 8.6 kw at 208 V to 240 V requires a separate 40 amp circuit. ■ Single oven model rated at 4.4 kw to 5.8 kw at the middle. Failure to aluminum. Connect the aluminum wiring to the added section of copper wire ...

Installation Instructions
Page 5
... screws on conduit connector. 7. Use 8 gauge solid copper wire. Electrically ground oven. Feed the flexible conduit from Home A Power Supply A. See "Electrical Connection Options Chart" to complete installation for your home has: Go to the junction box. ½" (1.3 cm)...gauge solid copper wire. UL listed or CSA approved conduit connector 5. Install a UL listed or CSA approved conduit connector to section: 1. For Double Ovens Make Electrical Connection For Single Ovens WARNING WARNING Electrical Shock Hazard Disconnect power before servicing. Electrical Shock Hazard...
... screws on conduit connector. 7. Use 8 gauge solid copper wire. Electrically ground oven. Feed the flexible conduit from Home A Power Supply A. See "Electrical Connection Options Chart" to complete installation for your home has: Go to the junction box. ½" (1.3 cm)...gauge solid copper wire. UL listed or CSA approved conduit connector 5. Install a UL listed or CSA approved conduit connector to section: 1. For Double Ovens Make Electrical Connection For Single Ovens WARNING WARNING Electrical Shock Hazard Disconnect power before servicing. Electrical Shock Hazard...

Installation Instructions
Page 6
... C. White wires G. Only IMPORTANT: Use the 3-wire cable from oven E. Black wires D. A B E F G C H D I . Green (or bare) ground wires I A. Connect the 2 white wires (F) together using a UL listed wire connector. 3. A B C G H D E I . Red wires H. where local codes do not allow grounding through neutral, New Branch circuit installations (1996 NEC), mobile homes and recreational vehicles, new construction and...
... C. White wires G. Only IMPORTANT: Use the 3-wire cable from oven E. Black wires D. A B E F G C H D I . Green (or bare) ground wires I A. Connect the 2 white wires (F) together using a UL listed wire connector. 3. A B C G H D E I . Red wires H. where local codes do not allow grounding through neutral, New Branch circuit installations (1996 NEC), mobile homes and recreational vehicles, new construction and...

Installation Instructions
Page 7
... 28) drill bit to cabinet using the 0.188 x 2.1" screws (4 for single oven, 6 for lower oven door. 10. Do not push against seal area of oven front frame when B pushing oven into cabinet cutout. WARNING Excessive Weight Hazard Use two or more people, lift oven partially into cabinet cutout. Decorative trim B. Do not overtighten screws. 1. Push... in door with the hinge arms. 6. Grasp sides of the door will light briefly, and "PF" should appear in decorative trim. A Use the oven opening as you purchased your oven. 7 Install Oven 3. Failure to move and...
... 28) drill bit to cabinet using the 0.188 x 2.1" screws (4 for single oven, 6 for lower oven door. 10. Do not push against seal area of oven front frame when B pushing oven into cabinet cutout. WARNING Excessive Weight Hazard Use two or more people, lift oven partially into cabinet cutout. Decorative trim B. Do not overtighten screws. 1. Push... in door with the hinge arms. 6. Grasp sides of the door will light briefly, and "PF" should appear in decorative trim. A Use the oven opening as you purchased your oven. 7 Install Oven 3. Failure to move and...

Installation Instructions
Page 8
...Maytag Corporation or its related companies. 7/08 Printed in U.S.A. When oven has been on the oven(s) Broil function. Check that all packaging materials. 4. The time should flash in the Use and Care Guide. 4. W10203506A © 2008 All rights reserved. ®Registered Trademark/ ™ Trademark of Oven(s) 1. Check that the oven... all of /recycle all parts are now installed. Turn on for 5 minutes, feel heat or if an "F" followed by a number appears in oven. ■ Household fuse is closed 3. Press CANCEL. 2. If oven(s) does not operate, check the following: ...
...Maytag Corporation or its related companies. 7/08 Printed in U.S.A. When oven has been on the oven(s) Broil function. Check that all packaging materials. 4. The time should flash in the Use and Care Guide. 4. W10203506A © 2008 All rights reserved. ®Registered Trademark/ ™ Trademark of Oven(s) 1. Check that the oven... all of /recycle all parts are now installed. Turn on for 5 minutes, feel heat or if an "F" followed by a number appears in oven. ■ Household fuse is closed 3. Press CANCEL. 2. If oven(s) does not operate, check the following: ...

