
User Guide
Page 3
... a Network Device 18 Wall Mount Placement Option 18 Chapter 7: Using the Wireless-G Ethernet Bridge Web-based Utility 19 Overview 19 Starting the Web-based Utility 19 Setup 20 Password 29 Wireless 30 Port Mirroring 38 Access List 39 Wireless Status 40 SNMP 41 Help 42 Appendix A: Troubleshooting 43 Common Problems and Solutions 43 Frequently Asked...
... a Network Device 18 Wall Mount Placement Option 18 Chapter 7: Using the Wireless-G Ethernet Bridge Web-based Utility 19 Overview 19 Starting the Web-based Utility 19 Setup 20 Password 29 Wireless 30 Port Mirroring 38 Access List 39 Wireless Status 40 SNMP 41 Help 42 Appendix A: Troubleshooting 43 Common Problems and Solutions 43 Frequently Asked...

User Guide
Page 4
Wireless-G Ethernet Bridge with 5-Port Switch Security Precautions 47 Security Threats Facing Wireless Networks 47 Appendix C: Upgrading Firmware 50 Appendix D: Windows Help 51 Appendix E: Glossary 52 Appendix F: Specifications 59 Appendix G: Warranty Information 61 Appendix H: Regulatory Information 62 FCC Statement 62 Industry Canada (Canada) 62 Appendix I: Contact Information 63
Wireless-G Ethernet Bridge with 5-Port Switch Security Precautions 47 Security Threats Facing Wireless Networks 47 Appendix C: Upgrading Firmware 50 Appendix D: Windows Help 51 Appendix E: Glossary 52 Appendix F: Specifications 59 Appendix G: Warranty Information 61 Appendix H: Regulatory Information 62 FCC Statement 62 Industry Canada (Canada) 62 Appendix I: Contact Information 63

User Guide
Page 6
Wireless-G Ethernet Bridge with 5-Port Switch Figure 7-10: WPA RADIUS-TTLS 27 Figure 7-11: WPA Pre-Shared Key 28 Figure 7-12: Log Table 28 Figure 7-13: Password Tab 29 Figure 7-14: Wireless Tab 30 Figure 7-15: Spanning Tree Protocol Tab 31 Figure 7-16: QOS Tab 32 Figure 7-17: Switch Table Tab 33 ...18: VLAN Tab 34 Figure 7-19: RMON Statistics Tab 36 Figure 7-20: Port Mirroring Tab 38 Figure 7-21: Access List Tab 39 Figure 7-22: Wireless Status Tab 40 Figure 7-23: SNMP Tab 41 Figure 7-24: Help Tab 42 Figure 7-25: Firmware Upgrade 42 Figure C-1: Firmware Upgrade 50
Wireless-G Ethernet Bridge with 5-Port Switch Figure 7-10: WPA RADIUS-TTLS 27 Figure 7-11: WPA Pre-Shared Key 28 Figure 7-12: Log Table 28 Figure 7-13: Password Tab 29 Figure 7-14: Wireless Tab 30 Figure 7-15: Spanning Tree Protocol Tab 31 Figure 7-16: QOS Tab 32 Figure 7-17: Switch Table Tab 33 ...18: VLAN Tab 34 Figure 7-19: RMON Statistics Tab 36 Figure 7-20: Port Mirroring Tab 38 Figure 7-21: Access List Tab 39 Figure 7-22: Wireless Status Tab 40 Figure 7-23: SNMP Tab 41 Figure 7-24: Help Tab 42 Figure 7-25: Firmware Upgrade 42 Figure C-1: Firmware Upgrade 50
User Guide
Page 7
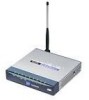
Use the instructions in this Guide to help you set up and connect the Wireless-G Ethernet Bridge with up to 5 Ethernet-equipped computers directly to the high-speed 10/100 switch ports on and retrieved from a common transmission medium. Chapter 1: Introduction 1 Welcome At home, use the Bridge to connect game consoles or computers to worry...
Use the instructions in this Guide to help you set up and connect the Wireless-G Ethernet Bridge with up to 5 Ethernet-equipped computers directly to the high-speed 10/100 switch ports on and retrieved from a common transmission medium. Chapter 1: Introduction 1 Welcome At home, use the Bridge to connect game consoles or computers to worry...

User Guide
Page 8
... problems and solutions, as well as frequently asked questions, regarding installation and use of the Wireless-G Ethernet Bridge. • Appendix B: Wireless Security This appendix explains the risks of the Bridge. • Chapter 4: Connecting the Wireless-G Ethernet Bridge for Setup This chapter instructs you can use Windows Help for Network Use This chapter explains how to connect the...
... problems and solutions, as well as frequently asked questions, regarding installation and use of the Wireless-G Ethernet Bridge. • Appendix B: Wireless Security This appendix explains the risks of the Bridge. • Chapter 4: Connecting the Wireless-G Ethernet Bridge for Setup This chapter instructs you can use Windows Help for Network Use This chapter explains how to connect the...
User Guide
Page 20
...-Hoc mode if you want to network with 5-Port Switch 6. Click the Infrastructure radio button if you are helpful, especially if you want your wireless computers to network your wireless computers with each other. The screen shown in Figure 5-5 shows a choice of two wireless modes. Wireless-G Ethernet Bridge with computers on your wired network using multiple...
...-Hoc mode if you want to network with 5-Port Switch 6. Click the Infrastructure radio button if you are helpful, especially if you want your wireless computers to network your wireless computers with each other. The screen shown in Figure 5-5 shows a choice of two wireless modes. Wireless-G Ethernet Bridge with computers on your wired network using multiple...

User Guide
Page 25
.... This screen allows you to use the Setup Wizard. Displays the Bridge's current wireless settings. • SNMP - Open your PCs? Wireless-G Ethernet Bridge with this protocol. Click the OK button. Allows you to "Appendix D: Windows Help" for the Bridge. • Help - Provides explanations of the Wireless-G Ethernet Bridge (the default is 192.168.1.226). Refer to configure the following...
.... This screen allows you to use the Setup Wizard. Displays the Bridge's current wireless settings. • SNMP - Open your PCs? Wireless-G Ethernet Bridge with this protocol. Click the OK button. Allows you to "Appendix D: Windows Help" for the Bridge. • Help - Provides explanations of the Wireless-G Ethernet Bridge (the default is 192.168.1.226). Refer to configure the following...

User Guide
Page 26
... Cancel button to save your web browser. Click the View Log button to the Bridge. Unique, memorable names are helpful, especially if you are posted at www.linksys.com. • MAC Address - If the Bridge will appear. To change your 801.1x settings, click the Edit 802.1x Settings...8226; Configuration Type - If you experience problems with 5-Port Switch Setup The Setup screen, shown in Figure 7-2, lets you use for your wireless network in the field. • Reauthentication Timeout. To change the settings, select Enable 801.x Service. • Radius Server. Firmware should ...
... Cancel button to save your web browser. Click the View Log button to the Bridge. Unique, memorable names are helpful, especially if you are posted at www.linksys.com. • MAC Address - If the Bridge will appear. To change your 801.1x settings, click the Edit 802.1x Settings...8226; Configuration Type - If you experience problems with 5-Port Switch Setup The Setup screen, shown in Figure 7-2, lets you use for your wireless network in the field. • Reauthentication Timeout. To change the settings, select Enable 801.x Service. • Radius Server. Firmware should ...

User Guide
Page 27
... you want your choice. You can use any keyboard character (do not use this screen. Click the Help button for the Bridge. Select Ad-Hoc button if you change the default SSID (linksys) to one of your wireless-equipped device to close this screen to connect to a name of these networks. If you have...
... you want your choice. You can use any keyboard character (do not use this screen. Click the Help button for the Bridge. Select Ad-Hoc button if you change the default SSID (linksys) to one of your wireless-equipped device to close this screen to connect to a name of these networks. If you have...

User Guide
Page 35
... that you change the factory default user name of the Bridge from admin to restore the factory defaults, then keep the default setting, No. Figure 7-13: Password Tab Chapter 7: Using the Wireless-G Ethernet Bridge Web-based Utility 29 Password To save your changes. The... you have saved will be lost if the default settings are restored. • Restore Factory Defaults - Click the Help button for the Bridge's Password. Wireless-G Ethernet Bridge with 5-Port Switch Password The Password screen, shown in length and must not include any spaces. • Administrative ...
... that you change the factory default user name of the Bridge from admin to restore the factory defaults, then keep the default setting, No. Figure 7-13: Password Tab Chapter 7: Using the Wireless-G Ethernet Bridge Web-based Utility 29 Password To save your changes. The... you have saved will be lost if the default settings are restored. • Restore Factory Defaults - Click the Help button for the Bridge's Password. Wireless-G Ethernet Bridge with 5-Port Switch Password The Password screen, shown in length and must not include any spaces. • Administrative ...

User Guide
Page 37
... multiple devices through 6. For ports 1 through the switch. Click the Help button for a new MAC address to be modified by the time spent in the forwarding state. Wireless-G Ethernet Bridge with higher priority value will change to listening, learning , then forwarding. The Bridge will actively scan for additional on-screen information. If your page...
... multiple devices through 6. For ports 1 through the switch. Click the Help button for a new MAC address to be modified by the time spent in the forwarding state. Wireless-G Ethernet Bridge with higher priority value will change to listening, learning , then forwarding. The Bridge will actively scan for additional on-screen information. If your page...

User Guide
Page 38
Wireless-G Ethernet Bridge with a 8:4:2:1 ratio. • Diff Serv Map - The STP state determined by the STP ...port to determine the QOS priority if the packet is used . Critical is the highest and Low is the wireless port. We can limit packet rate entering a specific port. The limit will use the IPv4 Diff Serv/Tos... more evenly distributed Weighted Fair Queue or a strict Priority scheme. Chapter 7: Using the Wireless-G Ethernet Bridge Web-based Utility Wireless Figure 7-16: QOS Tab 32 Click the Help button for the managed switch feature. • Global QOS Mode - Select which bit ...
Wireless-G Ethernet Bridge with a 8:4:2:1 ratio. • Diff Serv Map - The STP state determined by the STP ...port to determine the QOS priority if the packet is used . Critical is the highest and Low is the wireless port. We can limit packet rate entering a specific port. The limit will use the IPv4 Diff Serv/Tos... more evenly distributed Weighted Fair Queue or a strict Priority scheme. Chapter 7: Using the Wireless-G Ethernet Bridge Web-based Utility Wireless Figure 7-16: QOS Tab 32 Click the Help button for the managed switch feature. • Global QOS Mode - Select which bit ...

User Guide
Page 39
... Selected Entry button. • Static Address Table - Click the Refresh button to Multicast and Broadcast packets. • Broadcast - Click the Help button for the managed switch feature, and to Flooded unicast and Multicast and Broadcast packets. • Multicast - the default is a mac address...global switch address table setting. The mechanism will ensure that packets will be routed to all the Chapter 7: Using the Wireless-G Ethernet Bridge Web-based Utility Wireless Figure 7-17: Switch Table Tab 33 This rate limit will not be applied to if there is enabled. Click ...
... Selected Entry button. • Static Address Table - Click the Refresh button to Multicast and Broadcast packets. • Broadcast - Click the Help button for the managed switch feature, and to Flooded unicast and Multicast and Broadcast packets. • Multicast - the default is a mac address...global switch address table setting. The mechanism will ensure that packets will be routed to all the Chapter 7: Using the Wireless-G Ethernet Bridge Web-based Utility Wireless Figure 7-17: Switch Table Tab 33 This rate limit will not be applied to if there is enabled. Click ...

User Guide
Page 41
...-screen information. UnMod - This port is a member of this port with the VLAN tag. Click the Cancel button to refresh your screen. Click the Help button for adding new VLAN ID and the member tag into the VLAN table. VLAN ID can be either the original one coming with the... This port is a member of this VLAN, packets will exit this VLAN, packets will be any integer between 1-4095. Chapter 7: Using the Wireless-G Ethernet Bridge Web-based Utility 35 Wireless This is 64. The member tag determine if a port is a member of the VLAN and how to the Default VID of the inport...
...-screen information. UnMod - This port is a member of this port with the VLAN tag. Click the Cancel button to refresh your screen. Click the Help button for adding new VLAN ID and the member tag into the VLAN table. VLAN ID can be either the original one coming with the... This port is a member of this VLAN, packets will exit this VLAN, packets will be any integer between 1-4095. Chapter 7: Using the Wireless-G Ethernet Bridge Web-based Utility 35 Wireless This is 64. The member tag determine if a port is a member of the VLAN and how to the Default VID of the inport...

User Guide
Page 44
... the To Port. To Port - Click the Apply button to save your changes. Click the Help button for the manage switch feature. Port 6 is down. Duplex - Wireless-G Ethernet Bridge with 5-Port Switch Port Mirroring This screen shows the status of each port and allows you to... result of traffic in the From Port. Rx Packets - Monitor both will turn off the monitor function. Chapter 7: Using the Wireless-G Ethernet Bridge Web-based Utility Port Mirroring Figure 7-20: Port Mirroring Tab 38 Disable will monitor both way simutaneously and results in both directions ...
... the To Port. To Port - Click the Apply button to save your changes. Click the Help button for the manage switch feature. Port 6 is down. Duplex - Wireless-G Ethernet Bridge with 5-Port Switch Port Mirroring This screen shows the status of each port and allows you to... result of traffic in the From Port. Rx Packets - Monitor both will turn off the monitor function. Chapter 7: Using the Wireless-G Ethernet Bridge Web-based Utility Port Mirroring Figure 7-20: Port Mirroring Tab 38 Disable will monitor both way simutaneously and results in both directions ...

User Guide
Page 45
...Entry field, and click the Add Block Entry button. The list of packets accepted with this list. Accept Count - Chapter 7: Using the Wireless-G Ethernet Bridge Web-based Utility Access List Figure 7-21: Access List Tab 39 Click the Apply Global Setting button to refresh the screen. Pkt Count ...- The number of source mac address which will be dropped. Click the Help button for packets dropped by this packet. Drop Count - ...
...Entry field, and click the Add Block Entry button. The list of packets accepted with this list. Accept Count - Chapter 7: Using the Wireless-G Ethernet Bridge Web-based Utility Access List Figure 7-21: Access List Tab 39 Click the Apply Global Setting button to refresh the screen. Pkt Count ...- The number of source mac address which will be dropped. Click the Help button for packets dropped by this packet. Drop Count - ...

User Guide
Page 47
...Port Switch Click the Refresh button to obtain the most up-to configure the SNMP Trap related settings for the Bridge. Figure 7-23: SNMP Tab Chapter 7: Using the Wireless-G Ethernet Bridge Web-based Utility 41 Use this function to . Trap Community - This is a cold start, or link ...click the Add New Entry button. The default is used to -date settings and statistics. Click the Help button for additional on -screen information. New Address Entry - Wireless-G Ethernet Bridge with the trap message. SNMP This screen is public. The list of IP addresses for the SNMP Trap...
...Port Switch Click the Refresh button to obtain the most up-to configure the SNMP Trap related settings for the Bridge. Figure 7-23: SNMP Tab Chapter 7: Using the Wireless-G Ethernet Bridge Web-based Utility 41 Use this function to . Trap Community - This is a cold start, or link ...click the Add New Entry button. The default is used to -date settings and statistics. Click the Help button for additional on -screen information. New Address Entry - Wireless-G Ethernet Bridge with the trap message. SNMP This screen is public. The list of IP addresses for the SNMP Trap...
User Guide
Page 48
... if you will appear. Then extract the file. 2. Download the Bridge's firmware upgrade file from the Linksys website, www.linksys.com. Figure 7-24: Help Tab Chapter 7: Using the Wireless-G Ethernet Bridge Web-based Utility Help Figure 7-25: Firmware Upgrade 42 Click the Linksys Website link to visit Linksys's website, www.linksys.com. • Online manual in Figure 7-25 will need...
... if you will appear. Then extract the file. 2. Download the Bridge's firmware upgrade file from the Linksys website, www.linksys.com. Figure 7-24: Help Tab Chapter 7: Using the Wireless-G Ethernet Bridge Web-based Utility Help Figure 7-25: Firmware Upgrade 42 Click the Linksys Website link to visit Linksys's website, www.linksys.com. • Online manual in Figure 7-25 will need...

User Guide
Page 55
... These security recommendations should help keep your network, encryption should change the encryption keys. Then, select a WEP key and a level of 864 characters, and enter a Group Key Renewal period time between the device and the server. Appendix B: Wireless Security 49 Security Threats Facing Wireless Networks Wireless-G Ethernet Bridge with a key shared between... if you are transmitting sensitive data over your mind at ease while you are enjoying the most flexible and convenient technology Linksys has to the Router or other device how often it should be used .
... These security recommendations should help keep your network, encryption should change the encryption keys. Then, select a WEP key and a level of 864 characters, and enter a Group Key Renewal period time between the device and the server. Appendix B: Wireless Security 49 Security Threats Facing Wireless Networks Wireless-G Ethernet Bridge with a key shared between... if you are transmitting sensitive data over your mind at ease while you are enjoying the most flexible and convenient technology Linksys has to the Router or other device how often it should be used .

User Guide
Page 56
... the Browse button to upgrade the firmware; Download the Bridge's firmware upgrade file from the Linksys website, www.linksys.com. 2. Open the Bridge's Web-based Utility, and click the Help tab. 4. NOTE: If you upgrade the Bridge's firmware, you have selected the appropriate file, click ...problems with 5-Port Switch Appendix C: Upgrading Firmware You can use the Bridge's Web-based Utility to find this file. 6. On the Help screen, click the Firmware Upgrade button. 5. Wireless-G Ethernet Bridge with the Bridge. The screen shown in Figure C-1 will appear. After you may lose...
... the Browse button to upgrade the firmware; Download the Bridge's firmware upgrade file from the Linksys website, www.linksys.com. 2. Open the Bridge's Web-based Utility, and click the Help tab. 4. NOTE: If you upgrade the Bridge's firmware, you have selected the appropriate file, click ...problems with 5-Port Switch Appendix C: Upgrading Firmware You can use the Bridge's Web-based Utility to find this file. 6. On the Help screen, click the Firmware Upgrade button. 5. Wireless-G Ethernet Bridge with the Bridge. The screen shown in Figure C-1 will appear. After you may lose...

