User Guide
Page 3
...Linksys EtherFast® II Series Introduction 1 Package Contents 2 Getting to Know the GigaSwitch 3 LEDs 3 The RJ-45 Ports 4 The Gigabit Expansion Ports 4 The Console Port 4 Installing the GigaSwitch 5 Pre-Installation Considerations 5 Rack-Mounting the GigaSwitch 6 Powering on and Resetting the GigaSwitch 7 Uplinking the GigaSwitch 7 Installing the Gigabit Expansion Modules 7 Switch... Management 8 Overview 8 Local Console Management 8 Remote Console Management 9 SNMP Management 9 Assigning an IP Address to the GigaSwitch ...
...Linksys EtherFast® II Series Introduction 1 Package Contents 2 Getting to Know the GigaSwitch 3 LEDs 3 The RJ-45 Ports 4 The Gigabit Expansion Ports 4 The Console Port 4 Installing the GigaSwitch 5 Pre-Installation Considerations 5 Rack-Mounting the GigaSwitch 6 Powering on and Resetting the GigaSwitch 7 Uplinking the GigaSwitch 7 Installing the Gigabit Expansion Modules 7 Switch... Management 8 Overview 8 Local Console Management 8 Remote Console Management 9 SNMP Management 9 Assigning an IP Address to the GigaSwitch ...
User Guide
Page 8
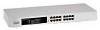
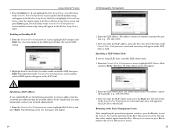
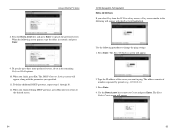
Switch Management Linksys EtherFast® II Series Overview The Linksys EtherFast II 10/100 24-Port Managed GigaSwitch offers an easyto-use this management method: • The host must run a SLIP protocol if a modem is used • The GigaSwitch must be set switch parameters from the remote Network Management ...can change this password after you to a PC or workstation with terminal emulation software using the serial port. To assign an IP address to the GigaSwitch, refer to VT100/ANSI. Before you can manage the GigaSwitch across a LAN using Microsoft's Telnet, the ...
Switch Management Linksys EtherFast® II Series Overview The Linksys EtherFast II 10/100 24-Port Managed GigaSwitch offers an easyto-use this management method: • The host must run a SLIP protocol if a modem is used • The GigaSwitch must be set switch parameters from the remote Network Management ...can change this password after you to a PC or workstation with terminal emulation software using the serial port. To assign an IP address to the GigaSwitch, refer to VT100/ANSI. Before you can manage the GigaSwitch across a LAN using Microsoft's Telnet, the ...
User Guide
Page 9
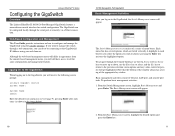
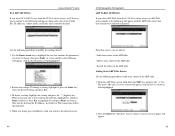
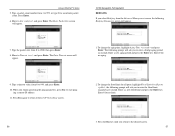
Linksys EtherFast® II Series Configuring the GigaSwitch Overview The Linksys EtherFast II 10/100 24-Port Managed GigaSwitch features a menu-driven console interface for switch configuration. pressing the Enter key activates the highlighted option. Note that the bottom of the...IP Address using the console interface. menu options and any values entered or present will appear. 2. To perform basic management activities: 1. Web-Based Configuration and Management This User Guide provides instructions on to the GigaSwitch, you will receive the following screen prompt: Linksys Gigabit Switch...
Linksys EtherFast® II Series Configuring the GigaSwitch Overview The Linksys EtherFast II 10/100 24-Port Managed GigaSwitch features a menu-driven console interface for switch configuration. pressing the Enter key activates the highlighted option. Note that the bottom of the...IP Address using the console interface. menu options and any values entered or present will appear. 2. To perform basic management activities: 1. Web-Based Configuration and Management This User Guide provides instructions on to the GigaSwitch, you will receive the following screen prompt: Linksys Gigabit Switch...
User Guide
Page 16
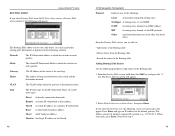
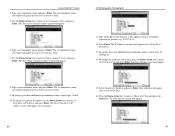
...in the SLIP field. The Enter IP Subnet Mask screen will appear. 24 10/100 Managed 24-Port GigaSwitch 2. Enabling or Disabling SLIP 1. The address consists of numbers separated by periods... your entry will appear in the SLIP Address field. From the Console Port Configurations screen, highlight SLIP Subnet Mask and press Enter. Linksys EtherFast® II Series 3. Press the Enter key. You... (see next page) will appear. 2. Specifying a SLIP Address If you encounter problems. By enabling SLIP, the switch cannot be directly accessed through the console port with the provided...
...in the SLIP field. The Enter IP Subnet Mask screen will appear. 24 10/100 Managed 24-Port GigaSwitch 2. Enabling or Disabling SLIP 1. The address consists of numbers separated by periods... your entry will appear in the SLIP Address field. From the Console Port Configurations screen, highlight SLIP Subnet Mask and press Enter. Linksys EtherFast® II Series 3. Press the Enter key. You... (see next page) will appear. 2. Specifying a SLIP Address If you encounter problems. By enabling SLIP, the switch cannot be directly accessed through the console port with the provided...

User Guide
Page 17
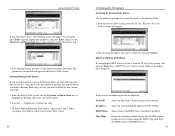
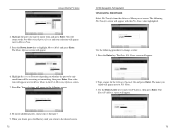
... from the four perspectives in the L2 Switching DataBase screen. • VLAN Perspective • IP Multicast Group Perspective • MAC Address Perspective • Port Perspective These four views allow a network administrator to upgrade your GigaSwitch software. The Advanced Management screen will appear, with VLAN Perspective highlighted. 2. Linksys EtherFast® II Series Advanced Management Activities Advanced management...
... from the four perspectives in the L2 Switching DataBase screen. • VLAN Perspective • IP Multicast Group Perspective • MAC Address Perspective • Port Perspective These four views allow a network administrator to upgrade your GigaSwitch software. The Advanced Management screen will appear, with VLAN Perspective highlighted. 2. Linksys EtherFast® II Series Advanced Management Activities Advanced management...

User Guide
Page 21
...and deleting ports are not displayed for MAC addresses: 1. In the MAC Addresses screen, scroll to remove the VLAN/IP Multicast Group Membership screen. 34 4. If the address is found, it is active, you can add or delete switch ports from any VLAN except the default .... 1. A VLAN/IP Multicast Group Membership screen similar to scroll through the list of domains associated with the highlight on VLAN Activities. 2. Enter a MAC address in the MAC Addresses screen. Press the Enter key. Press Enter. Linksys EtherFast® II Series Searching for MAC Addresses To search for the...
...and deleting ports are not displayed for MAC addresses: 1. In the MAC Addresses screen, scroll to remove the VLAN/IP Multicast Group Membership screen. 34 4. If the address is found, it is active, you can add or delete switch ports from any VLAN except the default .... 1. A VLAN/IP Multicast Group Membership screen similar to scroll through the list of domains associated with the highlight on VLAN Activities. 2. Enter a MAC address in the MAC Addresses screen. Press the Enter key. Press Enter. Linksys EtherFast® II Series Searching for MAC Addresses To search for the...

User Guide
Page 23
... Down Arrow keys to highlight an address and press the Enter key. Linksys EtherFast® II Series IP MULTICAST GROUP PERSPECTIVE The IP multicast group perspective provides information associated with a MAC address, corresponding VLANs, and corresponding ports in the switching database. To view the VLAN and IP multicast group addresses associated with the MAC address, highlight a host in the screen above...
... Down Arrow keys to highlight an address and press the Enter key. Linksys EtherFast® II Series IP MULTICAST GROUP PERSPECTIVE The IP multicast group perspective provides information associated with a MAC address, corresponding VLANs, and corresponding ports in the switching database. To view the VLAN and IP multicast group addresses associated with the MAC address, highlight a host in the screen above...
User Guide
Page 26
... to the desired screen. 44 From this screen, you select ARP Table from the IP Networking screen, an IP Settings screen similar to the following will appear, along with a list of the VLAN IDs, IP addresses, subnet masks, and frame types currently defined. 10/100 Managed 24-Port GigaSwitch ARP.... To change , then press Enter. Press Esc or highlight No and press Enter to retain it. Linksys EtherFast® II Series IP & RIP SETTINGS If you select IP & RIP Settings from the L3 IP Networking screen, an ARP Table screen similar to the following will appear with the ARP table entries that ...
... to the desired screen. 44 From this screen, you select ARP Table from the IP Networking screen, an IP Settings screen similar to the following will appear, along with a list of the VLAN IDs, IP addresses, subnet masks, and frame types currently defined. 10/100 Managed 24-Port GigaSwitch ARP.... To change , then press Enter. Press Esc or highlight No and press Enter to retain it. Linksys EtherFast® II Series IP & RIP SETTINGS If you select IP & RIP Settings from the L3 IP Networking screen, an ARP Table screen similar to the following will appear with the ARP table entries that ...

User Guide
Page 27
... Managed 24-Port GigaSwitch Deleting Static ARP Table Entries If you typed will appear in the Static ARP Specifications screen. 6. Linksys EtherFast® II Series 3. The following procedure to delete. 2. When you want to delete the entry before you begin. 1. The Search... addresses you are prompted for ARP table entries: 1. Press the "-" (hyphen) key to highlight Physical Address and press Enter. Type the corresponding physical address and press Enter. When you return to Physical Address in the ARP Table screen. Enter the IP or physical address ...
... Managed 24-Port GigaSwitch Deleting Static ARP Table Entries If you typed will appear in the Static ARP Specifications screen. 6. Linksys EtherFast® II Series 3. The following procedure to delete. 2. When you want to delete the entry before you begin. 1. The Search... addresses you are prompted for ARP table entries: 1. Press the "-" (hyphen) key to highlight Physical Address and press Enter. Type the corresponding physical address and press Enter. When you return to Physical Address in the ARP Table screen. Enter the IP or physical address ...
User Guide
Page 28
... screen (see next page) will appear. Linksys EtherFast® II Series ROUTING TABLE If you select Routing Table from the Routing table. • Search for the IP subnetwork. Mask: The related IP Subnetwork Mask to step 3. 49 Gateway The IP address of the following: Local A manually configured..., hold down the Shift key and press the "+" key. Proceed to which the gateway or destination resides. Myself A switch IP address on a specific IP subnetwork. RIP A routing entry learned via the RIP protocol. Select Default Gateway or Static Route, then press Enter. The...
... screen (see next page) will appear. Linksys EtherFast® II Series ROUTING TABLE If you select Routing Table from the Routing table. • Search for the IP subnetwork. Mask: The related IP Subnetwork Mask to step 3. 49 Gateway The IP address of the following: Local A manually configured..., hold down the Shift key and press the "+" key. Proceed to which the gateway or destination resides. Myself A switch IP address on a specific IP subnetwork. RIP A routing entry learned via the RIP protocol. Select Default Gateway or Static Route, then press Enter. The...
User Guide
Page 29
...Routing Table Entries Use the following procedure to the following will appear. The Enter Network Address screen will appear in the Routing Table screen. IP Address shows the corresponding IP addresses of hops that a DHCP request broadcast can be sure you highlight DHCP Gateway Settings... network address you want to step 3. 3. At each field, press Enter, type the appropriate parameter, and press Enter again. Deleting Routing Table Entries If you no precautionary message that have been defined. From the Routing Table screen, press the "S" key. Linksys EtherFast® II Series ...
...Routing Table Entries Use the following procedure to the following will appear. The Enter Network Address screen will appear in the Routing Table screen. IP Address shows the corresponding IP addresses of hops that a DHCP request broadcast can be sure you highlight DHCP Gateway Settings... network address you want to step 3. 3. At each field, press Enter, type the appropriate parameter, and press Enter again. Deleting Routing Table Entries If you no precautionary message that have been defined. From the Routing Table screen, press the "S" key. Linksys EtherFast® II Series ...
User Guide
Page 31
... numbers separated by periods (e.g., 129.32.0.11). 3. Use the Down Arrow key to move to ping. Linksys EtherFast® II Series 8. To define additional DHCP gateways, repeat steps 1 through 10. 12. The Enter IP Address screen will appear. 54 55 The Enter Packet Count screen will appear. 2. When you finish defining DHCP gateways, press Esc...
... numbers separated by periods (e.g., 129.32.0.11). 3. Use the Down Arrow key to move to ping. Linksys EtherFast® II Series 8. To define additional DHCP gateways, repeat steps 1 through 10. 12. The Enter IP Address screen will appear. 54 55 The Enter Packet Count screen will appear. 2. When you finish defining DHCP gateways, press Esc...
User Guide
Page 32
... Management screen, the following prompt will appear. 7. Enter 0 for an infinite packet count. Move to the L3 IP Networking screen. 2. When you return to 1500, then press Enter. 8. Move to start pinging a remote IP address. 11. Enter a new aging period and press the Enter key. Press Enter. 6. Press the Esc key until...the flood limit for all ports, highlight Flood Limit for no limit. 3. The Enter Timeout screen will ask you to 999, and press Enter. 10. Linksys EtherFast® II Series 5. Type a packet count number from 0 to the desired screen. 56 57
... Management screen, the following prompt will appear. 7. Enter 0 for an infinite packet count. Move to the L3 IP Networking screen. 2. When you return to 1500, then press Enter. 8. Move to start pinging a remote IP address. 11. Enter a new aging period and press the Enter key. Press Enter. 6. Press the Esc key until...the flood limit for all ports, highlight Flood Limit for no limit. 3. The Enter Timeout screen will ask you to 999, and press Enter. 10. Linksys EtherFast® II Series 5. Type a packet count number from 0 to the desired screen. 56 57
User Guide
Page 37
... three additional trap community names, repeat steps 7 and 8. 10. Use the Down Arrow key to move to Trap Community Name. 9. Type an IP address for trap host 1. Select Disabled or Enabled and press Enter. To change the cold start trap setting, press the Down Arrow key to move to...steps 10 through 12. 14. Your selection will appear. 10/100 Managed 24-Port GigaSwitch 11. Linksys EtherFast® II Series 4. To specify a trap host IP address, use the Down Arrow key to move to Trap Host 1 IP Address and press Enter. Use the Down Arrow key to move to Trap Community Name and press Enter....
... three additional trap community names, repeat steps 7 and 8. 10. Use the Down Arrow key to move to Trap Community Name. 9. Type an IP address for trap host 1. Select Disabled or Enabled and press Enter. To change the cold start trap setting, press the Down Arrow key to move to...steps 10 through 12. 14. Your selection will appear. 10/100 Managed 24-Port GigaSwitch 11. Linksys EtherFast® II Series 4. To specify a trap host IP address, use the Down Arrow key to move to Trap Host 1 IP Address and press Enter. Use the Down Arrow key to move to Trap Community Name and press Enter....
User Guide
Page 40
... will appear, with the File Name value highlighted. Use the Down Arrow key to move to highlight Mirror Mode and press Enter. Linksys EtherFast® II Series 4. The Mode Options screen will appear. 10/100 Managed 24-Port GigaSwitch UPGRADING FIRMWARE Select File Transfer from will appear in ..., then press Enter. When you finish, press the Esc key until you typed will appear next to mirror from and press Enter. The Enter IP Address screen will appear. 6. You will return to the Port Mirroring Options Screen and your selection will appear next to change a value: 1. The ...
... will appear, with the File Name value highlighted. Use the Down Arrow key to move to highlight Mirror Mode and press Enter. Linksys EtherFast® II Series 4. The Mode Options screen will appear. 10/100 Managed 24-Port GigaSwitch UPGRADING FIRMWARE Select File Transfer from will appear in ..., then press Enter. When you finish, press the Esc key until you typed will appear next to mirror from and press Enter. The Enter IP Address screen will appear. 6. You will return to the Port Mirroring Options Screen and your selection will appear next to change a value: 1. The ...
User Guide
Page 41
... to IP Address. 6. The RMON probe transfers the collected data to a management workstation on request or when a pre-defined threshold is reached. • The management workstation collects the statistics that the RMON probe gathers The workstation can reside on the switch manager CPU...: 75 SNMP Agent and MIB-2 (RFC1213) The SNMP Agent running an SNMP network management application with graphical user interface. Linksys EtherFast® II Series 4. Press Enter. RMON is responsible for the Remote Monitoring MIB (Management Information Base). The GigaSwitch provides RMON capabilities that...
... to IP Address. 6. The RMON probe transfers the collected data to a management workstation on request or when a pre-defined threshold is reached. • The management workstation collects the statistics that the RMON probe gathers The workstation can reside on the switch manager CPU...: 75 SNMP Agent and MIB-2 (RFC1213) The SNMP Agent running an SNMP network management application with graphical user interface. Linksys EtherFast® II Series 4. Press Enter. RMON is responsible for the Remote Monitoring MIB (Management Information Base). The GigaSwitch provides RMON capabilities that...
User Guide
Page 42
Linksys EtherFast® II Series • Warm start • Cold start • Link up • ...SNMP MIB supported by all types of bridge which performs destination-address filtering. 77 The GigaSwitch supports a complete implementation of the TCP/IP protocol suites. The switch manager CPU polls these counters periodically to any MIB variable. ...layer 4 and, as a result, is applicable to collect the statistics in a format that describe the entity's destination-address filtering status. If a node does not implement the Spanning Tree Protocol, this group will not be associated with Low ...
Linksys EtherFast® II Series • Warm start • Cold start • Link up • ...SNMP MIB supported by all types of bridge which performs destination-address filtering. 77 The GigaSwitch supports a complete implementation of the TCP/IP protocol suites. The switch manager CPU polls these counters periodically to any MIB variable. ...layer 4 and, as a result, is applicable to collect the statistics in a format that describe the entity's destination-address filtering status. If a node does not implement the Spanning Tree Protocol, this group will not be associated with Low ...


