Owners Manual
Page 1
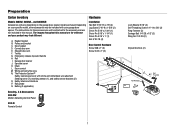
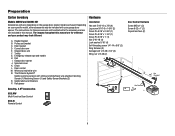
...be used ONLY with myQ® and Security+ 2.0® accessories. • DO NOT install on label. Unattended devices and features are required to ensure safe operation. • This...;8355W-267 Chain Drive Models 8360W•8360WL•8360WLB•8365W•8365W-267 FOR RESIDENTIAL USE ONLY • Please read this manual and the safety materials carefully! • The door...door opener to receive updates and offers from LiftMaster Take a photo of the garage door opener are to 71403 (US) or visit www.liftmaster.photo (Global) LiftMaster 300 Windsor Drive Oak Brook, IL 60523
...be used ONLY with myQ® and Security+ 2.0® accessories. • DO NOT install on label. Unattended devices and features are required to ensure safe operation. • This...;8355W-267 Chain Drive Models 8360W•8360WL•8360WLB•8365W•8365W-267 FOR RESIDENTIAL USE ONLY • Please read this manual and the safety materials carefully! • The door...door opener to receive updates and offers from LiftMaster Take a photo of the garage door opener are to 71403 (US) or visit www.liftmaster.photo (Global) LiftMaster 300 Windsor Drive Oak Brook, IL 60523
Owners Manual
Page 3
...you do not comply with the cautionary statements that allows the door to close without being in the line of sight of the door is installed, operated, maintained and tested in strict accordance with sectional doors. 3 The Timer-to-Close (TTC) feature, the myQ Smartphone Control, ...and any other reproductive harm. When you see this manual. The hazard may come from something mechanical or from electric shock. Read the warnings carefully. Any device or feature that accompany it. Preparation ...
...you do not comply with the cautionary statements that allows the door to close without being in the line of sight of the door is installed, operated, maintained and tested in strict accordance with sectional doors. 3 The Timer-to-Close (TTC) feature, the myQ Smartphone Control, ...and any other reproductive harm. When you see this manual. The hazard may come from something mechanical or from electric shock. Read the warnings carefully. Any device or feature that accompany it. Preparation ...
Owners Manual
Page 6
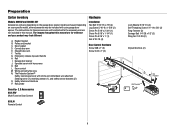
...control M. Safety labels and literature P. Door bracket D. Straight door arm F. Trolley G. The Protector System® Safety reversing sensors with hex screws K. Rail grease Installation Hex Bolt 5/16"-18 x 7/8" (4) Lag Screw 5/16"-9 x 1-5/8" (2) Clevis Pin 5/16" x 2-3/4" (1) Clevis Pin 5/16" x 1-1/4" (1) Clevis... attached: Sending senor (1), receiving sensor (1), and safety sensor brackets (2) O. The images throughout this manual are not included in this manual. A. Garage door opener J. Curved door arm E. Preparation Carton Inventory Hardware Models 8355W and 8355W-...
...control M. Safety labels and literature P. Door bracket D. Straight door arm F. Trolley G. The Protector System® Safety reversing sensors with hex screws K. Rail grease Installation Hex Bolt 5/16"-18 x 7/8" (4) Lag Screw 5/16"-9 x 1-5/8" (2) Clevis Pin 5/16" x 2-3/4" (1) Clevis Pin 5/16" x 1-1/4" (1) Clevis... attached: Sending senor (1), receiving sensor (1), and safety sensor brackets (2) O. The images throughout this manual are not included in this manual. A. Garage door opener J. Curved door arm E. Preparation Carton Inventory Hardware Models 8355W and 8355W-...
Owners Manual
Page 7
...arm F. Garage door opener J. Chain L. White and red/white wire N. Battery (if applicable) Installation Hex Bolt 5/16"-18 x 7/8" (4) Lag Screw 5/16"-9 x 1-5/8" (2) Clevis Pin 5/16...Not M Provided J Not Provided O P Q I . Preparation Carton Inventory Hardware Models 8360W, 8360WL, and 8360WLB Accessories will vary depending on your specific model, other accessories may look different. Header bracket B. Door control M.... your garage door opener. The images throughout this manual are not included in this manual. Safety labels and literature P. Door bracket D. ...
...arm F. Garage door opener J. Chain L. White and red/white wire N. Battery (if applicable) Installation Hex Bolt 5/16"-18 x 7/8" (4) Lag Screw 5/16"-9 x 1-5/8" (2) Clevis Pin 5/16...Not M Provided J Not Provided O P Q I . Preparation Carton Inventory Hardware Models 8360W, 8360WL, and 8360WLB Accessories will vary depending on your specific model, other accessories may look different. Header bracket B. Door control M.... your garage door opener. The images throughout this manual are not included in this manual. Safety labels and literature P. Door bracket D. ...
Owners Manual
Page 8
...: Sending Sensor (1) Receiving Sensor (1) and Safety Sensor Brackets (2) O. The images throughout this manual are not included in this manual. Curved door arm E. Garage door opener J. Emergency release rope and handle H. Rail grease Security+ 2.0® Accessories 882LMW Multi-Function Door Control Installation Hex bolt 5/16"-18 x 7/8" (4) Lag screw 5/16"-9 x 1-5/8" (2) Clevis Pin 5/16" x 2-3/4" (1) Clevis Pin...
...: Sending Sensor (1) Receiving Sensor (1) and Safety Sensor Brackets (2) O. The images throughout this manual are not included in this manual. Curved door arm E. Garage door opener J. Emergency release rope and handle H. Rail grease Security+ 2.0® Accessories 882LMW Multi-Function Door Control Installation Hex bolt 5/16"-18 x 7/8" (4) Lag screw 5/16"-9 x 1-5/8" (2) Clevis Pin 5/16" x 2-3/4" (1) Clevis Pin...
Owners Manual
Page 16
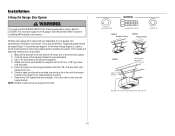
...Nut 5/16"-18 16 Concrete anchors MUST be different. Hanging your garage door opener will vary depending on your garage. Yours may be used if installing ANY brackets into masonry. Drill 3/16" pilot holes in line with 5/16"-18 x 7/8" hex bolts, lock washers and nuts. 6. Check ...to make sure the rail is not centered above the door). 7. Operate the door manually. Hanging brackets should be angled (Figure 1) to structural supports before installing the opener. On finished ceilings (Figure 2), attach a sturdy metal bracket to provide rigid support. Attach one end ...
...Nut 5/16"-18 16 Concrete anchors MUST be different. Hanging your garage door opener will vary depending on your garage. Yours may be used if installing ANY brackets into masonry. Drill 3/16" pilot holes in line with 5/16"-18 x 7/8" hex bolts, lock washers and nuts. 6. Check ...to make sure the rail is not centered above the door). 7. Operate the door manually. Hanging brackets should be angled (Figure 1) to structural supports before installing the opener. On finished ceilings (Figure 2), attach a sturdy metal bracket to provide rigid support. Attach one end ...
Owners Manual
Page 22
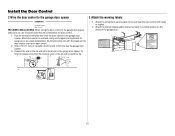
... terminal, push in a visible location on the inside of the wire near the door control with staples (not applicable for gang box or pre-wired installations). To insert or release wires from the end of the garage door. Do not pierce the wire with screwdriver tip. 1 2 7/16" (11 mm)...GREY 22 Attach the entrapment warning label on the garage door opener. Attach the manual release/safety reverse test label in the tab with the staple as this may cause a short or an open circuit. 2. Install the Door Control 2 Wire the door control to the garage door opener HARDWARE Insulated...
... terminal, push in a visible location on the inside of the wire near the door control with staples (not applicable for gang box or pre-wired installations). To insert or release wires from the end of the garage door. Do not pierce the wire with screwdriver tip. 1 2 7/16" (11 mm)...GREY 22 Attach the entrapment warning label on the garage door opener. Attach the manual release/safety reverse test label in the tab with the staple as this may cause a short or an open circuit. 2. Install the Door Control 2 Wire the door control to the garage door opener HARDWARE Insulated...
Owners Manual
Page 43
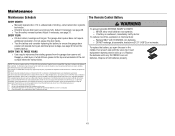
...Test the safety reversal system. This device must accept any interference received, including interference that may cause harmful interference to be installed to operate the equipment. However, there is no guarantee that to provide reasonable protection against harmful interference in .) distance is...or incinerate. Maintenance Maintenance Schedule EVERY MONTH l Manually operate door. l Check to radio communications. Adjust if necessary, see page 30. These limits are designed to which can radiate radio frequency energy and, if not installed and used in the middle, then at each...
...Test the safety reversal system. This device must accept any interference received, including interference that may cause harmful interference to be installed to operate the equipment. However, there is no guarantee that to provide reasonable protection against harmful interference in .) distance is...or incinerate. Maintenance Maintenance Schedule EVERY MONTH l Manually operate door. l Check to radio communications. Adjust if necessary, see page 30. These limits are designed to which can radiate radio frequency energy and, if not installed and used in the middle, then at each...
Owners Manual
Page 44
... click. Check for binding or obstructions, such as needed . 1 4 The garage door opener will not function. Replace logic board if necessary. Manually open and close and the Safety reversing sensors are shorted or the door control is programmed with self-diagnostic capabilities. Replace motor if necessary. 1...by a trained door systems stop. Realign both LEDs are not installed, connected, or wires may be cut wire. 1 2 The garage door opener will not close the door. Replace travel module if necessary. Manually open and close and the There is hanging or mounted on the...
... click. Check for binding or obstructions, such as needed . 1 4 The garage door opener will not function. Replace logic board if necessary. Manually open and close and the Safety reversing sensors are shorted or the door control is programmed with self-diagnostic capabilities. Replace motor if necessary. 1...by a trained door systems stop. Realign both LEDs are not installed, connected, or wires may be cut wire. 1 2 The garage door opener will not close the door. Replace travel module if necessary. Manually open and close and the There is hanging or mounted on the...
Owners Manual
Page 45
...5 Opener runs approximately 6-8" (15-20 cm), Communication error to travel stops and reverses. Manually open and close and the light bulbs blink on when the safety reversing sensors have been ...Fi LEARN mode can be disabled using the door control, see page 4 or visit WiFiHelp.LiftMaster.com for more information. Visit www.homelink.com for binding or obstructions, such as a ...path while closing. Check travel module connections, replace travel module. The myQ characters are properly installed, aligned and free of the garage door opener, the garage door opener must be required....
...5 Opener runs approximately 6-8" (15-20 cm), Communication error to travel stops and reverses. Manually open and close and the light bulbs blink on when the safety reversing sensors have been ...Fi LEARN mode can be disabled using the door control, see page 4 or visit WiFiHelp.LiftMaster.com for more information. Visit www.homelink.com for binding or obstructions, such as a ...path while closing. Check travel module connections, replace travel module. The myQ characters are properly installed, aligned and free of the garage door opener, the garage door opener must be required....
8355W 8355W-267 8360W 8360WL 8360WLB 8365W 8365W-267 Users Guide - English French and Spanish
Page 2
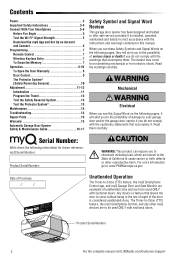
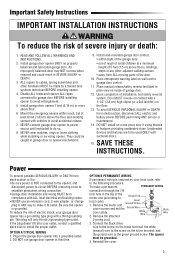
...accompany them carefully. Serial Number: Write down the following pages, it will alert you to the possibility of the door is installed, operated, maintained and tested in the line of sight of serious injury or death if you do not comply with sectional ...including lead, which are examples of unattended close without being in strict accordance with sectional doors. Product Serial Number 2 For the complete manual visit LiftMaster.com/Customer-Support Contents Power 3 Important Safety Instructions 3-4 Connect With Your Smartphone 5-6 Before You Begin 5 Test the Wi-Fi®...
...accompany them carefully. Serial Number: Write down the following pages, it will alert you to the possibility of the door is installed, operated, maintained and tested in the line of sight of serious injury or death if you do not comply with sectional ...including lead, which are examples of unattended close without being in strict accordance with sectional doors. Product Serial Number 2 For the complete manual visit LiftMaster.com/Customer-Support Contents Power 3 Important Safety Instructions 3-4 Connect With Your Smartphone 5-6 Before You Begin 5 Test the Wi-Fi®...
8355W 8355W-267 8360W 8360WL 8360WLB 8365W 8365W-267 Users Guide - English French and Spanish
Page 3
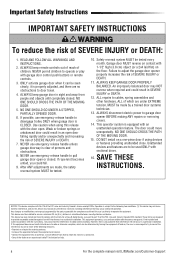
... To reduce the risk of garage door. 12. NEVER wear watches, rings or loose clothing while installing or servicing opener. They could result in SEVERE INJURY or DEATH. 3. Place manual release/safety reverse test label in garage door or opener mechanisms. 9. Unattended devices and features are to be caught in plain view...
... To reduce the risk of garage door. 12. NEVER wear watches, rings or loose clothing while installing or servicing opener. They could result in SEVERE INJURY or DEATH. 3. Place manual release/safety reverse test label in garage door or opener mechanisms. 9. Unattended devices and features are to be caught in plain view...
8355W 8355W-267 8360W 8360WL 8360WLB 8365W 8365W-267 Users Guide - English French and Spanish
Page 4
.... 3. NEVER use emergency release handle to radio communications. ALWAYS disconnect electric power to ensure a minimum 20 cm (8 in a particular installation. ALWAYS keep garage door in sight and away from that to door travel. 4. NEVER use emergency release handle unless garage doorway is...door is subject to provide reasonable protection against harmful interference in accordance with the limits for help. 4 For the complete manual visit LiftMaster.com/Customer-Support However, there is maintained between the equipment and receiver. • Connect the equipment into an outlet on...
.... 3. NEVER use emergency release handle to radio communications. ALWAYS disconnect electric power to ensure a minimum 20 cm (8 in a particular installation. ALWAYS keep garage door in sight and away from that to door travel. 4. NEVER use emergency release handle unless garage doorway is...door is subject to provide reasonable protection against harmful interference in accordance with the limits for help. 4 For the complete manual visit LiftMaster.com/Customer-Support However, there is maintained between the equipment and receiver. • Connect the equipment into an outlet on...
8355W 8355W-267 8360W 8360WL 8360WLB 8365W 8365W-267 Users Guide - English French and Spanish
Page 10
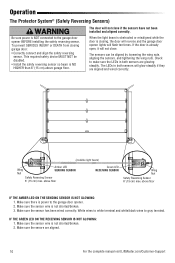
...correctly: White wires to white terminal and white/black wires to make sure the LEDs in both sensors are aligned. 10 For the complete manual visit LiftMaster.com/Customer-Support Make sure the senors are glowing steadily. IF THE GREEN LED ON THE RECEIVING SENSOR IS NOT GLOWING: 1. Make ...above floor IF THE AMBER LED ON THE SENDING SENSOR IS NOT GLOWING: 1. Check to gray terminal. The sensors can be disabled. • Install the safety reversing sensor so beam is NO HIGHER than 6" (15 cm) above garage floor. This required safety device MUST NOT be aligned ...
...correctly: White wires to white terminal and white/black wires to make sure the LEDs in both sensors are aligned. 10 For the complete manual visit LiftMaster.com/Customer-Support Make sure the senors are glowing steadily. IF THE GREEN LED ON THE RECEIVING SENSOR IS NOT GLOWING: 1. Make ...above floor IF THE AMBER LED ON THE SENDING SENSOR IS NOT GLOWING: 1. Check to gray terminal. The sensors can be disabled. • Install the safety reversing sensor so beam is NO HIGHER than 6" (15 cm) above garage floor. This required safety device MUST NOT be aligned ...

8355W 8355W-267 8360W 8360WL 8360WLB 8365W 8365W-267 Users Guide - English French and Spanish
Page 12
... garage door opener lights are flashing 10 times during the steps for Program the Travel. 12 For the complete manual visit LiftMaster.com/Customer-Support Adjustment 1 Program the Travel Without a properly installed safety reversal system, persons (particularly small children) could be SERIOUSLY INJURED or KILLED by a closing garage door. • Incorrect adjustment...
... garage door opener lights are flashing 10 times during the steps for Program the Travel. 12 For the complete manual visit LiftMaster.com/Customer-Support Adjustment 1 Program the Travel Without a properly installed safety reversal system, persons (particularly small children) could be SERIOUSLY INJURED or KILLED by a closing garage door. • Incorrect adjustment...
8355W 8355W-267 8360W 8360WL 8360WLB 8365W 8365W-267 Users Guide - English French and Spanish
Page 14
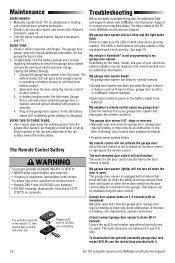
...re, explosion or chemical burn: • Replace ONLY with it is restored. 4. For help and support videos visit LiftMaster.com/Customer-Support or contact your installing dealer. My vehicle's Homelink® is operating on the door control or reprogram the remote control. Garage door may ...near batteries. • If battery is charging). Open and close the garage door. The garage door moves 6-8", stops or reverses: • Manually open and close the door using the door control. Pry open : The garage door opener is binding, call a trained door systems technician. ...
...re, explosion or chemical burn: • Replace ONLY with it is restored. 4. For help and support videos visit LiftMaster.com/Customer-Support or contact your installing dealer. My vehicle's Homelink® is operating on the door control or reprogram the remote control. Garage door may ...near batteries. • If battery is charging). Open and close the garage door. The garage door moves 6-8", stops or reverses: • Manually open and close the door using the door control. Pry open : The garage door opener is binding, call a trained door systems technician. ...
8355W 8355W-267 8360W 8360WL 8360WLB 8365W 8365W-267 Users Guide - English French and Spanish
Page 15
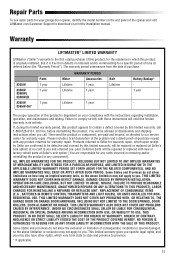
... have other rights, which vary from the date of the opener and visit LiftMaster.com/Customer-Support to you . Some States and Provinces do not allow limitations on the end panel of purchase. 8355W 8360W 8360WL 8360WLB 8365W 8365W-267 Parts 1 year 1 year 1 year WARRANTY PERIOD Motor Accessories...are confirmed to be repaired or replaced (at Seller's sole option) at no cost to you may not apply to download or print the installation manual. THIS LIMITED WARRANTY DOES NOT COVER ANY PROBLEMS WITH, OR RELATING TO, THE GARAGE DOOR OR GARAGE DOOR HARDWARE, INCLUDING BUT NOT LIMITED...
... have other rights, which vary from the date of the opener and visit LiftMaster.com/Customer-Support to you . Some States and Provinces do not allow limitations on the end panel of purchase. 8355W 8360W 8360WL 8360WLB 8365W 8365W-267 Parts 1 year 1 year 1 year WARRANTY PERIOD Motor Accessories...are confirmed to be repaired or replaced (at Seller's sole option) at no cost to you may not apply to download or print the installation manual. THIS LIMITED WARRANTY DOES NOT COVER ANY PROBLEMS WITH, OR RELATING TO, THE GARAGE DOOR OR GARAGE DOOR HARDWARE, INCLUDING BUT NOT LIMITED...
8355W 8355W-267 8360W 8360WL 8360WLB 8365W 8365W-267 Users Guide - English French and Spanish
Page 16
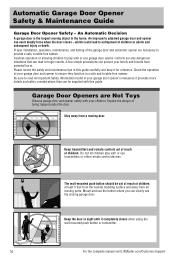
... it completely closes when using the wall-mounted push button or transmitter. 16 For the complete manual visit LiftMaster.com/Customer-Support Stay away from potential harm. Proper installation, operation, maintenance, and testing of children, at least 5 feet from the nearest standing surface and away from all Important Safety Information found in sight...
... it completely closes when using the wall-mounted push button or transmitter. 16 For the complete manual visit LiftMaster.com/Customer-Support Stay away from potential harm. Proper installation, operation, maintenance, and testing of children, at least 5 feet from the nearest standing surface and away from all Important Safety Information found in sight...
8355W 8355W-267 8360W 8360WL 8360WLB 8365W 8365W-267 Users Guide - English French and Spanish
Page 17
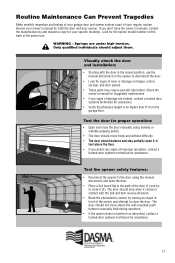
Visually check the door and installation: • Starting with the 2x4 and then reverse direction...unless the wall-mounted push button is no higher than 6" from the garage floor. Check the owner's manual for suggested maintenance. • If any signs of improper operation, contact a trained door systems technician for assistance....it (2). Springs are evident, contact a trained door systems technician for assistance. • Verify the photoeye height is manually held during operation. 1 • If the opener does not perform as described, contact a trained door systems ...
Visually check the door and installation: • Starting with the 2x4 and then reverse direction...unless the wall-mounted push button is no higher than 6" from the garage floor. Check the owner's manual for suggested maintenance. • If any signs of improper operation, contact a trained door systems technician for assistance....it (2). Springs are evident, contact a trained door systems technician for assistance. • Verify the photoeye height is manually held during operation. 1 • If the opener does not perform as described, contact a trained door systems ...

