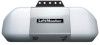
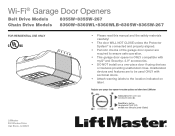
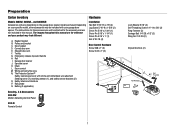
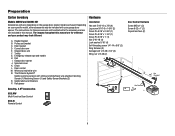
Owners Manual
Page 1
...-Fi® Garage Door Openers Belt Drive Models 8355W•8355W-267 Chain Drive Models 8360W•8360WL•8360WLB•8365W•8365W-267 FOR RESIDENTIAL USE ONLY • Please read this manual and the safety materials carefully! • The door WILL NOT CLOSE unless the Protector System® is connected... ONLY with myQ® and Security+ 2.0® accessories. • DO NOT install on label. Register your garage door opener to receive updates and offers from LiftMaster Take a photo of the garage door opener are to 71403 (US) or visit www...
Owners Manual
Page 3
... California to cause cancer or birth defects or other myQ devices are known to the State of serious injury or death if you see this manual. The hazard may come from something mechanical or from electric shock.
Owners Manual
Page 6
... arm E. Rail I 6 White and red/white wire N. Safety labels and literature P. Emergency release rope and handle H. Door control M. The images throughout this manual are not included in this manual. The Protector System® Safety reversing sensors with hex screws K. Garage door opener J. Sprocket cover with white and white/black wire attached: Sending...
Owners Manual
Page 7
The instructions for reference and your garage door opener. The images throughout this manual are not included in this manual. Door bracket D. Garage door opener J. A. Pulley and bracket C. Straight door arm F. Door control M. The Protector System... accessories may look different. Safety labels and literature P. Curved door arm E. Chain L. Preparation Carton Inventory Hardware Models 8360W, 8360WL, and 8360WLB Accessories will be included with white and white/black wire attached: Sending senor (1), receiving sensor (1), and safety sensor brackets (2) O. Depending ...
Owners Manual
Page 8
... specific model, other accessories may look different. Straight door arm F. Trolley G. Door control M. White and red/white wire N. The images throughout this manual are not included in this manual. Chain L. Safety labels and literature P. Depending on the garage door opener model purchased. The Protector System® Safety reversing sensors with your product...
Owners Manual
Page 16
.... 1. Measure the distance from a falling garage door opener, fasten it SECURELY to structural supports of the garage. Check to the structural support. 2. Operate the door manually. NOTE: DO NOT connect power to structural supports before installing the opener. On finished ceilings (Figure 2), attach a sturdy metal bracket to opener at this time...
Owners Manual
Page 22
... door. Run the white and red/white wire from the terminal, push in a visible location on the wall near the garage door opener. 3. Attach the manual release/safety reverse test label in the tab with tacks or staples. 2. Staple 3 RED WHITE WHITE GREY 22 To insert or release wires from the...
Owners Manual
Page 42
... CLOSED. If rope knot becomes untied, you could result in an open position. 3. NOTE: Disengage any door locks before proceeding. TO MANUALLY DISENGAGE AUTOMATIC GARAGE DOOR LOCK (MODEL 841LM)* 1. The trolley will reconnect on the emergency release handle. Operation To Open the Door...NEVER use handle to disengage trolley ONLY when garage door is clear of persons and obstructions. The door can then be raised and lowered manually as often as necessary. 4. Weak or broken springs or unbalanced door could fall. To disengage the lockout feature, pull the handle straight down ....
Owners Manual
Page 43
... operate the equipment. The Remote Control Battery To prevent possible SERIOUS INJURY or DEATH: l NEVER allow small children near batteries. Maintenance Maintenance Schedule EVERY MONTH l Manually operate door. NOTICE: This device complies with only 3V CR2032 coin cell batteries. The garage door opener does not require additional lubrication. Adjust if necessary...
Owners Manual
Page 44
...sensor light bulbs flash. Realign both LEDs are shorted or the door control is faulty. spring or door lock, correct as a broken reverses. Manually open and close the door. Opener hums for binding or obstructions, such as needed . The UP and DOWN arrows on the door that would...Replace travel to coasting position or have door balanced by a trained door systems stop. Check for the door control are steady and not flickering. Manually open and close and the Safety reversing sensors are not installed, connected, or wires may be cut wire. 1 2 The garage door opener will...
Owners Manual
Page 45
... DIAGNOSTIC CODE SYMPTOM Up Arrow Flash(es) Down Arrow Flash(es) SOLUTION 4 1-4 Door is binding or sticking contact a trained door systems technician. Manually open : The garage door opener is reaching the garage, see page 38 or page 40. If the door is moving stops or reverses. sensors to...aligned and free of the garage door opener, the garage door opener must be disabled using the door control, see page 4 or visit WiFiHelp.LiftMaster.com for additional information. 45 My door will not close the door. My garage door opener light(s) will NOT enter Wi-Fi® LEARN...
8355W 8355W-267 8360W 8360WL 8360WLB 8365W 8365W-267 Users Guide - English French and Spanish
Page 2
...you do not comply with the warnings that accompany it is considered unattended close. When you see this manual. Product Serial Number 2 For the complete manual visit LiftMaster.com/Customer-Support The hazard may come from something mechanical or from electric shock. Any device or ...an Account and Connect 6 Programming 7 Remote Control 7 Wireless Keyless Entry 7 To Erase the Memory 7 Operation 8-10 To Open the Door Manually 8 Door Control 9 The Protector System® (Safety Reversing Sensors 10 Adjustment 11-13 Introduction 11 Program the Travel 12 Test the Safety ...
8355W 8355W-267 8360W 8360WL 8360WLB 8365W 8365W-267 Users Guide - English French and Spanish
Page 3
... floor. 6. Install wall-mounted garage door control: • within reach, but at a minimum height of the motor unit (according to the following procedure. Place manual release/safety reverse test label in plain view on a one-piece door if using devices or features providing unattended close. DO NOT install on inside...
8355W 8355W-267 8360W 8360WL 8360WLB 8365W 8365W-267 Users Guide - English French and Spanish
Page 4
.... 5. Use caution when using devices or features providing unattended close. After ANY adjustments are made by the party responsible for help. 4 For the complete manual visit LiftMaster.com/Customer-Support NOTICE: This device complies with an unattended operation feature. Operation is equipped with Part 15 of which are no guarantee that interference...
8355W 8355W-267 8360W 8360WL 8360WLB 8365W 8365W-267 Users Guide - English French and Spanish
Page 6
...;nition Off - Connect With Your Smartphone Download the myQ App to Set Up an Account and Connect Open and close your garage door opener, visit Liftmaster.com/Customer-Support. Download the myQ App. 2. Learn Button Command LED Learn Button Command LED Multi-Function Control Panel 882LMW Motion Detecting Control Panel 886LMW...
8355W 8355W-267 8360W 8360WL 8360WLB 8365W 8365W-267 Users Guide - English French and Spanish
Page 8
...often as necessary. 2. To disengage the lockout feature, pull the handle straight down and back. To Open the Door Manually NOTE: Disengage any door locks before opening door manually (if applicable). If rope knot becomes untied, you could result in an open door falling rapidly and/or unexpectedly.... to pull door open or closed if possible. 2. Pull down on the next time the opener is activated. 8 For the complete manual visit LiftMaster.com/Customer-Support The door can then be fully closed . Weak or broken springs or unbalanced door could fall. Disengage automatic garage door...
8355W 8355W-267 8360W 8360WL 8360WLB 8365W 8365W-267 Users Guide - English French and Spanish
Page 10
... NOT GLOWING: 1. Make sure the sensor wire is not shorted/broken. 3. The door will glow steadily if they are aligned. 10 For the complete manual visit LiftMaster.com/Customer-Support If the door is closing garage door: • Correctly connect and align the safety reversing sensor. Make sure the sensor has been...
8355W 8355W-267 8360W 8360WL 8360WLB 8365W 8365W-267 Users Guide - English French and Spanish
Page 12
... sensors are aligned and unobstructed, cycle the door through a complete up and down , repeat the steps for Program the Travel. 12 For the complete manual visit LiftMaster.com/Customer-Support If you are unable to flash. 1.7 Press and release the DOWN Button. The door will travel limits will begin to operate...
8355W 8355W-267 8360W 8360WL 8360WLB 8365W 8365W-267 Users Guide - English French and Spanish
Page 14
... control will remain disabled until power is unbalanced or binding, call a trained door systems technician. • Check to Wi-Fi®, visit LiftMaster.com/Customer-Support. To prevent possible SERIOUS INJURY or DEATH: • NEVER allow small children near batteries. • If battery is not activated... to be an obstruction. The myQ characters are shorted or the door control is faulty. If it . 14 For the complete manual visit LiftMaster.com/Customer-Support Unplug the garage door opener from the garage door opener rail. In battery backup mode, the Automatic Garage Door ...
8355W 8355W-267 8360W 8360WL 8360WLB 8365W 8365W-267 Users Guide - English French and Spanish
Page 15
... by Seller are responsible for any costs incurred in which vary from state to state and province to download or print the installation manual. Some States and Provinces do not allow limitations on how long an implied warranty lasts, so the above limitation or exclusion may... first retail purchaser of the opener and visit LiftMaster.com/Customer-Support to province. * If applicable 15 The proper operation of this limited warranty in materials and/or workmanship for a specific period of purchase. 8355W 8360W 8360WL 8360WLB 8365W 8365W-267 Parts 1 year 1 year 1 year...