User's Guide for Windows
Page 1
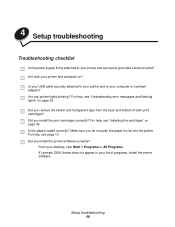
January 2003 www.lexmark.com Z600 Series Color Jetprinter™ User's Guide for Windows • Setup troubleshooting A checklist to find solutions to common setup problems. • Printer overview Learn about the printer parts and the printer software. • Printing ideas How to print several projects on various types of paper. • Maintenance Caring for your cartridges and ordering supplies. • General troubleshooting Error messages, print quality problems, paper jams, and much more.
January 2003 www.lexmark.com Z600 Series Color Jetprinter™ User's Guide for Windows • Setup troubleshooting A checklist to find solutions to common setup problems. • Printer overview Learn about the printer parts and the printer software. • Printing ideas How to print several projects on various types of paper. • Maintenance Caring for your cartridges and ordering supplies. • General troubleshooting Error messages, print quality problems, paper jams, and much more.
User's Guide for Windows
Page 3
... Printing transparencies 34 Printing your document in reverse order 36 Printing a banner 38 Printing on custom size paper 40 Chapter 3: Maintenance 42 Replacing the print cartridges 42 Aligning the print cartridges 45 Improving print quality 46 Preserving the print...
... Printing transparencies 34 Printing your document in reverse order 36 Printing a banner 38 Printing on custom size paper 40 Chapter 3: Maintenance 42 Replacing the print cartridges 42 Aligning the print cartridges 45 Improving print quality 46 Preserving the print...

User's Guide for Windows
Page 6
... the printer software 6 To print a typical document on page 57. • Check the printer status. This software has two parts: the Printer driver and the Lexmark Solution Center. When you do not need to : • Turn the printer on or off. • Eject paper from the printer. For more information, see... Front cover Paper exit tray Paper guide and release tab Paper support Power supply connector Sheet feeder USB cable connector When you can change print cartridges. • Clear paper jams. Stack paper after printing.
... the printer software 6 To print a typical document on page 57. • Check the printer status. This software has two parts: the Printer driver and the Lexmark Solution Center. When you do not need to : • Turn the printer on or off. • Eject paper from the printer. For more information, see... Front cover Paper exit tray Paper guide and release tab Paper support Power supply connector Sheet feeder USB cable connector When you can change print cartridges. • Clear paper jams. Stack paper after printing.
User's Guide for Windows
Page 7
... of your document. 6 Click OK to apply your document open, click File Print. Note: This option is not available if a black cartridge is not installed. Print Color Images in your color cartridge. • Quality/Speed: Normal • Type: Plain Paper • Paper Size: A4 or Letter • Orientation: Portrait • Layout: Normal...
... of your document. 6 Click OK to apply your document open, click File Print. Note: This option is not available if a black cartridge is not installed. Print Color Images in your color cartridge. • Quality/Speed: Normal • Type: Plain Paper • Paper Size: A4 or Letter • Orientation: Portrait • Layout: Normal...
User's Guide for Windows
Page 9
... printer status. • View common troubleshooting topics. • Install a print cartridge. • View information about how to purchase new cartridges. • Clean the print cartridge nozzles. • Align the cartridges. • Solve other problems. Note: Do not access this tab while a... job is in progress. • View information about ordering supplies. • Receive contact information for Lexmark Customer Support....
... printer status. • View common troubleshooting topics. • Install a print cartridge. • View information about how to purchase new cartridges. • Clean the print cartridge nozzles. • Align the cartridges. • Solve other problems. Note: Do not access this tab while a... job is in progress. • View information about ordering supplies. • Receive contact information for Lexmark Customer Support....
User's Guide for Windows
Page 20
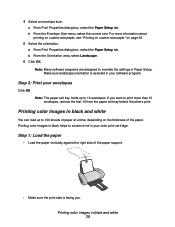
... Landscape. 6 Click OK. Note: The paper exit tray holds up to conserve ink in black and white 20 Printing color images in your color print cartridge. Make sure landscape orientation is facing you want to override the settings in your envelopes Click OK. If you . b From the Envelope Size menu, select...
... Landscape. 6 Click OK. Note: The paper exit tray holds up to conserve ink in black and white 20 Printing color images in your color print cartridge. Make sure landscape orientation is facing you want to override the settings in your envelopes Click OK. If you . b From the Envelope Size menu, select...
User's Guide for Windows
Page 42
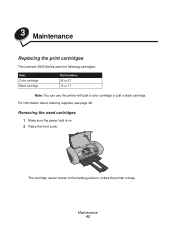
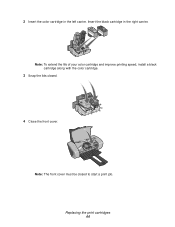
Removing the used cartridges 1 Make sure the power light is busy. The cartridge carrier moves to the loading position, unless the printer is on. 2 Raise the front cover. Maintenance 42 For information about ordering supplies, see page 48. 3 Maintenance Replacing the print cartridges The Lexmark Z600 Series uses the following cartridges: Item: Color cartridge Black cartridge Part number: 26 or 27 16 or 17 Note: You can use the printer with just a color cartridge or just a black cartridge.
Removing the used cartridges 1 Make sure the power light is busy. The cartridge carrier moves to the loading position, unless the printer is on. 2 Raise the front cover. Maintenance 42 For information about ordering supplies, see page 48. 3 Maintenance Replacing the print cartridges The Lexmark Z600 Series uses the following cartridges: Item: Color cartridge Black cartridge Part number: 26 or 27 16 or 17 Note: You can use the printer with just a color cartridge or just a black cartridge.
User's Guide for Windows
Page 43
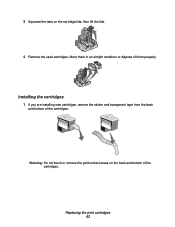
Warning: Do not touch or remove the gold contact areas on the cartridge lids, then lift the lids. 4 Remove the used cartridges. Store them in an airtight container or dispose of the cartridges. Replacing the print cartridges 43 Installing the cartridges 1 If you are installing new cartridges, remove the sticker and transparent tape from the back and bottom of them properly. 3 Squeeze the tabs on the back and bottom of the cartridges.
Warning: Do not touch or remove the gold contact areas on the cartridge lids, then lift the lids. 4 Remove the used cartridges. Store them in an airtight container or dispose of the cartridges. Replacing the print cartridges 43 Installing the cartridges 1 If you are installing new cartridges, remove the sticker and transparent tape from the back and bottom of them properly. 3 Squeeze the tabs on the back and bottom of the cartridges.
User's Guide for Windows
Page 44
Note: The front cover must be closed . 4 Close the front cover. 2 Insert the color cartridge in the right carrier. Insert the black cartridge in the left carrier. Replacing the print cartridges 44 Note: To extend the life of your color cartridge and improve printing speed, install a black cartridge along with the color cartridge. 3 Snap the lids closed to start a print job.
Note: The front cover must be closed . 4 Close the front cover. 2 Insert the color cartridge in the right carrier. Insert the black cartridge in the left carrier. Replacing the print cartridges 44 Note: To extend the life of your color cartridge and improve printing speed, install a black cartridge along with the color cartridge. 3 Snap the lids closed to start a print job.
User's Guide for Windows
Page 45
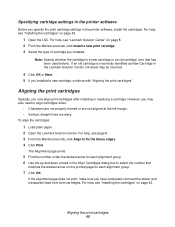
... LSC. To align the cartridges: 1 Load plain paper. 2 Open the Lexmark Solution Center. For help , see "Installing the cartridges" on page 8. 2 From the Maintenance tab, click Install a new print cartridge. 3 Select the type of cartridge you installed a new cartridge, continue with "Aligning the print cartridges." If an old cartridge is a new cartridge or an old cartridge (one that matches the...
... LSC. To align the cartridges: 1 Load plain paper. 2 Open the Lexmark Solution Center. For help , see "Installing the cartridges" on page 8. 2 From the Maintenance tab, click Install a new print cartridge. 3 Select the type of cartridge you installed a new cartridge, continue with "Aligning the print cartridges." If an old cartridge is a new cartridge or an old cartridge (one that matches the...
User's Guide for Windows
Page 46
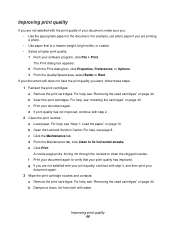
For help , see "Removing the used cartridges" on page 43. b Open the Lexmark Solution Center. d From the Maintenance tab, click Clean to clean the clogged nozzles. b Dampen a clean, lint-free cloth with step 2. 2 Clean the print nozzles: a ... not satisfied with the print quality of your print quality has improved. If your document again. 3 Wipe the print cartridge nozzles and contacts: a Remove the print cartridges. For help , see "Removing the used cartridges" on page 10. The Print dialog box appears. 2 From the Print dialog box, click Properties, Preferences, or Options. 3...
For help , see "Removing the used cartridges" on page 43. b Open the Lexmark Solution Center. d From the Maintenance tab, click Clean to clean the clogged nozzles. b Dampen a clean, lint-free cloth with step 2. 2 Clean the print nozzles: a ... not satisfied with the print quality of your print quality has improved. If your document again. 3 Wipe the print cartridge nozzles and contacts: a Remove the print cartridges. For help , see "Removing the used cartridges" on page 10. The Print dialog box appears. 2 From the Print dialog box, click Properties, Preferences, or Options. 3...

User's Guide for Windows
Page 47
..." on page 48. We do not print correctly if left exposed for an extended period. Preserving the print cartridges 47 Contacts e With another clean section of refilled cartridges. The print cartridges do not recommend use Lexmark supplies. Lexmark's printer warranty does not cover repair of the cloth, repeat step c through d. For best results, use of...
..." on page 48. We do not print correctly if left exposed for an extended period. Preserving the print cartridges 47 Contacts e With another clean section of refilled cartridges. The print cartridges do not recommend use Lexmark supplies. Lexmark's printer warranty does not cover repair of the cloth, repeat step c through d. For best results, use of...
User's Guide for Windows
Page 48
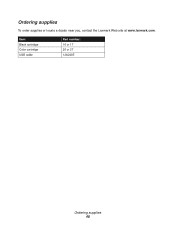
Item: Black cartridge Color cartridge USB cable Part number: 16 or 17 26 or 27 12A2405 Ordering supplies 48 Ordering supplies To order supplies or locate a dealer near you, contact the Lexmark Web site at www.lexmark.com.
Item: Black cartridge Color cartridge USB cable Part number: 16 or 17 26 or 27 12A2405 Ordering supplies 48 Ordering supplies To order supplies or locate a dealer near you, contact the Lexmark Web site at www.lexmark.com.
User's Guide for Windows
Page 49
... attached to your printer and to your computer or Lexmark adapter? Are any printer lights blinking? For help , see page 10. For help, see "Understanding error messages and flashing lights" on ? Did you install the print cartridges correctly? From your desktop, click Start Programs or ...All Programs. If Lexmark Z600 Series does not appear in your printer and computer on page 53. Is the paper loaded correctly...
... attached to your printer and to your computer or Lexmark adapter? Are any printer lights blinking? For help , see page 10. For help, see "Understanding error messages and flashing lights" on ? Did you install the print cartridges correctly? From your desktop, click Start Programs or ...All Programs. If Lexmark Z600 Series does not appear in your printer and computer on page 53. Is the paper loaded correctly...

User's Guide for Windows
Page 53
... See page: 53 54 56 58 60 Understanding error messages and flashing lights Use this message appears you by contacting the Lexmark Web site at www.lexmark.com. Paper Jam message For help : • Installing a new cartridge, see "Installing the cartridges" on page 43. • Ordering supplies, see "Printer has a paper jam" on your...
... See page: 53 54 56 58 60 Understanding error messages and flashing lights Use this message appears you by contacting the Lexmark Web site at www.lexmark.com. Paper Jam message For help : • Installing a new cartridge, see "Installing the cartridges" on page 43. • Ordering supplies, see "Printer has a paper jam" on your...
User's Guide for Windows
Page 56
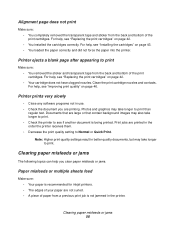
...your paper are large or that contain background images may also take longer to print. • Check the printer to see "Replacing the print cartridges" on page 46. Clearing paper misfeeds or jams The following topics can help you are printed in better quality documents, but may take longer ... setting to print Make sure: • You removed the sticker and transparent tape from the back and bottom of the print cartridges. For help , see "Replacing the print cartridges" on page 43. • You loaded the paper correctly and did not force the paper into the printer. Alignment page ...
...your paper are large or that contain background images may also take longer to print. • Check the printer to see "Replacing the print cartridges" on page 46. Clearing paper misfeeds or jams The following topics can help you are printed in better quality documents, but may take longer ... setting to print Make sure: • You removed the sticker and transparent tape from the back and bottom of the print cartridges. For help , see "Replacing the print cartridges" on page 43. • You loaded the paper correctly and did not force the paper into the printer. Alignment page ...
User's Guide for Windows
Page 58
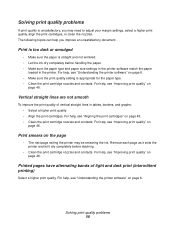
... Solving print quality problems 58 Solving print quality problems If print quality is appropriate for the paper type. • Clean the print cartridge nozzles and contacts. Remove each page as it exits the printer and let it dry completely before handling the paper. • Make... the printer software match the paper loaded in tables, borders, and graphs: • Select a higher print quality. • Align the print cartridges. Vertical straight lines are not smooth To improve the print quality of light and dark print (intermittent printing) Select a higher print quality. For...
... Solving print quality problems 58 Solving print quality problems If print quality is appropriate for the paper type. • Clean the print cartridge nozzles and contacts. Remove each page as it exits the printer and let it dry completely before handling the paper. • Make... the printer software match the paper loaded in tables, borders, and graphs: • Select a higher print quality. • Align the print cartridges. Vertical straight lines are not smooth To improve the print quality of light and dark print (intermittent printing) Select a higher print quality. For...
User's Guide for Windows
Page 59
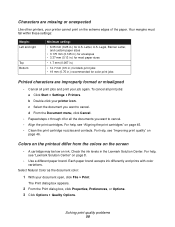
...Options. To cancel all print jobs: a Click Start Settings Printers. For help, see "Lexmark Solution Center" on page 45. • Clean the print cartridge nozzles and contacts. For help , see "Aligning the print cartridges" on page 8. • Use a different paper brand. Characters are improperly formed or...: Left and right Top Bottom Minimum setting: • 6.35 mm (0.25 in the Lexmark Solution Center. c Select the document you want to cancel. • Align the print cartridges. Each paper brand accepts ink differently and prints with color variations. Legal, Banner Letter, ...
...Options. To cancel all print jobs: a Click Start Settings Printers. For help, see "Lexmark Solution Center" on page 45. • Clean the print cartridge nozzles and contacts. For help , see "Aligning the print cartridges" on page 8. • Use a different paper brand. Characters are improperly formed or...: Left and right Top Bottom Minimum setting: • 6.35 mm (0.25 in the Lexmark Solution Center. c Select the document you want to cancel. • Align the print cartridges. Each paper brand accepts ink differently and prints with color variations. Legal, Banner Letter, ...
User's Guide for Windows
Page 60
...side facing you loaded the paper correctly (with specialty media. Solving specialty media problems 60 If the colors still seem faded, clean the print cartridge nozzles and contacts. For help , see "Printing photos" on page 11 or "Printing transparencies" on page 11. • Select a higher... transparencies" on page 34 or "Printing photos" on page 34. • Remove each page as Better or Best. • Clean the print cartridge nozzles and contacts. Glossy or photo papers or transparencies stick together • Load one sheet of photo paper or transparencies at a time. •...
...side facing you loaded the paper correctly (with specialty media. Solving specialty media problems 60 If the colors still seem faded, clean the print cartridge nozzles and contacts. For help , see "Printing photos" on page 11 or "Printing transparencies" on page 11. • Select a higher... transparencies" on page 34 or "Printing photos" on page 34. • Remove each page as Better or Best. • Clean the print cartridge nozzles and contacts. Glossy or photo papers or transparencies stick together • Load one sheet of photo paper or transparencies at a time. •...

User's Guide for Windows
Page 63
...a small book. A mechanism that automatically feeds paper into your printer. booklets. Multiple pages printed, folded, and bundled to print. cartridge contact. The gold area on the alignment page. coated paper. A nonstandard paper size. See printer software. A printer software option ...printed alignment patterns that touches the carrier contacts inside your printer. Numbers corresponding to patterns on your print cartridge that ejects from your printer during cartridge alignment. banner paper. A group of perforated inkjet paper designed for high-quality printed images. A printer...
...a small book. A mechanism that automatically feeds paper into your printer. booklets. Multiple pages printed, folded, and bundled to print. cartridge contact. The gold area on the alignment page. coated paper. A nonstandard paper size. See printer software. A printer software option ...printed alignment patterns that touches the carrier contacts inside your printer. Numbers corresponding to patterns on your print cartridge that ejects from your printer during cartridge alignment. banner paper. A group of perforated inkjet paper designed for high-quality printed images. A printer...


