
Getting Started
Page 2
Important safety information Use only the power supply and power supply cord provided with the printer software. Lexmark is not responsible for the use of specific Lexmark components. Operating system notice All features and functions are operating system-dependent. Connect the power supply cord to a properly grounded electrical... Macintosh, see the Mac Help installed with this product or make any electrical or cabling connections, such as the power supply cord or telephone, during a lightning storm. This product is near the product and easily accessible. The safety features...
Important safety information Use only the power supply and power supply cord provided with the printer software. Lexmark is not responsible for the use of specific Lexmark components. Operating system notice All features and functions are operating system-dependent. Connect the power supply cord to a properly grounded electrical... Macintosh, see the Mac Help installed with this product or make any electrical or cabling connections, such as the power supply cord or telephone, during a lightning storm. This product is near the product and easily accessible. The safety features...
Getting Started
Page 3
... defaults 29 Maintaining the printer 30 Changing print cartridges...30 Removing a used print cartridge...30 Installing print cartridges...31 Ordering Supplies...32 Ordering print cartridges...32 Ordering paper and other supplies ...32 Troubleshooting...34 Setup troubleshooting...34 Power button is not lit ...34 Software does not install ...34 Page does not print ...35 3
... defaults 29 Maintaining the printer 30 Changing print cartridges...30 Removing a used print cartridge...30 Installing print cartridges...31 Ordering Supplies...32 Ordering print cartridges...32 Ordering paper and other supplies ...32 Troubleshooting...34 Setup troubleshooting...34 Power button is not lit ...34 Software does not install ...34 Page does not print ...35 3

Getting Started
Page 12
6 Insert the power supply. 7 Connect the power cord. 8 Make sure the power is on. 2 1 9 Open the access cover. 12
6 Insert the power supply. 7 Connect the power cord. 8 Make sure the power is on. 2 1 9 Open the access cover. 12

Getting Started
Page 23
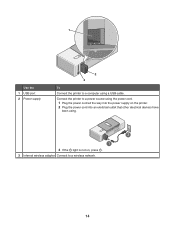
Use the 8 Paper support To Load paper. 1 Use the 1 USB port 2 Power supply 2 3 To Connect the printer to a wireless network. 23 Connect the printer to a power source using the power cord. 1 Plug the power cord all the way into the power supply on the printer. 2 Plug the power cord into an electrical outlet that other electrical devices have been using. 2 1 3 If the light is not on, press . 3 Internal wireless adapter Connect to a computer using a USB cable.
Use the 8 Paper support To Load paper. 1 Use the 1 USB port 2 Power supply 2 3 To Connect the printer to a wireless network. 23 Connect the printer to a power source using the power cord. 1 Plug the power cord all the way into the power supply on the printer. 2 Plug the power cord into an electrical outlet that other electrical devices have been using. 2 1 3 If the light is not on, press . 3 Internal wireless adapter Connect to a computer using a USB cable.
Getting Started
Page 34
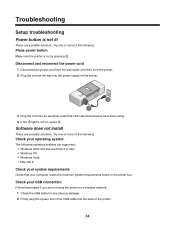
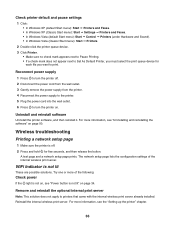
Disconnect and reconnect the power cord 1 Disconnect the power cord from the wall outlet, and then from the printer. 2 Plug the cord all the way into the power supply on the printer. 2 1 3 Plug the cord into the back of the printer. 34 Try one or more of the following: Check your operating system The... following : Press power button Make sure the printer is not lit These are not using...
Disconnect and reconnect the power cord 1 Disconnect the power cord from the wall outlet, and then from the printer. 2 Plug the cord all the way into the power supply on the printer. 2 1 3 Plug the cord into the back of the printer. 34 Try one or more of the following: Check your operating system The... following : Press power button Make sure the printer is not lit These are not using...
Getting Started
Page 35
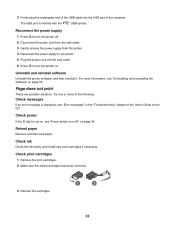
.... For more of the following: Check messages If an error message is displayed, see "Power button is marked with the USB symbol. Reconnect the power supply 1 Press to the printer. 5 Plug the power cord into the USB port of the computer. 3 Firmly plug the rectangular end of the... USB cable into the wall outlet. 6 Press to turn the printer off. 2 Disconnect the power cord from the wall outlet. 3 Gently remove the power supply from the printer. 4 Reconnect the power supply to turn the printer on. Check print cartridges 1 Remove the print cartridges. 2 Make sure the sticker...
.... For more of the following: Check messages If an error message is displayed, see "Power button is marked with the USB symbol. Reconnect the power supply 1 Press to the printer. 5 Plug the power cord into the USB port of the computer. 3 Firmly plug the rectangular end of the... USB cable into the wall outlet. 6 Press to turn the printer off. 2 Disconnect the power cord from the wall outlet. 3 Gently remove the power supply from the printer. 4 Reconnect the power supply to turn the printer on. Check print cartridges 1 Remove the print cartridges. 2 Make sure the sticker...
Getting Started
Page 36
...with the internal wireless print server already installed. WiFi Indicator is off . 2 Disconnect the power cord from the wall outlet. 3 Gently remove the power supply from the printer. 4 Reconnect the power supply to the printer. 5 Plug the power cord into the wall outlet. 6 Press to turn the printer off . 2 Press ... is not lit" on page 50. The network setup page lists the configuration settings of the following: Check power If the light is not on . Reconnect power supply 1 Press to turn the printer on , see the "Setting up the printer" chapter. 36 Remove and reinstall the optional ...
...with the internal wireless print server already installed. WiFi Indicator is off . 2 Disconnect the power cord from the wall outlet. 3 Gently remove the power supply from the printer. 4 Reconnect the power supply to the printer. 5 Plug the power cord into the wall outlet. 6 Press to turn the printer off . 2 Press ... is not lit" on page 50. The network setup page lists the configuration settings of the following: Check power If the light is not on . Reconnect power supply 1 Press to turn the printer on , see the "Setting up the printer" chapter. 36 Remove and reinstall the optional ...

User's Guide
Page 2
.... SAVE THESE INSTRUCTIONS. Connect the power supply cord to a properly grounded electrical outlet that is not responsible for the use of other than those described in the user documentation, to meet strict global safety standards with the printer software. Lexmark is near water or wet locations.... Mac Help installed with the use of specific Lexmark components. The safety features of some parts may not always be obvious. Do not set up this product or make any electrical or cabling connections, such as the power supply cord or telephone, during a lightning storm. Operating...
.... SAVE THESE INSTRUCTIONS. Connect the power supply cord to a properly grounded electrical outlet that is not responsible for the use of other than those described in the user documentation, to meet strict global safety standards with the printer software. Lexmark is near water or wet locations.... Mac Help installed with the use of specific Lexmark components. The safety features of some parts may not always be obvious. Do not set up this product or make any electrical or cabling connections, such as the power supply cord or telephone, during a lightning storm. Operating...
User's Guide
Page 4
... nozzles ...34 Wiping the print cartridge nozzles and contacts 35 Preserving the print cartridges...36 Ordering supplies...36 Using genuine Lexmark print cartridges 37 Refilling a print cartridge...37 Recycling Lexmark products...37 Troubleshooting...38 Setup troubleshooting...38 Power light is not lit...38 Software does not install ...38 Page does not print ...39 Print...
... nozzles ...34 Wiping the print cartridge nozzles and contacts 35 Preserving the print cartridges...36 Ordering supplies...36 Using genuine Lexmark print cartridges 37 Refilling a print cartridge...37 Recycling Lexmark products...37 Troubleshooting...38 Setup troubleshooting...38 Power light is not lit...38 Software does not install ...38 Page does not print ...39 Print...
User's Guide
Page 11
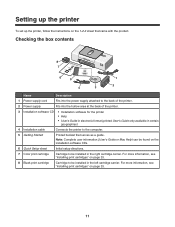
... more information, see "Installing print cartridges" on the 1-2-3 sheet that serves as a guide. Checking the box contents 8 1 7 2 3 6 5 1 2 4 3 Name Description 1 Power supply cord Fits into the power supply attached to the back of the printer. 2 Power supply Fits into the hollow area at the back of the printer. 3 Installation software CD • Installation software for the printer...
... more information, see "Installing print cartridges" on the 1-2-3 sheet that serves as a guide. Checking the box contents 8 1 7 2 3 6 5 1 2 4 3 Name Description 1 Power supply cord Fits into the power supply attached to the back of the printer. 2 Power supply Fits into the hollow area at the back of the printer. 3 Installation software CD • Installation software for the printer...
User's Guide
Page 14
Connect the printer to a wireless network. 14 1 Use the 1 USB port 2 Power supply 2 3 To Connect the printer to a computer using . 2 1 3 If the light is not on, press . 3 Internal wireless adapter Connect to a power source using the power cord. 1 Plug the power cord all the way into the power supply on the printer. 2 Plug the power cord into an electrical outlet that other electrical devices have been using a USB cable.
Connect the printer to a wireless network. 14 1 Use the 1 USB port 2 Power supply 2 3 To Connect the printer to a computer using . 2 1 3 If the light is not on, press . 3 Internal wireless adapter Connect to a power source using the power cord. 1 Plug the power cord all the way into the power supply on the printer. 2 Plug the power cord into an electrical outlet that other electrical devices have been using a USB cable.

User's Guide
Page 38
.... 2 1 3 If the light is marked with Service Pack 3 or later • Windows XP • Windows Vista Solution 1 Check that other electrical devices have disconnected the power supply cord from the wall outlet and then from the printer. 1 Plug the cord all New Hardware Found screens. 3 Insert the CD, and then follow the... symbol. 3 Firmly plug the square end of the USB cable into an electrical outlet that your computer. 2 Click Cancel on all the way into the power supply on the printer. 2 Plug the cord into the back of the computer.
.... 2 1 3 If the light is marked with Service Pack 3 or later • Windows XP • Windows Vista Solution 1 Check that other electrical devices have disconnected the power supply cord from the wall outlet and then from the printer. 1 Plug the cord all New Hardware Found screens. 3 Insert the CD, and then follow the... symbol. 3 Firmly plug the square end of the USB cable into an electrical outlet that your computer. 2 Click Cancel on all the way into the power supply on the printer. 2 Plug the cord into the back of the computer.
User's Guide
Page 39
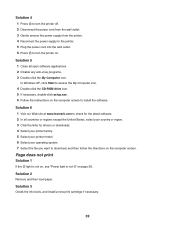
... at www.lexmark.com to check for drivers or downloads. 4 Select your printer family. 5 Select your printer model. 6 Select your operating system. 7 Select the file you want to install the software. Page does not print Solution 1 If the light is not on, see "Power light is not...Remove and then load paper. Solution 4 1 Press to turn the printer off. 2 Disconnect the power cord from the wall outlet. 3 Gently remove the power supply from the printer. 4 Reconnect the power supply to the printer. 5 Plug the power cord into the wall outlet. 6 Press to turn the printer on page 38. Solution 3 Check...
... at www.lexmark.com to check for drivers or downloads. 4 Select your printer family. 5 Select your printer model. 6 Select your operating system. 7 Select the file you want to install the software. Page does not print Solution 1 If the light is not on, see "Power light is not...Remove and then load paper. Solution 4 1 Press to turn the printer off. 2 Disconnect the power cord from the wall outlet. 3 Gently remove the power supply from the printer. 4 Reconnect the power supply to the printer. 5 Plug the power cord into the wall outlet. 6 Press to turn the printer on page 38. Solution 3 Check...
User's Guide
Page 46
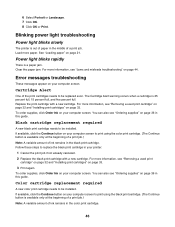
...installed. For more information, see "Jams and misfeeds troubleshooting" on page 44. For more paper. To order supplies, click Order Ink on your computer screen. Power light blinks rapidly There is 25 percent full, 15 percent full, and five percent full. Error messages troubleshooting... These messages appear on your computer screen. You can also see "Ordering supplies" on page 33. 3 Print again. Blinking power light troubleshooting Power light blinks slowly The printer is out of paper in the middle of the print cartridges needs to...
...installed. For more information, see "Jams and misfeeds troubleshooting" on page 44. For more paper. To order supplies, click Order Ink on your computer screen. Power light blinks rapidly There is 25 percent full, 15 percent full, and five percent full. Error messages troubleshooting... These messages appear on your computer screen. You can also see "Ordering supplies" on page 33. 3 Print again. Blinking power light troubleshooting Power light blinks slowly The printer is out of paper in the middle of the print cartridges needs to...

User's Guide
Page 50
...required. not applicable Scanning The product is available at www.lexmark.com. 50 A variable amount of the product. A replacement cartridge sold without these terms is scanning hard-copy documents. Mode Description Power consumption (Watts) Printing The product is generating hard-copy... after delivering a fixed amount of power, then to Lexmark for a print job. 5.84 Power Saver The product is the sum of Watts, the power consumption should be returned only to completely stop product power consumption, disconnect the power supply cord from hard-copy original documents....
...required. not applicable Scanning The product is available at www.lexmark.com. 50 A variable amount of the product. A replacement cartridge sold without these terms is scanning hard-copy documents. Mode Description Power consumption (Watts) Printing The product is generating hard-copy... after delivering a fixed amount of power, then to Lexmark for a print job. 5.84 Power Saver The product is the sum of Watts, the power consumption should be returned only to completely stop product power consumption, disconnect the power supply cord from hard-copy original documents....

User's Guide
Page 52
... poor text and graphic quality 43 portrait orientation, selecting 18 postcards loading 22 printing 24 power button 13 power light blinks rapidly 46 power light blinks slowly 46 power light is not lit 38 power supply 14 print cartridge cleaning 34 removing 32 wiping 35 print cartridge nozzles, cleaning 34 print ... page order 27 transparencies 27 Web page 27 Web page, photos only 28 publications, finding 7 Q Quality/Copies tab 18 R recycling Lexmark products 37 WEEE statement 49 removing print cartridge 32 reverse page order 27 S safety information 2 setup troubleshooting page does not print 39...
... poor text and graphic quality 43 portrait orientation, selecting 18 postcards loading 22 printing 24 power button 13 power light blinks rapidly 46 power light blinks slowly 46 power light is not lit 38 power supply 14 print cartridge cleaning 34 removing 32 wiping 35 print cartridge nozzles, cleaning 34 print ... page order 27 transparencies 27 Web page 27 Web page, photos only 28 publications, finding 7 Q Quality/Copies tab 18 R recycling Lexmark products 37 WEEE statement 49 removing print cartridge 32 reverse page order 27 S safety information 2 setup troubleshooting page does not print 39...


